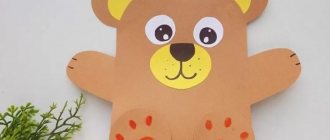
Whale
In 1st grade modeling classes, we offer to model a more complex fish using a template. To make the fish more believable, first tell us a little about it.
Sample figurine of a fish-whale.
Take a piece of blue plasticine and a plastic spatula.
Roll one large ball and four smaller ones.
From a large ball, mold the body of a fish in the shape of a thick leaf, one end of which is rounded and the other elongated and pointed. Form leaf-shaped figures from four small balls.
Attach the tail and fins to the body of the fish.
Turn the craft on its side, cut the plasticine in front, as shown in the picture. The whale has a mouth. Sculpt your eyes.
Using a spatula, draw stripes on the back and fins of the whale.
We make three thin sausages and connect them together on the whale’s head. The result is a fountain of water that the whale releases when breathing.
Finished blue whale specimen.
Theme of the week: “Defender of the Fatherland Day”
Lesson 23. Cannon
(Clay crafting)
Program content.
Continue teaching children to sculpt objects consisting of three parts. Enrich your speech vocabulary.
Demonstration material.
Subject pictures: cannon, pistol, shotgun, sword.
Handout.
Clay, cardboard stand, board lining.
Progress of the lesson
Tell the children about the defenders of the Fatherland - strong and brave people who protect the Motherland and its people from enemies; that the defenders have weapons. Show the children pictures of a cannon, pistol, shotgun, sword; name them. Tell us how the warriors used these weapons.
Invite the children to make a cannon out of clay.
First they must roll a cylinder (trunk) and two balls (wheels). The balls need to be slightly flattened and attached in the middle on the sides of the cylinder. Then mold a few more balls from clay and place them next to the cannon - these are the cannonballs.
Clown fish - step-by-step master class
Among the beautiful aquarium fish there is a clown fish. It is characterized by bright stripes on its body. This job is more difficult than the previous ones. We suggest making such a craft with children in the senior group of kindergarten or first grade students.
Take 3 pieces of plasticine - white, yellow and red and a plastic knife.
Form a wide sausage from red plasticine, one end of which is slightly wider than the other.
Roll into small balls. Leave one, and make leaves of different sizes from the rest. Connect two larger ones into a ponytail, make a dorsal fin from four small ones, and a lower fin from the largest last one.
Attach all the parts to the body of the fish.
Using a knife, draw stripes on the tail and fins.
Decorate the fish with yellow stripes of different lengths and widths, as shown in the picture.
Use the end of a knife to make indentations-scales.
Add an eye, cut out a mouth. Your clown fish is ready.
Or this simple master class on sculpting a clown fish.
Topic of the week: “Parts of the body and face”
Lesson 20. Grandmother and grandfather
(Applying plasticine to the surface)
Program content.
Continue teaching children how to apply plasticine to a given surface; bring the product to the desired image using threads and plasticine. Strengthen children's knowledge about parts of the face and body.
Demonstration material.
Books with Russian folk tales, in which the grandfather and grandmother participate.
Handout.
An oval cut out of cardboard; plasticine in white, black, red colors; white and gray threads (2–3 cm long for grandfather and 5–6 cm long for grandmother), lining board.
Progress of the lesson
Tell the children that in many Russian folk tales there is a grandmother and grandfather. Remember the fairy tales with their participation (“Hen Ryaba”, “Turnip”, “Kolobok”, “Masha and the Bear”, etc.).
Place in front of each child an oval cut out of cardboard, white and gray threads (2–3 cm long for grandfather and 5–6 cm long for grandmother). First, children must apply white plasticine to the entire surface of the oval. Then make eyes, nose and mouth out of plasticine. The grandmother needs to attach long threads in the form of hair, and the grandfather needs short threads in the form of hair and a beard. On top, the grandmother’s hair can be secured with a “handkerchief” molded from plasticine, and the grandfather’s hair can be secured with a hat.
At the end of the lesson, praise the guys for a job well done: “Well done! That’s how cute the grandfather and grandmother turned out!”
Topic of the week: “My Home”
Lesson 22. House for a bunny and a rooster
(Modeling from plasticine)
Program content.
Strengthen children's ability to bring a product to the desired image using plasticine. Learn to retell fairy tales based on illustrations.
Demonstration material.
Heroes of the fairy tale “Hare Hut” (hare, fox, bull, dog, bear and rooster), two toy houses.
Handout.
A small jar of Rastishka cottage cheese, plasticine, a green cardboard stand, a lining board.
Progress of the lesson
Read the Russian folk tale “The Hare’s Hut” to the children in advance.
At the beginning of the lesson, remember this fairy tale based on the illustrations or dramatize it for the children using toys.
Draw the children's attention to the fact that at the end of the fairy tale, the bunny and the rooster decided to live together. Invite them to make a new house for the heroes of the fairy tale - big and strong.
Place a jar of cottage cheese turned upside down in front of each child.
Children must fashion a door and windows from plasticine and attach them to a jar. Then roll it into a ball, flatten it and attach it like a roof at the top. You can make a pipe on the roof from a column rolled up from plasticine. The house needs to be secured with plasticine on a cardboard stand.
Invite the children to show the resulting houses to the bunny and the rooster. On behalf of the heroes of the fairy tale, thank the children.
Plasticine goldfish step by step
In the middle group of kindergarten we suggest making a goldfish. The “Prestige” set for children's creativity includes not only yellow, but also gold plasticine. In this case, your fish will be truly golden. We show you step by step how to do this.
You will need: plasticine, plastic knives for it and a set of toothpick sticks.
Roll a small ball out of plasticine.
Flatten it with your finger to make a circle.
Using a spatula, cut a circle on one side and turn the cut plasticine to the left and right sides, then use your hands to shape the turned pieces into triangles. The tail is ready.
Make another ball and attach a tail to it.
Make another ponytail and divide it in half. You now have a fin for the back. Attach it on top.
Make the circle smaller. Cut it in half, flatten it and mold each half into leaf-like figures.
It turned out to be two fins.
Attach them to the sides of the fish. Now take a toothpick and draw stripes on the tail and fins.
All that remains is to make the eyes. Form six small balls: two larger white ones, two smaller blue ones and two very small black ones.
Flatten the balls and stick large white circles on the goldfish’s head, then attach smaller circles to them and place black dots in the very center.
Do the same with the second eye.
The goldfish is ready. Stick it onto a piece of blue cardstock. Decorate the cardboard with pebbles and shells.