Master class: “The Frog Princess” made of plasticine.
Master class: “The Frog Princess” made of plasticine for children 5-6 years old, primary school.
Roman Voloshin, 10 years old, studying at Krasnoyarsk School No. 4, Krasnoyarsk.
Teacher: Nepomnyashchaya Yana Vardanikovna, teacher, Krasnoyarsk School No. 4, Krasnoyarsk. Description: The material may be useful to additional education teachers, parents, preparatory group teachers, educators and primary school teachers with children with mild mental retardation. Purpose: craft as a gift for mom to bring her back to childhood. Purpose: making a craft as a gift for a loved one. Tasks: - teach how to make a Princess - a frog from plasticine; - learn to recognize and name parts of the frog’s body; - consolidate the ability to cut along the contour, smoothly rounding; - cultivate a desire to do the work carefully; - develop fine motor skills, imagination, creativity in work. Materials and tools: - template - scissors
Cardboard - glue - pencil - plasticine - modeling board Safety precautions when working with scissors:
— Scissors must be well adjusted and sharpened. - Store scissors in a specific place (box or stand). — When using scissors, be as careful and disciplined as possible. — When passing scissors, hold them by the closed blades. — Place the scissors on the right with the blades closed, pointing away from you. — When cutting, the narrow blade of the scissors should be at the bottom.
Progress of the master class:
We begin work on making the Princess - a frog from plasticine.
1. Cut out the “Frog Princess” template and glue it onto thick cardboard. 2. We roll thin sausages from yellow plasticine and glue them along the crown, then we roll a thin sausage from black plasticine and attach along the contour of the eyes and arrows, we roll a thin red sausage and make the outline of the mouth and the tip of the arrow, then we roll the sausages from dark green plasticine and glue along the outline of the Princess - a frog and a water lily leaf. 3. Roll small balls of yellow plasticine and fill the inside of the crown, then roll five large yellow balls and attach them to the tops of the crown, fill the inside outline with blue and green plasticine. 4. Roll small balls of dark green color and fill the head of the frog princess. 5. We roll light green balls of different sizes - these are the Princess’s pimples - frogs, and attach them to the places where they are depicted. 6. Roll small balls of dark green color and fill the body of our Princess - a frog, except for the hind legs. 7. Roll six large dark green balls and attach them to the tips of the hind legs, fill the hind legs with small balls, also roll eight large dark green balls and attach them to the tips of the front legs. 8. Roll balls of light green plasticine of different sizes and fill the water lily leaf. 9. Decorate the applique: sun a). we roll thin sausages from yellow plasticine and a ball, then flatten it, these will be our rays and the sun itself, we attach it on top of the frog on the right side. b). roll a thin blue sausage, make an outline of the cloud, roll large balls and fill the cloud inside. V). roll thick sausages from blue plasticine, simulating water. The work is ready. 10. This is the beauty we got. I think my mother will be very pleased with this gift, since this was her favorite fairy tale as a child.
Inhabitants of lakes, rivers and swamps, green frogs really attract the attention of all children. Every child, at least once in his life, tried to pick up a frog and examine it, but few succeed because they are very nimble and real jumping champions. Therefore, we suggest you make a frog from plasticine. While sculpting, tell your child about the structure of an amphibian, its habitat and the existing species. Then the sculpting process will become not only exciting, but also very educational.
So, prepare some materials and tools for sculpting a frog:
- plasticine;
- stacks;
- toothpick, piece of wire or match;
- blade.
How to make a frog from plasticine
Plasticine is an amazing material that allows you to develop not only creativity and imagination, but also fine motor skills. You can make a frog from plasticine using a master class, where everything is described step by step and is understandable even for children. Follow the instructions exactly or apply your own ideas - everyone decides for themselves.
A simple do-it-yourself plasticine frog
Any child can make a frog from plasticine with their own hands in the simplest way. Just 8 main parts, 5 additional ones and the little toad will be ready. The child can complete large parts independently, and one of the adults will help him with small ones.
Sculpting process:
- Roll 2 balls from the green material - one larger than the other. Connect them together - this will be the torso and head.
- Make two identical small balls and attach them to the top of the head. Thin white plasticine circles are glued on top of them. Pupils of blue or another color are sculpted on them.
- The mouth and nose are cut using stacks or toothpicks. Attach a tongue made of red plasticine.
- Roll out two green bars. Flatten on one side, giving the shape of fins. The legs are bent and fixed on the frog's body.
- For the front legs, the blanks are made thinner and shorter. The lower part is made flattened. Cut out 3 toes on each foot, making membranes using a toothpick. Attach the legs to the body.
Frog princess made of plasticine
To get your child interested in modeling, you can make a frog princess from plasticine. To do this, first make the frog itself and add just a couple of additional details - a crown and an arrow:
- Roll the green mass into a roll and cut it into 3 pieces - 1 small and 2 larger.
- Prepare a blank for the head. One of the large pieces is rolled and flattened, giving it an oval shape.
- Roll the second large piece into a ball. Stick a toothpick or match into it and connect it to the head blank.
- From the last piece, four sausage-shaped legs are created. Bend them in half and connect them to the base.
- 2 small flat cakes are connected to the paws. 2 slightly larger cakes are attached to the body in the abdominal area.
- Make 2 balls from the remaining piece and attach them to the top of the head.
- On the base for the eyes, fix 2 white circles and stick black pupils on them.
- A stack is used to cut through the frog's mouth. Roll small balls from pale green plasticine. Slightly flattening them, place them on the head and body. The same details indicate the nostrils of a frog.
- The abdomen is made from light green material and attached to the body.
- Using the stacks, cut fingers at the edges of the foot cakes. White mini-highlights are placed on the pupils.
- To make a crown for the princess, you will need yellow or light orange plasticine. Make a sausage and roll it into thin strips. Sharp teeth cut along the edge of the stack.
- Cut a part from the jagged strip so that it has 5 teeth. They fold it into a crown, which is placed on the frog's head. The sharp ends are slightly twisted in different directions.
- A small tongue is created from a piece of red plasticine and glued to the line of the mouth.
- The arrow is molded from plasticine in brown, yellow and white colors.
Frog made of light plasticine
Making a frog from light plasticine is easy step by step. For example, you can create the heroine of the cartoon “Frog Traveler”. Parts made of this material hold their shape well, and the mass does not stick to your hands.
Important! This material is afraid of moisture, both during the work process and in finished crafts.
- Take a small piece of green mass. They give it the shape of a head with chubby cheeks. Particular attention is paid to the mouth - making it slightly pointed. Designate slightly raised areas for the eyes.
- Roll out yellow plasticine and frame the lower part of the head. A thin strip marks the opening of the mouth.
- The eyes are made from the white mass. To make them look funny and cheerful, the pupils are sculpted in different shapes, blue with black splashes.
- To save material, you can use foil for the frog’s body, which is crumpled into a pear-shaped shape and covered with a thin layer of green mass. To highlight the frog's abdomen, the front part is covered with a yellow mass.
- The bases for the frog's legs are made in the form of rounded blocks of the required size.
- The fingers and toes of the frog are squeezed out with a stack. Give them the necessary bends. Add a yellow mass to the middle of the palms.
- Connect all the parts together. For a strong attachment, the head is “set” on a match or toothpick.
- Smooth out roughness and unevenness. Add dark green splashes to the arms and legs of the frog.
Craft with a frog made of plasticine
To captivate your child, you can make together with him not only one frog from plasticine, but an entire craft. A step-by-step analysis will help you understand how to sculpt reeds using toothpicks. How to make a pond and a water lily leaf on it:
- To create a reed, you will need toothpicks, brown and green plasticine. The bottom is wrapped in green plasticine, the top in brown. Leaves are sculpted separately. Everything is connected and fixed to the surface.
- To make a water lily leaf, roll out the green mass and flatten it into an oval with your fingers. Using a stack or a knife, draw veins and make a cut in the bottom of the sheet.
- Cut out a circle or any shape large enough from cardboard to accommodate the wah and additional accessories.
- The cardboard is coated with a thin green layer.
- On top of the green layer, pieces of blue and light blue material are laid out and smeared in a chaotic manner.
- Reeds are placed at the edges.
- A water lily leaf is placed a little away from the center, on which the main character is planted.
MBDOU "Kindergarten No. 185 "Yubileiny"
Municipal budgetary preschool educational institution
“Kindergarten No. 185 “Yubileiny”
(MBDOU “D/s No. 185”)
Date of establishment of the educational organization – 1980.
Let's decide together
Can't enroll your child in kindergarten? Would you like to tell us about the teachers? Do you know how to improve your diet and exercise?
About the founder(s) of the educational organization
The founder of the Institution and the owner of its property is the urban district - the city of Barnaul, Altai Territory. Address: Barnaul, st. Union of Republics, 36-a Email address:
Website: https://barnaul-obr.ru/ Chairman of the Education Committee of Barnaul Mul Andrey Genrikhovich - tel. (8-3852) 56-90-45
The functions and powers of the founder of the Institution on behalf of the urban district - the city of Barnaul of the Altai Territory are performed by the Education Committee of the city of Barnaul. The functions and powers of the owner of the property of the Institution on behalf of the urban district - the city of Barnaul of the Altai Territory are performed by the committee for the management of municipal property of the city of Barnaul.
On the names of representative offices and branches of the educational organization (if any) (including those located outside the Russian Federation)
There are no representative offices or branches of the educational organization. There are no representative offices or branches of the educational organization located outside the Russian Federation.
About the location of the educational organization
Legal address: 656062, Barnaul, st. Shukshina, 17
Actual address: 656062, Barnaul, st. Shukshina, 17
About the mode and work schedule of the educational organization
Working hours: five-day work week. The kindergarten is closed on Saturday, Sunday and holidays.
Working hours: Monday from 7.00 to 19.00 Tuesday from 7.00 to 19.00 Wednesday from 7.00 to 19.00 Thursday from 7.00 to 19.00 Friday from 7.00 to 19.00
About the contact numbers of the educational organization
Telephone:
8 (3852)
567-911
About educational organization email addresses
About the addresses of official websites or pages on the Internet information and telecommunications network
,
[email protected]
Address of the official website of the educational organization
185-kindergarten.rf
The organization does not have official pages on the Internet information and telecommunications network.
On places of educational activities, including those not specified in the annex to the license (register of licenses) for educational activities
- places of educational activities for basic training programs: 656062, Barnaul, st. Shukshina, 17 ;
- places of educational activities for additional educational programs: 656062, Barnaul, st. Shukshina, 17 ;
- places of implementation of educational activities when using the network form of implementation of educational programs: no ;
- Places of practice: no ;
- Places for practical training of students: no ;
- Places for state final certification: no .
There are no places for carrying out educational activities not specified in the annex to the license (register of licenses) .
Preparing for work
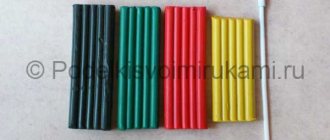
Making a frog from plasticine with your own hands is very simple. To do this, you will need a box of colored plasticine and a plastic knife, which most likely comes with the plasticine. For decoration you can use beads, sparkles, ribbons, pieces of material, cardboard, colored paper,
It is necessary to sculpt on a flat surface. You can use a table, bedside table, chest of drawers. The place should be well lit so that there is no strain on the eyes. It is best to do sculpting in the morning or afternoon. If this is not possible, then put an additional table lamp on the table or turn on a sconce. The surface is covered with oilcloth so that lumps of plasticine do not stick to the wooden surface of the furniture. A special plastic board is placed under the figurine.
A plasticine frog is made in several ways. Let's look at the most popular ones.
The habitat of the frog
Marsh leaves and water lilies are the best habitat for the green frog.
1. Cut out a circle or oval from cardboard with a diameter of 8-12 centimeters. The surface is completely covered with a layer of blue plasticine. We've got a pond.
2. Roll a ball of smaller diameter from green plasticine. Flatten it into an oval cake. Place it on the blue pond and use a plastic knife to make 5 small veins. We have a water lily leaf.
3. To create the water lily itself, we will need white and yellow plasticine. Roll 5-7 small white balls and 1 yellow circle, which is placed in the center. We flatten the resulting flower and lift the petals up.
The habitat of the green frog is ready.
Step-by-step photo lesson:
In this case, we propose to combine two color plates to create an animal figurine - green and yellow. Small flecks of white and black will also be used for the eyes.
First, divide the green block into one large portion (for the body) and four small portions (for the legs).
Also prepare a yellow mass; it should be slightly smaller in size than the largest green ball. Pull out both pieces, then attach them along the entire length to each other and press down. Using your finger, carefully spread the yellow plasticine along the edge at the joint to get the body of a frog with a yellow belly. Using a stack, pierce the plasticine in the front part and slightly lift it up, highlighting the tubercles of the eyebrows. In front, leave a gap between the green and yellow clay to indicate the mouth.
Attach two symmetrical oblong parts to the lower part of the body - the upper part of the legs.
Make the front legs and flippers for the back legs.
Attach the limbs to the main workpiece.
Place white eye balls into the holes.
The plasticine frog is ready. The yellow abdomen (quite voluminous) gives the impression that the animal is swelling and making sounds characteristic of frogs.
If you have a desire to have fun with your child, then take up object modeling. This is a great way to teach your child something useful, communicate with him, observe his emotions and reasoning while working. Even psychologists, when figuring out a person’s character, give children the task of drawing something or making something out of plasticine.
Select a green frog as an object for object modeling. All children know this marsh songbird, and therefore will be happy to reproduce its plasticine sculpture with their own hands. But to make things easier, here is a detailed sculpting guide.
Materials that will be used in the master class:
Green plasticine;
A small amount of white and black plasticine;
Children's rich imagination
In this master class we will learn how to make a frog from plasticine quickly and efficiently. Every mother at least once read a fairy tale to her child in which the main character was the heroine of this article. There are many examples: “Thumbelina”, “The Princess and the Frog”, “The Frog Traveler”, “The Frog in the Mirror”, “The Frog Princess”, “The Croak and the Toad”, “The Stubborn Frog”, “How the Little Frog Was Looking for Dad”, “ Zhab Zhabych Skovorodkin.”
Children have great imagination. From infancy, a child is able to perceive words and imagine what a particular animal from a story or fairy tale looks like. When the baby turns one and a half years old, you can safely begin exciting activities with plasticine. At this young age, the child is able to master simple actions with this material. A plasticine frog is a great start to modeling.
Development of fine motor skills
When palpating plasticine in children, 1/3 of the area of the motor projection of the brain develops and is occupied by the projection of the hands. It is located very close to the speech zone. That is why the ideal development of a baby’s speech is inextricably linked with the development of fine motor skills. The more parents spend time with their children, playing exciting games with them, the more developed their child will be. The frog princess made of plasticine will be an excellent reason to start developing fine motor skills.
At one and a half years old, children are able to do:
1. Plucking plasticine.
2. Flattening.
3. Kneading, rolling.
4. Spreading glue on cardboard.
5. Working with the stack.
