Summary of a modeling lesson for the middle group “Bear”
Lyubov Parshukova
Summary of a modeling lesson for the middle group “Bear”
Summary of a lesson on artistic creativity (modeling) for the middle group “Bear”. (4-5 years old).
Educational field - art
Goal: To form aesthetic tastes, develop creativity and thinking.
Objectives: Learn to sculpt an object consisting of several parts, conveying characteristic features (ears, muzzle)
.
Reinforce familiar sculpting : rolling, unrolling, connecting parts using smearing techniques. Develop independence, cultivate interest in modeling .
Integration of educational areas: cognition, physical education, reading fiction, artistic creativity, music.
Material: plasticine; boards for modeling ; bear images ; toy bear " _
.
reading fiction "Teremok"
,
"Three
Bears " ;
“Mashenka and
the Bear ” , talk about the wintering
of the bear , its food products, its living conditions, looking at illustrations depicting a bear , guessing riddles, watching the presentation “Wild Animals”
.
A simple sitting cat made of plasticine
The following instructions will tell you how to make a cat out of plasticine using simple steps. Despite the simplicity of execution, the finished product is surprisingly beautiful.
The first thing we will start with is choosing the color of the future animal. If you want a bright fluffy look, go for an orange shade. Fans of mystical murkas can choose black.
The list of materials for work does not change. We use a knife to separate the material into pieces and a board to protect the work surface. Now we’ll tell you how to make a cat from plasticine:
- Before you begin the main modeling, the material needs to be prepared for work. We warm it and knead it in our hands until it becomes completely pliable.
- Take the main color you chose for the cat and roll it into a ball. The finished figure needs to be given a conical shape. As a result, you should get the body of the future cat.
(Step 1) - We continue working with the main color. Make a big pea out of it. It is needed to make the head.
- Now we roll a thin worm. This is a wonderful tail. To make it look elegant, round it and sharpen it at the end.
- Decorate your cat with a beautiful bib. Roll into a ball, roll it out flat and cut out the bib. Make teeth along the edges so that the element looks like wool.
(Step 2) - To give the muzzle a natural look, you need to make four white peas. From these we will make the cat's eyes. We attach pupils of a different color to them, for example, black. We need the remaining white parts for the muzzle.
- Don't forget your nose. It can be made pink or orange. Give your nose a triangle shape for a more natural look.
(Step 3) - Let's take care of the ears. They need to be made in the form of thin triangles. You can make them from a color other than the main one. And, for example, from white. Inside each figurine we make we place an identical one, only with a smaller size and a different color.
- We finish working with the cat. We add dimples to his pupils, draw a mustache and toes.
The cat is ready. This plasticine modeling for children aged 3-4 years, like the previous one, is not complicated and interesting. All actions are elementary and with the help of adults, the cat will turn out natural and cheerful.
You learned how to make a cat from plasticine. Next, we will consider even more interesting manufacturing options.
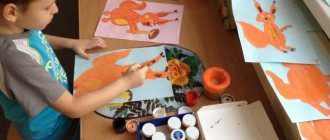
Progress of the lesson:
Educator: Guys, a guest will come to us today, but before he appears, we must guess who it is. I'll tell you a riddle, and you tell me the correct answer.
Clubfoot and big,
He sleeps in a den in winter.
Loves pine cones, loves honey,
Well, who will name it?
Children: Bear .
(there is a knock on the door. The teacher brings in a toy)
. Guys, we forgot to say hello to our guests, how can we greet beautifully?
Children: Hello, we are very glad to see you!
Educator: Bear told me that he is bored alone in the den in winter, how can we help him?
Children: Let's make little bear cubs .
Educator: But first we’ll play a game with you. The game is called "Teddy bear"
, you must perform movements in accordance with the text. So, let's go to our clearing and stand in a circle.
A clubfooted bear is walking through the forest,
He collects the cones and puts them in his pocket,
Suddenly a cone fell, right on the bear’s forehead,
How to make cats from plasticine, clay and mastic
Cats are favorite pets for many of us. Fluffy, wayward animals easily conquer the hearts of their owners. Children are especially partial to these pets. Every child would like to make a cat out of plasticine. This wonderful wish can be easily realized thanks to a simple master class. You can also make a beautiful pet figurine from other materials. For example, from clay or mastic. Let's look at all the options on how you can make a wide variety of kittens.
How to make a cat from plasticine? Tips and step-by-step instructions
A cat is an animal that brings comfort to the house. If it is not possible to have a real cat, you can make a figurine of it from plasticine.
A handmade figurine carries a special energy that will certainly bring positive emotions to the house and create a cozy atmosphere around. Sculpting plasticine figures is an inexpensive pleasure.
… VKontakte Facebook Twitter Google+ My world Contents:
- Material selection
- How to make a cat from plasticine
- How to make a “Kitten Woof” character from plasticine
To make a cat from plasticine, you will need:
- the material itself;
- stacks (sticks for forming indentations);
- knife;
- special board.
You can decorate a shelf or desktop with a cat figurine, or use it for playing.
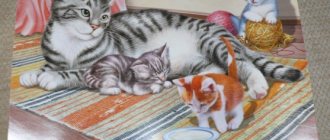
Modeling a cat family from clay
If you want to make a real figurine, then instead of plasticine, take another material. For example, clay. This is a popular mass for sculpting souvenirs; it is very easy to work with. Polymer clay (plastic) for crafts is sold in handicraft, art and online stores. This material has its own characteristics:
- Self-hardening clay hardens in air. This may take 2 days.
- Baking clay hardens when heated. It is kept in the oven for 10-30 minutes.
- Clay can be tinted, that is, mixed with paint to obtain all kinds of colors.
- To reliably fasten clay fragments, you need to moisten them with water.
Clay cat
Start by making the simplest figurine. For the master class you will need:
- clay;
- modeling board;
- toothpick;
- water in a bowl;
- brush and paints (acrylic or watercolor).
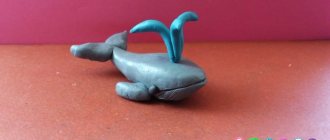
Take the amount of clay with the expectation that you will get a craft of the required size. Let's get started with some fun sculpting:
- Divide a piece of clay in two. One segment will make a body. From the second part, sculpt the paws, tail, ears and cheeks.
- The body should be shaped like a rounded cone. Press the bottom of the shape onto a flat surface to make it stable.
- Break off fragments from a smaller piece of clay to form ears. These will be two pointed triangles. Moisten these parts with water and connect them to the body.
- In a similar way, mold the remaining elements for the muzzle: voluminous cheeks, eyes, nose. Don't forget also about the last important detail - the tail. Moisten all this in water and secure it to the body.
- Add details to the finished figurine using a sharp toothpick. You can make pupils, a charming smile and dots on the cheeks. The mustache will be made from wire or fishing line.
- Wait for the craft to dry for a couple of days and paint the cat to your taste.
Cat Maneki-neko
Animal figurines often serve as a talisman in the home. The Maneki-neko cat figurine is common in Japan. It is believed that it gives wealth and great luck to its owners. This figure looks like this: the cat is waving friendly with one paw, and in the other she is holding a shiny gold coin. The figurine is made of porcelain, ceramics or glass. Its colors come in a variety of colors. But the most admired cat was a white cat with bright yellow and black spots on its fur.
We will work with clay, which will perfectly replace porcelain. Gather all important materials and tools:
- baked white clay;
- stack;
- food foil;
- toothpicks or matches;
- glue "Moment";
- brush and paints for ceramics;
- golden acrylic paint;
- colorless varnish for plastic.
During the process of sculpting with white clay, you need to wash your hands periodically. This material can get very dirty during operation.
How to make a cat from clay:
- Divide the clay into parts: 4 large fragments (body, head, hind legs), 3 smaller segments (forelimbs and tail), 3 tiny parts (ears, coin).
- Try to give all the elements of the figure an initial shape, and then try to connect them. If the body parts look proportional, start working on them in detail.
- Stick your ears to your head. It is necessary to create a convex nose on the face. Make folds on the paws. Make a flat coin. Connect the hind legs to the body, but do not fasten the remaining parts yet.
- Use a toothpick to make holes to connect the head, body and tail.
- Prepare everything for baking. Fold the foil in several layers. Place our clay parts on it. Preheat the oven for up to 20 minutes, and then place the pieces with foil on a mesh baking sheet. Bake for about half an hour at 100 degrees. After this, turn off the oven and, without removing the figures, wait until the oven has cooled completely.
- Connect all the parts with toothpicks and glue.
- Paint the craft: draw ears, mouth, nose and claws. Make yellow and black spots on the legs and tail. Paint the coin with gold acrylic and draw hieroglyphs on it. After the paints have dried, coat the figure with varnish.
Miniature kittens
Let's make figurines of small colorful animals. The cats will be successfully made from self-hardening polymer clay. In addition to this mandatory component, you need:
- foil;
- copper wire;
- spoke;
- a set of acrylic paints and a thin brush;
- beads.
Self-hardening clay is recommended to be stored in airtight containers. Do not leave it in the open air for a long time so that the plastic does not dry out.
Detailed instructions:
- At the first stage, prepare a frame for the kitten. Roll the foil into a circle (head) and a cone (torso).
- Wrap a piece of wire with foil so that a long tail remains.
- Place a second layer of foil on the workpiece. Make a beautiful transition from head to body. The neck should stand out, but not be too thin. Achieve stability in your figure. Use beads to make indentations in the places for the eyes.
- To obtain brownish-gray wool, mix plastic with brown and black dyes.
- Mash the clay into a layer of 2-3 mm. They need to tightly adhere to the foil figure. Don't touch the tail yet. Glue beads into the dimples for the eyes and draw pupils.
- Wait for the previous layer to dry. Blend different colors of wool and apply texture to it. To do this, scratch stripes on a piece of clay moistened with water using a knitting needle.
- Make the kitten's face: forehead and cheekbones. Create the famous cat eye shape. Make a triangular nose and white “pads” for the mustache. Then smooth out the contours of your cheekbones and also add texture to them. You need to pierce your nostrils with the same tool.
- Now start sculpting the top layer. Attach alternate strips of different shades to the entire body. At the same time, use a sharp knitting needle to create a wool texture on them.
- Make the front legs with pads. Form the hind limbs in a semicircle. Attach them to the body, and also cover the tail with plastic. Make ears by connecting wool-colored triangles with pink ones.
- After the product has dried, decorate the kitten's face. Draw the nose, eyes and cheeks.
How to make a cat from mastic
Instead of clay, you can purchase another similar material. This will be a polymer mastic. It looks like clay, but its properties are more flexible and more comfortable to work with. It holds its shape better and has a rich variety of colors. Plain water is also used to glue mastic parts.
Let's try to make another cute animal. To create a cat from mastic, the master class will be simple and interesting. We will make the face of a pet in love. So it makes a cute present for Valentine's Day.
For the MK “Cat from mastic” you will need pink, burgundy and white mastic, a stack and a toothpick.
Modeling the product step by step:
- Roll out a circle of pink fondant. This will be the cat's body. Using a stack, squeeze out the contours of the paws on it, and glue the feet from the bottom using white mastic.
- Attach a white circle to the chest.
- Place a toothpick in the center of the figure to which the head will be attached.
- Use burgundy fondant to create a heart-shaped nose, bow and cat eyes.
In addition to the proposed options, there are a lot of creative ideas for sculpting figurines. You can make figurines of cats from cartoons: Cheshire, Matroskin, Leopold, Puss in Boots, Hello Kitty. Add various accessories made from plasticine, clay and mastic to the figurine. Let it be a fish, a mouse, a bowl of food, a collar, a gift or a flower. It’s a pleasure to give such a beautiful, original craft for any occasion!