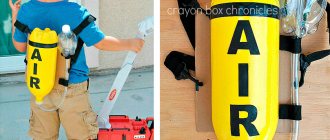
Oxygen balloon
You will need: 2 liter plastic bottle, black tape, yellow spray paint, plastic tube, thick cardboard, backpack straps, drill, Velcro, scissors, hole punch, 0.25 liter plastic round bottle.
Master Class
- Paint a 2 liter bottle with yellow paint and wait until it dries.
- Make the inscription “AIR” with black tape.
- Make 4 holes on the cardboard for the backpack straps.
- Attach and adjust the straps.
- Drill a hole in the bottom of the small bottle and secure the tube.
- Attach a large bottle in the center of the cardboard using tape.
- Make 2 Velcro loops to secure the tube and attach the round bottle.
The oxygen cylinder is ready!
Papercraft kits
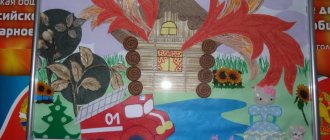
If you are wondering what kind of car can be made for kindergarten, then papercraft kits will help you. They are templates for cutting out parts, which subsequently, through bending and gluing paper parts, are transformed into machines of extraordinary beauty, reminiscent of a real car.
Similar models can be used to decorate a toy track drawn on thick paper. In this version, it will completely resemble the real one, since various cars will ride on it, so much like the large prototypes.
- Crafts from paper and cardboard - 110 photos of the best simple patterns for children and beginner craftsmen
Crafts for girls: simple, beautiful and interesting crafts. The best ideas with explanations and step-by-step instructions for creation (70 photos)
Coffee crafts: step-by-step instructions for creating three-dimensional figures from coffee (90 photos)
Fire
You will need: a white sheet of paper, yellow, orange and red napkins, 3 paper towel rolls, 3 toilet paper rolls, a plastic fork, brown and beige paint, a brush, a glue gun, scissors, a skewer and marshmallows.
Master Class
- Paint the bushings with beige paint and leave to dry.
- Dip the fork in brown paint and paint stripes on the bushings.
- Draw circles on white paper with a brown felt-tip pen, cut them out and glue them on both sides of each sleeve, making the firewood realistic.
- Prepare a stack of napkins, cut them to form triangles as shown in the image.
- Fold napkins of different shades to form lights.
- Glue the firewood together as shown in the photo.
- Glue lights to the wood to form a fire.
- Thread a piece of marshmallow onto a skewer and bring it to the fire.
The fire is ready! I recommend watching this video!
DIY Paper Campfire