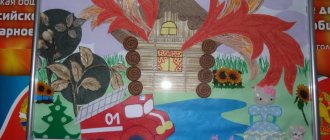
Children at a young age begin to explore the whole world around them, begin to make crafts and show their acquired skills in practice. In kindergartens, children begin to show an early desire and craving for creativity, so that by the age of 2-3 they already develop imagination and fantasy.
This type of activity, such as appliqué, is very simple and easy to perform; kids can handle it with ease.
The benefits of the application for kids
What are the benefits of applications? Firstly, this is, of course, the development of hand motor skills; kids begin to cut out shapes using scissors, thereby developing spatial thinking, learning to use glue, compasses and scissors.
Secondly, this is the development of imagination, because it is applications that allow children to show creative thinking, they develop a desire for self-knowledge and they come up with many ideas on their own for applications. Parents must help their children if any difficulties arise.
Materials for making applications
The advantage of this type of activity is that you do not need a lot of materials. It is enough to have scissors at home for cutting out various figures and characters, a glue stick for gluing parts, cardboard, colored paper, a ruler, a compass, felt-tip pens or markers can also be useful.
Using a ruler, you can create straighter lines if you need to make a house or any shapes in your applique.
A compass will be very helpful when creating circles; an adult can help a child when working with a compass.
Methods of teaching applications in the second junior group of kindergarten.
Visual activities in kindergarten
APPLICATION
2nd junior group
Application
Application
(from Latin appllcatio -
apply, apply
) - one of the types of applied art used for the artistic design of various objects (clothing, furniture, dishes, etc.) by attaching cut out decorative or thematic shapes to the main background. The originality of the applique lies both in the nature of the image and in the technique of its execution. The image in the appliqué is highly conventional compared to other types of planar images - drawing, painting. The applique is characterized by a more general form, almost without details. Most often, a local color is used, without shades, and one color is sharply different from another. The appliqué process involves two steps: cutting out individual shapes and attaching them to the background. As a means of decoration, appliqué creates a unique decorative effect. Sometimes cut-out shapes are used to decorate a room (for example, paper napkins and lace for decorating shelves, various multi-colored shapes for gluing onto glass windows as a festive decoration). Applique cut-outs from fabric, fur and leather are used to decorate clothes and make panels. Sometimes the cut out parts are not completely attached to the background, and the applique turns out to be partially voluminous. For example, the petals of a flower are attached only at the middle, and its ends lag behind the background. This gives greater expressiveness to the image. The simplicity and ease of execution of the applique make it accessible to children's creativity. Children can either use ready-made forms, painted in certain colors, or create compositions by cutting out elements of patterns, plot images, etc. Thus, applique classes contribute, on the one hand, to the formation of fine arts and skills, on the other hand, to the development of creative children's abilities.
Types of applications in kindergarten
Preschoolers master all the processes of making appliqué—cutting and gluing shapes. Preparatory exercises for mastering this type of activity are games with mosaics, with the help of which children, laying out ready-made geometric shapes, become familiar with their features, color, arrangement methods, and principles of creating a pattern. Cutting without gluing helps master the applique process (children cut paper, making tickets, flags, etc. for the game, learn to use scissors). In kindergarten, they use such types of appliqué work as gluing ready-made forms (decorative - from geometric and plant forms and object - from individual parts or silhouettes) and cutting and gluing forms (individual objects, plot, decorative). Preschoolers can cut out shapes in sections or as a silhouette. Composing an object from separate parts is easier for them, like any constructive image in drawing or modeling. Silhouette cutting is more difficult for children, since they always need to compare the general contours of the object with the proportions of its individual parts. Therefore, cutting out complex shapes is included in the program only in the preparatory group. The application contains great opportunities for the development of imagination, imagination, and creative abilities of children. Thus, the pattern can be made up of both ready-made geometric and plant shapes cut out by the children themselves. The use of ready-made forms in decorative works allows preschoolers to focus all their attention on the rhythmic alternation of elements in a pattern and the selection of beautiful color combinations. Children use the skills acquired in appliqué classes in other activities, mainly in design, making shadow theater, light decorations, and Christmas tree decorations.
Equipment
and materials for performing applique
For appliqué work, white and colored paper of various grades are used. For the background, take thicker paper - white from sketchbooks, colored table paper, thin cardboard. The forms to be glued are cut out of thin paper, preferably glossy. It comes in bright colors and is pleasant to the touch, which is especially important for working with young children. Older preschoolers also use matte colored paper of various colors and shades. If the desired shades of color are not available, the paper can be dyed. It is better to do this work not with the whole group, but with several children outside of class. Forms must be carefully prepared for classes. Geometric shapes must exactly match each other in size, which makes it possible to create a single pattern from them (for example, the side of a triangle should be equal to the side of a square or rhombus, etc.). To paste objects in the younger group, you need to prepare silhouette images or parts of the object. For classes in the middle and sometimes in the senior group, paper is cut in advance into pieces of a certain size in accordance with the task. For example, for gluing a house, they give a ready-made piece of paper representing the walls; Children cut out a roof from a strip of a different color, etc. This blank will help children maintain its shape and correctly convey the size and proportions of the parts of the house. For older preschoolers, forms of various colors and shades are used, since in these groups mainly decorative gluing is carried out from geometric shapes according to the children's plans, and they need to be provided with a wide choice of material. The use of shapes of different colors contributes to the manifestation of independence and creativity in work. Children can, if the task allows, choose the color of their choice. Particularly important is the selection of a variety of colored forms and paper in classes, the purpose of which is to independently compose beautiful color combinations. When cutting out objects, it is advisable to prepare a set of the necessary paper for each child in advance. For children in the preparatory group, all the material can be in one place. In all cases, both when gluing finished forms and when cutting, you should have more material than is necessary to complete the task. The glue is prepared from potato starch, since after it dries, no traces remain on the paper, which is very important for maintaining a neat appearance of the work. Children are given glue brushes; in older groups, hair brushes are sometimes used to apply small parts. Scissors should be small in size, with rounded ends and freely moving arms so that they can easily be moved by the child's fingers. The correctness of the created form will depend on this. Trays and flat boxes for ready-made forms, paper, scraps are placed in such quantities that it is convenient for children to use them. Each child is given an oilcloth for applying glue to the molds, a cloth and a brush stand. Such extensive equipment must be arranged so that tables are not cluttered during work. At the beginning of the lesson, only the material that will be needed at the beginning is displayed; then, as needed, new accessories are added and unnecessary ones are removed. The furnishings on the tables should remain neat and aesthetically pleasing until the end of the lesson. Thus, the application process requires a fairly large amount of materials and tools, which must be prepared in advance.
Tasks
and program material for appliqué
Learning appliqué involves familiarizing yourself with the material, acquiring the ability to cut out various shapes, arrange them on a sheet of paper in a certain order and paste them in accordance with the image and plot. The main tasks of learning applique are the following: - distinguish geometric shapes, know their names (circle, square, oval, rectangle, triangle, rhombus); -introduce primary, complementary colors and their shades, mastering the ability to create harmonious combinations; -know the sizes and quantities: large, small forms; one form is larger (smaller) than another, one, several, many forms; -develop compositional skills: rhythmically arrange identical forms in a row or alternate two or more forms; build an image depending on the shape of the sheet - on a strip, square, rectangle, circle; - create an image of an object from separate parts; -arrange objects in a plot applique. Mastering basic cutting techniques: a) cutting paper straight, along folds and by eye; b) cutting out rounded shapes by rounding corners, symmetrical shapes from paper folded in half, several times, like an accordion; c) cutting out asymmetrical shapes - silhouette and from separate parts; d) cutting along the contour; e) creating a shape by tearing off pieces of paper. Mastering basic gluing techniques (using a brush, glue, rag; the ability to sequentially glue forms). Let's consider the content of program material for different age groups. Appliqué classes begin with the second junior group ;
in the first junior group, children prepare for these activities by playing games with colored mosaics; at their own request or as shown by the teacher, they lay out the shapes in a row, alternating by color, making simple objects from them - a house, a flower, etc. In the fourth year of life, the child is able to realize his simple idea in the image, can master some technical skills. In this regard, applique is a more difficult type of activity in terms of technique than drawing or modeling, since the methods of its implementation are more complex and the result obtained is more conditional. The objectives of teaching applique in this age group are the following: familiarization with the geometric shapes that are part of many objects - a circle, a square, a triangle; knowledge of colors - red, yellow, blue, green, white, black; knowledge of the concepts of “quantity” (one, two, three, many), “size” (large, small, more, less); development of compositional skills in arranging shapes in a pattern (in a row, along the edge, in the corners) and parts of objects; mastering the skill of gluing forms. The development of motor functions of the hand in children of the fourth year of life is still imperfect, so they are not able to use scissors. True, a child can be taught this skill in a family setting. In this regard, the solution of the tasks set by the program takes place in classes with ready-made forms. Mastering the skill of making appliqué begins with gluing several shapes in one row on a strip of paper. Even this simple task requires knowledge of the features of the new pictorial form, its name and color, the ability to arrange the forms in a horizontal row, the skill of correctly applying glue and gluing the forms in the right place. So that the child can cope with this task, a circle shape is given for gluing, which is equally symmetrical along the entire contour, has no top and bottom and does not change depending on the location; to place the elements, they offer a narrow strip of paper, on which it is impossible to arrange the circles in any other way than in a row; all shapes have the same color. This makes completing the task easier: children must remember the name of the shape, its color and master the gluing technique. In the first lessons, sometimes the main difficulty for kids is the gluing process: they need to learn how to hold the brush correctly, pick up a little glue, carefully spread the form on the back side, using a special oilcloth, lay the forms in place with the smeared side, press them with a cloth, do not move them, put them down brush only on the stand. At first, the gluing technique completely absorbs the children's attention. Further complication of the program material occurs due to the introduction of circles of a different color and their arrangement in alternating colors. Then a new shape is introduced - a square. When making a composition of squares, you must ensure that they all fit exactly on one side. The composition of the appliques gradually becomes more complicated - children place and stick the shapes at the corners of the square and along the edge of the circle. These elements of the form are clearly highlighted by the form itself and are easily recognized by the child. Gluing in the center is still difficult for children in the younger group. Along with mastering the principles of the rhythmic arrangement of one or two elements, the program provides for gluing object images, first consisting of one, then of 2-3 parts (for example, a mushroom, a flag, a snowman, a house, etc.). The difficulty of these tasks is that the object and its parts must be located depending on its design: the stem of the mushroom goes down from the middle of the cap, the roof is located above the walls of the house, etc. However, kids will successfully cope with such work, since the subject tasks content is understandable to them. In addition, for the image they select objects with a symmetrical arrangement of parts, with shapes close to the geometric ones, which the children became acquainted with in the first lessons. I. L. Gusarova recommends starting appliqué work in the younger group by completing tasks that have a specific visual task - creating a familiar object. Interest in the topic will help the preschooler overcome both constructive and technical difficulties. A small child understands better the task of putting together an object from 2-3 parts than arranging geometric shapes according to the principle of alternation and symmetry in a pattern. In the first case, he himself will notice the mistakes made, since the logic of the content will be violated. The principle of alternating and repeating pattern elements will be mastered successfully when gluing flags or beads onto a drawn thread. Thus, for children of this age, each appliqué task, as well as drawing and sculpting, should be associated with a specific image. The teacher’s task is to select appropriate subject names for all decorative tasks of gluing geometric shapes - “decorate a handkerchief” (square ), “paint a plate” (circle), etc. The concept of the connection between the themes of children’s works and ideas about specific objects formed the basis of an appliqué album developed by E. E. Lootsar. All topics in it for the younger group are of a subject nature. So, the circles are glued not to a strip, but to a pre-prepared cup or saucer shape. The squares represent windows pasted onto the silhouette of the house, etc.
Methods
of teaching appliqué
in the 2nd
junior group of kindergarten
Teaching appliqué, like teaching other types of visual activities, is based on the development of children’s perceptions . Enriching their ideas about shapes, sizes, colors, and various relationships of objects in the world around them will help the work of thought and imagination during classes. Let's consider the specific features of using different teaching methods in appliqué classes in different age groups of kindergarten. Second
junior group .
For young children, material for work and the organization of the learning process are of great importance. The material for making the appliqué can be so bright that it can often distract children’s attention from the teacher’s explanations. Therefore, in the younger group, especially at first, ready-made forms for sticking are distributed to each child in a special bag after explaining the task. Children in this group are not yet able to use common material, since they do not know how to distinguish the shapes and colors of elements for gluing. After the teacher’s explanation has been heard and the forms for sticking have been distributed, the children lay them out on a sheet of paper in accordance with the assignment. The teacher checks the correct arrangement of the elements. Therefore, in the first classes in the younger group, glue is placed on the tables only after the teacher has checked all the work, immediately before the gluing process. This will allow the teacher to monitor the correct construction of the image and help children master the gluing technique. In the future, all equipment, except for color forms, can be prepared in advance. As is known, in teaching a teacher must rely primarily on the direct perception of children. Examination of an object during appliqué classes will be used to revive preschoolers’ ideas about the features of the shape, color of an object, etc. Since the image in the applique is associated with a large generalization of forms, examination of nature should be accompanied by showing samples made by the teacher, especially in the first lessons. These generalized forms of an object and their similarity to geometric ones are difficult for children to identify when examining, since they are obscured by a number of details. In the sample this shape is clearly indicated and details may be omitted. While showing the sample to the younger group, the teacher clearly names the color of the form and, if necessary, traces it with his finger, emphasizing its features. Since in the younger group the main task of teaching is to familiarize children with various forms and techniques of gluing, a sample is most often shown for exact repetition. But preschoolers should also be taught to independently solve certain problems during repeated lessons. For example, after becoming familiar with the shape of a circle and the techniques for gluing it on a strip, you can offer to choose circles of any color for gluing beads. The teacher's demonstration of work techniques is necessary to develop the correct skills in children. Moreover, the demonstration of the most complex techniques is given until the teacher is convinced that the kids have mastered them and can independently apply them in their work. The teacher also shows the sequence of the application: what form he takes, how he places it on the paper, explains at what distance from it another form should be placed, etc. After laying out, he shows and explains the gluing process if the children have not yet mastered it . The teacher accompanies each action with an explanation. The demonstration is not carried out in cases where children understand the process of laying out and gluing. The teacher, using the example, explains the task and reminds some working techniques. For children who find it difficult to complete a task, he shows these techniques individually.
Insect applications for kids
Making insects is very easy, you will see for yourself. It is enough to have with you the materials listed above and get started.
Making a ladybug
For the ladybug, you will need black, red and white paper.
To make a ladybug, follow the steps below:
- cut out circles from black paper: 1 large, this will be the body, the second smaller, this will be the head, five small circles for the points on the wings;
- cut out two circles from red paper, the same as the body;
- from white there are two circles, exactly the same as dots;
- Glue the body onto the cardboard;
- glue the head on the side you like;
- fold the red circles in two, glue them to the body so that one part is free;
- decorate the wings with black dots;
- Glue white circles on your head and make dots with a marker;
- draw a mustache.
Making a bee
To create a bee, you need to follow the steps below:
- cut out the body from yellow paper, cut out strips from black paper and stick them on the body;
- Glue white paper wings onto the figure, the wings look like a heart;
- glue the eyes, twist the antennae with scissors and glue them to the head, glue the sting.
Making a dragonfly
All kids will love the dragonfly; to make it, you need to follow these steps:
- cut out the body, eyes and wings. They can be any colors you wish;
- glue the wings crosswise onto the base, glue the dragonfly’s body on top, glue the eyes;
- at the end of all the work, all that remains is to draw out all the details so that they look more expressive;
- glue the antennae, to do this, cut out two strips, twisting them with scissors;
- Use any bright color to create a background.
Animal applications for kids
All children love animals, why not create cute and funny animals with your own hands at home.
Making a dog
To create a dog you will need brown or black paper. Stock up on scissors for cutting geometric shapes. Animals are quite easy to create from shapes such as an oval or a triangle.
Follow the steps below:
- prepare a background on which the dog will be located, it can be a blue or yellow background;
- cut out an oval from brown paper, which will be the body;
- cut out the ears, legs of any geometric shape, for example, the ears will be triangular, and the legs will also be oval;
- Glue all the resulting parts in the correct sequence onto the base, the dog is ready!
Making a kolobok
It won’t take much time to make an applique of a kolobok, the most beloved character from a well-known fairy tale. All the children are probably familiar with this fairy tale and they will make such a hero quickly and simply; to create it you will need yellow colored paper and scissors.
To make such a bright character, you need to draw a circle with a compass and cut it out, stick it on the background, then draw the eyes and mouth; you can use a black marker for this.
Making Luntik
If your child is crazy about cartoons, invite him to make his favorite character. Here we describe Luntik, a character from one of the most popular cartoons. To create it you will need lilac or purple colored paper.
For Luntik, follow the steps below:
- cut out a circle for the head, rectangular ears, paws can also be oval;
- stick correctly onto the selected color background of the part;
- Draw Luntik's face with colored markers, let the baby show his imagination and draw a cheerful or amusing face!
Educational application games for young children
Bibliographic description:
Barsukova, O. V. Educational games-applications for young children / O. V. Barsukova. — Text: direct // Questions of preschool pedagogy. — 2021. — No. 1 (7). — P. 72-74. — URL: https://moluch.ru/th/1/archive/49/1564/ (access date: 11/21/2021).
The use of a wide variety of materials in games with young children contributes to the most successful development of the psychomotor, speech and emotional spheres. And the use of various gaming techniques stimulates children's curiosity, cognitive and creative activity. Along with such visual arts techniques as modeling and drawing, children from a very early age must be introduced to the properties of paper. This is a very important component of the comprehensive development of children, because paper carries the richest developmental potential.
Educators and psychologists have long known that motor impulses entering the brain from the fingers affect the formation of “speech” zones and have a positive effect on the baby’s cerebral cortex. Various movements and actions with hands, gymnastics and finger games most effectively stimulate the process of speech and mental development of the child. By rolling, tearing, crumpling and twisting pieces of paper, the baby trains the muscles of the fingers, develops the differentiation and correlation of their movements.
This article presents some gaming techniques that we use in subgroup and individual developmental classes. Some of them were modified and supplemented by us, and some were invented independently, in some cases thanks to playful improvisation and the initiative of the kids themselves. It is recommended to carry out each of the exercises first with the child, telling him how to operate with gaming materials, and often acting on the “hand in hand” principle.
Our comprehensive game classes always contain a part dedicated to introducing children to artistic and aesthetic activities, which includes a lot of interesting developmental techniques and techniques for working with paper: elements of paper plastic, applique with elements of drawing and based on a drawing, applique-filling and laying out ready-made forms , modeling, drawing and sculpting with appliqué elements, as well as collective composition.
In this way, we expand the creative capabilities and skills of children. During play sessions, our kids get acquainted with a variety of types of paper, actively feeling soft napkins, corrugated, colored paper and cardboard, velvet, glossy, wrapping and even packaging, gaining a new tactile and sensory experience. Kids learn to work with paper through such simple appliqué making techniques as crumpling, tearing, rolling, laying out parts on a sheet of paper, spreading them with glue and gluing them. The end result always delights kids, because flat pieces of paper suddenly turn into real flowers, butterflies, berries, fish, chicks and even giraffes!
Game classes are held in a subgroup mode. Children sit around the table, the teacher or educational psychologist sits next to them. To arouse children's interest in making crafts, a story is played out at each lesson. Below are several game sessions containing different elements and techniques for working with paper and carried out according to a single algorithm of actions. This organization of work is as convenient as possible for children, since it allows children to predict further stages of action and show independence and initiative.
Game activity “Flower meadow”
Materials: a piece of artificial grass (for the lawn), small butterflies and flowers, sheets of white paper with drawn flower stems, cut out butterflies of different colors, cut out green leaves, corrugated paper in yellow, blue and red, cut into small pieces (4ˣ4 cm).
Progress of the game: children sit at the table, the teacher puts a piece of artificial grass on the table and plants flowers on it. Then he asks the kids who likes to sit on beautiful flowers? Children answer (butterflies). The teacher plants small butterflies on the flowers. Next, a warm-up exercise for the hands is carried out, the teacher reads a poem about a flower: first, a “bud” is made with the hands - the bases of the hands are pressed against each other, the fingers are closed and raised up.
The sun is rising - the flower is blooming! (the bases of the hands remain pressed, the fingers are spread out to the sides at the same time - “the flower is blooming”).
The sun sets - the flower goes to bed (we return to its original position). Then the teacher shows how a butterfly can be made from pens and how it flies.
Children are given sheets of white paper with drawn flower stems; in trays there are cut out butterflies of different colors, cut out green leaves and corrugated paper in yellow, blue and red, cut into small pieces (4ˣ4 cm). The teacher shows how to arrange and glue green leaves to the stem, how to crumple and glue a lump of corrugated paper; tells what a flower consists of - a yellow center and several petals located around it. The last stage is gluing butterflies from colored paper. To begin, the butterfly is folded in half, taking the shape of the letter “V”. Only one wing is smeared with glue, creating the effect of a three-dimensional picture. When the work is finished, the teacher hangs them on the stand, and the kids are invited to recognize their work. Everyone clap their hands together. The application can also be carried out in order to study the main colors of the spectrum, making butterflies according to the colors of the flowers and asking the kids to find each butterfly its home (a yellow butterfly lives in a yellow flower, a red one lives in a red one, etc.).
Game activity “Giraffe”
Materials: blanks of yellow colored paper in the shape of a giraffe, sheets of white paper, glue stick and small pieces of brown paper.
Progress of the game: The teacher plays the cheerful melody “The giraffe has spots, spots, spots everywhere...” by E. Zheleznova. The kids play a fun game together accompanied by a song, imitating the actions of the teacher. Then the children sit down at the table. The teacher says that today a very unusual character came to visit the children: his neck is long, long, his legs are thin, and his whole body is covered in brown spots. The children try to guess who came to them today. The teacher places a large figurine of a giraffe on the table. The kids study it, examine it, and show the spots on the giraffe’s sides. The teacher hands out sheets of paper and pastel yellow paper blanks in the shape of a giraffe to the children. Then the teacher shows how to place the giraffe on the sheet and how to carefully glue it. The teacher asks the children what giraffes lack? The children answer: “Specks!” The teacher praises the kids for their intelligence and shows how to make spots. Small pieces are torn off from a small piece of brown colored paper with your fingers and glued to a giraffe-shaped piece. Large spots are located on the sides, and smaller ones on the neck and legs of the giraffe. When the application is finished, the character goes around to all the kids and they show him their work. The giraffe rejoices, praises the children and says goodbye to them, and the teacher hangs the applications on the board or stand. Everyone claps their hands together, and the kids are encouraged to recognize their work.
Game activity “Berries for the bird”
Materials: a beautiful figurine of a bird, a dried twig, blanks in the form of painted twigs, PVA glue in saucers, small pieces of corrugated paper (scarlet).
Progress of the game: The teacher puts a vase with a dried branch on the table and tells the children that today a beautiful bird will fly to visit them. You just need to call her. The children call the bird, it flies and sits on a branch. The teacher says that birds love to peck not only grains, but also delicious red berries. But where can our bird find such berries? Let us make them for our guest.
Children are given sheets of white paper with drawn twigs; in trays there are cut pieces of red corrugated paper. The teacher shows how to crumple, dip in glue, arrange, etc. By pressing, glue the lumps of corrugated paper. When the bunch of berries is ready, the bird flies. The children show her the berries, the bird pecks them, rejoices, praises the children and says goodbye to them, the teacher hangs the applications on the stand. Everyone claps their hands together, and the kids are encouraged to recognize their work.
We also successfully conduct didactic games, through which children study the color, shape, size of objects, master the skill of simple counting, and develop mental operations and attentiveness.
Key terms
(automatically generated)
: teacher, child, corrugated paper, baby, white paper, colored paper, butterfly, giraffe shape, artificial grass, red color.
Applications from fruits and vegetables
All children love to eat fruits, they are very healthy and tasty, invite him to do work creating not only fruits, but also vegetables
Make an applique in the form of a plate with fruit; to create it you will need a plate and three apples of different colors.
To complete this application, follow these steps:
- make four templates, three of which are the same size as the apples, one circle is the plate. With the help of such a task, children learn to correctly determine sizes;
- Glue the colorful circles onto the white circle, the fruit plate is ready!
Making a basket with vegetables
For the little ones, in order to make vegetables, you will need to cut out the vegetables into the required shape and stick them on the background. For older children, vegetables can be made in a basket; to create it you will need glue and scissors, colored paper and multi-colored cardboard.
To make this work, cut out the basket template and place it on the background. To make the basket look more realistic, draw patterns on it. Next, cut the vegetables to the desired sizes so that they look like real vegetables.
At the end of the work, place the vegetables together with the baby as you like and glue them.
Abstract of GCD for application in the first junior group: Pyramid
Summary of direct educational activities on application in the first junior group “Pyramid”.
Author: Ionova Natalya Viktorovna, teacher of MBDOU Kindergarten No. 118, Orenburg Integration of educational areas: • Artistic creativity • Communication • Socialization Goal : Enriching the sensory experience of children when comparing objects by size. Reinforce the concept of “many” “one” Improve fine motor skills of the hands. Objectives: - Learn to group objects by color. Develop coordination of hand movements, develop visual and auditory perception. -develop the ability to correctly place and glue work parts; - learn to form a pyramid correctly - from the largest part to the smallest; teach accuracy, encourage the desire to do your work as beautifully as possible. - develop mental operations: comparison, generalization, ability to analyze; - develop coherent speech, the ability to reason, draw conclusions; - encourage independent formulation of conclusions. — improve children’s gaming skills, develop interest in games; - formation of cooperation skills, goodwill, and the ability to work in a group; — teach emotionally, to perceive the environment in the process of children communicating with each other. Equipment: 1\2 album sheet;
oval shapes of different colors and sizes cut out of colored paper and a small triangle for the top of the pyramid; PVA glue; Napkins; Oilcloth; Teddy bear toy; Toy Pyramid 1. GCD move:
A surprise moment, there is a knock on the door. Educator: Who came to us? Let's take a look, guys? Oh, yes, he came. (the teacher shows the toy Teddy Bear)
Children: - Bear!
Educator: That's right, Mishka tells me in my ear that he really likes to play with the pyramid. Today he came to us to play with the pyramid. The teacher puts the pyramid on the table and invites Mishutka to play with the pyramid with the children.
Game exercise “Assemble a pyramid” Educator : Children, look at what a beautiful pyramid we have. Let's look at it together. How many rings does the pyramid have? Children's answers (many). The teacher takes off the rings, and the children name their color and size. Educator: (takes off the first ring) which ring? What colour? etc. Children: this is a small ring, it is green, and so on until the end. If the children find it difficult, the teacher calls it himself. Then the exercise is repeated again; the children themselves begin the task: they put on the rings and name their colors. The children begin the task, and the teacher helps. Educator: Well done guys. We put everything together correctly and even helped Mishutka, let’s applaud our success. 2. Physical exercise. Three bears
Three bears were walking home The children waddled in place Dad was big, big.
Raise your arms above your head, pull up. Mom is shorter with him, hands at chest level. And my son is just a little baby. Sit down. He was very small, crouching and swinging like a bear. He walked around with rattles. Stand up with your hands clenched into fists in front of your chest. Ding-ding, ding-ding. Children imitate playing with rattles. 3. Making an application. Educator: “Today we will make pyramids for our guest Mishka from colored paper. Educator : Sit down at the tables and I will show you how to make a pyramid. Demonstration: Demonstrate the algorithm for performing the application on a magnetic board, then invite the children to repeat everything. 1. Place the prepared forms in the middle of the sheet, arranging the ovals in height from largest to smallest. During the work, the teacher guides the children’s actions, asking questions about the order of gluing, and helps some children correctly position and stick the figures. Finger gymnastics: We played, we played, (circular movements with the hands) Our fingers are tired. (movement of the hand up, down) And now we will rest (imitation of the movement of a wave) And we will begin to play again (circular movements of the hands) Fingers The fingers fell asleep, curled into a fist. One! Two! Three! Four! Five! Wanted to play! On the count of 1,2,3,4,5, open your fingers one by one from the fist. When they wanted to play with the words, their fingers moved freely.
4. Reflection. What did we do today? (children's answers) Well done guys! These are the beautiful pyramids we got. Do you guys like them? What kind of pyramid did you make, Kolya? What about you, Maya? You guys are so good at me, you made so many pyramids! Look how happy our bear is and dances! Let him now play with our pyramids! Finished works are laid out on the stand. Children, together with the teacher, admire the finished works.
Application
Practical part of the lesson
We take 1/2 album sheet, PVA glue and ready-made cut out oval shapes of different sizes and a small triangle for the top of the pyramid 1)
Next, we arrange the shapes in order (from the largest oval to the smallest) First, glue the largest oval in the middle of the sheet at the bottom. Then glue the second oval. And so on in order (from largest to smallest). Next, when all the ovals have been glued in order, glue a triangle on top - This is the top of the pyramid and our pyramid is ready!
We recommend watching:
Summary of a game (integrated) lesson on environmental education for the 2nd junior group. A summary of the GCD in the junior group on traffic rules. A synopsis of the GCD on social and communicative development for the 2nd junior group. A synopsis of the GCD for physical education in the second junior group.
Similar articles:
Lesson summary for an early age group. Vegetables: turnips and carrots
Lesson summary for an early age group. Vegetables: beets and potatoes
Lesson summary for an early age group. Fruits: lemon and orange
Lesson summary for an early age group. Cat with kittens
Summary of a lesson in an early age group on a winter theme. Hare and fox
Vehicle applications
Boys love various cars very much, so they definitely won’t refuse the offer to make an applique of cars. To make them, you will also need all the geometric shapes that are universal for any crafts.
Let's make a truck
To create a truck you will need any colored paper you like, scissors and glue, cardboard for the general background.
Follow the steps below:
- cut a rectangle from blue paper - this is the basis of the future truck, four black circles are the wheels, a rectangle from blue paper is the window, also 1 square from your favorite color is the transport cabin
- place all the details correctly on the working background and glue
- at the end of the work, draw all the details so that they are clearly visible
- to make a steering wheel, cut a circle out of black paper
For any transport, use the above method, let your child choose the transport he likes and make it himself, it can be a helicopter, bus or steamship.
Paper applique for kids
You can make many different things from paper, the main thing is that this material is very malleable and in case of a mistake you can always start over again by taking a blank sheet of paper.
In kindergartens, teachers quite often give children the task of making or coloring something on paper, and this is an absolutely correct approach, because with the help of paper, bright and memorable crafts are created, and most importantly, the child develops creatively.
Let's make a house
To make a house, cut out a triangle, square, rectangles. The triangle is the roof, the square is the base of the house, and the rectangle is the doors and windows. The benefit of creating a house is that the child remembers geometric shapes and learns to relate them to certain objects.
LiveInternetLiveInternet
Quote from Jolochka's message
Read in full In your quotation book or community!
Application for young children. Review of modern techniques
| Magazine “Modern preschool education. Theory and practice" No. 1 2012 |
Creative activities are very important for a child - they awaken his imagination, teach him to be inquisitive in learning new things, and develop creativity (the creative principle of the individual). All these qualities become especially important in our time, characterized by rapid development and variability. An important place in the development of a child’s creativity is occupied by productive activities - drawing, modeling, appliqué, design, the result of which is a certain creative product that can be examined, held in hands, or given to relatives or friends. Seeing the result of one’s efforts is especially important for a child - it gives a feeling of one’s own importance and competence (I did it! I did it!) and inspires new achievements. In addition to all of the above, engaging in productive activities brings many benefits: they provide a variety of sensory impressions, develop fine motor skills and speech, and introduce them to the phenomena of the surrounding world. Therefore, it can be argued that drawing, modeling, applique and design classes are necessary and important for children 1-3 years old - you should not postpone classes until preschool age (after 3 years), you just need to choose the right techniques. In this article we will look at modern applique techniques with young children.
Currently, early development ideas are becoming increasingly popular. However, not everyone knows how to organize activities with kids. Many people think that if the applique requires delicate actions of the hands and fingers - cutting out the applique parts, spreading the parts with glue, gluing the applique parts in the right place on the base, then this activity is inaccessible for the little ones. In addition, many adults are afraid that, having become familiar with the applique, the child may start cutting everything or smearing the glue. In addition, creating a beautiful image requires patience and time, and it can be difficult for a baby to concentrate on one activity for more than 5-7 minutes. However, there are effective methods that allow you to organize applique classes with the little ones. For this purpose, techniques are used to supplement the finished image with details, various methods of applique without the use of scissors (“crumpled paper”, broken applique). In addition, during applique classes with the little ones, various materials are used that make the activity easier and make it varied - this is not only colored paper and beautiful paper figures, but also multi-colored napkins, cotton wool, and fabric. Special application techniques for young children described in this article allow you to get bright results in literally a matter of minutes! Simple techniques are mastered by the child quickly and without much difficulty. The main task of an adult is to interest the baby.
The most effective form of presenting material is story-based and game-based: we use stories (texts and pictures) that are interesting to the child, and completing the task becomes important and necessary to achieve results during an interesting game, which creates a stable motive for activity, helping the child achieve results. Using a ready-made picture as the basis for the task makes it easier to organize the lesson and reduces the time it takes to complete the task, minimizing the preparation stage for completing the task.
Materials for applique Applique is cutting out and gluing figures, patterns or entire pictures from paper, cardboard, fabric and other materials. The base-background for the applique is selected depending on the texture and color of the materials used for the applique. Most often, colored cardboard or thick paper is used - plain white, colored, or velvet. The size and format of the background depend on the scale and theme of the application.
Paper is used as the main material in appliqué classes. Paper contains a variety of possibilities. This material enters a child’s life very early: a small child learns to grasp paper in his fist, crumples it, tears it and throws it. An older child looks at picture books, draws, and plays with paper toys. In addition to the obvious benefits, “communication” with paper imperceptibly affects the overall development of the child: his fingers are strengthened, sensory impressions are enriched - at the level of sensations he learns the texture, density, color of paper, and an interest in drawing and appliqué appears. When teaching children, it is convenient to use double-sided colored paper; in this case, children will not be confused about which side to apply the glue on. Choose thick colored paper for children to paste finished images, since thin paper, when spread with glue, curls, wrinkles, and can tear. Choose thinner colored paper (you can use sets of colored origami paper) for activities that use the “crumpled pictures” and “torn paper” methods, or when children cut the paper themselves with scissors. Glue is a necessary material for application. When learning to glue parts, we recommend first using a paste made from flour or starch so that the baby can spread the glue with a finger or sponge. In the future, you can teach your child to use a glue stick and apply PVA glue with a brush. Scissors with safe ends can be offered to a child closer to three years of age. Having introduced the baby to children's scissors, we begin the painstaking process of learning how to use them - how to hold scissors, how to cut, how to pass scissors, how to follow safety rules when using scissors. The child can practice cutting - first he cuts the paper as it turns out, then you can ask him to cut the paper into strips, squares and rectangles (by eye or along lines drawn in advance). The resulting parts are used to create applications. Additional materials - stickers, stationery stickers, ready-made pictures, cotton wool, fabric and others - are also used for appliqué lessons with the little ones. The use of additional materials makes the application process easier and makes it more varied and interesting.
Applique rules Before starting classes, tell your child about the following applique rules (these rules will be useful to your child in preschool age): • Carefully, evenly spread glue onto the paper with your finger (or sponge, brush, glue stick) from the middle of the image to the corners and sides. • Apply glue to the back of the image (if the colored paper is single-sided). • Turn the paper piece over, holding it on both sides with your fingers (thumb and index finger or thumb and middle finger). • Place the part with the glued side on the paper and press the image onto the paper with your entire palm. • Smooth the glued part with a soft cloth or napkin. • Cut out shapes not from a whole sheet of paper, but from small pieces - squares, rectangles. • When creating an image, you first need to place all the parts on the base, and then glue the parts one by one. • Work with scissors carefully, be careful: do not swing the scissors, take them only by the ring handles, pass them forward with the handles.
Using stickers Currently, on the shelves of bookstores you can see a wide variety of books with stickers of varying degrees of complexity. You should definitely use these books, because kids really like stickers! These can be story books - in this case, the baby complements the image on the book page with additional details (images of various objects). In addition, you can purchase sets of stickers (sold in sheets on which different stickers or stickers on a specific topic are located). These stickers can simply be glued to a sheet of paper. But you can come up with a variety of story-based tasks with stickers. Beautiful cards Cut out simple shapes from colored double-sided half-cardboard - circles, squares, hearts, flowers, stars. Ask your child to stick a beautiful image in the center of each figure - you get bright cards that you can give to family and friends for the holiday. Dog kennel You can find a wide variety of stickers with images of animals on sale. Choose stickers for the activity with animals that your child is especially interested in. Using these stickers, you can come up with an interesting plot for your applique. For example, draw square windows on an A4 sheet (or simply line them in the form of a table) - you get a “house”. In every window of the house you can see a dog - it turns out to be a “dog kennel” or a “dog hotel”. In the same way, you can use stickers with images of cats, horses, and other domestic and wild animals in appliqué classes. Geometric mosaic Use books in your classes with kids in which images are made from multi-colored geometric shapes. However, please note that actions with stickers that are too small are not yet available for the baby. In addition, painstakingly laying out a complex image is often an overwhelming task for the little ones. Therefore, using multi-colored circles, squares, triangles and rectangles, it is worth coming up with new tasks that are accessible to kids. For example, suggest sticking medium-sized multi-colored circles on a sheet of paper: Let's give the monkey colorful balls! Or make a simple applique - cut out and glue a large green Christmas tree on a sheet of cardboard, then invite your child to decorate the Christmas tree with multi-colored balls (in this case, use small circles): Let's make the Christmas tree elegant - decorate it with multi-colored Christmas balls! Using round stickers, you can make wheels for a drawn car. And from square and rectangular stickers, you can make a “path”, “windows in the house”, etc. In the future, after the child acquires the skills of using stickers, you can use mosaic stickers for their intended purpose - laying out images on the pages of a book. If there is any difficulty, do not forget to help your child separate the sticker from the base and stick the pictures in the right place. Decorations In classes with kids, it is also useful to use books with stickers or sets of stickers containing numerous bright stickers in the form of simple shapes - stars, flowers, hearts, etc. Using such stickers, you can come up with numerous simple plots that are accessible and interesting to kids. For example, invite your child to stick multi-colored figures on a sheet of dark-colored cardboard - you get a “holiday fireworks display.” Ask your child to stick multi-colored flowers onto a sheet of green cardboard to create a “flower meadow.” Or draw a doll in a dress and suggest decorating it with multi-colored circles - you get a “polka dot dress”. You can decorate large objects in a similar way. For example, cover a box or a plastic jar with stickers together with your baby - now they have “become beautiful.”
Applique using the “crumpled paper” method When practicing appliqué with children 1-3 years old, we recommend using this simplest method - tearing the paper into pieces and crumpling it, and then gluing multi-colored paper lumps to the paper base. This method allows you to create bright pictures in literally a matter of minutes without using scissors. Please note that you can glue paper lumps in two different ways - dip one side of each lump in glue and apply it to the base, or spread the entire base with a thin layer of glue, and then apply paper lumps and press down so that they stick better. When practicing appliqué using the “crumpled paper” method, use thin colored double-sided paper (for example, origami paper). Crumbs for birds Give your child a sheet of yellow paper (you can divide the sheet into small pieces in advance - in this case, the child will not have to tear the paper) and offer to “feed” the birds. Show your child how to crumple the paper to make small lumps - these are “crumbs for the birds”: Birds are hungry in winter. The kids made a feeder for them. The birds came to peck at the tasty grains and bread crumbs. But where are the crumbs? Let's put them in the feeder! Multi-colored pebbles For this task you will need colored paper of brown, orange and any other colors (the child can choose the color of the paper himself). Invite your child to crumple pieces of colored paper (or first tear the paper into pieces and then crumple it) and arrange them beautifully in the picture - “on the sand”, and then glue the paper pieces to the base: It’s good in the summer at the sea! You can swim in warm water or lie on the sand and bask in the sun. Or you can look for colorful pebbles in the sand and collect them in a bucket. But where are the pebbles? Let's make sea pebbles out of paper. Starry sky Give your child yellow double-sided paper and suggest that you first tear it into small pieces and crumple it into lumps, and then stick it on a dark background - you get a “starry sky”: Night has fallen on the city. It became dark outside, and lights came on in the windows of the houses. A bright moon appeared in the night sky. Where are the stars? Let's make stars in the sky!
Application using the method of gluing ready-made images Using this method, the child is asked only to place the finished parts (they are cut out in advance by an adult) on paper and stick them. Please pay attention to the following point: a child of this age, even with a sample, cannot yet imagine the picture mentally, so in those places where the intended images will be located, put dots or crosses. When gluing ready-made pictures, you can use a glue stick or PVA glue, which is spread with a brush (from the center of the figure to the edges), then the figure is applied in the desired place of the picture and smoothed with a napkin. Round candies Cut out medium-sized multi-colored circles - these are round “candies”. Invite your child to “fill the vase with delicious sweets”: Today we are expecting guests. Let's fill the vase with candy so you can treat your friends! Balloons Cut out multi-colored circles from colored paper in advance, and on a sheet of paper draw strings for future balloons. Help your child place the “balloons” on the base and then glue them on. Play with the applique: Katya has a lot of beautiful multi-colored balloons. Katya wants to give balloons to her friends. But suddenly the wind blew and the balls flew away! The girl was upset... Let's give Katya new balls! Elephant juggler Before starting the lesson, cut out multi-colored circles of a suitable size and draw an elephant on a piece of paper (or glue the cut-out image). Then invite your child to stick on the circles and play out the task: Who do you see in the picture? A lonely elephant has nothing to play with. Let's make the elephant happy - give him a lot of colorful balls! Find a place for each ball and stick it on it. Look how joyful the elephant has become. He can now juggle balls! Leaf fall Before starting the lesson, cut out figures of autumn leaves of different colors (and possibly also of different sizes and shapes). Invite your child to stick leaf figures on the base - a sheet of cardboard. Play with the applique: Autumn has come. Multi-colored autumn leaves swirl in the air. Let's make the leaves fall! Fish in an aquarium Cut out fish figures in advance from colored paper (or first draw and then cut out), and also draw an aquarium on a sheet of cardboard. Then invite your child to stick fish figures on the background of the aquarium: The fish really want to swim - let’s let them into the aquarium. Now the fish are swimming in the water! Butterflies Cut out figures of multi-colored butterflies in advance from colored paper (or first draw and then cut out). Invite your child to stick butterflies onto the base. Play out the plot of the task: Butterflies have flown to the clearing! What beautiful butterflies!
Application using the “torn paper” method This unusual type of application, such as tearing colored paper into pieces and gluing them to a base picture, has a number of advantages: it allows you to do without scissors (it is advisable to teach a child to use scissors closer to three years); offers an easier way of gluing parts - not a separate part is smeared with glue, but a part of the base picture, onto which paper parts are applied (or simply poured out) and glued (to do this, you need to spread them evenly over the adhesive surface with your fingers, and then press them with your palm); It is not necessary to glue the parts completely; on the contrary, the edges slightly raised above the surface of the paper give the image a “fluffiness” and volume. When the child masters this type of appliqué, you can offer him more complex tasks using this method - for example, tearing colored paper into strips and adding them to the image (make a vest for a sailor, help a tiger cub become striped, etc.). Berries for bullfinches First, prepare the basis for the task - draw a winter tree and bullfinches, and also prepare a sheet of double-sided colored paper. Invite the child to tear the paper into small pieces, then together cover with glue (it is convenient to use a glue stick) the image of the tree crown, invite the child to pour out pieces of red paper and glue them: Two small birds, two small birds flew to the tree to peck berries: “Oh and These berries are delicious! Oh, and these red berries! Chir-chik-chik!” You fed the birds berries - well done! Cornflakes Show your child how to tear the yellow paper (double-sided) into small pieces - these will be “cornflakes”. Then help your child evenly spread glue on the image of the plate in the picture (you can use a cardboard circle or disposable tableware as a “plate”), sprinkle “flakes” on top (to make the flakes more airy, you can lightly crush them before gluing), and press with your palm so that stuck better. Play with the result - invite your child to feed the dolls “corn flakes”. Grains for birds This task is performed in the same way - first, the baby tears a piece of bread (cut out a shape in the form of a loaf or a piece of bread from paper in advance) into pieces and places it on the feeder: The birds are hungry in winter... Let's feed the birds with bread crumbs - like this! Delicious porridge Draw a circle on a sheet of cardboard, or cut out a circle of large diameter from cardboard in advance - this is a “plate”. Then give your child a piece of brown paper, show how you can tear the paper into pieces to make a crumbly “porridge” (if the pieces turn out to be large, offer to tear them again into smaller ones). Then help your child evenly spread glue on the image of the plate and sprinkle “grains of porridge” on top. Play with the result - invite your child to feed the dolls “porridge”. Sprinkle the Easter cake In this task, we invite the child to decorate the Easter cake (you can draw it in advance or in front of the child) with bright sprinkles. To do this, ask your child to cut pieces of multi-colored paper into small pieces, and then glue them in the right place on the base. Play with the result: Now the Easter cake is very beautiful - well done! The doll came and asked for Easter cake. Here, doll, Easter cake! Very tasty thank you. Striped Tiger Cub When the baby learns to make applique using the “torn paper” method, you can offer him more complex tasks. In this case, the pieces of paper are no longer arranged chaotically, but in a certain order. For example, draw the outline of an animal on paper and suggest turning it into a tiger. To do this, ask your child to carefully tear the brown paper into strips of varying lengths and widths. Help your child place the stripes on the picture and glue them. This application is best done using the usual gluing method - each part is smeared with glue, then applied to the base and pressed down with the palm of your hand.
Getting to know scissors As you approach the age of three, you can start teaching your child how to use scissors. To do this, you need to select special children's scissors with rounded edges (it is also useful at the first stage to use specially designed scissors, the blades of which move apart automatically, since this is the movement that poses the greatest difficulty for the baby). It is better to use double-sided thin paper for cutting, which kids can cut without effort. Before starting the lesson, explain to your child the rules for using scissors: you must hold the scissors correctly, do not lift or swing the scissors, pass the scissors forward with your hands, keep your fingers away from the blades (hold the paper correctly). If something doesn’t work out for your child, don’t rush to do the work for him. Taking the baby’s hand in yours, show him again how to cut out this or that object, and also suggest the correct actions. Pay your child's attention to how best to prepare the workplace when using scissors: put paper scraps in the lid of a cardboard box - in this case, small pieces of paper will not fly around the room. After getting acquainted with scissors, we teach the child to cut paper along straight lines (it is better to draw them in advance), and also use the imprecise cutting method (the child cuts out the part approximately, not necessarily exactly along the edge). Most likely, your child will not be able to use scissors right away - remember that children master the technical techniques of working with scissors gradually; this is a long process that requires repeated exercises. Over time, the child’s actions will become more confident, and the cut out parts of the applique will become neater.
Method of cutting along straight lines To practice cutting skills, it is first better to ask your child to cut the paper along straight lines that were previously drawn on the sheet using a ruler and pencil. The multi-colored stripes and squares obtained during cutting are used for plot appliqué. To prevent the work from becoming mechanical, remind your child for what image the received parts will be used. Be prepared for the fact that at first the cut out parts will not be very even, but over time the baby will learn to act more carefully. Tickets Prepare in advance a strip of paper 2 to 5 cm wide (divided into squares by lines), depending on how the resulting “tickets” will be used: small “tickets” can be distributed to people drawn on a sheet of paper, and large ones can be used in a game with dolls. Invite your child to make “tickets” by carefully cutting the strip along the drawn lines into squares. When the “tickets” are ready, ask your child to “give them to the children” in the picture, or to the toys: All children love to go to the circus. Today there is a circus performance. Funny clowns and trained monkeys will perform in the arena. Let's give the kids tickets to the show! Napkins for babies Prepare a square sheet of paper, which you divide in advance using lines into four small squares. Invite your child to cut the blanks, making “napkins” for grimy kids: Kids eat delicious soup. But why are they so grimy? It’s just that the children are still small, they don’t know how to eat carefully. Let's give them napkins. Roofs for houses Draw square houses with windows on a sheet of paper in advance, or make them using applique. Also prepare squares of colored paper, separated by diagonal lines. Invite your child to carefully cut the squares to form triangular “roofs”. Then ask them to fix the houses - lay out the triangles on the picture and glue them: The little gnomes built the houses. It will start raining soon, but the roofs of the houses are not yet ready. Let's help the little people make roofs for their houses! Striped rug Prepare in advance rectangles of four different colors, divided by lines into narrower strips, as well as a sheet of cardboard and a toy dog. Invite your child to carefully cut the colored paper into strips. When the strips are ready, have your child lay them out on the table, alternating by color. Then give the child glue and ask him to glue the strips to the base: Once upon a time there was a little dog. Let's make a beautiful striped rug for the dog! It’s warm and cozy to sleep on such a wonderful rug! Quilt Prepare strips of colored paper divided into squares by lines. Invite your child to carefully cut the strips into squares, then arrange the squares on the base, alternating colors, and glue: Let's make a patchwork quilt - it consists of multi-colored squares! You can play with the craft by covering a paper doll with a “patchwork blanket”.
Method of imprecise cutting You need to be prepared for the fact that the child cannot immediately learn to cut out the details for the applique accurately. Therefore, it is useful to offer him special tasks for appliqué, in which great precision and accuracy are not required from the baby: no matter how the baby cuts and no matter how he glues it, it will probably turn out well. Here are some examples of such tasks. Blankets for gnomes Draw small gnomes on a sheet of paper and prepare pieces of colored paper. Invite your child to quickly cover the gnomes so that they do not freeze. To do this, you need to cut out blankets - a blanket from each scrap. At the same time, the shape of the blankets can be very arbitrary - after all, everyone covers themselves differently. Before gluing the applique pieces, you need to apply them and see what happens. Windows in the house Draw a large house, and separately – windows with inhabitants. Invite your child to “populate the house” - to do this, you need to cut out the windows (not necessarily exactly according to the drawing, just cut them out somehow without cutting the window itself) and glue them to the house in any order, but it’s better if the child first puts the pieces down and looks , how it turned out, and only then glue it. Snails Draw snails without houses on a sheet of paper; separately, on pieces of colored paper, draw spirals of a suitable size. Invite your child to make “snail houses.” Using one shell house as an example, show your child how to cut out a circle. Let your child touch and then glue the cut out house to one of the snails. When the child understands what the result should be, help him do the rest “on his own.” Beautiful flowers Draw the base for the flower - a stem with leaves and the middle of the flower (you can draw several future flowers at once), and also prepare double-sided colored paper. Invite your child to make the flower beautiful by adding colored petals. In this case, the paper can be cut completely arbitrarily - let the flowers have different petals. Moreover, the petals can be not only of different shapes, but also of different colors, as long as it is beautiful. Needles for a hedgehog Draw the basis for the applique - a hedgehog without needles. Then invite your child to “make the hedgehog real.” To do this, suggest cutting black paper into long strips, then these needle strips need to be glued onto the hedgehog.
Unusual applique To make it interesting for your child to do applique, it is useful to make the activities varied. To do this, you can use non-traditional materials - for example, cotton wool, fabric, foil, etc. Below we give as an example some simple applique options using cotton wool. Clouds Take a sheet of blue cardboard and invite your child to make “clouds” in the picture. To do this, you need to tear off pieces of cotton wool, spread glue on the “sky” (it’s convenient to use a glue stick), and apply the cotton wool: Let’s make white clouds in the sky! It is snowing! Draw a house on a sheet of blue or purple cardboard or glue a baby figurine. Then invite your child to tear off small pieces from the cotton wool and stick pictures in different places: Let’s make it look like the first snow is falling in the picture! Using the proposed application methods, it becomes possible to organize interesting and varied activities for the baby throughout his early years. In this article we describe only some of the tasks within each method - we hope that they will awaken your imagination and you will be able to come up with new original tasks and implement them with your kids. The article uses illustrations from the art albums of the “Your Baby Can Do It” series and other books from the Mosaika-Sintez publishing house.
Magazine “Modern preschool education. Theory and Practice" with an illustrated article can be purchased here
Applications from cotton pads
Cotton pads are quite common items in appliqués; there are many options for what exactly to make from them; be sure to make a snowman, it is very simple and quick to do.
To create it, stick disks on a blue background, cut out a square from them to make the base of the house, or use colored paper and stick snowflakes to create a snowy atmosphere.
What to make applications from
To diversify your classes, it is useful to alternate materials . Ideal for making appliqués:
- colored paper: plain, double-sided, velvet,
- napkins,
- stationery stickers,
- stickers,
- magazine clippings,
- foil,
- felt,
- textile,
- cotton wool and cotton pads,
- plasticine,
- natural materials,
- cereals,
- sand,
- salt,
- insulating tape.
Try to use cardboard or thick paper as a basis. We most often use A5 format in our works, sometimes A4.
Where possible, it is better to color the base template and cut it into the desired shape (Christmas tree, vase, etc.) - it’s more interesting for the child.
As for glue, you must have both a glue stick and regular PVA. Now, at 3 years old, Antoshka suddenly began to disdain to pick up a piece of paper with ordinary glue, which he applied with all his heart. And we temporarily switched exclusively to glue sticks.
Plasticine applications
Plasticine is the favorite creative object of all children; it is soft and pliable, which means that all the most interesting things can be sculpted from it.
The main thing is that you don’t need a lot of time and effort; to work with it, you just need to warm it up and start creating.
Let's make a caterpillar
To create a caterpillar, you will need green, black and yellow plasticine
Make balls of green in any shape, yellow will be used to create leaves or give a pattern to an insect. Glue all the resulting balls onto the main background, to make the background more interesting, rub blue plasticine on the cardboard with your fingers.
Cereal applications
Seeds are a good material for creating appliques; pumpkin seeds, which are most often used for crafts, will come in handy. Let's make a basket with flowers - to create it you need to draw a basket or trace a ready-made template and paste the seeds on the base.
To make flowers, make the centers using beads, make the petals with watermelon seeds.
To create crafts from cereals, purchase millet, you need to make a drawing that will serve as the basis, it can also be a template.
To create a chicken, draw it on a working background, apply glue and the child must fill the figure with millet. Beans will be needed to create eyes, beak and legs, our chicken is ready!
Creativity is always a fun and enjoyable pastime for any age; in a small preschool age it is very important to start small, doing simple, uncomplicated tasks, and then moving on to complex ones.
In kindergartens, children are taught and developed starting from the age of one and a half years; the task of parents is also to support them in everything and help them in such creative development.