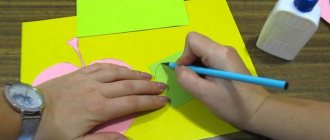
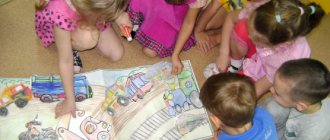
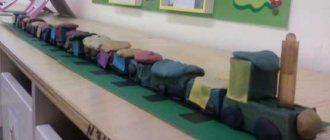
Application helps develop creative skills and hand motor skills. This kind of art is relevant for all ages and problems, but most often, educators practice this process in kindergartens and primary grades.
To keep the boys busy for a few hours or to spend fun and useful time with them, they make car panels from scrap materials. Now we need to look at machine templates for appliqué for children of different ages.
Simple car applique for kids
This simple option is suitable even for small children from 2 years old. To work you need to find material:
- Colored paper - the more shades, the better. It is better to develop color perception from infancy.
- Safety scissors are plastic.
- Glue stick.
- The base is cardboard or a thick white sheet.
It is difficult for children to draw figures; in the early stages they are printed using a printer on colored paper. Parents should be involved in the process so that the baby can observe the actions and repeat. Simple application instructions:
- cut out 2 small circles, 1 rectangle and a square;
- small ovals are cut out of red paper, which will indicate the presence of headlights (since the panel will be two-dimensional, only 2 pieces will be needed);
- then the assembly process begins - each part is coated with glue and placed on the base.
The shape of the car, colors are selected only at will. The main essence of this work is to develop motor skills by working with small parts.
How to make a paper boat with a sail?
It is very easy to make a sailboat, so you can do it with your kids. They quickly master this activity and enjoy folding the boats themselves.
- Take a square piece of paper, fold it in half and straighten it out. Repeat this on the other side. So you marked the necessary lines and got the center
- Bend the corners of the sheet towards the center
- Fold the corners again and turn them back
- Fold down the bottom left and right corner
- Then do the same with the top corners
- Turn the resulting book over to the back side
- Bend it diagonally and make a mound from the resulting fold.
- Fold the resulting square diagonally again.
- Your sailboat is ready
Here are more diagrams with step-by-step images, according to which you can easily make a sailboat from a sheet of paper.
Volumetric machine applique
Many adults remember this option. Previously, there were children's magazines on sale, where the authors included special car templates for appliqué for children, from which they assembled a full-fledged car.
Today it is difficult to find something like this; adults can print any model on their own. Assembly instructions are simple:
- You can use the suggested options.
- Next, the vehicle is printed on a thick A4 sheet.
- After that, it is cut along the dotted line.
- For convenience, a ruler is used; it will help make the folds even.
- Next, the parts are glued together with tape or PVA glue.
Thus, you can make any model that will become a full-fledged interior decoration. The work is suitable for older people, as gluing and folding parts requires skill.
Preparation for the application “Boats float on the river”
The success of an application lesson largely depends on its preparation. And here the leading role, of course, belongs to the teacher. After all, in the middle group, the guys still cannot prepare parts on their own.
Suitable materials
First of all, to create a composition you will need a base - a sheet of white A5 paper. The teacher also prepares colored paper for each child:
- long narrow stripes of blue, dark blue or gray (to create the image of a river) or ovals of the same colors (lake);
- paper rectangles of different colors (base for boats) of different sizes (approximate size 7X3 cm);
- scraps of colored paper for decorating boats (flags, portholes, etc.).
You can play with the base in a more interesting way - use blue or light blue cardboard, and give the traditional rectangle wavy edges. This will give the impression that the boat is actually rocking on the waves.
You can play with the base in an interesting way - give a traditional rectangle wavy edges
Of course, to work, preschoolers need scissors, glue, brushes, oilcloths and napkins.
Car applique
This option is good for all ages. To inspire your child, you can take a short walk around the city where he can watch the traffic. Next, it is recommended to study the master class:
- Parents often develop creativity through the “observe and play” technique.
- Children see the world differently, and with the help of art they can show it to adults (by the way, appliqué often helps to identify experiences or concerns; psychologists use this method).
- To work you will need colored paper, safety scissors, glue stick, rulers, compass.
- Using a compass, wheels and the sun are drawn on black paper.
- Next, using a ruler, the main elements are formed - trunk, windows, doors, body, etc.
- It is necessary to make a background - it is done using colored paper.
- Clouds or gas emissions are made using the torn technique - colored material is carefully torn, the child can create any interesting shape.
- Next, all the details are cut out and folded onto the background, after which they are glued.
Such work can even be submitted to a competition in kindergarten.
Download electronic presentations for children - it's so easy
Modern websites present a wide variety of materials that parents can use in teaching their children. We tried to make our free presentations for children
a little different, different from everyone else.
First of all, our materials are quite informative. They will be of interest not only to preschoolers. Such presentations for primary school children
will fit just as well. A logical question arises: is it really possible for a first-grader and a three-year-old child to learn the same amount of information that will be interesting for the former and understandable for the latter?
Definitely not. Our materials work on a slightly different principle. These are mainly presentations for children in the preparatory group.
.
They cover all the points that a child needs to know for school. However, you should still start teaching your child earlier - for example, at 3-4 years old, the child is already ready to see presentations for kindergarten children
.
At this age, the baby is tormented by a wide variety of questions that adults are sometimes unable to answer. But successful child development
is possible only when he gets free access to all things that are interesting to him. He may not understand some of the materials that are not yet so interesting to him due to his age, but if you repeat the lesson in six months, the baby will learn more points.
Truck applique
Children love to watch massive and large vehicles that amaze them with their majesty. Therefore, if a child is impressed by what he sees on the street, this is an excellent reason to make an applique with him at home. Necessary materials:
- Drawing.
- Cardboard.
- Scissors.
- Pens or pencils.
- Glue.
First you need to download a dump truck template made from thick paper, which many have already assembled. This will make the preparation process easier and the child will not lose interest in work. It is recommended to print the template on white cardstock.
If you only have regular printer paper, this will work too. However, cardboard is better, it is thicker and stronger. This will make it easier to draw the pattern on colored thick paper, and it will retain its shape for a long period.
After the pattern is printed, you next need to cut out the parts using scissors. For realism, add a little brown color for the ground, this is optional.
Using a torn technique, it can be added to the very bottom; each detail is glued with a glue stick. All parts are first placed on the base and then glued using regular PVA. You can complement the concept using watercolors, drawing clouds, houses, the sun, etc.
How to make an origami paper boat, diagram?
Another easy way to make a paper boat.
- Fold a piece of paper in half and fold it back out
- Fold the edges over so they meet in the middle at the fold. You should end up with a rectangle
- Fold the bottom of the workpiece and the top to the center to make a square
- Bend it all back
- Unfold the corners from below, pressing them down to create a bend.
- Align them and you have a trapezoid
- Repeat the same with the corners on top of the workpiece.
- Fold the upper trapezoid along the dotted lines marked in the figure
- Turn the workpiece over to the other side
- Fold the paper along the line shown and your sailboat is ready.
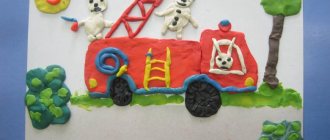
Fire truck applique
This craft is so simple that even small children can do it. And if the child is a little older, he can even help cut out and trace the template. Necessary materials for application in the senior group of fire trucks:
- Drawing.
- Cardboard.
- Scissors.
- Pen or pencil.
- Glue.
As in the previous version, it is recommended to print the template on cardboard. You can also use regular printing paper if your printer won't accept thick paper, but cardstock is an economical and convenient option that can be reused many times in the future.
Once the pattern is printed, the child simply cuts out the shapes using scissors.
Once all the shapes are cut out, you can start choosing the background color. Most often it is blue, as it resembles a clear and bright sky. On this basis, the red details will look even more impressive.
First of all, the children glue the body onto the base. Then two black outer tires and a center one. Two windows are added, a staircase and finally a yellow light at the top.
You can add a road under the fire truck or clouds in the sky to complete the scene to your liking. The fire truck applique is an excellent reason to tell your child about this profession while working.
How to make a two-pipe boat out of paper?
Making a boat with two pipes is quite difficult, but following the diagrams you will succeed.
- You will need a square piece of paper
- Fold it in half diagonally on both sides to create center lines
- Fold all 4 corners towards the center of the shape. Turn over to the other side and repeat the procedure
- Turn over again and fold all corners to the center again.
- Now turn your workpiece over and turn two corners on opposite sides so that you get pipes
- Fold the resulting figure in half, turning the right and left corners into squares, and they should also fold in half
- At the same time, the pipes should fold, that’s it, your two-pipe boat is ready
Ambulance application
The sound of an ambulance can be heard several hundred meters away, such a car attracts attention. Making it at home using the appliqué technique is quite simple. What we need for the colored paper applique machine:
- Colored paper.
- White cardboard.
- Scissors.
- Glue.
Let's start with a minibus template. It consists of two parts - a body and a frame with wheels. First we make the body, having previously estimated the size on paper. We also make the rear part of the body separately and glue it to the roof using glue.
After this, you need to cut out a cross separately and place it on the body. Red flashing lights and black wheels are cut out separately, depending on the size of the overall part.
All parts are carefully glued to the cardboard. If you have an old stencil at home that you can use to make letters, you should definitely use it.
How to make a boat with a paper pipe?
A ship with a pipe is even easier to make than a regular one. It will turn out especially beautiful if you make it from single-sided colored paper. Follow the diagrams below with step-by-step photos.
Police car applique
It's a fun activity to make things out of paper with your own hands. Parents need to: download and print the template, cut it out, fold it along the lines, and glue it.
You can also paint the car yourself by pre-printing the drawing in black and white. The car will be unique. The main point of assembling such a machine using origami and appliqué techniques is the possibility of play.
If made from thick cardboard, the vehicle will be stable and strong.
Such a machine can even be made from an old cardboard shoe box or equipment. Any ideas:
- Cut several holes for windows.
- Next, cut off the parts for the doors; this must be done so that they can open.
- Afterwards the structure is simply covered with colored paper.
This version of the craft can become a full-fledged toy or work for a competition. This work is similar in technique to fire truck appliqué.
How to make a paper boat step by step?
Below we describe step by step how to make the simplest boat from a white sheet of paper.
- Fold a piece of paper in half and place it with the fold facing up.
- At the same time, bend the top corners towards the center of the sheet so that they form a right angle. At the same time, this must be done in order to easily find the center
- Bend the lower edges of the workpiece upward on both sides separately
- On the sides you will have corners that break the triangle, bend them to the opposite side
- Now take the corners and, opening the pocket, connect them to each other, you should get a square with a pocket
- Your square will have a free edge, fold it up on each side. You will get a triangle
- Connect the corners again to make a square.
- Pull the corners on top of the resulting square, while holding the middle
- Your figure should open up and you will have a boat
- Smooth all the lines with your fingers, then your boat will be stable and beautiful
- Launch the boat into the water
Fabric machine applique
This part of the master class is suitable for mothers who want to decorate towels or bed linen for their babies. Stripes are often used for identification in kindergartens; teachers may ask them to buy them or make them themselves.
The technique is quite simple, especially if you have a sewing machine at hand:
- First you need to choose bed linen or clothing on which embroidery will be done.
- Next, you need to download and print a special machine template for the applique. It will make the work much easier.
- After this, the threads are selected.
- The sewing machine is refueled and you can start working.
- Each detail is carefully stitched.
You can also do this work on a separate piece of fabric to use the machine as a patch. If the work is done for a kindergarten or camp, it is appropriate to add the name or the first letters of the initials. This can also be done using standard stitches.
If you don’t have a machine at hand, you can do the appliqué by hand, which will take more time.
Applique is a great way to develop motor skills and creative skills in a child. Working together brings adults and children closer together, which will have a positive impact on relationships in the future.
Presentations for children as one of the best ways to teach a child
Information technology has come a long way in recent years. Modern children easily master computer technology, and as a result, presentations for children’s development
. This is a special type of material that helps kids learn all the information more easily.
When preparing children
for school, presentation
is often key.
Bright and colorful pictures allow the baby to clearly see the world around him and imagine plants and animals that he has never met before. Children's presentations for children
are freely available, which allows all parents to use them in independent studies with their child.
