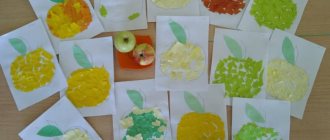
Autumn applications: preparatory group
Applications made from natural materials in kindergarten occupy a large part of the children's development program. Autumn gifts of nature open up many possibilities for activities with children. Therefore, autumn fairs are a place where you can show off your talents.
You can invite the children to come up with a real composition of leaves.
If you combine drawing and applique, you can make such a cute hedgehog from seeds.
Using flower petals and grass sprigs, you can make beautiful applications
Application for the younger group on the theme of autumn
Applications made from natural materials in kindergarten are not very complicated. For them you can use not only leaves, but seeds, acorns, twigs. Colored paper and cardboard are also used.
Autumn flower applique
Beautiful colorful leaves that fall to the ground from trees can be transformed into an autumn flower. You can create such a flower using glue and a sheet of cardboard.
If one flower is not enough, then you can make a vase with flowers from autumn leaves.
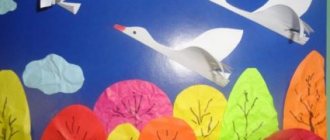
Beautiful umbrellas will be made from pieces of colored paper. This type of applique is called cut-off.
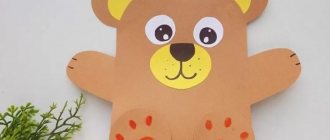
Teddy bear
Using yarn, you can make an applique of a wonderful bear in the senior group of kindergarten.
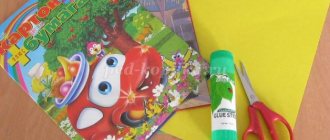
For this you will need:
- Bear stencil;
- Cardboard;
- Pencil;
- Scissors;
- Brown and gray paper;
- Glue;
- Brushes;
- Gouache.
The children must independently choose a suitable background, draw or trace a stencil of a bear on it, fill in the areas with parts made of colored paper, and draw the missing elements.
Golden spikelet
On the theme of bread, you can invite the children to make a modular application using the origami technique. Lesson notes on this topic will greatly help the teacher in the learning process. This way you can make an autumn carpet. For the application the children will need:
- Sheets of paper;
- Scissors;
- Adhesive paper.
Progress:
- Take a sheet of yellow paper, which will later become a spikelet, cut it into 20 squares with sides of 5. Cut the remaining piece into long pieces. This is the future stem.
- Place one of the squares in the shape of a diamond and bend it to form a triangle. After that, bend it again, open it and return to its previous shape. Thus, we only marked the fold lines.
- Fold the corners of the triangle as shown in the photo.
- Fold the lower ends of the figure. You should get a shape similar to a heart.
Each spikelet consists of three such modules. The upper module is obtained by folding the original one in half. The lower one is done by simply bending the tip. Attach the stem to the base of the spikelet.
Collect the remaining spikelets. They can be either part of the composition or an independent fake.
Cotton wool applications
One of the most popular and simplest ways to imitate snow for crafts is cotton wool. The work done in this way turns out to be voluminous and truly winter-like.
Snow covered trees
What you will need:
- blue or light blue cardboard;
- pencil;
- glue;
- cotton wool
Let's get started:
- Take cardboard and draw a tree trunk on it.
- We coat the branches with glue and put cotton wool on them.
- In the background we draw snowdrifts and a few more trees, make clouds and bushes.
- We glue the cotton wool to the snowy hills and along the contours of the plants. The picture is ready.
We use cotton balls
For the next craft we will prepare: cardboard, colored paper and several cotton balls.
- We cut out snowdrifts from a strip of white paper and glue them at the bottom.
- We make several trunks for future trees from brown paper and place them on cardboard. We put a snow cap made of cotton wool on each of the branches.
- We cut out patterned snowflakes or make small circles using a hole punch and paste them over the trees.
Forest of cotton pads
As an alternative to regular cotton wool, you can use cotton pads. Additionally you will need: colored cardboard, glue and scissors.
Let's start designing the application:
- To imitate snow-covered hills, take a cotton pad, cut it in half and glue it onto cardboard.
- Then we cut out several strips - these will be tree trunks. Glue them onto the snowdrifts.
- We make the crown of the tree from a whole disk.
- To add liveliness to our picture, we draw snowflakes. They can be cut out of paper, drawn with cotton swabs, or small circles of cotton pads made with a hole punch can be glued on.
Another craft option:
- We draw Christmas trees on several cotton pads: we got four, then we cut them out.
- From another disk we make a month and snowflakes.
- We take cardboard and glue a cotton swab in the middle at the bottom - this is the trunk of one of the trees.
- Cut several cotton pads in half. In our case - three. We glue them at the bottom with different sides - we get snowdrifts and snowy hills.
- Place a cotton pad on top of a cotton swab - this is the crown of the tree.
- We place the cut out Christmas trees on the snowdrifts. Glue the month and snowflakes.
House in the forest made of cotton swabs
Don't forget about cotton swabs. With their help, you get cute snow-covered trees and houses.
Let's take: cardboard, colored paper, scissors.
- Whole sticks are suitable for tree trunks, but to create branches you will need to cut them.
- To make it at home, place cotton swabs next to each other horizontally or vertically. Cut out a triangular roof from white paper and glue it on top. We make windows and doors from colored paper. You can do the opposite: cut out houses from paper, and lay out the roof from sticks.
- We also cut out clouds, snowflakes and snowdrifts from white paper.
Autumn mushrooms
Autumn is a time of beautiful landscapes. If classes fall at this time of year, you can perform a mushroom composition with the guys. You can also make fruit using this technique.
This will be an application made from cereals, so for it you will need:
- Semolina and buckwheat;
- Sheets of green colored paper;
- Cardboard;
- Scissors;
- PVA glue;
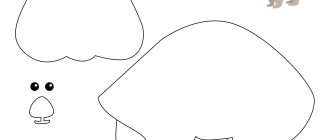
- Grass and mushrooms patterns.
To complete the application, children will need:
- Trace the patterns of mushrooms on the background;
- Cut the grass;
- Apply glue to the cap;
- Fill it with buckwheat;
- Shake off loose residues;
- Also coat the leg with glue;
- Cover with semolina;
- Glue the grass.
The application is ready!
