Preparation
The first step is to prepare for the development process:
- When organizing a workplace, everything unnecessary is removed from the table.
- You can cover the surface with oilcloth to protect it from glue.
- All elements are cut out in the required quantity.
- It is recommended to use stationery scissors with blunt tips - they are comfortable for the child and he will not be able to cut himself with them.
- A background base is selected from colored paper or thick cardboard.
- For younger children, it will be more convenient to use pencil glue rather than PVA.
- To make the activity more interesting, you should choose beautiful and bright colors.
Before creating an application, you need to tell your child about geometric shapes - show the blanks, name their shapes. It is important to become familiar with the sequence.
Your child will be interested in creative activities together, and teamwork will strengthen relationships. Over time, the baby himself will learn to assemble compositions from different elements.
How to organize the process
Applications from geometric shapes do not require artistic abilities from an adult. It is enough to be a creative person. You can select photos of geometric crafts in various manuals or use Internet resources.
The task of the teacher or parents is to select the necessary materials, organize the workplace and ensure safety.
The organization of the process depends on the age of the child.
- Children under 4 years old. For successful work, children can be offered cut-out blanks and shown the sequence of actions. For the first works, it is better to prepare a base with a marked drawing diagram. These should be simple figures. For example, a dish with fruit, an ornament from a sequence of elements.
- Children from 4-5 years old. Basic work skills have already been developed. The process needs to be complicated. Children should learn to work with scissors. Templates with clear contours of the figures are prepared for them. The child’s task is to carefully cut out all the figures, place them on the base according to the pattern, and then glue them. At this age, it will not be possible to cut out an element of complex shape. You need to start with triangles, squares or diamonds.
- Age 6-7 years. Children can create the parts themselves. To work, you can use a ruler with stencils or prepare a template from thick cardboard. Older preschoolers not only prepare the template themselves, but also create a color scheme.
- Junior schoolchildren. Children not only draw figures for applique themselves, but also create and develop a plot, and select a color scheme. This kind of work promotes perseverance, develops accuracy and patience. The work is more complex creatively and technically. Children can do not only appliqué on a plane, but also three-dimensional geometric crafts. For example, flowers with voluminous petals or leaves.
For the little ones
Toddlers are just beginning to learn about crafts and shapes. Initially, you should randomly distribute the shapes on the sheet so that the child learns to work with glue.
Children aged 1-2 years are characterized by energy and restlessness, so you should start the lesson in a playful way.
You can tell a story about a circus bear who lost his juggling balls. The child will get acquainted with different colors, the circle shape and learn how to handle glue.
For the applique you will need three circles of different diameters made of colored paper. You can print the bear using a template or use a sticker. The bear is glued to the background sheet, and the child’s task is to find balls of a certain color. The found circle is covered with glue.
It is important to teach your child to hold the glue at a 90 degree angle. The part is located in an arbitrary location.
When the baby learns to handle glue, you can complicate the task a little and try to make an applique along the contours. To do this, geometric shapes are sketched on a sheet or cardboard, and parts corresponding to the drawing are cut out of colored paper.
The baby must find and glue the parts along the contours of the picture.
Vase with candies
The word “vase” in this task is conditional. The child can fill a jar, plate, tray or glass with colorful shapes. It is these objects (their outlines on paper, cardboard) that will act as the basis. The step-by-step process of making a craft looks like this:
- You need to prepare a base with the outline of a basic object applied to it - vases, jars, plates.
- Cut out circles of different diameters from multi-colored paper or foil that will symbolize lollipops.
- Kids must fill the outline of the base object with candies in any order, without going beyond its boundaries.
- You can complement the applique with painted flowers, candies of other sizes, and the sun.
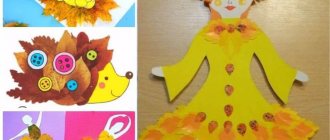
House
Photos of applications for the little ones clearly show how you can assemble a picture from simple shapes. To make a house you will need a template or sketch, glue, scissors, colored paper and cardboard.
From colored paper, cut out a large square and a triangle for the house, a small square for the window, and use a rectangle for the door.
All parts are sequentially treated with glue and placed on the base.
Typewriter
When working with a child, it is important to take into account his interests; for example, a boy will be much more interested in assembling a craft in the form of a car. The application will be appreciated by children aged 3-5 years, and for the work you will need colored paper, glue, a simple pencil, scissors and a model of the machine.
Stages of work:
- Shapes are cut out - rectangles for the body, circles for the wheels. You can complement the picture with smoke from ovals, and a route from a black elongated rectangle. Details are added or removed based on the child’s characteristics; if the baby is diligent and easily involved in the task, then you can freely supplement the composition. Don’t forget about the brightness of color, it is what makes the creative process even more interesting.
- Each element is smeared with glue in turn and glued to the background. The road and body come first, and then the wheels and smoke.
For greater expressiveness, you can draw trees, the sun and clouds with colored pencils. Blue color is ideal for a base. In a more complex version, the child himself cuts out the parts along the marked lines.
Ideas for creativity
Applique balls for friends. Suitable for children up to 4 years old. Children are given a base of white paper with drawn patterns and 3 circles of different colors and sizes. The child must find a place for each ball and then stick it on.
Children become familiar with the concept of “circle”, repeat colors and sizes. You can ask questions about what color the largest circle is and the smallest one.
- Children 4-5 years old can assemble up to 10 elements on one base. For example, the application “Baba Yaga’s House”. Kids will be able to cut out some of the figures themselves.
- Older preschoolers create more complex compositions. Popular themes include cars with a trailer and cargo, a Christmas tree, a train, a forest clearing, and various animals. You can complicate the work with volumetric elements.
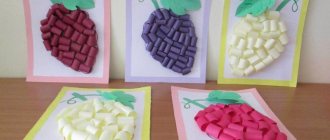
- Younger schoolchildren create entire compositions from geometric shapes. These can be complex ornaments or mosaics of small details or compositions on proposed themes. For example, a circus performance, domestic or wild animals, holiday themes, seasons or seascapes. You can include three-dimensional details in the composition. For example, a New Year tree with voluminous ball toys, a basket of fruits made in the form of voluminous figures, a seascape with voluminous ships or a city with cube houses.
Fantasy has no boundaries. Children enjoy creating geometric crafts with their own hands. This is a creative process, so young designers should not be criticized.
They need to be told how to correctly perform this or that element, and praised for accuracy and high-quality work.
For children from 3 years old
At the age of three, children can already assemble a picture of 6 parts in the correct sequence. You can choose animals for applique that are familiar to the child - for example, a hen with chicks.
For production you will need:
- Green cardboard.
- Yellow circles - 3 pcs.
- White circles of different diameters - 2 pcs.
- Triangles – 1 white, 2 yellow, 3 red, 6 brown.
- Colored markers.
- Glue.
The first step is to prepare a sample, and the children follow the picture and lay out their applique. It is advisable to focus on the baby’s characteristics; for some it is easier to create from a sample, while others prefer to repeat the actions step by step.
Eyes are added to the pasted chickens. The picture can also be supplemented with green grass made from stripes, a bright round sun, and daisies made from white triangles.
For the little ones there is a large selection of colorful applications for creativity, with self-adhesive figures. The kits are sold in bookstores or delivered via courier.
Ready-made sets help develop fine motor skills.
School age children
Junior grades are able to independently separate details according to a model, and can assemble a complete picture, focusing on their imagination. Initially, you should show the children what the finished craft will look like.
To work you will need brushes, colored paper, glue, scissors, cardboard, a ruler and a simple pencil.
A base is prepared, geometric shapes in a specific theme are sketched on it. All details are copied from the base, cut out and glued according to the template.
During the classes
II. Setting the goals and objectives of the lesson.
We often say: “Learn creativity, develop independence, design abilities, artistic taste...” What type of work activity will help us with this? (Working with paper). And more specifically? (Applique).
III. Conversation.
What is an application? Applique is a decorative work consisting of making various images (patterns, ornaments, drawings, paintings) by cutting and attaching them to the surface of paper, fabric, leather, wood or plastic. What are the differences between applications? A variety of shapes, materials, colors and textures of parts made from one or another specially selected sheet materials: colored paper, fabric, leather, dried plants, straw, birch bark.
Where is the application used? In clothing, in arts and crafts, on covers, bookmarks, cards and household items. For a long time, people have strived to make their homes, clothes, and household items not only comfortable, durable, but also beautiful.
IV. The main part of the lesson.
Pay attention to the works presented on the demonstration board and say: what application will we make today? (Applique using geometric shapes)
Name the geometric shapes used in the work. (Square, triangle, circle, oval, arc, rectangle). Adult design artists most often show their design ideas in drawings and technical drawings, but we can also show this work in appliqué.
What are the stages of construction and where do you start? They invent it, draw it, create it. These steps are also used in the application.
Before starting the main work, let's practice. Let's split into two teams and have a competition. Each team was given a Lego panel and a technical map. The technical card shows "Clown". What needs to be done: quickly, efficiently and quietly complete the structure. Each player must place two figures on the canvas (the figures are arranged according to the geometric shapes depicted on the tables).
Conducting a competition. Summing up the competition.
V. Practical work.
So, we move on to practical work. Name the tools used when working with paper. (Scissors, glue brush, pencil).
Let's repeat the safety precautions when working with scissors.
VI. Planning practical work.
Take the technical card and look at it. Where to start with the application?
- Definition of geometric shapes (a template punch card with images of geometric shapes is provided to help).
- Number of shapes and color.
- Execution of the application.
Think about how to quickly and economically use paper when cutting out this or that shape.
VII. Execution of the application.
Construction of a control line on which the application is built. Depending on the drawing, the line will be at the top or bottom. When starting work, do not forget that when summing up the results will be taken into account:
- Quality of work;
- Color solution;
- Location on the sheet.