Of the many varieties of children's creativity, paper cut applique is of particular interest for teaching the little ones.
To make crafts using this technique, very few devices are required and you do not need to work with scissors, which is the safest developmental activity for preschool children.
Multi-colored pieces of paper, napkins or cotton wool help to develop artistic imagination and lie on the base for the applique, like paint strokes from an artist. This technique is also close to mosaic and therefore looks especially decorative and original.
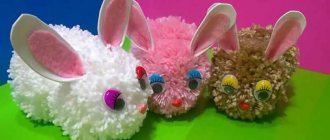
Bunny made of paper
To create such a craft, pre-prepared templates with images of animals are perfect. In the photo of the broken appliqué you can see a bunny; thanks to the use of this technique, an interesting texture is created, the character looks more voluminous.
To create beautiful crafts, you can take templates by cutting them out of magazines, old coloring books, or print them from the Internet. You can also draw the figure yourself on paper or cardboard.
Crafts technique:
- Tear off the paper strips and then finely tear them into pieces.
- Glue these elements like a mosaic onto a pre-printed or drawn image.
- Try to make small distances between the pieces so that they do not overlap each other.
- The nose and eyes can also be torn from dark-colored paper or drawn on.
- Makes a great craft!
Examples of finished works
The finished cut-out appliqué looks very much like a mosaic, especially if there is little space left between the pieces of paper. Here are examples of such applications:
For older children or schoolchildren, you can choose more serious subjects. In Ancient History lessons, the teacher may well suggest making Egyptian frescoes out of paper!
In general, cut-out applique as a type of children's creativity is quite suitable for kindergartens, aesthetic centers, and lower grades of school.
An alternative material for making cut-out appliqué can be multi-colored double-sided tape or adhesive-backed note paper. Scotch tape, of course, is a more expensive method, but the baby will not need to get dirty with glue. Simply tear off a piece, remove the base and stick it on paper. Ideal for kindergarten!
Snowman
Prepare a sheet of white paper and draw snowdrifts on it.
- Tear them off with your hands, following the drawn line.
- Now cut it into two parts.
- Blue or light blue cardboard will play the role of a background; stick snowdrifts on it.
- Attach different parts on top of each other to make the result look more realistic.
- Make templates with snowman parts from white paper.
- Carefully tear off the blanks along the pencil outline.
- You can glue the resulting circles to make a snowman; try to put the bottom border on the snowdrift to “put” the snowman on the snow.
- Cut out a headdress for a snowman from colored paper, buttons and parts of the face can be drawn with felt-tip pens.
- Decorate the craft further as you wish.
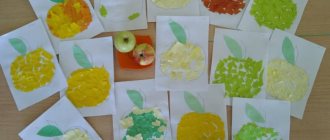
Fruits in quilling style
Twisting narrow strips into spirals is a labor-intensive process, but understandable to older preschoolers. Fruit slices are made using the quilling technique.
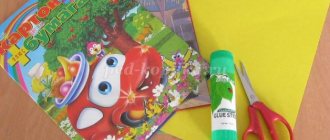
Materials that will be useful for creativity: colored paper, disposable cardboard plate, glue. Tools: pencil, ruler, scissors, toothpick.
How to make kiwi slices
For 1 slice, cut 8 green strips 0.5 cm wide and 30 cm long:
- Alternately twist onto a toothpick with a spiral.
- They are formed into drops by squeezing one part of each shape with your fingers.
The center of the kiwi is made from a white strip of the same width and length. A tight roll is made from it, loosened slightly, and then flattened with the palm of your hand.
Last step: 4 brown strips are glued together with one long strip. A ring is made from it, which is glued to the base. Inside, fix a white center in the center, and green drops around them, placing them in a circle.
How to make orange slices
Cut strips of white, yellow and orange paper:
- Combine the yellow and white stripes into one.
- Screw onto a toothpick, starting from the yellow end.
- Form a triangle - squeeze the spiral in three places with your fingers.
- Glue the blanks together to form an orange slice.
Three orange stripes are combined into one strip and pasted around the triangular blanks.
Looking through photos of children's crafts, you might think that stunning still lifes are created by young talents.
Paper fruits made using different techniques are simply impressive in appearance.
I want to decorate the walls of my apartment with appliqués and decorate the New Year tree. And also give as a gift to relatives and friends from the whole family.
Other application options
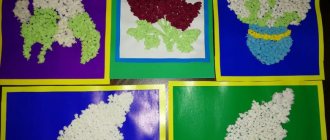
You can create entire paintings using the cut appliqué technique. This technique is perfect for children in the preparatory group of kindergarten.
You can tear off pieces, cut them and arrange them randomly. You can also beautifully outline the contours with markers or felt-tip pens and design an applique inside the image.
Using napkins for applique
If you tear a napkin into small pieces and stick it on, you will create a volume effect and the craft will turn out airy.
If you are doing a craft with the image of trees, the trunks are cut out or drawn, and the leaves will be light, made from napkins. Pieces of napkins can also be rolled into balls.
Application using cotton wool
- You will need a piece of cotton wool or cotton pads.
- You can give the children the task of tearing the cotton wool into small pieces.
- Draw images on a piece of cardboard.
- Pre-paint the cardboard or take a colored sheet.
- Decorate the background by gluing pieces of colored paper or painting it.
- Lay out and glue pieces of cotton wool inside the outlines drawn in pencil.
Using this technique, you can also create more complex images, where all the details of the composition, even the smallest ones, are made of cotton wool.
“Fox” applique made using the cutting technique
You will need:
- White base
- Chanterelle pattern
- Paper in three colors: orange, black and white
- Glue
Execution stages. Trace the stencil or draw the fox yourself on a white base.
Take orange paper and tear it into random pieces. Applying glue to each piece, we gradually fill the outline of the fox entirely. If the craft is being done by small children, it is better to cover the entire chanterelle - the base - with glue and stick the dry pieces from bottom to top.
Tear off two small, approximately identical pieces of black paper—the eyes—and glue them onto the fox. Another part will be needed for the spout. Tear off a small piece from a white sheet and make the tip of the fox's tail. Our fox is ready.
You can also not prepare pieces of paper in advance, but tear them off from the strip at the gluing site. Watch the video to see how this is done.
Applique tree
In order to make such a magical tree, prepare colored paper, a glue stick or PVA glue and cardboard or a sheet of thick paper.
- To begin, draw the trunk and branches of a tree on a sheet of paper and color them; you can print the finished image from the Internet or trace it using a template.
- Now tear off small pieces of colored paper and glue them in the form of leaves.
- You can use various shades of paper - your tree can turn out to be both autumn and magical.
- The applique will look neater if the pieces of paper are the same.
- You can apply glue to the sheet of paper itself so that you don't have to apply colored paper to each piece.
Application ideas for preschoolers
To practice cut-out appliqué in the middle group, children are encouraged to fill out stylized figurines of the most famous and easily recognizable animals, birds or simple landscape compositions with paper elements.
Often, compact and simple templates are used for the first tasks, examples of which are present in any teaching material for classes with preschoolers in kindergarten or at home.
Bunny
The most common task for working with applications in the junior and middle groups of kindergarten. For work you will need: glue in the form of a pencil for children's creativity, white and blue paper for pieces.
The teacher can draw a bunny pattern on the basics, and at this time the children tear paper of two colors into pieces, trying to ensure that the elements are close to the same size.
Then you have to spread the base with glue along the inside of the contour and gluing the parts. The nose and eyes can be completed with felt-tip pens after the applique has dried.
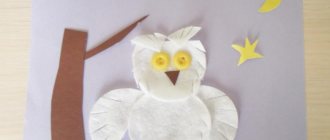
Owl
The owl is one of the easiest birds to draw and cut out for kindergarten. To depict it, you need to prepare pieces of dark brown, beige and yellow colors.
This bird is characterized by a large round head with circles of a lighter shade around the eyes and an oval body with the same spot in the chest area. The bird's eyes can be clarified with a pencil after gluing the elements of colored paper.
Snowman
Another simple example of a template for preschoolers. It consists of three circles of different diameters, the largest of which is at the bottom.
To depict a blue winter sky, you will need a background made of colored paper, and the snowman figure itself can be made from pieces of white torn paper or cotton balls.
The drawing is interestingly diversified by a bright carrot instead of a nose and a colored bucket on the snowman’s head.
Winter landscape
This is a more difficult job of creating a broken appliqué in the older group. In the process of completing the task, children develop logical methods of thinking, try to most accurately convey their impressions of seasonal changes on the street and show the inclinations of a creative attitude towards the life around them.
Children 5-6 years old enjoy making postcards dedicated to the New Year holidays with pictures of winter. A standard sheet of thick paper can be folded in half and an applique with a winter theme can be made on the inside.
To do this, you will need a lot of white and blue paper, from which snowdrifts, snowmen and other winter attributes will be made.
Landscape made of paper
In order to create an entire landscape using the cut-out appliqué technique, you will need several sheets of colored paper, as well as pencil glue and a sheet of cardboard as a base.
- Now the most fun part of the job is tearing and crumpling colored paper.
- If you use crumpled paper to create a composition, it will look even more interesting and voluminous.
- Now you can collect parts for a future application.
- Develop your child's imagination by asking him what a piece of paper looks like.
- This way you can find creative and unexpected solutions.
- In addition, for children this is a real game, so the creative process will become even more interesting. If you have already outlined the elements of the picture on a sheet of paper, you can safely glue the details to the base.
- Attach the corners first so you can experiment by moving the paper pieces around.
When the picture is ready, carefully glue all the parts and let them dry thoroughly. The picture is ready, you can decorate it if you want and put it in a frame.
Principle of operation
Paper crafts using the cut appliqué technique are made in 2 main ways.
Simple option
This option is suitable for the youngest children.
The stages of such creativity are as follows:
| № | Stage | Description |
| 1 | Preparing the template | At the initial stage, an adult (parent or teacher) must select a drawing suitable for the work - an outline on the basis of which the craft will be made. In this case, you can take a ready-made drawing or draw it yourself. When there is a background, all that remains is to put a picture on it. Its elements are torn off from colored paper and then glued to the main canvas. It is important to keep in mind that a large number of parts will be glued to the top of the canvas. |
| 2 | Selecting Colored Paper | The paper that serves as the background for this craft must be thick enough, so when choosing, you should pay attention not only to the color of the base, but also to the thickness. Children can be involved in the work. Along with them, you can choose the color of the paper that will be used for filling. After this, the child himself begins to tear off pieces of any size. |
| 3 | Gluing paper to background | It is necessary to take each piece of paper, apply an adhesive substance to one of its surfaces, and then apply it to the base one by one. It is most convenient to use a glue stick, because with its help you can evenly distribute the adhesive over the surface. When the space is filled, the work is completed. The result is a monochrome product, much like a mosaic. |
The option is more complicated
Cut-out paper applique (templates for products can be classic or abstract) always starts with an idea. After choosing a suitable example, the child begins to do everything independently, but at the same time, an adult must supervise his creative process in order to prevent mistakes.
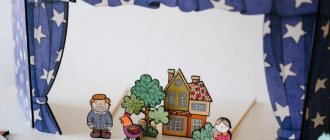
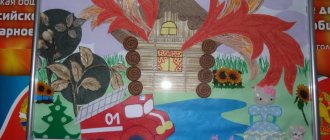
Tear paper applique on a fairy tale theme
The stages of the complex version are as follows:
- Take thick colored paper. It can be any color.
- Attach a stencil to thick colored paper and trace it. If desired, you can apply a design to the surface of the paper without using a stencil.
- Select thin paper of the desired color and start tearing pieces from it.
- Fill the space with torn paper pieces. To do this, an adhesive is applied to each fragment; it is best to use a glue stick.
- After filling the entire space, the work is considered completed.
Decoration of the composition
When the painting is ready, you can decorate it using all kinds of materials to give it a finished look and make the work unique.
- A few shells, dried flowers and leaves, ribbons, bows, buttons, beads, beads, rhinestones are perfect for this (adults should supervise the children’s work, especially if small parts are used in the process of creating a masterpiece).
- The resulting creation can be inserted into a beautiful frame. And then the child can safely participate in competitions with his works.
All these ideas will help you and your children create real masterpieces using a minimum of materials. And most importantly, this is a very fun and interesting process that can become leisure time for the whole family.
The finished work can become a wonderful interior decoration, and you can also present it at any children's craft competition. Such educational crafts will be very useful for teaching in kindergarten.
There are a lot of different techniques of varying complexity; you can choose something suitable for the creativity of children of different ages, from the youngest to the preparatory group.