Notes on non-traditional drawing for older children. Theme: Space
Notebook on non-traditional drawing on the topic “Travel to Space” for children of the senior preschool group
Author: Salova Elena Viktorovna, teacher, MBDOU - kindergarten No. 7, Yekaterinburg Description: this summary on non-traditional drawing is intended for pupils of senior preschool groups. It will be of interest to educators, additional education teachers and parents. The goal is to create conditions for the development of children's creative abilities through non-traditional drawing. Objectives: Educational objectives:
– introduce unconventional drawing – drawing with napkins;
– consolidate knowledge about space. Developmental tasks:
– to develop the ability to work with non-traditional tools;
– develop children's creative abilities. Educational objectives:
– to cultivate an aesthetic attitude towards planet Earth and space as a whole;
– to cultivate sensitivity to the perception of the beauty of the surrounding world. Planned result: – be able to apply acquired knowledge; – be able to listen carefully and answer questions; - be able to complete assigned tasks. Form of joint activity: gaming, communicative. Form of organization: collective. Integration of educational areas: “Artistic and aesthetic development”, “Cognitive development”, “Speech development”, “Social and communicative development”. Educational and methodological set: Tools: – visual
– illustrations of the Solar system, the view of the Sun and Earth from space;
– equipment
– magnetic board;
– materials and tools
– gouache, paper napkins, album sheets.
Progress of the lesson
Updating children's knowledge
The teacher attracts the attention of children. Educator. Guys, today we are going on a trip with you! But not in a simple way, but in a cosmic way! What should we take with us? Children's answers. Educator. Great! We have collected our things, now we need to get dressed. What do astronauts wear? Children's answers. Educator. That's right, you need to put on a spacesuit. He will protect us and also give us air, because there is no air in space, and a person cannot live without it. Now we have to get on the bike and fly. Right? /no/
Why can’t we ride a bicycle to space?
Children's answers. Educator. Of course, a bicycle cannot fly. And you can only get to space using special transport. What is it called? /rocket/
We are boarding a rocket! Our journey begins!
Finger gymnastics
1,2,3,4,5
(Children take turns bending the fingers of one hand, starting with the little finger, helping with the index finger of the other hand).
We will fly in space
(Children rotate the hand, which is clenched into a fist)
.
1 – comet. 2 – planet. 3 – lunar rover. 4 – starship. 5 – earth (Children take turns extending their fingers, starting with the thumb)
.
Goodbye friends! (Children wave their hands, as if saying goodbye)
.
Same with the other hand.
Communicative activity
Educator. Guys, look, we are already flying in space! Oh, our porthole is dusty with cosmic dust, let's wipe it down. Children make circular movements with their hands. The teacher places an illustration of the solar system on the board.
Educator. Guys, look how far we have flown. What do we see? Children's answers. Educator. That's right, this is the solar system. At its center is the Sun star, and the planets revolve around it. Who knows what planets are in the solar system? Children's answers. The teacher summarizes the children's answers. Educator. Let's fly a little closer to our Sun? The teacher places an illustration of the Sun on the board - a view in space.
Educator. Look how beautiful and interesting the Sun is when you look at it from space! How would you describe it? Children's answers. Educator. Great, but you and I have flown far from the Earth, I’m afraid we won’t have enough fuel, let’s fly a little closer to the Earth and look at it. The teacher places an illustration of the Earth on the board - a view from space.
Educator. Guys, this is planet Earth! Do you like this look? What is the Earth like, how would you describe it? Children's answers.
Creating a problem situation
Educator. Our Earth is very beautiful! Let's take a picture of her and show our parents what we saw today! Oh, who took the camera? What do we do? How do we capture such beauty? Children's guesses. Educator. That's right, guys!
You can draw the Earth and show it to your parents! Great, but first we'll stretch our legs and arms a little. Motor activity
Children stand in a circle and run after each other.
Fast rockets are waiting for us to fly to the planets.
Whichever one we want, we’ll fly to that one! But there is one secret in the game: (Children squat down)
There is no room for latecomers!
Repeat several times.
Visual activities
Educator. Well done boys! Only we have a small problem again! I took paints on our trip, but forgot about the brushes! But I have one idea! You and I will draw with napkins! Our space is extraordinary and our drawings will be extraordinary too! The teacher explains the progress of the work. Educator. In front of you lies a landscape sheet with the outline of the Earth, a palette and napkins. Educator. Take one piece of napkin and crumple it into a ball. Let's dip it in blue paint and stamp the ocean, but the most important thing is not to smear it, but to print it.
Educator. Next, take another napkin, crumple it too, dip it in brown paint - these are mountains and dry land.
Educator. Next, we print the meadows, forests and fields with green paint.
Educator. The earth is ready. Now we will paint space with purple paint.
Educator. The final touch is to paint distant stars and planets with yellow paint.
Reflection
Educator. Guys, did you like the time we spent with you today? What did you like most? What new did you learn today? Let's take a look at our wonderful works!
We recommend watching:
Unconventional drawing technique Blotography. Master class How to draw a cosmic landscape step by step Drawing with crayons on paper for children from 4 years old Drawing using the TRIZ system in the senior group on the topic: Space
Similar articles:
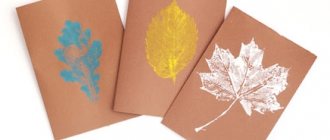
Drawing autumn leaves, grades 1-2
Beautiful drawings on the theme of space using scratch paper technique
With this unusual technique you can quickly get a colorful drawing. It will look unusual and bright, but it won’t take much time to complete.
Materials:
- Thick sheet of white paper
- Wax crayons
- Black gouache
- Brush
- Sharp instrument: knitting needle, toothpick, skewer
- Dishwashing liquid
We color a sheet of paper with wax crayons as desired. You need to paint the paper in a thick layer.
Gouache should be mixed with dishwashing liquid in a ratio of 2 to 1. Cover the paper with this mixture.
Now you need to wait for the paint to dry. Using a sharp object, draw space objects on the sheet so that the colored chalk appears.
Another version of a drawing on the theme of space using the grattage technique.
It is better and more convenient to use a wooden stick or a bamboo manicure stick for this.
Wax crayons can be used to paint over the sheet in any way.
You can add dishwashing detergent or liquid soap to the gouache.
Only after the sheet has completely dried can you start drawing.
You can use stencils to depict space objects
Drawing for Cosmonautics Day in pencil
As the days of April approach, we remember such a holiday as Cosmonautics Day. You can draw the cosmic universe with pencils in just a few steps, and even schoolchildren can do it.
Draw a circle on a white sheet of paper with a compass. Use a yellow pencil to shade the center of the circle, and then make orange strokes. Then again we make a layer of yellow and then continue with pink a little higher, then lilac.
On the other hand, you can take blue and purple.
Use a black pencil to make strokes in the places where you want. You can use cherry blossom. In the center of the circle, switch to lighter colors. Make smooth transitions, gradually moving from dark to light shades.
A white helium pen will be useful for us to show stars, constellations or the milky way.
Drawings on the theme of space in pencil can be taken from the following options.
Children's drawing Rocket: how to draw step by step
Since the main subject in space is a spacecraft such as a rocket, it is quite advisable to teach your child how to draw it to prepare a drawing on the theme of space.
Drawing of a rocket in space
Materials:
- Album sheet
- Pencil
- Eraser
- Pencils/markers
On a sheet of album placed horizontally, let's start drawing a rocket. Let us depict the body as oblong, with a sharp edge at the top and a straight line at the bottom.
Draw two straight lines parallel to the horizon - depict the nose of the rocket and its nozzle.
In the center of the body we will draw two circles - a porthole.
Draw the legs of the rocket on both sides
If a rocket is flying, then you need to draw a flame under it
The rockets can be colored with pencils, markers or paints.
Space rocket: drawing for children on April 12
In order to draw a rocket body, you need to draw an oval. It should not be very thin, but also very potbellied. Draw the legs of the rocket using squares at an angle of about 45 degrees. Below it draws triangles, in front there is a rectangle right in the center.
These rocket legs are called rudders. Make it smoother in shape by erasing the extra lines. Draw a round porthole in the center of the body. Using straight lines, draw the nose of the rocket and the nozzle. All that remains is to color the rocket.
Rocket flying to the stars: simple drawing
It’s not difficult to depict a rocket taking off. To do this, you need to start drawing it at an angle to the horizon.
First show the guide line. The second step is to show the rocket body - a rectangle that meets at the top.
Below we will depict the rocket nozzle and the fire that the rocket will emit in flight. Draw 4 lines along the body. Show the rocket's rudders - two on the sides and one in the center of the body at the bottom. Don't forget about the porthole window.
Drawing on the theme of space for school: how to draw for schoolchildren for Cosmonautics Day
Space drawings can be decorated with bright colors in blue and purple tones; use blue, lilac and black paints with white splashes. This way you can show outer space more believably.
You can use watercolors to draw a picture using the sketching technique.
A drawing on the theme of space most often contains an image of a rocket, planets (all or several), you can show an astronaut in a special suit, stars, the moon.
Many people like to look at the sky, watch the stars and the moon. Using watercolors you can more realistically depict the infinity of space.
Materials:
- Watercolor paints
- Watercolor paper
- Brushes
- Palette
- Jar of water
- White paint
- Toothbrush
- Rag
Such a fantasy drawing will be achieved in just a few steps.
As in any drawing, you need to outline the horizon line and decide in which part of the sheet what details will be. Cover the part where space will be depicted with water.
We cover the sheet with the first layer of paint with the main colors until the paint has dried.
The main principle of painting with watercolors is to dilute the paint with water and apply it to a wet base. This way it will spread smoothly and there will be no precise boundaries.
Let's draw a black forest along the bottom of the sheet.
You can depict stars using white splashes.
Using this technique you can make many different drawings on a space theme.
Lunokhod: children's drawing for 1st grade children
Before you start drawing, consider the models of the lunar rover to understand the general principle of depicting this device. For first grade children, you can draw a lunar rover using the following steps.
First of all, we draw the cabin of the lunar rover.
On each side we depict 4 wheels.
Draw an antenna above the cabin.
To make the drawing funny and childish, you can supplement it with original elements.
You can color it with pencils or crayons.
A drawing of this kind can be transformed by adding surrounding objects, placing it in outer space, or sending it straight to the moon.
