The main advantage of plasticine over other materials suitable for modeling is its special flexibility for detailed processing, which makes it possible to make even the most miniature crafts, for example, food for dolls, miniature fruits and vegetables.
However, having decided to make a craft in the form of a basket of fruits and vegetables, it is worth remembering that such work requires special skills in working with this material, namely the ability to make small products of complex geometry that can imitate the color, texture and other features of their natural prototypes. That is why it is necessary to approach the choice of mass with special responsibility, which should:
- warm up quickly and easily;
- effortlessly divided into parts;
- do not stick to hands or other surfaces;
- keep its shape;
- do not crumble after hardening (otherwise all the work will go down the drain).
Using such material with such characteristics and spending some of their free time, everyone will be able to fashion crafts from plasticine and vegetables, collecting in a single composition any gifts they like from gardens and vegetable gardens. In addition to an easy-to-knead mass, to successfully sculpt beautiful vegetables and fruits, you should also make sure that you have several stacks and toothpicks on hand.
PHOTO step by step - How to mold fruits from plasticine
As part of today's lesson, we will make an original composition of vegetables and fruits, placing it on a kind of improvised board. Let's start modeling by making carrots, using yellow and green colors (or their shades). We give the yellow material the shape of a carrot, and from the green we make a tail, not forgetting to make the stripes characteristic of this vegetable using a stack.
We mold the cucumber, giving it a characteristic elongated shape. In order to cover it with pimples, green in the form of small irregularly shaped rounds is also suitable.
In the same way as carrots, we sculpt a tomato. Of course, it should be red, but the shape can be either round or elongated, because tomatoes come in different varieties, which determines their shape. The tail, as expected by nature, is made green.
It's time to make the cabbage. Plasticine cabbage is made from flattened blanks that need to be fastened together by placing them on top of each other. This should be done according to approximately the same principle as when making a rose flower: from the dense middle we move to the more expanded edges.
According to the already mastered and proven pattern, we fashion a radish, a radish, two eggplants and one pumpkin, using the colors of the material corresponding to the vegetables. Since pumpkin is a large vegetable, or rather a berry, we will not place it on plates. I'm next to her.
Now you can decorate the composition with a pea pod. Let's make a line of two oblong blanks with pointed ends, connect them together, not forgetting to leave room inside for the peas. Insert a few green peas into the middle.
We complete the craft with a yellow cob of corn, wrapped on three sides with a characteristic green coat.
The craft is finished.
As you can see, modeling vegetables from plasticine is a rather difficult task that requires special attention. However, if desired, using the techniques learned today, you can sculpt absolutely any small-sized fruits and vegetables.
Progress of the lesson
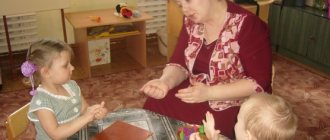
There's a knock on the door. They bring a parcel and a letter.
The teacher addresses the children:
- Guys, what do you think this is?
Children try to guess
Educator: - Let’s read the letter first, and then open the parcel, don’t you agree?
Teacher (reads)
: - the Fairy writes to us, she says that Winter and the Snow Queen ordered their subjects not to let Spring come to us.
But you can help Spring and plant a vegetable garden in the window, then the Sun will definitely help Spring, but the trouble is Fairy, the friend of Spring, has forgotten what is a fruit and what is a vegetable .
She asks you guys to help her! Can you help? -Let's see what we have here.
Educator: That's right. Guys, let us sculpt vegetables and fruits , and choose what exactly you will sculpt. (optional)
.
And then we the fruits on a plate and the vegetables on a tray and send them to the Fairies. Do you agree?
-Let's remember how we sculpt round and oblong objects (I show in the air)
. We must take a whole piece of plasticine and begin to roll it in a circular motion. We are the ones who sculpt round objects. Show us how we'll ride.
-And now we will sculpt oblong objects. We also take a whole piece of plasticine and begin to roll it between our palms. That's right, well done
Physical school
.
-Okay, guys, now let’s sit down at the tables, warm up our hands before work. Do not forget that you need to sculpt from a whole piece of plasticine, without breaking it into pieces.
(During individual work, he helps children by example)
.
Afterwards we put our work on a plate fruits , and vegetables on a tray .
- Guys, what did we sculpt today?
(Praise everyone and ask who sculpted what and why)
.
Now I will collect a package for the Fairies.
Summary of a lesson on application in the middle group “Vegetables and fruits” Lesson in the middle group. Application “Vegetables and fruits” (collaboration technology). Goals: *teach children to cut vegetables and fruits according to given instructions.
FEMP in the middle group. Lesson summary “Vegetables and fruits” Directly organized activity in an average mixed-age group. Formation of elementary mathematical concepts “Vegetables.
Summary of direct educational activities in sculpting for senior preschool age “Fruits and vegetables” Goal: Learn to sculpt vegetables and fruits Objectives: Educational: 1. Strengthen the ability to convey the shape of vegetables and fruits using a variety.
VIDEO lesson - How to make Vegetables from plasticine
Vegetables from plasticine updated: April 30, 2021 by i7allia
Today let's make bright and beautiful vegetables from plasticine!
The theme of the gifts of nature and the harvest is one of the most favorite children's themes. Kids will have a lot of fun making cabbage, carrots, peas, broccoli, corn and pumpkin! We start each lesson by showing the children what a particular vegetable looks like in the picture.
How to make vegetables from plasticine? We'll start by making cabbage. Roll out a round ball from bright green plasticine. Then we cover the ball with flat cakes. The flatbreads are very easy to make. Roll into small balls and flatten them firmly between your fingers. We try to make the edges of the cakes a little wavy.
How to make cauliflower? Roll up a ball of yellow-white plasticine and make indentations in it. We wrap it with leaves around the edges. For cauliflower leaves we use different shades of green and yellow.
Let's start making carrots. We take orange plasticine and roll it into a “sausage”, applying a little more pressure on one side. We should end up with an elongated cone. Using a stack, we draw cuts on the cone. Decorate the carrots with greens and eyes.
When preparing each vegetable, we remember what can be prepared from it. Maybe a flavorful soup or a fresh salad?
To make the broccoli inflorescence look like a real one, roll up several light green stalks and the same number of dark green balls. We make pinholes in the balls. Glue a leg to each ball. We connect the legs with balls into a single “bouquet”. Complete the inflorescence with several yellow-green balls.
It's a little more difficult to make corn. We roll a sausage out of dark yellow plasticine and apply a checkered pattern onto it using a stack. Roll a small ball out of light yellow plasticine and press it into the top of the craft. From the same plasticine we make elongated leaves, which we use to wrap the bottom of the crafts. We try to bend the ends of the leaves naturally.
Probably the easiest way is to make a pumpkin from plasticine. Roll the pale orange plasticine into a ball. Let's make it a little flattened. Draw stripes on the sides in a stack. All that remains is to decorate the pumpkin with a green stalk and leaves.
Svetlana Ivanova
Summary of a modeling lesson in the middle group “Vegetables and Fruits”
Lesson summary for the middle group on the topic
“
Vegetables and Fruits ”
Modeling theme
: «
Vegetables and fruits
«
(middle group
)
Target :
Strengthen the ability to distinguish between vegetables and fruits
;
compose a story using reference pictures. Develop gross and fine motor skills. Foster a caring attitude towards nature. Develop memory, thinking, attention. Strengthen the ability to sculpt familiar round and oval objects, using previously learned techniques (pulling, smoothing, pinching)
.
Demo material:
Pictures with vegetables and fruits
(tomato, onion, apple, pear, plum, lemon, orange, natural
vegetables and fruits (or dummies)
(tomato, onion, apple, pear, plum, lemon, orange,
“wonderful bag”
.
Handout :
Envelopes with two pictures depicting a vegetable and a fruit
(tomato and apple, carrot and pear, orange and tomato, plum and cucumber, cut into 2 parts vertically, plasticine, board, stack, napkins.
Abstract on visual arts modeling “Vegetables and fruits in a doll’s corner” middle group.
Author: Ovcharenko Olga Anatolyevna
teacher MBDOU kindergarten No. 27
Abstract on visual arts modeling “Vegetables and fruits in a doll’s corner” middle group.
Abstract on visual arts modeling “Vegetables and fruits in a doll’s corner.” middle group No. 8
Prepared by: Ovcharenko O.A.
2021
Activities:
creative, gaming, communicative, educational, social.
Educational areas:
Artistic and aesthetic
,
cognitive development, social and communicative development, speech development.
Target:
teach how to sculpt vegetables and fruits.
Tasks:
-form ideas about the shape of fruits and vegetables.
- strengthen the ability to distinguish between fruits and vegetables
- consolidate the ability to roll out plasticine with straight hand movements when sculpting oval-shaped objects and circular ones - when sculpting round-shaped objects. - develop fine motor skills of the fingers.
- to cultivate an interest in modeling, a desire to help, to create new things.
Preliminary work:
looking at still lifes depicting vegetables and fruits, a card index of pictures with vegetables and fruits, a d/game “What kind of vegetable, what kind of fruit”, a d/game “Guess by the description”, reading and guessing riddles on the topic “Vegetables and fruits”.
Materials:
dummies of vegetables and fruits, plasticine, modeling board.
Stage 1: We help children plan their activities.
| Content | Feedback on children's statements |
| - Guys, I had such a problem, I was in such a hurry this morning that I didn’t notice that the bag was torn, and on the way I lost all the toy vegetables and fruits that I bought for the doll corner, only cabbage remained. -How to play now without vegetables and fruits? -Maybe we can make them? -What would be the most convenient way to make them? - Guys, can you help me make them? | Children pay attention to the teacher. -I believed that you would find a way out and would definitely help me. - I also think that it would be best to make them from plasticine and they will look like real ones. |
Stage 2: We help children plan their activities.
| Content | Feedback on children's statements |
| -Do you know what these vegetables and fruits made from plastic are called? -I’ll introduce you to a new word, they’re called dummies. Repeat all together 3:4 -Tell me: apple, pear, peach, orange, tangerine, apricot, how to name it in one word? -Tomato, cucumber, potato, onion, beet, carrot, cabbage, what can you call it in one word? -Somewhere in a natural corner there were dummies, now we’ll find them. -Oh, all the vegetables and fruits are mixed, now you have to pour them all out and put them in baskets. Can you help me? D/game “Name it and put it in the basket.” -Take turns taking a dummy and saying, for example, carrots are a vegetable and putting the vegetables in the basket with the picture. Well, are you ready? -You remember all the fruits and vegetables, now you can start sculpting, tell me, what fruits and vegetables are similar to the shape of a ball? -What shape are sausages? - Everyone remembers, it’s time to prepare our fingers. Finger gymnastics “Fruits in a basket”: Children make their palms into a “basket”. Apples and pears for the boys to eat, Peaches and plums - How beautiful! Look at the ranet! | If you don’t know, it’s okay, I’ll tell you now. -It's all sweet and therefore fruit. -We cook food from them and they are called vegetables. -You are real helpers, thank you. - Let’s take our time, remember that sweets and cook compote are fruits. -I agree: orange, tomato, peach... -Cucumbers, bananas, carrots... |
Stage 3: we contribute to the realization of the children's plan.
| Content | Feedback on children's statements |
| -What will we need to take for sculpting? -To make it easier for you to sculpt, I suggest taking from the basket a vegetable and a fruit that you will sculpt; I’ll take a carrot. -Is it possible to sculpt vegetables and fruits in a color that does not exist? -For the plasticine to become soft, what needs to be done with it? -Can I roll plasticine on the table? | - We will definitely need boards and plasticine. -Don’t swear, everyone will get dummies. -The colors of fruits and vegetables must be real. -Yes, the plasticine needs to be warmed up by breathing in your palms. |
Stage 4: we facilitate children’s reflection based on the results
activities.
| Content | Feedback on children's statements |
| -How delicious our vegetables and fruits turned out, now we can admire them and save them for the doll’s corner. -What was difficult? -What new word did you learn? -What interesting things did you learn? -What new have you learned? |
Abstract on visual arts modeling “Vegetables and fruits in a doll’s corner” middle group.
Bananas
Making bananas from yellow plasticine is very easy! First you need to roll two thick, elongated sausages and bend them slightly. Then, with a sharp object (for example, a toothpick), draw several longitudinal shallow grooves along them. Now make the sausage thinner and shorter with a small extension in the middle. Stick two bananas to this shoot and you get a bunch.
If you did everything correctly, your playdough bananas will look like the picture above.
Tomato
There is nothing easier than making a tomato! Even three-year-olds can cope with this task.
Again, you need to start with blanks. First we make the fruit, for which we roll a ball of red plasticine. Now we make a green stem with leaves in two stages: first, you need to roll a ball from a material of the corresponding color, then use two fingers to pull out five short sausage-leaves from it.
The last step is to collect our tomato, that is, we simply attach a green stem with leaves to a red ball. If everything is done correctly, you will get a vegetable like the one in the picture below.
Summary of the organization of educational activities for modeling in the middle group "Rucheek" on the topic "Vegetable garden on the window"
-You have plasticine of brown, red, green and orange colors on your tables, as well as cardboard on which we will make our composition.-Brown plasticine is a small bed where you will place your vegetables, place it on the cardboard.
-Take a piece of orange plasticine and knead it a little in your hands to warm it up.
-Now roll a sausage out of this plasticine. Then squeeze one side of the sausage with your palms to create a narrow, thin tip.
-What else needs to be done for carrots?
-That's right, make a ponytail.
-Take a piece of green plasticine and remember it a little.
-Pinch off small pieces of plasticine and roll two not very long flagella. Now connect them on one side, pressing lightly with your fingers, and attach them to the carrots, as I do.
-Guys, how will carrots grow, because they sit in the ground, and only the tail is visible from the outside?
-We will press the narrow end of the carrot onto the brown plasticine so that it flattens slightly and holds tightly. Make a hole with a pencil and place the carrots there.
-Now we will make a cucumber. Take green plasticine (a larger piece) and also remember it in your hands.
-Roll out a not very long sausage from plasticine. Give it a slightly curved shape so that our sausage looks like a cucumber (I show the children how to do this).
-Take a small piece of green plasticine and roll a small flagellum out of it, from which we will make a tail for a cucumber.
-Now attach the flagellum to the tip of our cucumber and press down lightly so that the tail holds on.
-Tell me, does a cucumber grow above or below the ground?
-That's right, place the cucumber in the garden.
-We just have to make a tomato. Take a piece of red plasticine, hold it in your hands and roll it into a ball.
-Then take the remaining piece of green plasticine and also roll a small flagellum out of it so that the tomato has a tail.
-Using a pencil, make a small hole in the tomato and place the flagellum there. Using your fingers, flatten the sides of the hole so that the tail stays firmly in the tomato.
-Where does the tomato grow, under or above the ground?
-That's right, place the tomato in the garden as you did with the cucumber.
-You have turned out wonderful vegetables! We've worked for a long time, let's get up and rest.
Turnips, beets and carrots cleverly hid in the garden bed. (sit down, cover your eyes with your hands) We’ll pull the tops, we’ll get them out of the ground. (stand up, imitate the movements of “pulling the carrot” with our hands from bottom to top) The kids will have lunch (steps in place): Borscht, mashed potatoes and vinaigrette. (high jumps with turns in different directions)
-Now let's compare your vegetables and the vegetables from the book, are they similar?
-And now we will play the game “What shape do our vegetables grow?” You will need to match the images of vegetables (tomato, cucumber, carrot, onion, eggplant, cabbage, zucchini) with images of geometric shapes (circle, oval, triangle). For example, what shape is a tomato? In the shape of a circle. This means you need to match the image of a tomato with a circle. Look, don't make a mistake!