The essence of the application: goals and objectives in the middle group
Applique is a type of isotechnics that is based on the creation of a plot composition using paper, fabric parts, elements made from natural materials, cereals or grains, located and glued/sewn onto a dense backing - cardboard, paper or draped with fabric.
In the middle group, children become more independent when performing appliqué
The mission of appliqué classes is as follows:
- enriching children's ideas about the world around them, in particular about the concepts of shape, shades of colors, an initial understanding of proportionality and the arrangement of elements in a limited space (on a sheet of paper or cardboard);
- forming the basis of critical thinking, that is, the ability to compare, generalize, and draw simple conclusions;
- development of logic, imaginative thinking, speech through composing stories based on applications;
- hand motor skills training;
- awakening a taste for creative work, the desire to harmonize color and shape in holistic subjects;
- nurturing initiative, self-organization and the ability to work with a partner or in a group.
The objectives of classes in this type of visual creativity in the middle group are:
- mastering the skill of straight cutting in different (!) directions, as well as with elements of creating rounded shapes by cutting off the corners of a square;
- developing the ability to combine elements to obtain a complete composition (if you put squares on top of each other, you get a tower, and if you place a triangle over a square, you get a house);
- training in composing plots from geometric shapes of different sizes (10–12 parts), in particular in the shape of a triangle, circle, square, rectangle;
- developing the skill of finding aesthetically attractive combinations of appliqué with other types of art;
- develop the skill of working in pairs;
- develop the ability to evaluate your work.
Children learn to work just side by side, and in pairs, mini-groups
New appliqué skills for the middle group
The main “acquisition” of middle preschool age is training in the ability to use scissors. In addition, children 4–5 years old:
- arrange and glue plot elements onto a base that has an irregular shape;
- learn to form parts of the required shape and size by cutting off corners, cutting an element around the entire perimeter or only from the bottom/top/right/left, for example, making a circle by cutting off the corners of a square;
- improve the cut-off appearance of the applique, including during the preparation of materials (cut off or tear off the corners of the rectangle so as to give the workpiece a square shape, etc.).
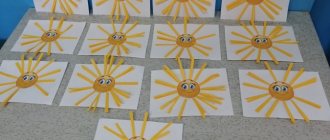
Specific options for the collective composition “Magic Garden” in the middle group
The collective application “Magic Garden” is offered to middle school students at the end of the school year (May). By this time, the guys already had skills in this kind of work - in the first half of the year (November) they created a joint composition “Basket of Mushrooms”.
During the lesson, preschoolers are given freedom of creativity; they independently determine the content of the image: they include strange trees, flowers in the picture, it can even be unusual animals, birds and insects (at the request of the children). The main goal of such a lesson is not only to consolidate visual skills, but, above all, to develop imagination and figurative perception.
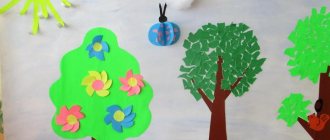
You can make the topic of the lesson more specific and invite the children to create a wonderful apple orchard where apple trees with unusual fruits will grow. The teacher prepares a base in advance with drawn tree trunks and crowns, and each child cuts out an apple of the color and size he likes (they can be, for example, blue or silver) and sticks it on any place.
The theme can also be described as a wonderful tree: in this case, kids decorate one large blank (trunk and crown) with strange fruits and leaves.
Place of appliqué lessons in the educational program for the middle group
Application is not only a separate lesson in the artistic and aesthetic cycle of lessons, which includes a detailed consideration of the topic and the implementation of application in one technique or another, but also:
- a way to consolidate the learned material in classes within other educational vectors (for example, in a lesson on speech development on the topic “My City,” children make a geometric appliqué “My Street”);
- assignment of project work (for example, kids, together with their mothers and fathers, make an application on the topic “Unusual professions,” which is accompanied by a story about the specialist presented in this way);
- the essence of the activities of the art activity circle.
For children 4–5 years old, an appliqué club is possible only if the group is mixed - middle-high, since in the middle group the applique club gives way to a drawing circle.
How is the time spent working on the application distributed in the middle group?
A lesson within the framework of a creative course of the educational process lasts 20 minutes, and all this time is allocated for preparation - up to 3 minutes, execution - up to 12 minutes, and evaluation of the application - up to 3 minutes (the remaining minutes are left for organizing the work of the group). Finger gymnastics is introduced into the preparation stage, and at the stage of performing crafts there is a mandatory (!) physical education break - up to 2 minutes.
Finger gymnastics is a mandatory element of appliqué classes.
If the application is a separate type of work in non-creative lessons, then a quarter of the class time is usually allocated for its implementation. As a rule, the application is part of the stage of consolidating the material, that is, it is performed at the end of the lesson.
Typically, a project, the ultimate goal of which is to complete an application, in the average group is limited to a fairly large time period - from two days to a week. In addition, the project requires the active assistance of parents. However, if a project application is a task that is performed during the educational process in a group, then the timing of its creation will be the same as in a regular lesson.
Work on applications in a circle activity can be carried out according to a lesson or project scenario, depending on the topic of the lesson.
What is the teacher's participation?
When working with children 4–5 years old, the teacher voices the task, shows a sample, and then gradually completes the task, which the children repeat step by step. In addition, the teacher:
- provides practical individual assistance with the implementation of individual details of the composition, for example, cutting out small details (for example, grape leaves in the “Fruit on a Plate” appliqué);
- helps to arrange the elements of the composition on the substrate;
- controls the accuracy of applying glue and pressing down elements;
- gives recommendations on the most harmonious use of decorative elements (for example, for a paper “Matryoshka”, sundress decorations can be made of plasticine and buttons, but rhinestones and sequins will violate the style of the folk costume).
Video: teacher’s activities during an application lesson on the theme “Tulips” in the middle group
What artistic techniques can the applique be combined with?
By the middle group, children are familiar with all visual techniques designated as software in the Federal State Educational Standard (FSES). However, the level of proficiency in many of them is still low. For example, design is mastered at the initial stage. Therefore, the application can only be combined with a drawing or plasticineography.
Photo gallery: examples of combinations of applications with other types of isotechnics
To make the work look neat, there should not be a lot of plasticine elements
Some crafts combine not only isotechnics, but also different types of applique
Children in the middle group can make hand-drawn additions to the applique in the form of non-solid elements themselves.
Table: types of applications for children of middle preschool age
| Technique | Application type, material | Features of use in the middle group |
| Traditional | Flat - solid elements cut out of paper are glued onto a backing. | In the second youngest group, children used the parts that the teacher prepared; in the middle group, they cut out large parts themselves without unnecessary bends. In addition, children 4–5 years old master the skills of multi-layer appliqué, when parts overlap one another. |
| Mosaic - cut pieces of paper are laid out within the boundaries of the design. It is mastered in parallel with the tape one. | On a mosaic applique, children practice direct movement with scissors to cut out parts. The ribbon type involves children folding paper like an accordion and then cutting it into pieces. | |
| Geometric - the composition is made up of elements of geometric shape. | Children aged 4–5 years practice laying out plots in triangles, squares and rectangles of different sizes. Last year, parts of the same shape were used to create compositions; in the middle group, kids combine several. | |
| Unconventional | From napkins - elements or individual parts are made from napkins, often folded in several layers to give the image volume. | In the middle group, children learn to fold napkins to create a multi-layered piece. |
| Tear - paper or napkins are torn into pieces of different sizes, which are then used to lay out the picture. | The type of appliqués familiar from last year in the middle group can be complicated by the fact that children twist balls from torn parts with their palms, which are then laid out in mosaics along the contours of the image. | |
| From cotton wool or cotton pads - the image is filled with pieces of cotton wool or discs (whole or cut). | In the middle group, cotton wool and discs become an additional element of other types of applications. | |
| Palm - the composition is made up of children’s palms outlined and cut out. | The teacher is responsible for cutting out palms, since children 4–5 years old do not use scissors at such a level to cut out rounded parts. | |
| From cereals, grains - individual elements of the composition are filled with buckwheat, rice, semolina, etc. | Kids are familiar with this type of crafts from the second junior group; in the middle group, children learn to combine cereals in one composition. | |
| Fabric, that is, suggesting that some elements are cut out of fabric. | Working with fabric is a very troublesome task, so the fabric elements are prepared by the teacher in advance, the children only glue the blanks onto the base. | |
| From dry leaves, pine needles - the image or its elements are laid out with natural material. | When performing such applications, it is important to apply the required amount of glue so that the fliers “do not drown,” so children master the technique under the guidance of a teacher. | |
| Quilling - a picture or its details are laid out with elements of paper twisted in different ways, usually in the form of circles or loose circles. | Children 4–5 years old learn to twist tight circles, loose ones, that is, with a displaced center, are made by the teacher. |
Photo gallery: examples of different types of applications in the middle group
For cotton wool applications, children 4–5 years old learn to pinch off small pieces of cotton wool.
Cotton pads can be applied in two layers to add volume to the application.
When performing flat appliqué, children independently choose the location of the composition elements
The fabric elements are prepared by the teacher, the children just place them in the picture and glue them
Working with leaves requires kids to carefully select the material according to shape and size.
The broken look is the most commonly used type of applique in the middle group
Children try to twist parts themselves using the quilling technique
For napkin applique, children roll balls from pieces of thin paper and lay out a picture with them.
Geometric applications are familiar to children from the second junior group
In the middle group, kids lay out cereal elements that require delimitation by contour lines
The teacher cuts out the palms for this type of applique.
Mosaic applique is most often combined with a broken one
Video: lesson on flat appliqué on the theme “Flag” in the middle group
Video: lesson on flat multi-layer appliqué on the theme “Flowers” in the middle group
Important issues of individualization of work with children
The key factor determining the degree of adult participation in the application is the child’s degree of confidence in using scissors. If a child copes well with cutting out large silhouettes, rhythmically squeezing and unclenching scissors to perform forward movements, then he will be able to work in ribbon appliqué. But if the baby cannot hold the scissors and has difficulty cutting, then he should practice: perform finger exercises more often, cut out silhouettes with right angles, gradually moving to round shapes.
From my experience, I can say that the cutting skill is perfectly trained by the “Labyrinth” exercise: the teacher draws lines on a sheet of thick paper (in the case of children 4–5 years old, the lines should be straight, with turns at an angle of 90º), and the child “looks for a way out” from the labyrinth, cutting through the passage. Moreover, in the second half of the year, when the skill has already been mastered, this simulator can prepare children to become familiar with the basics of cutting out rounded silhouettes. To do this, the guys also practice the size of the paper cut: opening the scissors wide, they take “giant’s steps,” and as soon as they open the blades, they “walk like dwarfs.”
Small details of the applique are cut out by the teacher
How to play up the beginning of a lesson in an interesting way
At the age of four or five years, children do not yet separate play from direct educational activities, therefore, in order to interest them in a creative activity as much as possible, the teacher must think through an exciting start to the lesson. For example, a group may receive a letter from a good wizard. He has a wonderful garden with unusual trees, on which fabulously beautiful flowers bloom and delicious fruits grow. But due to the tricks of the evil witch, the flowers did not bloom this year. The kids should help - decorate the trees with their strange flowers.
Another option is that a girl Masha comes from a fairyland to visit the children (a doll is on display). She tells an interesting story. One day she went for a walk in a wonderful forest to admire its beauty: all the trees there were bright and elegant. And so she walked and met one sad tree: it was worried that it did not have beautiful flowers and fruits. Masha felt very sorry for the tree, but she didn’t know how to help it—she couldn’t do it alone.
When telling preschoolers such stories, it is necessary to provide them with illustrations for them - pictures depicting magical nature. These can be gardens and clearings where apple trees with huge fruits grow, trees with soft lilac foliage, bizarrely shaped plants, among which fairy-tale characters (fairies, unicorns, anthropomorphic insects, etc.) walk.
Photo gallery: pictures depicting magical scenes of nature
A tree with huge roots and wonderful fruits
Apple tree with huge delicious apples
Fairies and unicorns are located between the delicate trees
Multi-colored trees, among which cute bugs and birds rest
Kids always love to transform into representatives of some profession, fairy-tale heroes. Therefore, they will enthusiastically accept the teacher’s offer to become wizards for a while and create the image of a magical garden, which they can populate at will with unusual trees, flowers, birds, beetles, and butterflies.
On the eve of the lesson, it is good to invite the children to complete puzzles on the theme “Garden”.
Before a creative activity, it is good to offer preschoolers puzzles on the relevant topic.
You can start a visual arts activity with a short fairy tale or an episode from a suitable work (after all, too long a story will tire the children). For example, in the fairy tale story “The Magic Garden” by Elena Zheryakova, the girl Lilya has a dream in which she goes to a wonderful castle and meets her cat there. It turns out that the animal can talk and invites its owner to take a walk in the garden. Lilya sees beautiful flowers: some her mother grew at the dacha, and others she has never seen before. There was a wonderful smell in the garden, and a bright rainbow shone in the sky. The girl's mood became simply wonderful. The cat told her about the names of flowers and various interesting facts from the life of plants (it was not for nothing that in the summer they took her with them to the dacha). She also told Lila that this garden is magical: if you look at the flowers and inhale their wonderful aroma, then all the bad things will be forgotten.
The following fairy tale with the same name, which was invented by schoolgirl Margarita Efimova, is also suitable for the lesson. One family had a large garden where various fruit trees grew: apple and pear trees, plums and apricots. And one day beautiful birds flew there. The son grabbed a stick and began to drive them away. The father scolded the boy. And the next day the garden became sad, and all the fruits became bitter. It turns out that the birds were magical and sang magical songs to the trees, but now they are offended and no longer come. Mom told her son that he should go into the forest, find the birds and apologize to them. The boy did so, and then the garden came to life again and the fruits became tasty.
The story of Elena Pishchulina-Volkova “A Tale of Love” also deserves attention. Magic Garden" (intended for children and adults). Here we are talking about a wonderful, kind garden that talked with the sun.
“Sunlight took Joy and Warmth by the hands (although a little warmth always remained to warm the conversation) and walked quietly and calmly through the Garden. The warmth caught up with them a little later, having already warmed the communication between the Garden and the Sun, it hurried after Joy and Sunlight. Oh, my God! How wonderful it was in this Garden - everyone loved each other in it: trees, flowers, cheerful bees and light-winged butterflies, carefree dragonflies, bugs, and spiders - after all, the Sunlight was nearby, and the Warmth entered the Soul of the Garden and warmed her, and the Joy that the guests brought filled the hearts of all its inhabitants.”
After reading such works, you can invite the children to create images of anthropomorphic trees inhabiting an unusual garden: glue on them, among other details, eyes and a smile (the teacher provides the details).
To convey imagery and expressiveness, it is good to include artistic words (riddles, poems, sayings) in the lesson.
Birds, bees, flowers, trees, They all live in our wonderful garden, We invented this garden ourselves In our little kindergarten. We all worked together and now, this garden on paper is blooming. Very bright, beautiful, wonderful, Made by our skillful hand.
Novruzova A.L.
https://mbdou6-krop.ru/?p=3043
Kids love outdoor games and dynamic physical education. They must be used in class, choosing the appropriate topic.
Physical school
| Trees have grown in the field. It's good to grow in freedom! | Stretching - arms to the sides |
| Everyone is trying, reaching for the sky, reaching for the sun. | Hands stretching up |
| A cheerful wind blew, the branches began to sway, | Children waving their hands |
| Even the thick trunks bent to the ground. | Forward bends |
| Right and left, back and forth - This is how the wind bends the trees. | Tilts left and right, forward and backward |
| He turns them, he turns them. When will there be a rest? | Torso rotation |
| The wind died down. The moon has risen. There was silence. | Children sit at tables |
| They raised their hands and shook them - These are trees in the forest. | smooth swaying of arms raised up |
| Arms bent, hands shaken - The wind knocks down the dew. | shaking hands in front of you |
| Let's wave our hands to the sides, smoothly - These are the birds flying towards us. | horizontal, simultaneous movements of the arms to the right - left |
| We’ll also show you how they sit down – the wings are folded back | Children sit down and fold their hands behind their backs |
Finger gymnastics “The hazel tree bent its branches...”
| The hazel tree bent its branches and gave nuts to all the animals. | stroke their hands |
| Here's a nut for the little squirrel, Here's a nut for the mouse, Here's a nut for the hamster, Here's a nut for the chipmunk, And here's a nut for me. | alternately massage fingers |
| He cooked it friends | rub your palms together |
Physical school
| The stems were straightened and the branches were stretched out. | Raise your hands up |
| They straightened out the leaves and rustled the leaves. | Wiggle your fingers |
| Gymnastics for the stem | Torso tilts left and right, forward and backward |
| Gymnastics for the roots | Stretched the right leg - rotation of the feet, extended the left leg - rotation of the feet |
| Washing leaves and stems in the rain | Raise your hands up, spread your fingers, expose your palms to the rain, spin around |
Outdoor game "Living Flowerbed". Children are divided into three teams: Golden Balls, Daisies, Marigolds and Marigolds. In the center of the flowerbed there are golden balls - they are the tallest. The guys raise their hands up and spin around themselves. The second circle is the marigolds; they form a dance around the golden balls. And the third circle is baby marigolds: they squat down because these flowers are the shortest.
The wind blew, the flowers came to life and moved: golden balls were spinning, marigolds were moving in a circle in one direction, and marigolds were moving in the other.
Sample lesson notes on applications in the middle group
An application lesson in the middle group is held once a week and, as noted above, lasts 20 minutes. This time includes:
- the introductory stage, at which the teacher updates the children’s knowledge on the topic - 2-3 minutes (usually in the form of solving riddles, reading poems or watching a cartoon);
- the main stage, divided into a preparatory stage - preparing the background, materials, tools for appliqué, performing finger exercises - and doing crafts - children, with the help of an adult, create, cut out parts, stick them on a backing - 15 minutes (in the middle of the main stage there is a physical education break);
- final stage - the teacher thanks the children for their work, gives an assessment of their activity - 2 minutes.
An example of the implementation of all three stages could be a lesson on geometric appliqué on the topic “Decorating a Handkerchief” by O. Rasseikina. A sample lesson summary, which combines application with drawing, is presented in the work of I.E. Ulyanina "Skiers". An interesting version of the technique for practicing direct movement with scissors is presented in V. Zolotareva’s summary “Colored Cubes.”
Tear-off applique occupies a special place in the system of practicing this type of creativity, since children really like to tear paper, and this, in turn, is an excellent training for fine motor skills. In addition, crafts made from scraps of paper or napkins look original. An example of a lesson on broken appliqué can be found in the notes “Letter from an Unknown Friend” by O.G. Lebedeva.
Subjects for application in the middle group
The composition for applications in the middle group is selected according to the theme of the lessons of the cycle “Artistic and Aesthetic Creativity”, designated by the Federal State Educational Standard, as well as to the theme of lessons in other areas, if this type of work is appropriate for its disclosure.
The list of application lesson topics includes, among others:
- "Kindergarten";
- "Garden. Fruits";
- "Vegetables. Garden";
- "Forest. Mushrooms. Berries";
- "Trees";
- "Wild animals";
- "Furniture";
- "Transport. Traffic rules";
- "Winter";
- "Birds";
- "Toys";
- "Dishes";
- "Space";
- "Victory Day";
- "Summer is coming soon".
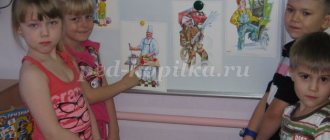
In classes on speech development, applications are used on the following topics:
- “Friendship” (kids make a palm applique “Tree of Friendship”);
- “Professions” (children stick blanks of tools onto the “suitcases” of representatives of a particular profession);
- “My City” (children do the craft “Winter covered the houses on my street” using geometric shapes and cotton pads).
Lessons on FEMP can be diversified by performing applications on the study of the following topics:
- "Form. Color" (the guys make an applique of geometric shapes "Traffic Light");
- “The simplest geometric shapes: rectangle, square, circle” (if this topic is close to the celebration of National Unity Day, then the kids can be invited to make a craft from colored napkins “Flag of Russia”);
- “Quantitative and ordinal counting. Day" (children perform a flat applique "Night").
Another educational cycle where applications are very appropriate for reinforcing material is classes on familiarization with the outside world. In particular, topics such as:
- “Fire” (the guys perform the applique “Fire Truck”);
- “Harvest” (children make an applique of paper and seeds “Golden Sunflowers”);
- “Zimushka-winter” (pupils of the middle group make snowmen from blanks cut out of cotton pads).
Photo gallery: samples of finished work during appliqué classes
In the “Toys” theme, special attention is paid to nesting dolls as a type of folk art.
When making the “Summer is Coming” applique, kids roll up small scraps of napkins for the flower head.
For the application on the theme “Vegetable Garden”, the children cut out the dish themselves
Carrying out an application on the topic “Vegetables”, the guys make a carrot for the bunny
When working on the “Birds” theme, children themselves choose color combinations of parts
By working to fill in the outlines of the dishes with scraps of paper, children learn to combine two colors
An application for Victory Day can be used as a postcard design
The theme “Trees” in non-traditional appliqué technique can be a project task
The geometric applique “Rocket” is a kind of puzzle, which the children first fold and then glue to the base
In the middle group on the topic “Wild Animals”, children learn to combine two types of cereals or grains
When making an applique on the “Mushrooms” plane, the children’s task is to correctly position the parts on the backing for the collective applique
Photo gallery: examples of applications for speech development lessons
When creating a collective application on the theme “Friendship”, the teacher helps to cut out palms
One of the options for an application on the theme “Professions” is to create a composition from the tools of representatives of various types of activities
In the “Houses on Our Street” applique, kids combine several types of isotechnics: applique on a plane, geometric and from cotton pads
Photo gallery: examples of applications in FEMP classes
For the flat applique “Traffic Light”, children use three round and one rectangular element
Night in applications is shown as a background, that is, a black or dark sheet of colored paper
In the “Flag of Russia” applique, children repeat geometric shapes in the process of cutting elements to fill the borders of the image
Photo gallery: examples of applications in lessons on familiarization with the environment
In the “Golden Sunflowers” applique, children combine the cutting technique with multi-layered
To complete the “Fire Truck” applique, children cut out the body of the machine and the window themselves; the teacher helps with the rest of the elements.
The “Snowman” applique can be made from cut white sheets that are laid out within the borders of the image
Text of the book “Applique with children 3-4 years old. Class notes"
Daria Nikolaevna Koldina Application for children 3–4 years old
From the author
By the end of the third year of life, the child acquires basic ideas about color, size, shape; listens to fairy tales; learns to compare real objects with their images in paintings; looks at the landscapes.
It is easier for a small child to express his impressions with the help of visual activities (three-dimensional image - in modeling, silhouette - in appliqué, graphic - in drawing). He conveys images of objects using plasticine, colored paper, and paints. The child should always have these materials at hand. But this is not enough. It is necessary to develop the child’s creative abilities, show modeling techniques, teach how to cut out colored paper, and introduce various drawing techniques. To improve visual skills, one should develop the perception of form, color, rhythm, and aesthetic concepts.
A 3-4 year old child can do a lot: wash his hands, brush his teeth, feed himself, dress and undress, use the toilet. The baby develops simple verbal reasoning. He answers questions from adults with pleasure and is eager to communicate with other children; His gaming skills and voluntary behavior develop.
To develop children's creativity and mastery of visual arts, it is necessary to take into account the interests of children, use a variety of lesson topics and forms of organization (individual and collective work). It is very important to create a friendly environment in class.
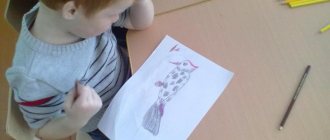
At first, the child is interested in the process of making the craft, but gradually he begins to be interested in its quality. He strives to stick the object as neatly as possible, and after class admire his work, tell him what color he chose, what this object can do, and what kind of applique he turned out to have.
In this manual, we provide notes on exciting activities for children 3–4 years old on appliqué made from colored paper and natural materials.
These activities contribute to the implementation of the following tasks: introducing the child to the surrounding beauty; development of imagination, independence, perseverance, the ability to complete work, accuracy and hard work, skills in processing various materials, which in the future the child will be able to independently use to make similar crafts.
The classes are organized according to the thematic principle: one topic unites all classes (on the surrounding world, on speech development, on modeling, on appliqué, on drawing) during the week.
It is advisable to conduct an appliqué lesson after the children have sculpted the item.
An appliqué lesson for children aged 3–4 years is held once a week and lasts 15 minutes. The manual includes 36 notes of complex plot-game activities designed for the academic year (from September to May).
Read the lesson notes carefully in advance and, if something doesn’t suit you, make changes; prepare the necessary material and equipment. Preliminary work is also important (reading a work of art, becoming familiar with surrounding phenomena, looking at drawings and paintings).
By observing each child in class or playing with other children, you can learn more about them and deal with challenging behavior.
If a child quits his activity
, as soon as something doesn’t work out for him, it means he doesn’t know how to overcome obstacles. This can be taught by offering the child other ways to achieve what he wants. Then he will understand that there must be a way out of any situation. For example, if a child wants to draw a snowman, but he can’t do it, invite him and you to make an applique of a snowman from white paper on a dark background.
If your child quickly loses interest in an activity
, perhaps it is too simple or, on the contrary, complex for him. Understand the reason and make the task harder or easier. For example, a child needs to applique a turnip with tops. If this is too easy for him, have him stick a basket and place different vegetables in it using colored paper. If the task is too difficult for the child, you can invite him to stick a turnip without tops.
If your child gets tired quickly
, cannot sit for even five minutes, try to develop his endurance using massage, hardening, and sports exercises. In art classes, alternate between active and calm actions more often.
To ensure that the child understands the task and completes it
, it is necessary to develop his attention and ability to concentrate. Play the game “What Has Changed?” with your child. (place 3-4 toys in front of the child, and then quietly hide one of them or swap the toys).
Try to find as many ways as possible to involve the child in bringing the task to its logical conclusion (for example): “Let’s stick balls on the elephant, otherwise he has nothing to play with” or “Let’s make a big house for the bunny and the rooster, otherwise they have nowhere to live.”
We recommend conducting appliqué classes with children 3–4 years old in accordance with the following sample lesson plan.
1. Creating a gaming situation to attract children’s attention and develop emotional responsiveness (riddles, songs, nursery rhymes; a fairy-tale character in need of help; dramatization games; exercises to develop memory, attention and thinking; outdoor games).
1. Acquaintance with the subject that children will subsequently depict in the appliqué; determining the sequence of laying out pre-prepared parts, applying glue to them; attaching forms to paper and gluing.
2. Bringing the application to the desired image with the help of additional decoration with felt-tip pens or decorating the work with small pieces of colored paper (in this case, it is necessary to draw the children’s attention to expressive means: correctly selected colors and interesting details).
3. Review of finished works (they are given only a positive assessment). Children should be happy with the result and learn to evaluate their crafts.
There are three types of application:
Subject
– individual objects are depicted that do not participate in any events (fruit in a vase);
Plot
– a composition is compiled based on events (actions) in fairy tales, stories, poems, nursery rhymes; by personal recommendation;
Decorative
– a pattern is made of geometric shapes on a strip, square, circle.
We list the application methods that are used in working with children 3–4 years old.
Application from prepared parts of an object
– the child must assemble an object (pyramid, bear) from the proposed parts and stick it on paper.
Application from prepared silhouettes of objects
– the child makes a composition from one or more cut-out objects, and then pastes it onto a sheet of paper (cucumber, tomato).
Breaking-mosaic
- small circles, triangles, squares or torn pieces of colored paper are glued inside the outline (autumn leaves on a tree).
Cutting along the contour
– colored paper is torn along the intended contour to convey the texture of the object (the curly body of a lamb, a fluffy cloud).
Rolling paper
– the paper tears into small pieces, each piece crumples and rolls into a lump (rowan berries, fluffy chicken).
Overlay applique
– parts that are identical in shape but different in size are glued onto each other, starting from the largest to the smallest (snail, turtle, flower).
Application of dried leaves
– the leaves are laid out and arranged into the intended object, then glued onto a sheet of paper (fish, swan).
For applique classes you will need: colored paper, magazine paper, colored napkins, dried leaves, album sheets, colored cardboard, felt-tip pens, PVA glue, oilcloth lining and a rag.
Expected skills and abilities of a child by age 4:
• has an interest in the art of applique from pre-prepared figures;
• knows how to select colors that match the color of objects;
• knows the order of gluing (first you need to lay out all the prepared parts of the application on a sheet of paper and make an image of the object, and then gradually stick them on);
• knows how to carefully glue (first you need to put the part with the colored side on the oilcloth, carefully pick up glue on a brush and apply it in a thin layer from the middle to the center, apply the side with the glue applied to a sheet of paper, gently pressing it with a cloth or napkin);
• knows how to stick simple objects (fruits, tree leaves) onto a sheet of paper;
• knows how to compose a subject application from 2–4 parts (house, traffic light);
• knows how to create a simple composition (a plate of fruit, flying airplanes);
• knows how to make patterns on a strip, square, rectangle, circle from prepared geometric elements, alternating them by color, shape and size (decorate a scarf);
• knows how to decorate a product using felt-tip pens (draw the eyes and nose of a hare);
• knows how to create an object not only from colored paper, but also from magazine paper, dried leaves and napkins.
If your child can't do any of the above, don't worry. You will still have time to catch up.
We wish you success!
Annual thematic planning of application classes
Class notes
Theme of the week: “Toys”
Lesson 1. Cube on cube (Colored paper. Applique from prepared parts of the object)
Program content.
Teach children to lay out cubes and squares in a certain sequence (by size). Introduce the method of applying glue with a brush to the back side of the figure from the middle to the edges; teach to apply the glue-smeared side to a sheet of paper and press it tightly with a cloth. Introduce the color blue, learn to correlate the color with its name. Cultivate compassion and kindness.
Demonstration material.
Cubes of three colors.
Handout.
Half of an album sheet; 3 blue squares (large, medium and small), cut out of paper; PVA glue, glue brush, cloth, oilcloth lining.
Progress of the lesson
Read the story “Cube upon Cube” by Ya. Taits to the children:
“Masha puts cube on cube, cube on cube, cube on cube. She built a high tower.
Misha came running:
- Give me the tower!
- I'm not giving it!
- Give me at least one cube!
- Take one cube. Misha reached out his hand and grabbed the lowest cube! And instantly - bang-bang-bang! “The whole Machine Tower has collapsed!” Ask the children: “Which cube should be given to Misha so that
did the tower collapse? (Upper.)
Let's help Masha build a new tower."
Place a landscape sheet and 3 blue squares (large, medium and small) cut out of paper in front of each child. The child must find the largest square and place it at the bottom of the sheet, then find the middle square and place it above the large one, and place the small square on top.
Tell the children that they now need to glue the cubes onto a piece of paper. Show them how to put glue on a brush, apply it in a thin layer from the middle to the edges, not on the colored side, but on the back of a small square, press it firmly to a sheet of paper with the greased side and blot off excess glue with a rag. The large and medium squares are glued in the same way.
Look at the resulting towers with your children and ask: “What color are the cubes from which your towers are built?” (Blue.)
Theme of the week: “Vegetables”
Lesson 2. Turnip (Colored paper. Applique from prepared parts of the object)
Program content.
Teach children to make a whole from two parts. Strengthen the ability to apply glue to parts and stick them onto a sheet, pressing with a cloth. Continue to introduce the color yellow, learn to correlate the color with its name. Develop memory. Learn to retell fairy tales based on illustrations.
Demonstration material.
Six cards, each of which depicts a hero from the fairy tale “Turnip” (grandfather, grandmother, granddaughter, Bug, cat, mouse) or a sheet of paper with schematic images of the heroes.
Handout.
Half a landscape sheet, blanks for turnips, cut out of colored paper (root crop and tops); glue, glue brush, rag, oilcloth lining.
Progress of the lesson
Read the Russian folk tale “Turnip” to the kids in advance.
During the lesson, remind the children of this fairy tale, show cards on which the heroes of the fairy tale “Turnip” are drawn and offer to arrange the heroes of the fairy tale in the right order: grandfather, grandmother, granddaughter, Bug, cat, mouse. (If you don’t have cards, you can sketch the characters on a piece of paper, leaving space in front of them for a turnip.)
Help each child make a turnip from two parts (root and tops). Show the kids how to apply glue evenly with a brush on the back side of the root crop from the center to the edges and stick it on the sheet, pressing with a cloth, and then stick the tops in the same way.
Ask the guys: “What color is the turnip? What color are the tops?” Ask the children to retell the story based on their work.
Theme of the week: “Fruits”
Lesson 3. Fruits in a vase (Colored paper. Application from prepared silhouettes of objects)
Program content.
Teach children to apply glue to the part and stick it to the sheet. Continue to introduce the color green, learn to correlate the color with its name. Cultivate a friendly attitude towards others.
Demonstration material.
Doll.
Handout.
Colored cardboard on which the vase is glued in advance; apples and pears cut out of colored paper in yellow and green colors; glue, glue brush, rag, oilcloth lining.
Progress of the lesson
Show the children the doll and say: “Guys, the doll Masha came to you for help. She got sick. The doctor said that she needs to eat more green apples and pears because they contain a lot of vitamins. But the doll doesn’t know which apples and pears are green.”
Invite the children to help the doll - put only green apples and pears in the vase. Place in front of each child colored cardboard, on which a vase and blanks cut out of colored paper have been glued in advance - apples and pears in yellow and green colors.
Children select green apples and pears and place them on a sheet of cardboard.
“Thank you,” says the doll and “takes” from one of the children a cardboard with fruit preparations (apples and pears fall). “Oh, how can I carry apples and pears home?”
If the guys don’t guess that apples and pears need to be labeled, tell them. Remind how to put glue on a brush, apply it in a thin layer to the workpiece and press it tightly to the sheet with a cloth.
At the end of the lesson, say: “Well done, guys! Now the doll won’t lose the fruit.”
Theme of the week: “Berries”
Lesson 4. Strawberries (Colored paper. Applique from prepared silhouettes of objects)
Program content.
Continue teaching children to stick parts on the sheet in the right place. Continue to introduce the color red, learn to correlate the color with its name. Cultivate compassion and kindness.
Demonstration material.
Doll, object picture, which depicts a strawberry bush with berries.
Handout.
Half of an album sheet on which strawberry bushes without berries are drawn and red strawberries cut out of colored paper; glue, glue brush, rag, oilcloth lining.
Progress of the lesson
Show the children the doll and say: “This is the girl Zhenya. She wanted to pick strawberries in the garden, but did not find a single berry. Zhenya is very upset.”
Invite the kids to plant berries on the strawberry bushes and treat Zhenya.
Place in front of each child half of a landscape sheet on which strawberry bushes without berries are drawn and red strawberries cut out of colored paper. Examine strawberry bushes with your kids, determine the shape and color of the berries.
Remind the children to apply glue to each berry and stick it to the tip of the branch.
At the end of the lesson, invite the children to give Zhenya a treat: give her strawberry bushes and berries.
Theme of the week: “Mushrooms”
Lesson 5. Mushroom (Colored paper. Application from prepared parts of the object)
Program content.
Improve children's ability to make appliques and apply glue to parts. Learn to accompany the words of the poem with movements corresponding to the text. Develop precision and coordination of movements.
Handout.
Landscape or tinted sheet of paper; blanks cut out of colored paper: grass, mushroom details; glue, glue brush, rag, oilcloth lining.
Progress of the lesson
Talk to the guys about mushrooms, tell them where mushrooms grow, what time of year they appear. Tell the children: “Today I invite you to go for a walk in the forest. I will read a poem, and you repeat the appropriate movements after me:
In the morning the children went to the forest (Steps with high knees.)
And they found mushrooms in the forest.
(Measured squats.)
We bent over, collected,
(Bent forward.)
We got lost along the way.”
(Rhythmic spreading of arms to the sides.)
Invite the children to depict a mushroom in the applique.
First, they must place the blanks - the details of the mushroom and the grass on the sheet, then apply glue to the stem of the mushroom and stick it on, then apply glue and stick on the cap. The grass is glued last.
Tell the kids a riddle about a mushroom:
Antoshka stands on one leg.
Ask the guys: “Can we say that the mushroom has one leg? (Can.)
What else does a mushroom have?”
(Hat.)
Theme of the week: “Autumn trees and bushes”
Lesson 6. Maple (Colored paper. Collective applique from prepared silhouettes of objects)
Program content.
Strengthen children's knowledge about the rules of sticking. Introduce the color orange, learn to correlate the color with its name. Consolidate knowledge about yellow, green, red colors. Continue to learn to understand and analyze the content of the poem.
Demonstration material.
Half a piece of Whatman paper with a maple tree without leaves on it.
Handout.
Maple leaves cut out of colored paper (yellow, red, green, orange), glue, glue brush, rag, oilcloth lining.
Progress of the lesson
Read the poem “Maple” by D. Rozalieva to the children:
The maple moves its branches, shedding its leaves. A cloud runs across the sky, dropping droplets.
Give the children one maple leaf cut out of paper. Draw the children's attention to the shape of the leaves - it resembles a star. Tell the children: “Run up to me, everyone who has yellow leaves!”
Children, holding yellow maple leaves in their hands, run up to the adult and then return to their seats. Then the guys with red (green, orange) leaves run up.
Show the children a piece of whatman paper with a maple without leaves on it and suggest: “Guys, let’s give the maple its leaves back.” Each child must apply glue to their own leaf and stick it to a tree branch.
At the end of the lesson, say: “Well done, guys! You’ve got a real autumn maple!”
Theme of the week: “Autumn”
Lesson 7. Sun in the clouds (Colored napkins. Cutting along the contour and appliqué from large lumps of paper)
Program content.
Teach children to create a plot composition from a broken circle along the contour and crumpled lumps of napkins. Learn to glue rolled up large lumps of paper onto cardboard. Strengthen the ability to understand and analyze the content of a poem.
Handout.
Napkins of yellow and white colors, a sheet of blue cardboard, glue, a glue brush, a rag, an oilcloth lining.
Progress of the lesson
Read the Armenian song to the children:
– Where does the sun spend the night? - In grandma's bed. - Who is his grandmother? - Blue sky. - What will it cover with? - A woolly cloud. -Who will cover him? - Grandfather is the wind.
Ask the children: “Where does the sun sleep? (In the sky.)
What color is the sky?
(Blue, blue.)
What covers the sun?
(A cloud.)
What color are the clouds?
(White, gray.)
Now you and I will also put the sun to bed.”
Show the children a blue piece of cardboard and ask: “What does it look like?” (To the sky.)
Then show them the yellow napkin and ask: “What do you think can be done with this napkin?”
(Sun.)
Give each child a yellow napkin and help them tear it in a circle to make a “sun.”
Show the children a white napkin and ask: “What can you do with this napkin?” (Clouds, clouds.)
Place a white napkin in front of each child and offer to tear the white napkin along a line into four parts, crumple each part - you get four clouds. Now we need to place the sun and clouds in the sky. The child sticks on the sun first, and then the clouds.
Theme of the week: “In the forest”
Lesson 8. Leaves from the forest (Applique from dried leaves)
Program content.
Show children that the applique can be made from dried leaves. Learn to relate an object to its shape. Continue to teach how to accompany the words of the poem with movements corresponding to the text. Cultivate compassion and kindness.
Handout.
A landscape sheet on which colored outlines of two leaves of different shape and color are drawn; dried leaves of appropriate shapes and colors; leaves cut out of colored paper; glue, glue brush, rag, oilcloth lining.
Progress of the lesson
Give the kids leaves cut out of colored paper and invite them to play with these leaves while listening to the poem:
The leaf flew up, (Flash the leaf).
The leaf is spinning, The leaf is spinning,
(Twist the leaf.)
It falls under your feet.
(Lower the leaf to your feet.)
The leaf is torn, torn, torn.
(Tear the leaf.)
The leaf wrinkles, wrinkles, wrinkles.
(Crumple up the leaves.)
Play out the situation that two Leafs came to visit the children from the forest: everyone in the forest tramples them, the Leafs want to find their home.
Place in front of each child a landscape sheet with colored outlines of two leaves of different shapes and colors drawn on it, and ask them to find a house for each leaf.
Tell the children: “In order to prevent the leaves from losing their houses again, they need to be glued: apply glue to the back of the leaf with a brush and press it to the paper with a cloth. So we hid the leaves in the houses.”
Methodology for preparing an open lesson on application in the middle group
The work of drawing up a script for an open lesson on application in the middle group is not much different from writing notes for a regular lesson: the same three stages, the same distribution of time between them. However, there are a number of features at the content level:
- An open lesson must have a plot basis; in the middle group it is convenient to work with fairy tales, the heroes of which come to the kids for help or advice on the topic;
- For the lesson to be successful, the type of application being practiced must already be familiar to the children;
- At the final stage of the lesson, children should be given the opportunity to evaluate their application - like it/don’t like it and why.
From the standpoint of implementing these conditions, the summary of an open lesson on application on the topic “The Best House” by E.A. is interesting. Iyutinskaya.
Criteria for assessing an open lesson by inspectors
The demonstration lesson is assessed both by the teacher himself and those present according to a single scheme:
- compliance of the goals and objectives of the lesson with the topic and requirements of the Federal State Educational Standard;
- effectiveness of techniques;
- the presence of suitable and understandable visuals for children;
- consistency of types of work and teacher’s explanations;
- conducting physical education breaks during class (finger exercises and physical education sessions);
- forms of implementation of an individual approach;
- the general atmosphere of the lesson, its pace;
- evaluation of finished work;
- recommendations to the teacher (what levels of methodological work need to be adjusted).
If the analysis by those present involves a written form, then you must first indicate the full name, regalia of the teacher, as well as the age of the children and the number of people present at the lesson.
In the middle group, children learn to give their own assessment of their work in class
Methodological literature on application
When preparing lessons on application, the teacher will find the following manuals useful:
- Applications and paper crafts. - M.: Dragonfly, 2012.
- Grigorieva G. The use of gaming techniques in the management of visual activities. / Preschool education, 1991.
- Gusakova, M.A. Application. - M.: Education, 1987.
- Dubrovskaya N.V. Applications made from natural materials. - M.: Astrel, Sova, 2012.
- Dubrovskaya N.V. Applications from seeds and seeds. - M.: AST, Sova, 2013. Dubrovskaya N.V. Application from corrugated paper. - M.: Detstvo-Press, 2013.
- Komarova T.S. Methods of teaching visual arts and design. - M., Education, 1991.
- Kosminskaya V.B., Khalezova N.B. Fundamentals of fine arts and methods of guiding children’s visual activities: Lab. workshop: Textbook for pedagogical students. Institutes - M.: Education, 1987.
- Malysheva A.I., Ermolaeva N.V. Application in kindergarten. – M.: 2000.
Samples of drawing up lesson plans for applications can be found in the manuals:
- Koldina, D. N. Application with children 4–5 years old. Lesson notes / D.N. Koldina. - M.: Mosaika-Sintez, 2021.
- Komarova T.S. Lessons in visual arts in the middle group of kindergarten: lesson notes. – M.: 2008.
- Lesson notes on application in the middle group.
A lot of time is devoted to the creative development of children aged 4–5 years in the kindergarten educational program. At the same time, applique classes are of particular importance, allowing children not only to learn how to use scissors, practice skills in working with glue and brushes, but also to learn about the visual possibilities of paper and other materials for crafts. All this develops important learning skills in children and introduces them to an interesting activity that awakens their imagination.
Class notes
| Author's full name | Title of the abstract |
| Selishcheva T. | “Magic Garden” (collective application) Educational objectives : learn to create a collective picture, independently choosing the content of your image (tree, flower), consolidate the ability to cut with scissors in a straight line, round the corners of a square and rectangle. Developmental tasks : develop figurative representation, imagination, compositional skills, color perception, continue to practice the ability to carefully glue parts to the base. Educational objectives : to cultivate interest in the natural world and art. Integration of educational areas : “Artistic creativity”, “Cognition”, “Communication”, “Socialization”, “Health”. Handouts: brown rectangles (for the trunk), green and yellow squares of different sizes (crown and fruits), glue, glue brushes, scissors, oilcloth. Progress of the lesson: The teacher invites the children to close their eyes and mentally find themselves in a magical garden, where fabulous apple trees with golden apples grow, and wonderful birds fly next to them. The teacher recalls with the children the structure of the tree (trunk, crown, leaves, fruits), the color of each part. Techniques for cutting a triangle from a rectangle to obtain a crown are demonstrated (fold the rectangle in half and cut off the corners from the middle to the edges). The part is decorated with cloves. Apples are cut from a square by rounding the corners. Finger gymnastics “The hazel tree bent its branches...” is carried out. Before children work independently, the teacher reminds them how to hold scissors correctly in their hands. Productive activity of preschoolers. Examination of the finished composition: analyzes what the trees have in common, and how certain details were cut out. The teacher invites the children to come up with a story for their application. |
| Shornikova E. | "Magic Garden" (collective application) The teacher invites the preschoolers to remember what they saw during a walk in the kindergarten. The children are invited to look at a branch of a plant with blossoming flowers. The teacher asks a riddle about the garden:
Conversation with children on the topic: how they imagine a magical garden. A picture with a suitable image is shown and questions about it. The teacher explains techniques for cutting out and arranging flowers (they need to be glued to the crowns of trees). Independent work of preschoolers. Kids who quickly complete the task are additionally invited to cut out butterflies, bugs and flowers for the grass). |