Nuances in the technique
A kindergarten teacher is like a conductor. Selects a program, knows the musicians' parts, and reworks the score. Skillfully leads the entire orchestra so that the piece sounds harmonious.
The situation is similar with children: the teacher plans application topics; selects materials; draws up a lesson plan.
The end result is a vernissage for parents. All the kids are busy with collective creativity. So, let's look at each point step by step.
Step-by-step instructions for making appliques using various techniques
Application using templates
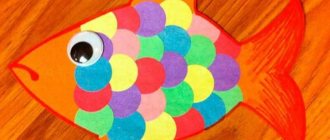
This type is very simple to perform. Typically, gluing template parts onto paper is used in younger groups of kindergartens. Children get initial appliqué experience.
To make fish parts using templates, you must do the following:
- Prepare templates for each part of the fish. To do this, you need to cut out the main elements of the fish: the body, scales, fins and tail from cardboard.
- Next, select the appropriate paper color. Children love making goldfish using yellow, orange or red construction paper.
- After selecting the color for each template part, you need to cut out the parts from colored paper. Each template is placed one by one on paper of the desired color, traced with a simple pencil and subsequently cut out.
- The prepared parts are glued onto a sheet of paper with glue and a bright applique is obtained. You can add details, such as water in an aquarium and algae, by finishing them with felt-tip pens or pencils.
Geometric applique: fish in an aquarium
This type of application is used by both schoolchildren and preschoolers. The difference lies only in the choice of execution method and the degree of complexity of the work. Younger children in kindergartens are usually introduced to shapes using various geometric shapes. For visual study, an application is used, so the child can make his own picture and at the same time study various geometric shapes: circle, oval, square, rectangle, triangle.
To make a fish using the geometric appliqué technique you need:
- Prepare templates for children that will be the components of the fish. The oval will serve as the body of the fish, the circle will serve as the scales, and the triangles will form the fins and tail.
- Next, select a color suitable for each detail. Here the child can show his imagination, use his photo memory to make the best applique work.
- All parts are cut out with scissors according to the appropriate geometric patterns.
- Next, all the templates are glued onto a landscape sheet in a certain order using glue. Sometimes the template is used to make a fish on the table so that the child does not forget the sequence of gluing the geometric parts.
Older children use fish figurines made using origami as three-dimensional geometric details. Next, the prepared parts are also glued onto a landscape sheet.
Fish in a fabric aquarium
Applications with fabric are carried out in older groups of kindergarten or in elementary school, since working with fabric is sometimes beyond the capabilities of younger children. For children, if they are working with fabric, a ready-made set of parts cut from fabric is prepared, which the child then independently glues onto paper.
To make an aquarium with fish, the first thing you need to do is prepare templates for the fish parts, which are cut out of cardboard. Next you need to select the material. You can use fabric of different densities (cotton, silk, knitwear, felt). For the water in the aquarium, you usually take a plain blue or blue fabric and cut it out. For the details of the fish, you can choose either a plain fabric of various colors or fabric with various prints. The guys glue all the prepared parts onto paper themselves, forming their own unique fish.
Volumetric applique from scrap materials
To make fish from scrap materials, you need to be very well prepared:
- First you need to prepare a fish template on a landscape sheet. To do this, an adult or a child himself draws a fish on a sheet of paper, drawing individual elements: body, head, tail, fins. For a more accurate drawing, you can use ready-made catalogs with images of fish with beautiful long tails for coloring those presented on the Internet.
- Next, prepare the material: peas, buckwheat, rice, colored paper and shells.
- On a landscape sheet you need to designate a water zone: be it an aquarium or just a body of water and cover it with colored paper of light blue or dark blue, you can cut out individual waves.
- Next, you need to smear the ryka with glue, PVA glue is the most suitable in this case.
- The next step is to form the fish using various grains. The body can be made of yellow peas; you need to carefully pour the peas without leaving any voids. The head area can be marked with white grains of rice. Make the eye from dark buckwheat. Make the fins from mixed white rice and brown buckwheat grains, alternating strips. The fish's head can be decorated with a crown made of colored paper.
- You can complement the picture with shells that are glued to areas of water and algae cut out of green paper.
Applique classes seem simple and easy to work with only at first glance. But for high-quality execution, it is necessary to carefully study the idea of execution: choose a material according to the child’s age skills, prepare a set of tools for the masterful execution of exhibition work: glue, brushes, scissors, etc. But the most important thing: it is necessary to interest and involve the child in the process of independent creativity.
Goals
Training sessions provide for the achievement of specific results.
In the case of applications with children (6-7 years old), the following is implied:
- Ability to use glue and different papers (thin, thick, colored, cardboard);
- At the moment of cutting, motor skills, eye and hand movements are involved. Children are instructed to cut out pre-selected fragments;
- Instilling a sense of composition;
- Development of skills of individual and collective activity;
- Development of speech abilities. During the work, the child needs to ask questions to the teacher if difficulties arise, and consult with his friends in the group;
- Expanding the boundaries of a child’s understanding of the animal world.
Applications from other materials
If desired, you can use any available material. If you take something not quite ordinary, the product will turn out much more interesting. Here are some examples of simple crafts made from a variety of materials.
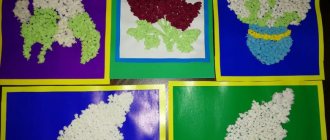
From leaves
Crafts made from autumn leaves are quite popular and loved. This is because the colorful leaves themselves are beautiful, and when they are folded into a certain composition, they become even more beautiful.
Such products add coziness when they serve as decoration in the home, and also bring a lot of positive emotions and give a good mood. In addition, anyone can handle this craft, as it is not at all difficult to create.
In order to make such an applique, you will need colorful autumn leaves. Before work, you will need to prepare them - rinse them under a weak stream of water, dry them and put them in a thick book so that they dry and straighten.
If you don’t have time to wait for the leaves to dry and straighten out in the book, you can dry them using an iron.
The basis is a piece of cardboard of any color you like, onto which a large orange leaf is attached. This will be the body of the fish. Other leaves, colored red, will become fins and a tail.
After completing the craft, decorate it with various twigs and other natural materials. You need to add algae and other seabed objects to the background.
From seeds, cereals, or pasta
Making fish from seeds is not at all difficult. You just need to follow these steps:
- Select a piece of cardboard of any shade and draw the outline of the future fish on it;
- Take glue and generously coat the entire area inside the outline;
- Now you can stick seeds, cereals, or pasta onto the glue, thereby building the fish itself. It is important to do this carefully so that the product turns out neat and tidy;
- After this, attach an eye made of paper or plasticine. Fins and tail can also be cut out of colored paper of any color.
This application is very interesting and will probably appeal to many children due to its unusual nature.
From buttons
You can make such a figurine yourself using ordinary buttons. You will need a template that is easy to find on the Internet, or you can draw it yourself.
It is painted in any color you like, and then buttons are selected to match it. Then, very evenly and carefully, each of them is glued to the base. This creates a voluminous and wonderful figure. And the remaining buttons are suitable for decoration.
Now that you have learned about so many ways to make your own fish, you can try each of them with your little one. Both he and you will enjoy spending time together doing such an exciting, useful and fun activity.
Materials
When choosing work materials, consider your child’s current skills.
Paper
Children become familiar with this material even before kindergarten. Parents read fairy tales to their child, turning over the pages of a beautiful book. Teach the child how to use scissors correctly.
They color coloring books together. If you don’t have enough time to collect materials, the paper option is the most convenient. In preparatory groups, some children achieve impressive results by making appliqué from plain paper.
Note! Scientists studying the psychology of children (ages 1 to 6 years) say: paper cutting skills with scissors should be taught from the age of 1.5-2 years. In this way, concentration is developed, motor skills are trained, and logic develops.
Accordion fish
This accordion applique is easy to make, but the result is very impressive.
You will need: colored paper sheets, glue, scissors, white and black paper, blue cardboard.
Cut a wide strip. This will be the torso. We bend the workpiece horizontally like an accordion, then fold it in half and the fish will be in the form of a fan. We glue the fold so that the part holds better. We straighten the fan and glue it onto blue cardboard.
We do the same from another colored paper - this will be the tail. We glue it to the body with the narrow end to the wide part of the fish’s body. The applique is voluminous due to the fan-shaped fish.
The fin can be cut out of paper in the form of a quarter circle and glued in the middle closer to the head. We cut out the eyes in a circle from a white sheet, and the pupil from a black one. We fasten the parts together and then onto the applique.
These fish can be made in many different colors and sizes.
Textile
Can be used partially, especially as large elements for the main product. For example, it could be water. Of course, children will not be able to cut out the material themselves. It is difficult to cut straight, the material crumbles.
Requires some dexterity. Parents or a teacher can help with this by making large blanks and templates in advance for the whole group.
The child can be assigned homework - cutting something out of fabric under the supervision of the parents.
Natural materials
Chestnuts, leaves, pebbles, etc. are used. The child should have such items in limited quantities. Otherwise, the baby will lose attention to the main work.
The young worker needs to glue the sea pebbles or seaweed evenly. And follow one path in composing a composition.
Decorative elements
Such things can be beads, sequins or rhinestones. Such items must be provided to the group in limited quantities. Otherwise, the problem described in the previous paragraph will arise.
In this way, the child develops his own taste and sense of proportion. The baby will be able to find a suitable place for the decorative detail.
Technique
A beautiful applique depends on the amount of materials and technique of application. Children aged 6-7 years are probably familiar with the underwater world. They know what aquariums and fish look like; drew underwater inhabitants or painted them. Therefore, the work can be slightly diversified. Next, we learn how to do it ourselves, introducing various materials.
- Use volumetric elements made of paper. These could be fish or other creatures from the underwater kingdom. The origami technique is applicable here.
- Small parts made of plasticine. For example, a baby can mold fry. If a child has already come into contact with this material before, it will be easy for him to interact with it purposefully in the future.
- For fish scales, a mosaic of cereals (buckwheat, semolina or millet) is used.
- Ribbon applique elements are used, made using the round dance method - they are simultaneously cut out and tied together.
- For collages, pictures from magazines or stickers are used.
Fish applique using templates
It is possible to create amazing fish using templates that can act as a stencil, or as a basis for appliqué. Such blanks can be made by simply drawing a silhouette on a sheet of colored paper, or by printing a ready-made picture found on the Internet.
It's very easy and fun to use templates as a basis. The fish is cut out of a sheet, and then it can be decorated and decorated as you please.
Individual approach to each child
During preschool preparation, the educational process requires an individual approach. If one child is diligent, you should entrust him with cutting out elements from cardboard paper.
But entrust a real fidget with gluing the details of the composition. This way, the noisy child is involved in a group activity and will not get bored while cutting out appliqués for a long time.
The formation of work fronts depends on several aspects:
- Temperament. Don’t push a slow baby by motivating him with the words “Everything has already been done!”
- Preparation. Not every child and their parents practice appliqué or other exciting activities at home. Therefore, not every child in the group will master certain tasks.
- Initiative. Don’t contradict your child if he wants to draw fish instead of the sea.
Aquarium fish
This task is for the older group of kids, but younger children can also cope with it with the help of adults.
You will need: a white piece of paper or cardboard, a set of multi-colored double-sided paper, glue, yellow and blue paints, a sponge (you can take it for dishes), scissors, ready-made self-adhesive eyes (sold in craft stores).
You can take cardboard or a white piece of paper and paint the background blue and yellow. This way you can differentiate between the sandy bottom and the water in the aquarium. Children can do this entire procedure with a sponge. They will like this kind of work. Next comes the work of preparing the blanks.
Fish can be cut out of colored paper according to a prepared template or sketches. Also do everything with algae, cutting them out of a green leaf, corals from brown or pink, and pebbles can be multi-colored.
To make the composition sparkle with bright colors, you need to distribute the details on the dried cardboard.
Such a fun craft can be placed in any room, and it will cheer up both children and adults.
About motivation
There is one famous saying: “Whatever you call a ship, that’s how it will sail.” Children's motivation works in a similar way. The way you motivate a child is how he works.
In this case, several methods of effective motivation are used.
- Conversation. An effective method to set up for productive activities. For example, ask some leading questions: Where do the fish live? Where will we place them - at home or in a group? Speak to children on behalf of animals by putting a doll of some animal on your hand.
- Puzzles. They intrigue and develop their way of thinking.
- Images. Children need a clear example to understand. So that your child can make a fish, show a photo of the fish applique.
- Presentation. Show a short slide video while talking about the underwater world.
- Stories. Talk about a goldfish to encourage kids to create a similar prototype. This is a great way to boost their motivation levels.
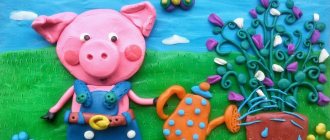
Plasticine fish
Probably everyone will like this method because of its simplicity and fun. And the end result will be a delicious goldfish. To create this underwater inhabitant you need:
- Make a base for a future application. To do this, use yellow and red plasticine;
- Next, you will need to roll out many small balls and flatten them into circles;
- The plasticine that you will have left after completing the previous steps will need to be rolled out into narrow strips;
- Next, you need to take a blue cardboard piece and mark the silhouette of a fish on it, after which you should surround its outline with circles of red shades;
- The inside of the body itself is surrounded by yellow circles. And the tail and fins are lined with thin stripes;
- An eye is also made from plasticine, which is then attached to the required location.
Once everything is ready, start decorating the background. Make seaweed, rocks, shells and other desired items from plasticine to complete the fish applique. Small pebbles or shells can be taken, even real ones, if such, of course, are available.
Use all your imagination, think through the whole composition. This way the product will look even more interesting and original. Once all the work is completed, you can place the craft in a prominent place so that it adds uniqueness to the overall atmosphere of the house and pleases the eye at any time.
Make a plan
No more than half an hour is allocated for the lesson.
Each stage of training is divided into several aspects:
- Motivational process - 5 minutes.
- Explanation of the main task - 3 minutes.
- Work with blanks - 10 minutes.
- Three minute break.
- Continuation of work activity - 5 minutes.
- Reflection - 5 minutes.
MAGAZINE Preschooler.RF
Lesson summary on application on the topic: “Underwater Kingdom”Prepared by: teacher of the first qualification category S.N. Podymova Municipal budgetary preschool educational institution Child Development Center - kindergarten No. 14 “Jolly Bells” , Moscow region, Ozyory, 2020
Target:
- teach the ability to work with colored paper, decorate templates with various pieces of paper to convey the expressiveness of the image
- develop technical skills in working with paper, creativity, emotional perception, interest in the process and result of the application
- foster a sense of collectivism, co-creativity, and joy in the overall result.
Materials and equipment:
For each child: outline image of fish, colored paper, glue, brushes, hand napkins. Pictures "Fish" .
For parents: Whatman paper, various items, corrugated paper, candy wrappers, pebbles, plasticine for preparing the seabed for fish.
Progress of the lesson:
Emotional mood: On the left is a friend and on the right is a friend -
Let's hold hands tightly
And let's smile at each other.
Q: I have an envelope in my hands, there is a letter in it:
— We, the inhabitants of a magical underwater kingdom. We ask for help. We were bewitched by a sea octopus, and now we have become sad, ugly, pale, and cannot swim or frolic. Magic spells can be broken by completing 3 tasks.
Q: Guys, let’s help the inhabitants of the underwater kingdom?
D: Let's help.
Q: Task 1: name the sea creatures
D: Fish, jellyfish, turtles, starfish, octopuses, crabs, seahorses, plants...
Q: What is the sea like?
D: Quiet, calm, stormy, running, cold, warm, transparent.
Q: Task 2 help the fish become beautiful: decorate them. To do this, use colored paper. It can be torn off, crushed, twisted into flagella or balls. But first, let's see what the fish were like before the octopus enchanted them.
Q: And there is also a task for our guests: And you will prepare an underwater kingdom for our beautiful fish.
View illustrations.
Q: Task 3, launch them into the underwater kingdom (glue them onto whatman paper of the underwater kingdom).
All works are hung against a common background.
- Oh, guys, look how the fish sparkled, became cheerful, swim, frolic, play. Let's play too.
The fish splashed happily in the clean, light water. Either they will shrink, they will unclench, or they will bury themselves in the sand.
(Connect the fingers alternately from the index finger to the little finger and back.
Twist hands forward and backward.
They squat, twisting their torso.)
| Next > |