Summary of OOD on modeling in the middle group "Round Dance"
Goal: to consolidate children’s ability to depict a human figure, correctly conveying the ratio of parts in size, their location in relation to the largest part.
Objectives: educational – to consolidate children’s knowledge about Dymkovo toys;
developing - continue to develop the ability to accurately sculpt, using previously learned techniques and methods.
educational: to develop the ability to combine your work with the work of others.
Methods and techniques:
1. Visual (showing sculpting , TSO, using a sample and other visual aids)
2. Verbal (conversation)
3. Practical (exercises in mastering technical skills, rolling - a ball, rolling - a cone, smoothing the bonding points)
Preliminary work:
- examining the image of a human figure in illustrations, pictures;
— round dance games;
— modeling “Girl in a long fur coat”, “Snow Maiden”
PROGRESS OOD.
1. Educator: Guys, our country is huge and it is famous for its great masters - craftsmen. Some of them make samovars, some gingerbread cookies, and some make toys. (Presentation show)
Look, this is a river, it’s called Vyatka. And on its shore stood a small village. And there lived in this village people who had skillful hands.
Educator: What did the masters sculpt from?
Children: They made toys from clay.
Educator: What did the craftsmen do to make the dishes strong?
Children: To make the dishes strong, they fired them in a kiln.
Educator: Every morning smoke rose over the village - white smoke from the stoves. Is that why they called the village?
Children: The village was called Dymkovo.
Educator: Guys, what kind of toys did the craftsmen sculpt in the village of Dymkovo?
Children: The craftsmen sculpted ducks, turkeys, and horses.
Educator: That's right. Craftsmen sculpted various toys for children to enjoy. The toys are bright and colorful.
Educator: Guys, do you want to become real masters of the Dymkovo toy?
Children: Yes, we want.
Educator: Then we’ll go with you to the workshop, where we’ll turn into real masters and sculpt Dymkovo toys.
(The music “Paravoz Romashkovo” plays)
2. Educator: Here we are. Today, guys, we will sculpt the Dymkovo young lady. I sculpted a figurine of a girl. She is wearing a long dress and she wants to dance in a circle . It just seems to me that she won’t be able to dance in a circle . What do we do?
Children: We need to fashion her friends.
3. Before we get started, let's look at the girl.
Educator: What parts does the girl’s body consist of?
Children: The girl’s body consists of a torso, head and arms.
Educator: What is the largest part of a girl’s figure?
Children: The largest part is the torso.
Educator: What is the girl wearing?
Children: She is wearing a dress.
Educator: Show in the air with your hands what kind of dress the girl is wearing.
Children: Her dress is narrower at the top and wider at the bottom.
Educator: What figure does the girl’s dress look like?
Children: The girl's dress looks like a cone.
Educator: What shape is the girl’s head?
Children: The girl's head is round.
4. Before starting work, let's stretch our fingers. (Finger gymnastics)
Two centipedes ran along the path,
They ran, they ran, they met each other,
They hugged each other like that, they hugged each other like that,
That we barely separated them.
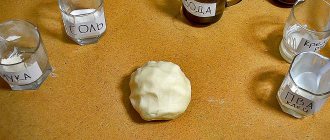
5. Educator: Where should we start sculpting a girl?
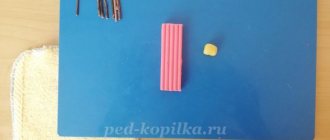
Children: You need to divide the plasticine into 3 parts, one large and the others smaller.
Educator: We begin to sculpt the girl’s dress.
(take the largest piece, first roll it into a ball, then roll the ball between your palms so that one end becomes pointed and the other remains thick, expanding downwards)
Educator: Let's sculpt the head. (let's roll a ball)
Educator: Let's connect the torso and head. (press tightly and smooth out the attachment points)
Educator: How to mold a girl’s hands?
Children: Roll out a long sausage and divide in half.
Educator: Now we press our hands to the body and smooth out the places of fastening.
6. Reflection.
Educator: Guys, let's put all the girls in a round dance . Let's admire your works.
Educator: Vanya, what kind of girl did you sculpt?
Vanya: I sculpted the Dymkovo young lady.
Educator: What is the name of the village where Dymkovo toys are made?
Children: Dymkovo village.
And now it’s time for us to return to kindergarten.
Children give their answers, and the teacher helps them. The guys say that children dance around the Christmas tree, celebrate the New Year, and Santa Claus gives out gifts.
Educator: That's right guys, well done. Do you know that different countries celebrate New Year differently?
Children's answers.
Educator: Now I invite you to learn about how the New Year is celebrated in Finland. Do you agree?
The children agree.
Educator: Great. Then let's watch the cartoon together. (The teacher plays a cartoon about Santa Claus.) Guys, tell us your impressions.
Children tell their impressions of the cartoon.
Educator: Great. Tell me, who gave gifts to all the children? This isn't Santa Claus, is it?
Educator: This hero’s name is Santa Claus. Tell me, how is he different from our Santa Claus?
Children give their answers, and the teacher helps with the answers (Santa Claus has a hat, Santa Claus has a nightcap with a pompom; Beard of different lengths, Santa Claus has a long fur coat, Santa Claus has a short jacket and pants; Santa Claus has a hand mittens and a Belt on his belt, Santa Claus has gloves on his hands, and a belt with a buckle on his belt; Santa Claus has glasses on his face; Santa Claus moves on foot or in a sleigh with three horses, and Santa Claus is in a cart with Reindeer )
Tell me, what is the main tradition for the new year?
Children: Sing a song around the Christmas tree
Educator: That's right, guys! Always on New Year's Day we dance around the decorated Christmas tree and sing the famous New Year's song. Which one?
Children: A Christmas tree was born in the forest.
Educator: Correct! Let's sing this famous song and dance like at a real New Year's party!
Physical education moment. Children stand in a round dance and sing a song. Making movements appropriate to the music
Educator: What great guys you are! And now I invite you to introduce boys and girls from Finland to our traditions. Make a real New Year's round dance from plasticine, we will photograph it and send it to our friends in Finland. Do you agree?
We start by choosing a character and his New Year's costume. Let's decide who will sculpt the New Year tree, Santa Claus, and who will be the kids who dance in a circle.
Children choose.
Educator: Do not forget to observe all the proportions of the body - this is very important when sculpting a human figure. Where do we start?
Cut a piece from a large piece of plasticine in a stack, forming the body, highlighting the neck. Then we cut off a piece - four times smaller than the first one. We roll it into a ball - this is the head. Then we form arms and legs from four pieces. We connect all the parts and pinch them to hold them together. Then we begin sculpting parts of the face and details of the festive costume. We make lips using stack cutting.
Defender of the Fatherland Day
Municipal budgetary preschool educational institution "Child Development Center, kindergarten No. 1 of the first category" Lesson plan for visual arts "Festive round dance" in the second junior, middle, senior and preparatory groups Educator: Savanina E.N.Second junior group
“Mom’s Day” Type of activity: Drawing with elements of appliqué Topic: “Flower for Mommy” Program content: Create a desire to draw a picture as a gift for mom. Learn to draw flowers based on an idea of the appearance of plants (corolla, stem, leaves). Develop a sense of shape and color. Cultivate a caring attitude towards parents, a desire to please.
Preliminary work: Examination of images of flowers, greeting cards. Conversation about mothers. Show color image options. Materials: Landscape sheet, vase template, brushes, paints, napkins. After class: Examination of children's work. Thematic exhibition: "Mother's Day"
Type of activity: Modeling Topic: “Flower for Mommy” Program content: Continue to improve the plasticineography technique, teach children to sculpt an image of flowers (corolla). Activate techniques for decorating stucco crafts. Develop a sense of form, composition, fine motor skills. Preliminary work: Examination of images of flowers, greeting cards. Conversation about mothers. Show color image options. Material: Cardboard, plasticine, boards, napkins. After class: Examination of children's work. Thematic exhibition: “Mom my sunshine”
Middle group “Mom’s Day” Type of activity: Drawing Topic: “Gift for Mom” Program content: Cultivate the desire to give gifts to loved ones. Teach children to draw patterns on round or square napkins. Cultivate aesthetic taste. Preliminary work: Conversation about mothers. Examination of patterns in different types of decorative and applied arts. Show options for combining decorative elements by color and shape (dots, circles, spots, straight and wavy lines). Material: Paper squares and circles, Paints, brushes, napkins. Three or four decorative napkins prepared by the teacher to show children the design options. After class: Examination of children's work. Thematic exhibition: “Mom my sunshine” Type of activity: Relief modeling, decorative Topic: “Flowers-hearts” Program content: Teach children to sculpt relief paintings as gifts for mothers. Show options for depicting flowers with heart elements. Arouse interest in framing stucco paintings. Develop a sense of form and rhythm. Cultivate aesthetic taste. Preliminary work: Examination of images of flowers, greeting cards. Conversation about mothers. Examination of works of decorative and applied art. A conversation about the heart as an important organ of the human body and as an artistic symbol. Material: Heart-shaped cardboard template, plasticine, napkins, stacks, planks. Three or four decorative crafts prepared by the teacher to show children ornament options. After class: Examination of children's works. Thematic exhibition: “Mom my sunshine”
Senior group “Mom’s Day” Type of activity: Drawing Topic: “Portrait of my dear mother” Program content: Learn to draw a portrait of mother, trying to convey the features of her appearance. Arouse interest in the search for visual media. Develop a sense of form and composition. Preliminary work: Introduce children to the portrait. Examination of reproductions of paintings by famous portrait artists (V.A. Serov, I.E. Repin, I.N. Kramskoy). Show a consistent way of drawing. Material: Simple and colored pencils, album sheet. After class: Examination of children's work. Thematic exhibition: “Mom my sunshine” Type of activity: Relief, decorative modeling (tiles) Topic: “Miracle flower” Program content: Teach children to create decorative flowers using plastic means based on folk art. Continue mastering the plasticineography technique. Develop a sense of rhythm and composition. Cultivate artistic taste. Cultivate a caring attitude towards parents, a desire to please. Preliminary work: Examination of works of decorative and applied art with floral decoration. Three or four decorative crafts prepared by the teacher to show children the design options. Material: Cardboard - square round base, plasticine, stacks, boards, napkin. After class: Examination of children's work. Thematic exhibition: “Mom my sunshine” Preparatory group
“Mom’s Day” Type of activity: Drawing Topic: “Mom and I are smiling” Program content: Continue learning to draw a paired portrait, trying to convey the features of appearance. Arouse interest in the search for visual media. Develop a sense of form and composition. Cultivate a caring attitude towards parents, a desire to please. Preliminary work: Conversation about mothers. Introduction to portraiture as a genre of painting. Examination of reproductions of paintings by famous portrait artists (V.A. Serov, I.E. Repin, I.N. Kramskoy). Show a consistent way of drawing. Material: Pencils, paints, brushes, album sheet. After class: Examination of children's work. Thematic exhibition: “Mom my sunshine” Type of activity: Relief, decorative modeling (tiles) Topic: “Miracle bouquet” Program content: Cultivate the desire to give gifts to loved ones. Teach children to create decorative flower arrangements using plastic means based on folk art. Continue mastering the plasticineography technique. Show a rational way to obtain a large number of identical elements (colors). Develop a sense of rhythm and composition. Cultivate artistic taste. Preliminary work: Examination of works of decorative and applied art with floral decoration. Show options for depicting complex corollas and individual petals. Three or four decorative crafts prepared by the teacher to show children the design options. Material: Cardboard - square base, plasticine, stacks, boards, napkin. After class: Examination of children's work. Thematic exhibition: "Mother's Day"
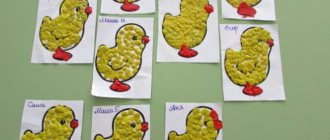
Second junior group “The New Year is just around the corner…” Type of activity: Drawing Topic: “Festive Christmas tree” Program content: Learn to draw a festive Christmas tree. Getting to know the color green. Continue to master shape and color as means of figurative expression. Develop ways of visually examining objects. Make you want to decorate the Christmas tree. Develop visual-figurative thinking and imagination. Preliminary work: Conversation about the upcoming holiday. Acquaintance with the structure and appearance of spruce (trunk, branches, evergreen needles). Show a consistent way of working. Material: Tinted sheet, paints, brushes, cotton swabs, napkins. After class: Examination of children's work. Thematic exhibition: “What is New Year” Type of activity: Modeling Topic: “Holiday Christmas tree” Program content: Continue to master the “plasticineography” technique. Arouse interest in the image of the New Year tree. Reinforce familiar sculpting techniques. Make you want to decorate the Christmas tree. Develop fine motor skills of the hands. Preliminary work: Conversation about the upcoming holiday. Continue to get acquainted with the structure and appearance of spruce (trunk, branches, evergreen needles). Show a consistent way of working. Examination of crafts prepared by the teacher to show children design options. Material: Cardboard, plasticine, boards, napkins. After class: Examination of children's work. Thematic exhibition: “What is New Year”
Middle group “The New Year is just around the corner... Type of activity: Drawing Topic: “Our Christmas tree” Program content: Teach children to draw a New Year tree, conveying the features of its appearance, structure, placement in space. To form methods of visual examination of nature. Develop coordination in the eye-hand system. Preliminary work: Conversation about the upcoming holiday about coniferous trees, examining a spruce branch. Making New Year's cards with a picture of a Christmas tree. Show a consistent way of working. Examination of crafts prepared by the teacher to show children design options. Material: Tinted sheet of various shapes in the form of a postcard, paint, brush, napkin, cotton swabs. After class: Examination of children's work. Thematic exhibition: “What is New Year” Type of activity: Modeling Topic: “New Year tree” Program content: Learn to create the image of a Christmas tree based on a cone. Activate mastered modeling techniques and various design techniques. Develop a sense of form, synchronize the work of both hands. Preliminary work: Conversation about the upcoming holiday. Looking at images of a decorated Christmas tree. Show a consistent way of working. Material: Plasticine, board, napkin, stack. After class: Examination of children's work. Thematic exhibition: “What is New Year”
Senior group “The New Year is just around the corner…” Type of activity: Drawing from life Topic: “Fir branch with a toy” Program content: Teach children to draw a fir branch from life, conveying the features of its structure, color and placement in space. Make you want to decorate the Christmas tree. Develop coordination in the eye-hand system. Preliminary work: Conversation about the upcoming holiday. Examining a spruce branch with a toy from life. Show a consistent way of working. Examination of crafts prepared by the teacher to show children design options. Material: Tinted sheets, colored pencils. After class: Examination of children's work. Thematic exhibition: “What is New Year” Type of activity: Modeling Topic: “Santa Claus brought gifts” Program content: Continue to learn how to sculpt a human figurine based on a cone (in a long fur coat). Learn to independently determine sculpting techniques to convey the characteristic features of Santa Claus. Develop a sense of form, proportion, composition. Preliminary work: Conversation about the New Year holiday. Looking at images of the Snow Maiden and Father Frost. Show a consistent way of working (Santa Claus and the possibility of forming a bag). Material: Plasticine, board, stack, napkin. After class: Examination of children's work. Thematic exhibition: “What is New Year”
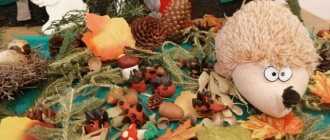
Preparatory group “The New Year is just around the corner…” Type of activity: Drawing Topic: “Father Frost and the Snow Maiden are rushing to the holiday” Program content: Continue to learn how to draw a human figure, conveying the characteristic features of appearance. Develop a sense of shape, color, proportion, composition. To form methods of visual examination of nature. Preliminary work: Conversation about the New Year holiday. Looking at images of the Snow Maiden and Father Frost. Show a consistent way of working. Materials: Tinted sheets, simple pencils, paints, brushes, napkins. After class: Examination of children's work. Thematic exhibition: “What is New Year” Type of activity: Modeling Topic: “Christmas tree toys-pine cones, bears and crackers” Program content: Teach children to create images of animals and toys. Develop a sense of form, proportion, eye, consistency in the work of both hands. Cultivate neatness. Preliminary work: Conversation about the upcoming holiday. Looking at Christmas tree decorations. Show a consistent way of working. Material: Plasticine, board, stack, napkin. After class: Examination of children's work. Thematic exhibition: “What is New Year”
Second junior group
Type of activity: Drawing
Topic: “Flag of Russia”
Program content: Induce a feeling of patriotism in children. Learn to convey the colors of the Russian flag. Learn to paint carefully.
Preliminary work: Conversation about the upcoming holiday. Looking at images of the Russian flag. Show a consistent way of working.
Material: Colored pencils, album sheet.
After class: Examination of children's work.
Thematic exhibition: “Happy Defender of the Fatherland Day”
Type of activity: Modeling
Topic: “St. George Ribbon”
Program content: Learn to convey the color scheme of the tape. Develop a sense of color and fine motor skills.
Preliminary work: Continue to instill in children a sense of patriotism for their homeland, respect for the defenders of the fatherland. Looking at images of the tape. Show a consistent way of working.
Material: Plasticine, board, stack, napkin, cardboard.
After class: Examination of children's work.
Thematic exhibition: “Happy Defender of the Fatherland Day”
Middle group
Type of activity: Drawing
Theme: "Soldier"
Program content: Teach children to draw a soldier in a long chenille, conveying in the drawing the structure, proportions and shape of a person. Develop your eye.
Preliminary work: Induce in children a feeling of patriotism for their homeland, respect for the defenders of the fatherland. Looking at images of a soldier. Show a consistent way of working.
Material: Landscape sheet, simple and colored pencils.
After class: Examination of children's work.
Thematic exhibition: “Daddy’s Day”
Type of activity: Modeling
Topic: “Funny helicopters”
Program content: Teach children to sculpt air transport (helicopter) using familiar sculpting techniques. Develop eye and fine motor skills.
Preliminary work: Conversation about the upcoming holiday. Create a desire to please dads with your crafts. Show a consistent way of working.
Material: Plasticine, board, stack, napkin.
After class: Examination of children's work.
Thematic exhibition: “Daddy’s Day”
Senior group
Type of activity: Drawing
Topic: “Daddy’s portrait”
Program content: Introducing children to a man's portrait. Learn to convey all the features of a particular person’s appearance. Develop your eye. Sense of facial shape and proportions.
Preliminary work: Examination of reproductions of paintings. Conversation about the upcoming holiday. Brief conversation about work. Show a consistent way of working.
Material: Landscape sheet, simple and colored pencils.
After class: Examination of children's work.
Thematic exhibition: "Daddy's Day"
Type of activity: Modeling
Topic: “Mug for Dad”
Program content: Learn to decorate a mug template as you wish. Develop imagination and imagination, fine motor skills.
Preliminary work: Conversation about the upcoming holiday. Create a desire to please dads with your crafts. Cultivate a caring attitude towards your loved ones. Show a consistent way of working.
Material: Template, plasticine, boards, napkins, stack.
After class: Examination of children's work.
Thematic exhibition: "Daddy's Day"
Preparatory group
Type of activity: Drawing
Topic: “Me and Dad” (pair portrait)
Program content: Learn to draw a paired portrait, trying to convey the features of appearance and mood of specific people. To develop an eye, to arouse interest in the search for visual and expressive means.
Preliminary work: Examination of reproductions of paintings. Conversation about the upcoming holiday. Brief conversation about work. Show a consistent way of working.
Materials: Landscape sheet, simple pencil, paints, brushes, napkins.
After class: Examination of children's work.
Thematic exhibition: “Daddy’s Day”
Type of activity: Modeling
Topic: “St. George Ribbon with Carnations”
Program content: Teach children to sculpt a decorative panel using familiar sculpting techniques. Develop imagination and imagination, fine motor skills.
Preliminary work: Conversation about the upcoming holiday. Brief conversation about work. Show a consistent way of working. To instill in children a feeling of patriotism for their homeland, respect for the defenders of the fatherland.
Material: Cardboard, plasticine, boards, napkins, stacks.
After class: Examination of children's work.
Thematic exhibition: “Daddy’s Day”
| Next > |
Text of the book “Lessons in visual arts in kindergarten. Middle group"
LESSON 4. MODELING. "BUNNY"
Software tasks.
Continue teaching children to sculpt animals using the ovoid shape (torso, head); convey in sculpting the characteristic features of the appearance of a hare (long ears, short tail), the different states of the animal (listening or calmly resting) through the different positions of its ears; consolidate the techniques of sculpting an ovoid and smearing parts to each other.
Material.
The teacher has a toy bunny, a figurine or a sculpted hare (sample) in a lying position; several Christmas trees, bushes (cardboard or plywood from a tabletop theater); parts of the bunny's body: two ovoids of different sizes, a thin cylinder. Children have plasticine, boards, stacks.
Progress of the lesson.
On his desk, the teacher lays out a sheet of white paper and places several bushes and Christmas trees on it, and behind one of them is a bunny.
Educator.
Look, children, this is a winter forest glade. Here grow... (fir trees, bushes). Quiet, quiet in the forest clearing. Nobody here. Oh! Who was that moving behind the tree? Yes, this is a bunny - long ears, short tail (puts the bunny in front of the children). Bunny, what are you doing here?
Bunny.
I ran away from the fox, hid behind the tree and rested. Now, if I were not alone, if I had many fellow bunnies, the fox would not have dared to attack us.
Educator.
Children, let's help the bunny, make comrades for him - there are many such long-eared bunnies.
Bunny, jump on this stump so that the children can take a good look at you, find out what shape your body and head are.
Bunny.
Let the children tell me what shape my head and torso are. What are they like? (On the testicle.)
Educator
. Who can tell me how to sculpt such a shape?
Children.
First roll the ball, then roll it lightly between your palms, roll it a little harder on one edge.
Bunny.
Right. You see, children, my head is rounded at the back, and in front my muzzle is slightly elongated and my body is the same shape.
Educator.
I already have a body and head sculpted for a bunny, similar to large and small testicles (shows). Children, who will show you how to connect the body and head so that they hold tight?
The child attaches the head to the body and names the method of attaching the parts.
The teacher shows the children a cylinder and asks what can be fashioned from it (ears) and how to do it (cut the cylinder into two even parts with a stack, slightly flatten them and sharpen the ends with your fingers).
The teacher performs all the necessary operations or calls the child to show how to sculpt the ears of a hare.
Educator.
Here's your first comrade, bunny! Why are your ears down and lying on your back?
Bunny.
It’s calm here, there’s no fox, and I’m resting. But if I hear any rustling or steps, I will immediately raise my ears up, just like my new friend raised his ears.
The teacher invites the children to start sculpting bunnies, having first asked where they will start working.
During the lesson, he monitors the modeling methods, clarifies their names through questions, asks children about the position of their bunnies’ ears and connects this with the state of the animals (resting calmly, alert and listening).
Encourages those who have added additional elements to their work, for example, sculpted paws or given the animal a different pose.
At the end of the lesson, you can invite the children to place the sculpted bunnies in a forest clearing, wherever they want (by the Christmas tree, in front of a bush), or together with other bunnies, or one at a time.
The teacher asks the bunny if he is happy that he now has so many friends. Answers must be structured in such a way that they include an assessment of the characters sculpted by children (the shape of body parts, their proportionality, the position of the ears, etc.).
Everyone who wants to can play with the sculpted characters after class or in the evening should be given the opportunity to add a toy fox or wolf.
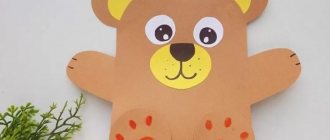
LESSON 5. MODELING. "TEDDY BEAR"
Software tasks.
Teach children to sculpt an animal from three parts of different shapes, observe approximate proportions between parts; convey the simple movement of the bear’s paws; consolidate the techniques of rolling, unrolling, flattening, joining parts by applying the technique of smearing; use a stack to draw details and cut plasticine.
Material.
The teacher has a sample - a sculpted bear (without legs) and separate parts of the same bear cub; box for sample and toy parts. Children have plasticine, boards, stacks.
Progress of the lesson.
The teacher shows the children a box tied with a ribbon: “I was in the store and bought two identical teddy bears for our dolls (Masha and Dasha). Here they are".
…
Rice. thirty
He looks into the box and exclaims: “Oh, one bear is intact, but the other fell apart!” He takes out the whole toy and parts of the second teddy bear. Lays it out before the children's eyes. "What to do? How do you know what it is? What is this? Confirms the children's answers that you can recognize the parts of a toy if you compare them with parts of a whole teddy bear. After all, the toys are the same.
The teacher offers whoever wants to “fix” the broken toy. He asks about the shape of each part - the body, head, ears, paws, and how it should be sculpted. Involve other children in the discussion. If the children do not know how to sculpt the round ears of a bear cub, he shows and explains: “The bear cub’s ears are small, so you must first roll two small balls. To do this, take a lump of plasticine, place it on your left palm and roll a small ball with the finger of your right hand. Then flatten it. You will get a round ear.” When the child connects all the parts of the toy and presses them together so that they hold tightly, the teacher says that now the children only have two teddy bears, but there are many dolls. Invites everyone to sculpt one teddy bear for each doll. Asks children about the sequence of modeling, how many parts the plasticine should be divided into, what size these parts will be.
During the lesson, the teacher monitors the modeling methods and asks about their names. When children attach paws to the cubs, he says: “The toys will be more interesting if the cubs can do something: for example, do gymnastics, hold something in their paws, or just wave them. Let each of you teach your little bear to do something.” If necessary, you should give children additional lumps of plasticine to sculpt certain items for the bear.
At the end of the lesson, the teacher says: “Our dolls heard that you have prepared gifts for them, and they really want to see them.” Demonstrates how to give a teddy bear to a doll: “Masha, I’m giving you this teddy bear. He has... (names some qualities). The little bear can wave its paw,” etc. Invites the children to take their bear cubs to the dolls and give them as gifts (the children do this in turns - two or three people at a time). Approves of those who told the doll about their teddy bear, what kind of animal it is and what it can do.
LESSON 6. MODELING. "TWO GREEDY BEARS"
Software tasks.
To instill in children a desire to work together, to develop the ability to negotiate with each other; learn how to independently arrange bear cub figures and convey the movements of the paws in accordance with the proposed plot; consolidate the ability to divide a lump of plasticine into parts, use familiar sculpting methods: rolling, rolling, flattening, smearing, smoothing; learn to use a stack to draw small details (eyes, claws at the ends of paws).
Material.
The teacher has an illustration by E. Rachev for the fairy tale “Two Greedy Little Bears,” two toy bears, a ball or a sculpted head of cheese, and additional lumps of plasticine. For two children, two lumps of plasticine, slightly different in size (for sculpting older and younger bear brothers), one stand for two, stacks.
Progress of the lesson.
“Children, I recently read you an interesting fairy tale,” says the teacher. – The artist Evgeny Rachev drew a picture for this fairy tale. Here she is (shows). Tell me who is drawn here and what fairy tale these animals are from.”
Confirms that the artist depicted two bear brothers from the fairy tale “Two Greedy Little Bears.”
“Where did the cub brothers go and what did they find on the road? I have two teddy bears. This will be the older brother (shows a larger teddy bear), and this will be the younger one. I'll put them one after the other.
So they walked along the road. The cubs were very hungry and suddenly found a round piece of cheese (he places a ball in front of the cubs). The cubs were delighted, ran up to the cheese and wanted to share it. How did they get up when they were about to share the cheese? Which one of you will place the cubs so that it can be seen that they are going to share the cheese?
One of the children changes the position of the cubs relative to each other. The teacher asks how the cubs now stand (opposite each other).
“Now you two will fashion two greedy bear cubs. Look at your lumps of plasticine. Are they the same or different in size? (One is smaller, the other is larger.) So, one of you will sculpt an older brother, and the other a younger one.
And when you’ve sculpted it, place the two bears on one stand, so that you can see that they were going to share the cheese.”
The teacher asks where the children will start sculpting bear cubs (by dividing a lump of plasticine into parts). In the process of work, he watches in what ways the children sculpt different parts of the teddy bear, and how they fasten them together. For those who want to sculpt bear cubs standing on their hind legs, he suggests taking additional lumps of plasticine from a tray on your table. To ensure the stability of the figures, he advises making the paws short and thick and spreading them slightly. It suggests that with a stack you can draw not only the eyes, but also the claws at the ends of the cubs’ paws using short lines.
By the end of the work, the teacher distributes one lump of plasticine to two children for making cheese. The children themselves decide who will make the cheese.
“What should be done with the paws of the bear cubs so that it can be seen that they are both holding a head of cheese? Or is one grasping the cheese, and the other stretching out its paws to it?” (Stretch your paws forward.)
At the end of the lesson, place stands with sculpted bear cubs on the table and invite the children to look at their work. Say: “The greedy bear cubs wanted to divide the cheese equally, but each was afraid that the other would get more. And you know how it ended. You have sculpted bear cubs who are about to share the cheese. How are they worth? (Opposite each other.) How do you hold your paws? (Point to works where one has grabbed a head of cheese, and the other is stretching out his paws to it.) Is the older or younger bear holding the cheese? How did you find out that the eldest (junior)?” You can address two children who were doing a common job with the following words: “Did you sculpt these bear cubs alone or together with Vasya? Which of you sculpted the older brother, which the younger?
Finally, be sure to ask everyone if they enjoyed sculpting together. To say that together, together, we can do more and more interesting things. The artist Rachev drew the bear cubs, and the children sculpted them as described in the fairy tale “Two Greedy Little Bears.”
LESSON 7. INTRODUCTION TO SCULPTURE OF SMALL FORMS
Software tasks.
To introduce children to a new type of fine art - small-form sculpture; teach to understand the content of sculpture and its means of expression; give an idea that the sculpture is made from different materials.
Material.
The teacher has animal figurines (4–5 pieces), made of porcelain or earthenware, wood, metal, ceramics, glass, etc.; turntable or tablet, book illustrations with images of animals.
Progress of the lesson.
The teacher says that in book illustrations, children saw how artists depicted animals.
“Look at the fluffy, mustachioed, striped kitten, which was painted by the artist Lebedev. Look at the elegant sly fox by artist Rachev. But there are artists who do not depict animals with paints and pencils, but make them from different materials.”
The teacher places the animal figures one at a time on a turntable or board and slowly turns them so that the children have the opportunity to examine the sculpture from all sides.
He asks who it is and what he’s doing. Names the material from which the figurine is made. For example: “This is a squirrel, she crouched down and looks back. Probably some noise was heard, the squirrel became wary and looked to see what was there? It's made of porcelain." When showing a sculpture, it is necessary to bring children to an understanding of the means by which its author conveys the state or character of the animal (posture, movement, emphasizing certain features).
Having examined in detail three figures made of different materials with the children and placing a book illustration next to them, the teacher says that the artist who depicts an animal with paints shows it only from one side: “This cat (dog...) is drawn from the side. We don’t see what it looks like from the front or back. But we can look at these figures from all sides. They are voluminous. Those craftsmen who create such figures are called sculptors.”
The teacher adds one or two more animal figures.
You can draw children's attention to the fact that some of the figures are painted by sculptors - these are animals made of porcelain and ceramics. Other figures remain unpainted; they are metal, wood, glass, etc.
In conclusion, you can invite the children to show the figurine they like best and describe it (who it is, what it does, what it is, what it is made of). Next, ask who has figurines at home, and invite them to look at them carefully in the evening, and the next day tell the teacher and friends about them.
LESSON 8. MODELING. “THREE FOR FOREST ANIMALS”[3]
Software tasks.
To develop in children the ability to create their own ideas; teach techniques for sculpting an animal; combine children's works into a common composition; learn to independently apply familiar working methods in modeling.
Material.
The teacher has a screen on which are pasted children's drawings depicting a winter forest, a plastic or cardboard Christmas tree, toy Snow Maiden and Santa Claus or their cardboard images on a stand; toy fox and squirrel or animal figurines.
Progress of the lesson.
The teacher places a screen with a picture of a winter forest on the table. He tells the children: “Father Frost and Snow Maiden decided to arrange a Christmas tree for the animals in the forest (he places the Christmas tree, Father Frost and Snow Maiden in front of the screen). They can't wait to see guests for the holiday. Let's, children, sculpt forest animals and let them have fun around the decorated New Year's tree. Each of you will sculpt some kind of animal - a bunny, squirrel, bear or fox. You have already sculpted a bunny and a bear. Make a big fluffy tail for a squirrel, a sharp muzzle and a fluffy tail for a fox.” (Points to toys.)
The teacher asks several children what kind of animal they will sculpt. Those who express a desire to sculpt a squirrel or a fox are asked what these animals look like and praised for their desire to sculpt a new animal, which they have not worked on before in class.
During the sculpting process, the teacher helps the children remember certain features of the appearance of animals, asks about the methods of sculpting this or that part of the body, and about the relative size of the parts. Reminds us that small details - eyes, fur - can be indicated by a stack.
The teacher says that Father Frost and the Snow Maiden invite the little animals to dance around the Christmas tree. Invites children to place the animals' paws in such a position that they can dance in a circle. Invites children with sculpted animals to come to the table and arrange them in a round dance around the Christmas tree. On behalf of Father Frost and the Snow Maiden, he greets the animals: “Hello, squirrel! Get up in a round dance. And you, cunning fox with a fluffy tail, come to us. Well done, little bear, he took the long-eared bunny by the paw and, together with everyone else, stood by the Christmas tree,” etc. And you can invite the children to also hold hands, stand around the Christmas tree, sing a familiar New Year’s song and dance around the forest Christmas tree together with the animals.
In the evening, it is advisable to invite the children to play again.
LESSON 9. DRAWING. “THE BUNNY UNDER THE CHRISTMAS TREE”
Software tasks.
Continue to teach children to convey a simple plot in a drawing; maintain basic proportions between objects; consolidate the ability to depict a Christmas tree with branches gradually lengthening downward; through different positions of the hare’s ears, convey different states of the animal; consolidate technical techniques for drawing objects of different shapes and structures.
Material.
The teacher has an illustration of a hare sitting with its paws drawn up, a sheet of gray paper with an incomplete image of a hare (body, head, tail) to show how to draw ears and legs. Children have sheets of gray paper, close in shape to a square, gouache paints, soft brushes.
Progress of the lesson.
The teacher says that today the children will draw a Christmas tree and a bunny under it. The bunny was running away from the fox, saw a thick spruce and hid behind it. He sat down and tucked his paws under himself. Like this (shows illustration). Now the fox won't find him.
Reminds me that recently the children were drawing a Christmas tree under the snow. He asks which branches are at the top and which are at the bottom. Confirms that the spruce branches gradually lengthen downwards. It also reminds us that children sculpted a bunny and know what shape its body is (he traces the bunny’s body in the illustration with his finger), head, ears and tail. Invites one of the children to name the shape of the hare's body parts.
…
Rice. 31
He says that a bunny can be drawn in different ways. You can portray a calm bunny. He lowered his ears, pressed them to his body and rested. Or you can show in the picture how the bunny raised his ears and listens to see if the fox is sneaking.
The teacher attaches a sheet of paper with an unfinished drawing to the easel, asks the children which bunny to draw - calm or anxious, listening to rustling noises. After the children’s answers, he draws the hare’s ears in one position or another. Shows how to draw legs.
The teacher asks what the children will draw first - a Christmas tree or a bunny. Confirms that the Christmas tree is big, tall, and the bunny is small, so first you need to draw a Christmas tree. But where is it better to depict a Christmas tree - in the middle of a sheet of paper or a little to the side, so that there is room for the bunny?
During the work, the teacher reminds about the color of the spruce (dark green), the color of the hare (white), only the tips of the ears and tail are black. He asks some of the children what kind of bunny they will draw. Ensures that oval shapes are depicted correctly and that when painting the child does not go beyond the outline. He says that you can paint snow on the branches of a spruce tree and falling snowflakes with the tip of a brush. He advises not to draw too many snowflakes (otherwise the snowfall will be so heavy that you won’t even be able to see the white hare in the drawing).
At the end of the lesson, you need to compare two drawings in which bunnies are depicted differently: one with their ears down, the other with their ears up. Ask what this bunny is doing and what the other one is doing. "How did you find out? Show more drawings where the bunnies are calmly resting, and where they are listening.” Next, draw the children’s attention to the size of the tree and the hare, to the fullness of the design on the sheet of paper, to the beautiful combination of colors: gray, dark green and white.
LESSON 10. DRAWING. “SQUIRREL WITH MUSHROOM”
Software tasks.
Teach children to depict an animal based on an ovoid (torso, head), conveying its characteristic features in the drawing: a lush large tail, red color; maintain basic proportions between parts; convey a simple movement - a sitting squirrel holds a fungus with its front paws.
Material.
The teacher has a picture of a squirrel sitting on its hind legs, blanks: two ovoids of different sizes (body and head), a tail and legs for laying out on a flannelgraph, a sheet of paper for partially showing image techniques. Children have sheets of paper the size of 1/2 a landscape sheet, gouache paints, soft brushes. (To get a red color, mix orange and brown paints.)
Progress of the lesson.
In the first part of the lesson, children are seated in a semicircle, an easel with a piece of paper and a flannelgraph are placed in front of them.
“One artist loved to walk in the winter forest,” says the teacher. “And if I saw something interesting or beautiful there, I would draw it.” The last time he saw a squirrel on a branch of a tall tree. She sat on her hind legs, and held the fungus with her front legs and ate. I asked the artist where the squirrel found the mushroom in winter. After all, now they are not growing. The artist said that in winter the squirrel hides in a hollow in a tall tree, and in severe frosts it covers itself with its large fluffy tail like a blanket. And when she gets hungry, she crawls out of her hollow and runs to those branches on which she hung mushrooms to dry in the fall. She picks a fungus from a branch and eats it. This is the picture the artist painted when he returned from the forest.”
The teacher places a picture of a squirrel in front of the children. When examining, he draws their attention to the pose of the animal, to the shape of the body parts, to their relative proportions, to the location of the body and head. Emphasizes that their oval shape is similar to a testicle (ovoid). The head is rounded on one side and slightly pointed on the other. Near the head, the squirrel's body is narrower than at the tail, and the head tapers at the muzzle. At the same time, he circles the body and head of the squirrel with his finger.
…
Rice. 32
Next, the teacher invites the children to portray a squirrel together.
“You will lay out a squirrel from parts on a flannelgraph, and I will look at the flannelgraph and draw a squirrel in parts on a sheet of paper. If you make mistakes, then my squirrel will turn out to be different from the real one. Where should we start depicting a squirrel? (From the body.)
The teacher invites the child to the flannelgraph, offers to find the squirrel’s body among other parts and attach it to the flannelgraph in the middle. The child should give it a slightly inclined position. “Can I start drawing the squirrel’s body?” - asks the teacher. Draws the outline of the body and quickly paints it in one direction with wide lines using the entire brush, lifting it off the paper. Calls another child to the flannelograph and offers to attach the squirrel's head so that the narrowed end is in front (muzzle).
Draws a squirrel's head on a piece of paper. The remaining parts - tail, paws - are attached by other children. When depicting a tail, it is necessary to emphasize its length: “The tail is long, when it is raised, it reaches the squirrel’s head.”
Children should be drawn to the different lengths of the hind and front legs: “A squirrel’s hind legs are longer than its front legs, so it moves by jumping like a hare.” The rest of the details - ears, eyes, fungus in the paws - the children will draw themselves.
Before drawing a squirrel, you can use questions to repeat with the children the sequence in the image of the parts. As you work, ask the children about the color of the squirrel's fur (dark orange). This color is called red (if we are talking about animal fur). If there is any difficulty, you can invite the child to circle one or another part of the animal’s body with his finger.
At the end of the lesson, the teacher puts the children’s drawings on the stand and says: “How many red squirrels have gathered here! They probably came running from all over the forest to enjoy delicious dried mushrooms together.”
Pointing now at one squirrel, now at another, he emphasizes successful images of individual parts: “This squirrel has such a big and fluffy tail. It will not freeze in the most severe frosts. What other squirrel has a tail like that? (Children show.) This squirrel jumps well. Her hind legs are long. What other squirrels have long hind legs?” and so on.