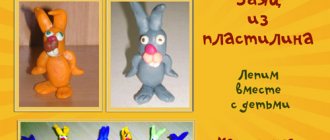
Summary of GCD in the senior group for modeling from plasticine “What animals live in the winter forest”
Summary of GCD in the senior group on modeling from plasticine
“What animals live in the winter forest”
Program content:
— Enrich children's knowledge about animals,
— Learn to sculpt animals from a whole piece of clay, convey movements.
-Develop a good eye
-Develop gross and fine motor skills
— Activate the dictionary on the topic
— Foster a caring attitude towards animals.
Methodical techniques
:
1. Use of artistic words (note the characteristic features of wild animals).
2. Inspection - list all parts (first large, then small).
3. Demonstration and reinforcement of sculpting techniques: pulling, pinching, smearing.
4. Survey of children (sequence of work).
5. Children's work.
6. Analysis (what did we want to do?; how?; we did it).
Material:
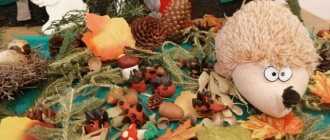
boards, stacks, plasticine, napkins, picture of a winter forest, audio recording
Preliminary work
: Looking at paintings depicting wild animals, toys, talking about wild animals and their habits. Guessing riddles. Reading works.
Progress of the lesson:
1. Game technique:
— Today I received a parcel from old man Lesovich. In the parcel there are lumps of plasticine and a letter
"Dear Guys! The evil Baba Yaga turned all my animals into lumps of plasticine. Help me get my animals back!”
- Do you agree to help the old forest man?
- How can you do this? (children's answers).
- Guys, take a lump each and put them on the board. But until I tell you to start working, you cannot touch the lump, otherwise you will not be able to disenchant it (the children take their seats).
2. Examination
-Guys, you have lumps of plasticine of different colors. What animals did Baba Yaga enchant? (children's answers)
- First name all the large parts found in all animals (torso, legs, head, tail).
-Which part of the body is the largest?
-How are animals different?
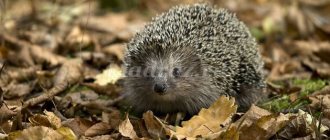
-What kind of head does a fox have? (elongated muzzle, triangular ears).
- What kind of tail does a fox have? (children's answers).
- Yes, the tail is fluffy and big. Even the riddle says this:
"Taller than a cat"
Lives in a hole in the forest.
Fluffy, red tail,
We all know the fox."
-What other animal also has a fluffy tail? (children’s answers)
-What is the difference between a squirrel and a fox? (children's answers)
-What are the features of the hare’s appearance? A bear? (children's answers)
Finger gymnastics “Wild animals”
Alternately connecting all fingers with the thumb, starting with the index finger and ending with the little finger
Hedgehog, bear, badger, raccoon
They sleep in winter all year round (change of hands)
Wolf, hare, lynx, fox
And in winter you will find in the forest
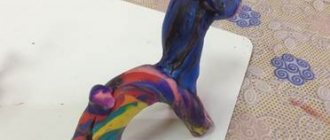
- Now we will talk about how we will sculpt animals, what techniques to use.
We will make the head of the animals using the pulling technique, let's show it in the air together
We use the same technique to make the front and hind legs of animals. We use the stack for cutting.
The teacher shows how to sculpt ears.
— I pinch my ears with two fingers. Who has ears like that? (children's answers, a bear)
- On both sides with two fingers we give a triangular shape to the ears of the fox and the squirrel. And the ears of the hare are made by rolling out from a separate piece of plasticine
— You can sculpt the tail for the squirrel and the fox yourself using a direct method.
-What is the best way to make tails for a hare and a bear? (children's answers)
- How can you depict the fur of animals? (stack) .
3. Children's work (musical background)
.
While working, I watch children. Sometimes I provide a little help with a child’s hand or on my own sample. I draw attention to the characteristic features of the animal.
4. Summary
- Guys, old Lesovichok is already waiting for his animals.
- What did we want to do? (help Lesovich).
- Did we succeed? (Yes). How? (fashioned) .
- Lesovichok is grateful to you for helping him disenchant the lumps and turn them into his favorite animals.
Summary of OOD on modeling in the preparatory group “Wild Animals”
Kalugina Valeria Anatolevna
Summary of OOD on modeling in the preparatory group “Wild Animals”
Summary of OOD on modeling in the preparatory group
Topic: " Wild Animals "
Goal: Creating conditions for the development of children's creativity through modeling .
-Create conditions for developing the ability to sculpt an animal in motion , conceive an image, divide the material into the required number of parts of different sizes, convey the shape and proportional relationship of the parts.
-Create conditions for the development of creative imagination, attention, memory, fine motor skills. speech activity.
— Create conditions for nurturing a love for animals and a desire to care for them.
Interaction: Children - children. Children Adults.
Sculpting and age
At what age can you start sculpting with plasticine? As early as one and a half years old, you can give your baby a ball and show him how to knead it. Of course, it makes no sense to want a child to mold an elephant or a cow at this age, but he can make simple blanks that you will already assemble for him into this or that animal. At the age of three to five years, children are already able to create simple figures of animals and birds on their own. And at six years old, a child can sculpt more complex options, guided by diagrams or master classes. In addition, at this age he is already using his imagination to the fullest extent.
As you can see, figuring out how to mold animals from plasticine is not at all difficult. The main thing is not to be afraid to use different materials and your own imagination. And also follow the diagram or instructions for creating various animals. Any child will be happy to share this exciting activity with you, and you can create a huge zoo or a whole farm for games.
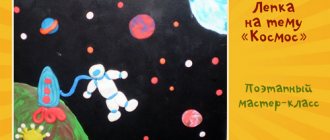
Olga Maslekha
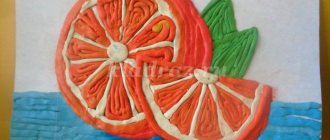
Summary of GCD for modeling in the second junior group on the theme “Hedgehog”
Topic: " Hedgehog"
»
Tasks :
1 To develop an interest in working with plasticine;
2 To strengthen children’s skill of plucking small pieces of plasticine from a piece and rolling them into balls with a diameter of 5-7 mm;
3 Strengthen children’s ability to smear plasticine on cardboard using pressing movements of the index finger;
4 Fix the navk and place the plasticine balls at an equal distance from each other;
5 Develop fine motor skills;
6 Cultivate neatness;
7 To develop aesthetic perception in children;
8. To foster in children a sense of empathy for the characters and a desire to help them;
9. Promote positive emotions in the process of mastering basic sculpting
;
10. Improve hand-eye coordination.
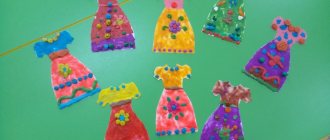
Materials: Demonstration material: Toy hedgehog
,
Handout: Sheets of cardboard with a hedgehog
without needles according to the number of children; gray or black plasticine in bars; plasticine rolled into balls with a diameter of about 5 - 7 mm, at the rate of 10-15 balls for each child, wet wipes for hands.
How to choose the right plasticine
Plasticine is different from plasticine. In order for the work process to bring only pleasure, you need to choose the right plasticine. If you will be modeling with children, it is better to choose a plasticine substitute. This is a special mass for modeling that does not need to be kneaded before use. It also has pleasant fruity scents. This mass is completely incapable of harming a child, even if he decides to chew it.
Its only drawback is that it dries quickly when exposed to air. For older children, you can completely use regular plasticine. It comes in soft, hard and medium soft. Soft plasticine does not hold its shape for long and collapses under the influence of its own weight, while hard plasticine is practically impossible for a child to knead. It follows from this that medium-soft plasticine is best suited for modeling. It is better not to use hard plasticine when working with children.
Why is it so pleasant to crush plasticine in your hands?
It’s not in vain that I devoted a large article specifically to plasticine crafts, because this activity is one of the most useful for the development of a child. We are all already literate and know how important it is to train fine motor skills. In addition, by kneading the plastic mass, children develop imagination, logical thinking, and memory.
After all, you don’t just need to crush plasticine, but to form a product on a given topic.
The child, moving towards the goal of sculpting a figurine, develops patience, perseverance, and perseverance;
When he decides which color to choose and how to combine different pieces and colors, he develops abstract thinking, artistic taste, and creativity;
By rolling a ball or sausage, children develop coordination of movement and self-regulation;
Modeling from clay or other materials is extremely useful for the nervous system, it is not for nothing that this activity is one of the elements of psychotherapy. It is especially useful to sculpt for children with an excited nervous system; they will calm down and sleep better;
This type of art can also be used to rid a child of fears: let the child blind his fear and then crush the figurine or remake it into something positive;
At home, modeling will help you and your baby grow spiritually together and strengthen emotional contact;
And in general, by creating their own works from plasticine, the child independently builds a kind of bridge between the world of fantasy and reality. He feels important when he creates.
Leave your comment
Gift certificates
Responsibility for resolving any controversial issues regarding the materials themselves and their contents is taken by the users who posted the material on the site. However, the site administration is ready to provide all possible support in resolving any issues related to the work and content of the site. If you notice that materials are being used illegally on this site, please notify the site administration using the feedback form.
All materials posted on the site were created by the authors of the site or posted by users of the site and are presented on the site for informational purposes only. Copyrights for materials belong to their legal authors. Partial or complete copying of site materials without written permission from the site administration is prohibited! The opinion of the administration may not coincide with the point of view of the authors.
Source
Basic techniques for working with plasticine
Modeling animals from plasticine is a step-by-step process. There are basic shapes that serve as the basis for creating various elements.
These are the ball, cube, pyramid, cake, drop and strip. A cube is formed from a ball by squeezing and pressing it on four sides, and then it can be rolled out using a rolling pin, or left in the shape of a cube, finally aligning the edges with a flat stick. Or, for example, the “drop” shape is also created from a ball. In this case, the round workpiece from one edge begins to be gradually compressed and stretched to the desired size.
How to sculpt animals from plasticine with your own hands step by step
In this modeling lesson for children you will learn how to make a plasticine bear with your own hands in just 8 steps step by step
This detailed photo tutorial tells you how to make a plasticine hippopotamus with your own hands in 9 steps.
In this detailed modeling lesson for children, we will show you how to make a donkey from plasticine with your own hands step by step.
In this detailed tutorial with large photographs we will show you how to make a husky dog from plasticine with your own hands step by step
In this step-by-step photo lesson for children, we will show you how to make a lemur from plasticine with your own hands step by step.
Thanks to our detailed tutorial with photographs, now anyone can make a leopard from plasticine with their own hands, step by step.
In this detailed photo tutorial we will show you how to make a plasticine panda with your own hands step by step. It's simple and fun!
In this detailed lesson we will show you how to make a cheetah with your own hands from children's plasticine step by step, in 11 steps.
In this lesson we suggest you make a long-haired Yorkie dog from plasticine with your own hands step by step.
In this step-by-step modeling lesson we will show you how to sculpt a poodle from plasticine with your own hands in just 11 steps with photographs.
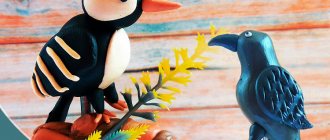
In this step-by-step modeling lesson, we will mold you a bird that symbolizes peace and family well-being - a do-it-yourself plasticine stork.
In this lesson, we invite you to make an absolutely harmless little lioness from plasticine with your own hands in just 10 steps with a photo.
Thanks to our step-by-step photo lesson, your child can easily mold a lion cub from plasticine with his own hands in 11 steps.
In this photo modeling lesson we will show you how to sculpt a purebred Dalmatian dog from plasticine with your own hands step by step
Now we will show you how to make a penguin for a child out of plasticine with your own hands in just 10 simple steps with large photographs.
In this photo tutorial we will show how to make a bull from plasticine with your own hands in 12 simple steps for a child step by step. Come in, you'll like it.
In this simple photo tutorial you will learn how to make a zebra for a child from plasticine with your own hands in 12 simple steps.
In this photo tutorial you will learn how to make a jellyfish for a child from plasticine with your own hands in 9 simple steps step by step
In this step-by-step tutorial we want to show you how to make a hammerhead shark from plasticine with your own hands in just 8 steps.
In this photo tutorial we will show you how to make a bison from plasticine with your own hands in 10 steps step by step
What you need for work
In addition to the plasticine itself and your own fingers, you will also need some tools, such as a modeling board, a special knife, and a roller for rolling out the plasticine. Stacks will also help you in this matter. They are special plastic knives with which you can not only cut the plasticine mass, but also crush it or create grooves and dents of various shapes on the surface. You will also need matches or toothpicks to connect the individual parts together. Among other things, wet wipes will be useful for cleaning your hands while working, as well as a diagram for sculpting animals from plasticine, which explains the whole process step by step, instructions or a master class. Guided by such material, you can easily master the entire process of sculpting an animal, both wild and domestic.
Preparing for sculpting
Before you start learning how to make animals from plasticine, you should take care of preparing your workplace. The surface of the table at which modeling will be done should be well lit. In addition, you should protect your workplace from plasticine. It is for such purposes that special boards are used. But if you don’t have one, you can simply cover the table with a piece of oilcloth so as not to get it dirty. For kids, you can stock up on various shaped molds, and then sculpting animals from plasticine will become an even more exciting activity. You can also purchase special gloves for handles so that the plasticine does not rub into the skin during work.