Methodology for compiling notes
Work on drawing up a lesson plan begins with formulating goals and objectives. The main goal-setting factors in sculpting a moving person can be called:
- learning to make a complex plot composition;
- work on the ability to maintain the proportions of the body and other related elements of the composition;
- cultivate independence and patience.
The objectives of the lesson are more specific:
- fix the method of creating a cylinder roller to create the base of the figure;
- development of the ability to convey simple body movements with a molded structure (bending arms/legs, tilting the body);
- training to convey the dynamics of human movement;
- continue to work on smoothing;
- consolidation of the skill of conveying the dynamics of the human body in plastic material;
- repeat the studied geometric shapes (circle, oval, cylinder, ball, etc.);
- develop the ability to work with a stack;
- continue to train fine motor skills, eye and visual perception;
- expand the boundaries of imagination;
- cultivate accuracy in working with plasticine.
After the goals and objectives are formulated, the teacher needs to plan the stages of the lesson so that every minute is used, and the children, accordingly, do not have time to be distracted.
- Introductory part - 5 minutes. This is the time to motivate the little ones to work.
- The main stage is 20 minutes. During this period of time, children complete a craft. Please note that this part of the lesson involves mandatory physical education and finger exercises.
The lesson notes must include time for physical education.
- The final stage is 5 minutes. Exhibition of works, words of gratitude for good work from the teacher, self-analysis. As for the latter, children, answering questions, evaluate their work, the crafts of their comrades and express their emotions regarding the activity as a whole: “Did I turn out a good little man?”, “Which craft do you like best?”, “What Did you like the lesson and what didn’t you?”
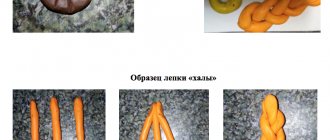
Example of a lesson summary (abbreviated) - table
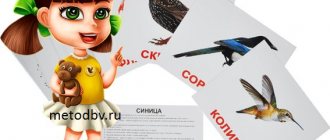
| Kargina Natalya “Winter fun, sculpting a human figure in motion” | The teacher shows the children cards with a schematic image of a man in motion. Next, he demonstrates the pose of a person in motion using a visual aid - a human figure. Draws children's attention to how the skier's arms and legs are positioned. After becoming familiar with the characteristic features of a person in motion, the teacher asks the children a question: “Guys, how should a skier be dressed?” Children's answers: “He should have a warm jacket, pants, mittens, scarf, boots.” Educator: That's right. Now let’s each of you create your own skier and choose your own color of clothes for him. |
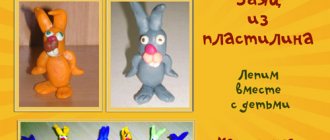
Sequential execution:
Educator: Well, our skier is ready. What a great fellow you are. What good skiers we have! | |
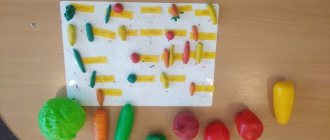
| The teacher sums up the lesson: The guys put their skiers on the snowy plain of a layout prepared in advance, called “Winter Walk”. (The teacher prepares a platform made of foam plastic and corrugated paper in advance). They look at who got what. Educator: Guys, now you can imagine yourself in the role of your sculpted skiers and play with them at the model... |