Nazilya Khismatullina
Thematic applique with drawing elements “Visiting the Sun”
TASKS:
— Teach children to draw simple plots based on fairy tales.
— Reinforce the technique of cutting round shapes from squares of different sizes.
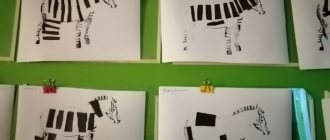
— To lead to an understanding of the generalized way of depicting different animals (chicken and duckling)
in applique and drawing - based on two circles or ovals of different sizes
(torso and head)
.
— Develop a sense of color, shape and composition.
— Foster independence, confidence, initiative.
MATERIALS, TOOLS, EQUIPMENT:
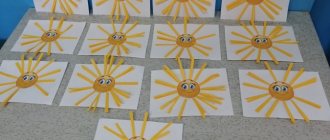
Sheets of white and blue paper for the background, yellow or orange paper squares of different sizes: the largest for the sun, medium-sized for the body of a duckling and chicken, the smallest for the head (thus, each child should have a set of one large , two medium and two small squares); scissors, glue, glue brushes, colored pencils and markers, paper and cloth napkins. Two or three versions of the composition “ Visiting the Sun ”
for showing to children.
Pedagogical development
Author:
Olga Gennadievna Mitrofanova
Position:
teacher
Educational institution:
MBDOU "Kindergarten No. 256"
Settlement:
Barnaul city, Altai Territory
Name of material:
Summary of organized educational activities in the middle group "The Sun is Visiting"
Topic:
Summary of educational activities in the middle group " Visiting the Sun"
Date of publication:
09.12.2019
Section:
preschool education
Municipal budgetary preschool educational institution
"Kindergarten No. 256"
Summary of organized educational activities
"Visiting the Sun"
Age group:
average
Author, position:
Mitrofanova Olga Gennadievna, teacher
Summary of the final OOD in the middle group
"Visiting the Sun"
Target:
generalization and consolidation of children’s ideas received during
- create conditions for strengthening children’s ideas about the seasons,
parts of the day, wintering and migratory birds;
- promote the consolidation of ideas about geometric shapes;
- continue to encourage children to intonationally highlight the sound in a word and assign
this sound to the corresponding iconic image;
— contribute to the expansion and activation of children’s vocabulary.
- promote the development of visual attention, perception, speech hearing,
- create conditions for the development of the ability to generalize and draw conclusions.
contribute
FORMATION
in mutual understanding,
goodwill, independence, initiative;
- create conditions for stimulating creative imagination, accumulation
positive emotional experience.
depicts chickens, magpie, hare, duck and hedgehog); hats for children: snail,
magpie, hare, duck, hedgehog, month, sun; "garden"; ball; pictures “Wintering and
migratory birds"; cards with pictures of vegetables; cards with numbers;
"Creek"; "duck house"; geometric figures; "tree"; pictures in titles
which have the sounds “p” or “p”; starry sky and stars; "House of Sun";
pictures depicting the sun or clouds; musical accompaniment.
Preliminary work:
reading the fairy tale “Visiting the Sun”, talking about
seasons, a conversation about migratory and wintering birds, a conversation about vegetables and
MAGAZINE Preschooler.RF
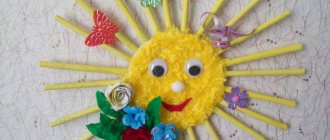
Summary of a lesson on application in the middle group “And the Sun has clear rays”Prepared by teacher Yakovleva E.S. 2021 Municipal budgetary preschool educational institution "Shemurshinsky kindergarten "Romashka"
Program content:
Educational objectives: learn to create an image - a symbol of the Chuvash pattern depicting the sun, arranging the elements of the pattern and gluing them to the base.
Developmental tasks: develop children’s ability to place shapes throughout the sheet, as well as the ability to compose a simple pattern of geometric shapes on a square; develop aesthetic taste.
Educational objectives: to cultivate interest and emotional responsiveness to the means of artistic expression of works of Chuvash applied art.
Vocabulary work:
Activate children's vocabulary with words: rays, sun, pattern.
Methods and techniques:
- A surprise moment - the Ilembi doll invited the children to visit.
- Examination of the pattern on the doll's dress.
- Questions:
-What does the pattern look like?
— Does the pattern look like a sun?
- What does the sun have?
4. Game “Sun Rays” (children lay out rays on the floor from satin ribbons to the model of the sun).
5. Making napkins for the doll’s girlfriends.
6. Demonstration of a sample method of action.
7. Laying out the pattern details on the prepared square.
8. Physical school.
9. Encouraging children.
10. Instruction, reminder.
11. Examination of symbol patterns on a multimedia installation
12. Outdoor game “Sun and Rain”
Preliminary work:
- Drawing the sun
- Learning the outdoor game “Sunshine and Rain”
- Learning physical education
Material and equipment
- Doll in national costume
- Fine model of the original pattern (symbol of the sun)
- Napkin with a pattern.
- Cards with drawings of patterns and their semantic meaning.
- Hoop covered with fabric.
- Colored ribbons.
- Attributes for an outdoor game (sun and cloud)
- Handout: red cardboard 15*15 cm, yellow and green pattern elements 2 pieces each, glue, napkins.
Progress of the lesson:
Educator: Guys, we have guests today, say hello! (Children say hello). Now come to me and see who is waiting for us? This is a doll. Her name is Ilembi. Let's come closer and see how elegant she is. Guys, the doll has a beautiful dress, and unusual patterns are embroidered on it.
Children look at the doll and the patterns on the dress.
Educator: What does this pattern look like? (children's answers). Well done! And it seems to me that this pattern resembles the sun. The sun has rays and this pattern also has rays. The rays look in different directions to keep everyone warm. Does this pattern look like the sun?
Children: Yes!
Educator: Guys, Ilembi is telling us something. Ah-ah-ah, I understand. She reminded me of an interesting game. Now you and I will play it, and the doll will sit next to you and watch.
Educator: I have a circle. Now we will make a sun out of it. Look how big the circle is (puts it on the floor). There is a circle, but what is missing?
Children: Luchikov.
Educator: That's right, the sun doesn't have enough rays. We will make rays from ribbons. Our doll has these ribbons. Look, here they are (takes out colored ribbons that are on a tray and shows them to the children). We will lay out the rays like this: first we will lay out a yellow ray, then a green one, then again a yellow one, and so on until we have laid out all the rays; Our rays are straight (shows how to lay out ribbons on the floor). Come to me, I will give you ribbons (hands out ribbons to children).
The game "Sunshine"
(children lay out rays from colored ribbons on the floor).
Educator: Look what a beautiful sun we have created! Well done! Now, guys, help me clean everything up (children help clean up the attributes). Our doll has a beautiful scarf! (Takes out a napkin that is located on the doll’s apron.) Look.
Children look at the napkin.
Educator: There is a sun on this napkin. And he has rays. The rays are colored, on a napkin they are located one after another. Our doll has girlfriends, but they don’t have such beautiful scarves. Can we help the doll make handkerchiefs?
Children: Yes!
Educator: Sit down at the tables, guys. Place a handkerchief in front of you, and now arrange the rays on it as on my handkerchief
Sets up an easel on which the sample is placed.
Educator: The rays look in all directions, up and down, right and left. Guys, are the rays different colors or the same? (Children's answers). That's right, rays of different colors. And on our handkerchiefs we will arrange the colors in order: yellow, green, yellow, green.
Children lay out the details of the pattern on their blanks.
Educator: Spread out? Well done! Now let's play. Stand near your chairs.
Physical school is being held.
Guys, let's call the sun!
Sunny, little bucket, (they wave their hands invitingly)
Look out the window! (one hand above the head, the other under the chin - depict a window)
Your kids are crying (pretending to cry)
They jump on the pebbles. (jump up)
Educator: We played, now sit down at the tables, let’s glue our rays. First, take the top yellow ray, turn it over, and spread it with thin glue. Spread glue over the entire ray; Carefully, evenly place the ray in its place, pressing it with a napkin. Then we take the green ray, then the yellow one, and now the green one again. Glued? Well done!
Educator: Take your tissues and leave the tables. Look how many beautiful scarves you have made. Give them to Ilembi doll so she can give them to her friends. How happy the doll is. We have the sun on our scarves and the sun on our dress.
Children place their work on the high chair where the doll is located.
Educator: Look at this big screen, everyone.
Displaying illustrations of patterns-images on a multimedia installation
Educator: What do you see on the screen? That's right, it's a tree, and this is how you can show a tree on a handkerchief. This is a pattern. This is a house, and this could be a house on a handkerchief. This is also a pattern. Say in unison: pattern.
Children (in chorus): Pattern.
Educator: Well done! Patterns may vary. Next time we will make other patterns on handkerchiefs. Guys, the sun has come through our window. Here it is (takes out attributes for the game).
The outdoor game “Sunshine and Rain” .
Educator: Did you like making handkerchiefs today? Did they turn out beautiful? Next time we will make other patterns on handkerchiefs? Say goodbye to the doll and the guests.
The children say goodbye and leave.
| Next > |
Summary of “Visiting the Sun” in the middle group. Application
Lesson summary “Visiting the Sun”
(world around us, 2nd teen group)
Goals:
- Introduce children to Russian folklore;
- Encourage children to communicate and develop speech;
- Consolidate knowledge about the sun (what is it for? what is it like?);
- The sun gives us light.
- Continue to introduce the unconventional way of drawing with your palm.
- Develop aesthetic feelings for nature, teach to see its beauty.
- Develop color perception and hand-eye coordination.
- To encourage in children the desire to finish what they start.
Equipment: sheets of paper, gouache (yellow, red), saucers (for drawing with the palm of your hand), napkins, illustrations and sketches depicting the sun.
Preliminary work:
- Walking around the kindergarten area in order to observe the sun (during walks, the teacher teaches children to peer into phenomena, compare them, see what is common and distinctive, and with questions encourages them to find their own words and expressions to describe what they see);
- Telling the fairy tale “Visiting the Sun”;
- Examining the sun in illustrations, clarifying the shape and color of the sun;
- Learning songs and nursery rhymes about the sun;
- Guessing riddles about natural phenomena.
GCD move
1. Motivational stage.
The children stand in a semicircle.
Educator: Guys, what is the weather most often in the fall?
Children: Rainy, cloudy.
Educator: What helps us during rainy weather to move along the street and not get wet?
Children: Umbrellas!
Educator: Yes, guys, umbrellas are our faithful helpers. An umbrella protects us from the rain and prevents us from getting wet. I have an umbrella, but it’s very gloomy. (The teacher gets a black umbrella for the children)
. Please tell me what can be done with it to make it bright?
Children: Decorate it!
Educator: This is a great idea, but will you help me decorate my umbrella?
Children: Let's help!
The teacher invites the children to glue pre-cut silhouettes of drops and circles from self-adhesive paper onto the umbrella.
Educator: Guys, what a bright and beautiful umbrella we have! Thank you, you are great! But suddenly it might rain, and we only have one umbrella, and we won’t be able to fit everything under one umbrella. I suggest you each make your own umbrella!
II. Search and research stage.
The teacher invites the children to sit down at their desks.
Educator: We will now cut out beautiful, elegant umbrellas from colored paper to hide from the cold autumn rain.
The teacher displays versions of umbrellas made using the applicative technique on an easel or board.
Educator: Umbrellas are so different, but you can cut them out in one way, and then decorate each one in your own way.
The teacher clarifies and explains using partial demonstration.
“Fold the rectangle in half and from the top point of the fold draw an arc with scissors to the bottom corner, open it and see the dome of the umbrella. Now let’s think about how this umbrella can be designed.”
Children express their assumptions, the teacher encourages them, noting interesting and original ways.
— Before we get to work, let’s do finger exercises
"Rain"
It started to rain for a walk. (The index and middle fingers of both hands “walk”
on the table)
He runs down the alley.
Drumming on the window
Scared the big cat, they bend one finger at a time
Washed the umbrellas of passers-by, both hands on each line
The rain also washed out the roofs.
The city immediately became wet. They shook their palms, as if they were shaking water off them.
The rain has stopped. Tired. Place your palms on the table
Offers to get acquainted with new ways.
“We need one way to decorate the edge of the umbrella so that it becomes like a real one. Here we cut out the “teeth”
(movement with scissors
“zigzag”
, or
“top”
(movement with scissors
“wave”
) We will need another method to decorate the dome of the umbrella. Look: I lightly spread the dome with glue, and sprinkle confetti or scraps of rain and tinsel on top. You can also use your own design method. Don't forget about the handle by which the umbrella is held. Cut out a strip and stick a handle to it - confetti, or cut out a circle, triangle from paper. I suggest you choose the background color on which you will glue your umbrellas and the color of the paper for the umbrella itself. Let's get to work."
Children choose the material for the applique as they wish and begin to cut out umbrellas.
If the teacher sees that one of the children needs individual help or the child himself asks for help, then the teacher provides help by example.
If the teacher sees that one of the children is already finishing their work, he suggests cutting out raindrops and gluing them to the background, as if it were already raining.
The teacher reminds children about finishing work up to 3 times.
Educator: Guys, I remind you that the time allotted for the lesson is ending.
III. The final stage.
Educator: Guys, what bright and beautiful umbrellas you have made! I suggest you stand up and hang your work on the board.
Children hang their work on the board.
Educator: Guys, look at your work carefully and tell me who got the brightest umbrellas?
Educator: What umbrella do you want to walk under?
Educator: Is it already raining outside and an umbrella keeps him from getting wet?
Educator: Well done, guys, I really like your umbrellas! Now we are not afraid of getting caught in the rain, because we have such wonderful bright umbrellas!