Number and figure 2
And here is our second student. This is Fairy. At our school, she not only learns magic, but also tries to master mathematics. The fairy will help us get acquainted with the next number.
She used to be an ordinary girl whose name was Vanessa. She loved butterflies very much and grew flowers in her garden so that moths would flock to their wonderful scent. one grew , and then another . And there were two .
So we'll get to know the number two.
Yellow flower - one, pink flower - two. We counted all the flowers in the garden. There are two .
The yellow flower bloomed first , and the pink flower second .
As soon as the flowers bloomed, butterflies flew to them: first one , and then another . And there were two .
Let's count all the butterflies: small butterfly - one , big butterfly - two . There are two . The small butterfly arrived first , and the big one came second .
The moths really liked Vanessa's garden, and they gave the girl two pairs of wings and magic pollen. Vanessa turned into the Butterfly Fairy.
A pair is two objects that cannot exist separately. The Fairy has two large wings (she will not be able to fly with one wing). And two small wings. This means she has a pair of large and a pair of small wings.
Look at Vanessa and name other pairs of objects she has.
It's a pair of eyes, a pair of hands. What else?
The fairy wants to tell you her first magic spell about the formation of the number: two is one and one more . You need to count like this: one, two . You can count in order: first, second .
Now let’s check how you remember everything. Look at the picture and say which items are in two.
Let's secure it.
Tell me, how many girlfriends flew to Vanessa?
That's right, alone.
Remember what you learned about the formation of the number two. How many more fairies must come before there are two of them?
Thought?
That's right, one more!
Because two is one and one !
How can you write down that there are two fairies, two flowers or two butterflies in the picture?
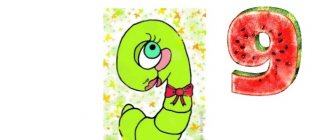
To denote the number two there is the number 2 . Look at it. It consists of a hook and a tail.
Our Fairy in this pose is very similar to the number 2.
What else does the number 2 look like?
Like a swan, an elephant's trunk, and even a long-necked giraffe.
Look at the picture and find the number 2 .
Try to make the number 2 from plasticine and attach two objects next to it. For example, like this.
Now let's talk about writing the number 2 in a notebook.
- We start writing the first element just below the middle of the upper border of the cell. We draw the line up and round it in the upper right corner.
- We lower the line to the middle of the lower border of the cell.
- Draw a wavy line to the right along the bottom border of the cell to its corner.
Print out the picture and practice writing the elements and the number 2 .
That's all. Together with Fairy Vanessa, we got acquainted with the number and number 2 .
Cards “Numbers from 1 to 10” - print each number on a separate sheet.
The sixth archive contains cards similar to the previous ones with numbers and mathematical symbols, but without names. In order to use cards for a long time, it is better to print them on thicker paper or laminate them.
It is quite difficult for a child to remember numbers, so the learning process needs to be given special attention, and most importantly, to make it fun and interesting. You need to study constantly, in a playful way, using visual materials and objects. Practice at home, on the street, in transport, in a store; such training, as a rule, brings the most unexpected results and is most effective.
If you are interested in a complete set of cards with mathematical signs and symbols for creating various examples and problems during lessons with your child, follow this link.
Download numbers from 1 to 10 “Blue”. Numbers and their names.
The fifth archive contains 11 cards with blue numbers from 1 to 10, starting from zero, each of which is located on a separate page. Under each number on the sheet there is also a name for the number. Additionally, we also included the mathematical signs “plus”, “minus” and “equals” in the set of cards.
When studying numbers with your child, it is necessary to direct all efforts to teach the child to compare the visual image of the number shown on the card with its quantitative value.
To print cards, use A-4 paper size. Even if you don't have a color printer, don't worry, when you print numbers on a black and white printer, the numbers will turn black.
How to write numbers from 1 to 10 correctly.
This manual will be useful to you after your child has learned and memorized 10 printed numbers well. In order for a child to learn to write capital numbers correctly, it is first necessary to demonstrate to the child the sequence of writing them using arrows using a clear example. Place the form on the table in front of the child, take a pen or pencil, and start circling the first number from the indicated point in the direction of the arrows, then invite the child to do the same. Then the second, third and so on, depending on how quickly the child remembers the writing sequence.
The form must be in sight of the child at all times so that he can check himself at any time. After the child has memorized these rules, you can proceed to the seventh point of this page, where the child needs to circle the numbers by dots, guided by this manual.
Download numbers - coloring pages from 1 to 10 with tasks.
These cards are good because during classes the child can combine learning with drawing. If you notice that your baby is tired and has stopped perceiving information carefully, take a break and invite your child to color pictures with a number that he has already learned. This way, the child will have a rest and will be happy to start learning the next number.
On the fourth form you will find two counting tasks for kids to reinforce the material covered. In addition, in the second task the child is asked to complete the patterns on the mittens in a mirror image. You can easily create such examples yourself using numbers, pictures and mathematical symbols that you print on the page.
“Numbers from 1 to 10” for printing in pictures.
You can print these bright and colorful picture cards with numbers from 1 to 10 on a color printer (A-4 paper). Cut each form into four parts along the indicated lines - and start teaching your child. Using these cards, you can independently come up with various tasks for kids, for example, similar to those that we have placed on the fourth form of the manual.
Cards with numbers from 1 to 10 and mathematical plus and minus signs.
By downloading the fourth archive, you will receive 2 forms with numbers and mathematical plus and minus signs, which are located on sheets in frames, 6 pieces on each. Cut out the frames along the lines and you will have a wonderful set of cards for introducing your child to printed numbers and teaching your child how to count to 10.
Your main task is to convey to the child that real objects are “hidden” behind the numbers and how interesting it is to learn how to count them yourself.
During classes, give your child as many visual examples as possible from the environment in counting, unobtrusively practice with him on a walk, while eating, playing - make learning fun and interesting.
