What do you need to prepare for work?
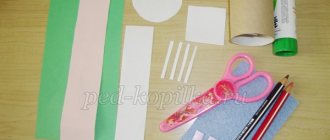
Before you start creating the image of a bird, you should prepare the following materials and tools:
- Plain slate pencils of varying degrees of hardness.
- Soft and hard eraser.
- Suitable paper for sketching.
- If the image is colored, you should get a set of pencils with high-quality leads that leave a bright, rich mark, but do not crumble.
- A picture of the bird itself that will be created.
Please note that the drawing of the original picture depends on the skill level of the draftsman. For beginners, it is better to take a simple image that is fairly easy to reproduce.
For those who are more experienced in drawing, you can take photographic images and reproduce naturalistic pictures.
Parrot
The colorful Macaw is in demand, so let’s boldly get to work and try to draw this bird step by step:
- We depict a large and small oval; they are smoothly united by a back line ending in a flowing tail.
- The volumetric fragment becomes the basis of the wing, wavy at the bottom.
- Add a convex nose-hook and an eye.
- Marked semicircles will help show how the colors on the head change.
When coloring, use a red and yellow pencil, additionally using a dark blue tone on the tail section and the edges of the wings. Violet and black colors provide relief to the feathers.
And the youngest creators will love the image of a tiny chicken. They will undoubtedly cope with this task.
- The body consists of two circles, painted yellow.
- We draw on the thin paws and beak; the orange fluff along the contours will give the baby some authenticity.
The proposed sketch options provide an answer to the question of how to beautifully draw different birds that are similar to the prototype.
Fine arts lessons not only develop artistic thinking in children, but also enrich them with knowledge about the environment, which is important.
What is important to consider when drawing a bird
Before you start drawing a bird, you need to learn some features:
- See the features of the skeleton and how it is located in relation to the verticals and horizontals.
- Pay attention to the location of the beak and its shape.
- Take into account the behavior of the bird, what position it occupies in space. Few people realize that a predator and a simple bird have so-called different statures. As a result, not everyone manages to convey the basic character of the image.
- When creating a silhouette, remember that you will have to draw feathers on it, which add even more volume. This is important to take into account so that the bird does not turn out to be too plump.
Experts in the field of drawing highly recommend that beginners, before drawing a bird step by step, study its anatomy in detail. Do this in different positions - when the bird is sitting, standing on its feet or flying.
Only in this case the drawing will turn out to be alive and will convey in maximum detail not only the appearance, but also the character of the representative of the animal world.
Eagle
- The proud master of heaven is extremely attractive.
- Having sketched out the bird's body, draw an open beak and a circle-eye on the head.
- Let's detail the picture.
- We frame the open wings with zigzag feathers.
- The tail section is lowered down.
A formidable predator sits on a rock or stump, clinging to it with powerful claws. On his paws are characteristic downy pants. It's not the most affordable offer, but it's worth a try.
Step by step drawing of a bird
When creating any bird, regardless of its size, detail or angle, you must follow the following step-by-step steps:
- Draw an oval forming the torso.
- Draw the head from the desired side.
- On the body and head we detail individual elements - beak, eye, wing, tail.
- Let's finish drawing the paws.
- After working out the individual elements, it’s worth moving on to drawing the plumage.
The technique of execution can be different - with a simple slate pencil or in color.
Features of bird paws and beaks
Depending on whether you are drawing a predator or an ordinary bird, it will have a certain shape of paws and beak.
It is they who form a predatory or pretty image, determined by their habitat and behavior.
Here's what they pay attention to:
- Predators have a sharp, hooked beak and the same claws. The paws are strong, powerful, the toes are quite large and long. It is necessary to note that the middle finger and the back finger can close in a circle - forming a powerful grip on the victim.
- Small small birds that eat plant foods have small legs. They are short, thin, adapted for sitting on branches, and, as a rule, are not curved. But its length can vary over a significant range.
- Birds living near bodies of water have long, thin legs. Or, in contrast, their legs are short with powerful webbed feet.
- She rewarded the runner birds with powerful legs. Their claws resemble nails in structure. The beak is most often short and wide.
- It is worth remembering that the legs of any bird are covered with scales, which are important to draw, regardless of the detail of the drawing.
Features of the beak image
To make the beak naturalistic, it is important to take into account subtle points:
- Determine the exact location of this part in relation to the head.
- Draw one line that will form the upper contour of the beak. Maintain the length.
- Draw a second line, which will be half the width of the beak from the first. Draw the bottom line of the beak, taking into account how the two parts overlap.
Features of the plumage image
Remember that the feathers must be drawn separately, each of them is a separate element. There is a line divided in the middle from which thin hairs run in different directions at an angle, forming the feather itself.
They overlap one another to create full plumage. The feathers on the wings and tail are larger. And the head and abdomen are covered with small elements with soft hairs.
Wise Owl
This peculiar representative of the fauna is a frequent hero of children's paintings.
- Her head is represented by a flattened ball, and her pointed body is connected to it by a smooth transition with the absence of a cervical bridge.
- The legs begin with small oval panties and end with claws.
- We finish drawing the pointed ears, a crochet nose and a wing.
- We highlight the feathers on the tail. The eyes are round and yellow.
- The head area is decorated with down strokes. The breast is lighter in color.
Image of a bird in flight
When analyzing how to draw a bird in flight, take into account the following features:
- The head is shown.
- Individual elements are drawn on it.
- The body is drawn, taking into account that there will be spread wings on both sides of it. They may be fully straight or slightly bent at the middle joint.
- The tail is depicted, which should be as straight as possible, melted in width.
- The legs are folded together during flight.
- When the main elements are drawn, the bird's small details are completed.
If the picture is not just a bird, but it is flying over objects in space, then you should think about how to position the shadows.
Bullfinch
- The circle and oval are combined with rulers, the back of which will go into the wing.
- Draw the head elements and the triangular tail.
- We select the feathers and plant the bird on a branch.
We outline the outline in relief and color the winter singer, making the abdomen red, which is its distinctive feature.
Features of drawing for a child
Before you draw a child’s bird, you should pay attention that the drawing should be as simple as possible, without small elements. It will be difficult for the baby to depict everything anatomically correctly.
The child’s hand does not have the necessary “hardness” to draw lines in the right direction.
Use the following steps:
- The torso is depicted.
- Draw the head.
- Depicts beak and eyes. If necessary, add a tuft.
- Add a tail and wings.
- Legs should be depicted as simply as possible, without detail.
Swan
The majestic specimen captivates with its grace.
Look how easy it is to draw this handsome guy:
- We outline a circle-head and an oval body; these parts are connected by an elongated swan neck, which is thickened.
- We emphasize with strokes the outlines of the wing and small tail.
- The eye is blue, and the wide beak is reddish with the obligatory nostrils.
- Using chiaroscuro we add volume to the figure.
- We accentuate the blue of the water.
You can display a pair of birds located opposite.
Another long-necked figure is the stork. It is characterized by long, ankle-shaped legs with a middle thickening of orange color and large paws.
Firebird image
Before you figure out the features of how to draw a firebird, pay attention to the fact that this is a fairy-tale character. Therefore, you can add any elements, taking into account your own imagination and desires.
Most often, the firebird has:
- A lush crest-crown on the head.
- Massive tail, similar to a peacock.
- Of course, such a bird should be depicted exclusively in color to show the richness of the color.
If the points are taken into account, the drawing will turn out to be detailed and anatomically correct. Some skill will be needed, it is worth depicting the same bird several times to choose the best angle and understand how to do each part of the body.
Magnificent peacock
The colorful specimen does not hold back your imagination when decorating it, and it is not at all difficult to reproduce it on paper.
Step-by-step instructions for children:
- A peacock's head is a circle with a beak.
- Add a torso configuration with a neck.
- The rest of the space on the album sheet is given to a chic, flowing tail, onto which patterns similar to the leaves of a tree are applied.
- The tail background will be green. We paint the body, eyes and fragments of decoration with bright colors. Don't forget about the characteristic crest.
You can choose colors at your discretion, experimenting and achieving expressiveness.