In this article you will find many ideas for modeling from plasticine with step-by-step instructions and photos, as well as what crafts you can do with a child at different ages.
Working with plasticine has a beneficial effect on a child's development. These activities improve memory, attention, have a good effect on thinking, develop fine motor skills of the hands, which in turn contributes to the development of speech, form the imagination, open up creative abilities, and force one to exercise imagination. You will learn more about the benefits of practicing with plasticine and other materials in the article Let’s sculpt with children from plasticine. Plasticineography
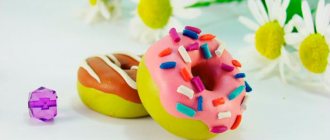
Donut
You will need: plasticine of bright colors, a stick, a plastic spatula.
Master Class
- Roll out a ball of yellow plasticine.
- Flatten the workpiece and press the center with the round tip of the stack-bulk.
- Trim off excess plasticine from the back side.
- Make a cake from pink plasticine.
- Attach the doughnut to the donut base and make a hole in the center.
- Roll plasticine flagella in bright colors.
- Place the flagella in the freezer for 5 minutes.
- Remove and cut the frozen flagella into small pieces.
- Decorate the donut by adding sprinkles.
The plasticine donut is ready!
How to make food for dolls from plasticine?
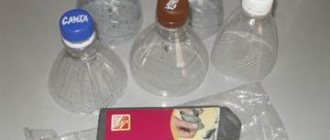
Soft plasticine is good for creating toy food. It will be boring for the baby to just make balls, but if they are used as decoration for a toy cake, it will be more interesting. You can make various cakes, pasta, sandwiches, pastries and much more with your child, as long as your imagination is enough. You don’t have to throw away the candy boxes, but make your own toy candies for them. Be sure to fit your doll food to the container they will eat it from.
For older children, you can combine the lesson with mathematics, divide the cake into equal parts and study fractions, feed guests and count how many cakes you need to prepare for them.
Below we give you several step-by-step instructions on how to make some food for dolls from plasticine.
Broccoli made from plasticine
Take plasticine in three different shades of green. From the lightest one, make a sausage leg for cabbage, divide it in a stack into several small branches. Take three pieces of plasticine of different shades and press them through a kitchen strainer, and you have broccoli florets. Connect these parts together.
Modeling sausages from plasticine
Prepare sausage-colored plasticine. Make a flat cake out of it, put white stripes on top. Roll the cake, roll it like a sausage between your palms and put it in the refrigerator for a while. You need to cut the sausage using sawing movements, not pushing.
Making ice cream from plasticine
Take a piece of sand-colored plasticine and stamp cells on it, like on waffles. Now make a cone and one or three balls, the same color as you want to make ice cream, you can take different colors. We stick the balls onto the cone to its base, and wrap it with our wafer cake. You can add jam on top by smearing two or three sausages crosswise on the balls, stick small multi-colored pieces and sprinkle with crumbs.
Modeling cheese from plasticine
The cheese is made from yellow plasticine with a small addition of orange. Make a cake, cut out a triangle and press holes in it, it is convenient to make large holes with the back of the pen, and small ones with a writing tip or pencil.
Making a cake from plasticine
Make several plasticine balls of different colors, it is better to take two brown ones for the chocolate layers of the sponge cake, two different berry colors and one of whatever color you want for the icing.
We make chocolate and berry cakes very simply, flatten the ball a little and roll it out into barrels to even them out.
We combine all the cakes into one cake and roll it sideways again to even out all the layers.
We take our icing ball and roll it out as thin as possible, wrap our entire cake in it, cut off the excess edges and smooth it out.
Now we make the cream: roll out the plasticine into a thin and long sausage, fold it in half and twist it. We spread it around the perimeter of our cake.
We cut the cake into pieces and use a toothpick or toothbrush to add porosity to our chocolate layers of the sponge cake. Each piece can also be decorated with fruit beads and topped with glaze.
Bread can be sculpted using sand-colored plasticine. To make a loaf, add toothpick prints to it diagonally.
How to make a watermelon from plasticine?
We take black plasticine and roll several thin sausages. We roll out the red plasticine into a not very thin oval-shaped cake. Place one sausage in the middle and fold the flatbread in half.
Add a couple more sausages and fold them again and repeat this several times. Finally, give it a round shape.
We wrap our watermelon in a white cake, and then in a green one, thus making a peel.
Add lighter colored green stripes.
And cut it. Look how ripe our watermelon turned out!
Husky
You will need: plasticine of gray, white, black, blue, red and yellow, toothpick, stacks.
Master Class
- Roll a ball of gray plasticine.
- Stack 2 triangles at the top of the ball.
- Attach 2 flat triangles of white plasticine.
- Cover the bottom of the ball with white plasticine.
- Roll out an oblong oval from white plasticine and attach it as a muzzle.
- Roll the nose out of black plasticine and attach it to the muzzle.
- Make eyes from blue, black and white plasticine and attach them to white triangles.
- Make a tongue out of red plasticine and secure it.
- Make the lower part of the mouth from white plasticine and attach it under the tongue.
- Make 2 triangles from gray plasticine and attach them as ears.
- Work out the features of the muzzle with a stack.
- Make a body out of gray plasticine, insert a toothpick and secure the head.
- Cover the dog's belly with white plasticine.
- Roll 2 sausages from gray plasticine and attach them as front legs.
- Make 4 white plasticine cakes and attach them to the paws as shown in the image.
- Roll a sausage out of gray plasticine and mold a crescent-shaped tail.
- Stack the ponytail, adding fluffiness, then attach it.
- Make a collar from blue plasticine, and make a clasp from yellow plasticine, then make holes with a toothpick.
- Draw the ears, muzzle and paws with a stack.
Plasticine husky is ready!
How to mold a human head from plasticine. Master Class
Modeling a human head from plasticine tells children 5-6 years old the body proportions.
By taking your child through a step-by-step master class on sculpting a man’s head, you can develop the child’s ability to detail, since the head has many details. If something didn’t work out the first time, plasticine makes it possible to correct all the shortcomings.
Step by step sculpting:
- A ball is rolled out of beige or pale pink plasticine, which is given the shape of a human head and an oval face with a chin and forehead is formed. This is done using techniques of pressing and pulling with the fingers in the right places.
- From the side of the face, symmetrical recesses for the eyes are made with the flat side of a plastic knife.
- A small piece of plasticine is attached to the center of the face, from which the nose is formed. It should start from the bridge of the nose, gradually increasing the tubercle. The junctions between the nose and the face must be smoothed, then the nostrils should be made with a toothpick.
- Next, using a stack of pink plasticine, the lips are drawn.
- The oval whites of the eyes are attached to the eye sockets.
- Blue circles with black pupil dots are molded onto the eyeballs.
- Thin sausages are used to attach the upper and lower eyelids.
- Small oval ears are added to the head.
- Brown eyebrows are applied.
- A set of slightly flattened brown sausages is used to make a hairstyle that covers the crown, temples and back of the head.
- To sculpt an older person, you need to add wrinkles to the face using a stack, and make the hair gray with small strokes of white plasticine.
A pineapple
You will need: yellow, green, dark green and any color plasticine, stack, toothpick.
Master Class
- Roll a ball of brown plasticine (you can use leftover plasticine of any color for the base).
- Give the ball a pear shape and make the base stable.
- Roll out a ball of dark green plasticine, then roll it into an oval shape.
- Make a larger cake from yellow plasticine.
- Combine the green and yellow cakes, then roll them out.
- Turn the workpiece over with the yellow side up and draw a grid with a stack.
- Wrap the brown pineapple with a yellow tortilla.
- Trim off excess plasticine and smooth the joints with your fingers.
- Make oblong leaves from green plasticine and cut out the jagged outline.
- Stick the leaves to the top of the pineapple as shown in the image.
Plasticine pineapple is ready! Also check out the champagne and candy pineapple.
Equipment and materials for modeling classes in kindergarten
Typically, kindergarten groups use plasticine, but the possibilities of working with it are limited. The most effective way to use clay in creative work. Fat clay is best. You can sculpt several large objects from it, create objects with subsequent heat treatment for immortalization and paint them. The plasticity of clay can be adjusted with water, which makes the work easier for children.
In education, it is more practical to use clay, since plasticine is intended for small products, and small forms are not able to convey the fullness and clarity of the lines of the details of the figure. Using plasticine complicates activities with young children, since it is quite hard and needs to be constantly kneaded to make it soft, and small children are not always able to do this. Plasticine modeling is more suitable for children with developed finger muscles, at an older age of 5-7 years, but its use should be limited to only a small number of activities.
If the kindergarten has enough budgetary funds, then clay can be purchased at the store, but in rural areas it is easier to dig it up. The clay layer is located directly under the fertile soil layer, so this will not be particularly difficult. Preparing the mixture for modeling is also not difficult. You just need to add water to the clay and knead it, and then put it in a thick cellophane bag, and then the working material can be stored for a whole year. To fire clay, you only need to spend money on a muffle furnace. You will also need paint. Thus, after processing, children's crafts will turn into real ceramic products and souvenirs. Clay itself in its raw form is not a load-bearing material and to make products you will need to stock up on frames.
Ordinary sticks or pieces of wire can serve as frames. The frame must be made in such a way that it can be removed from the product after the clay dries, otherwise the clay on the frame may crack when drying. To draw out individual elements and recesses, you can use plastic knives like in plasticine, spatulas and nails. The better and more conveniently the place for a child’s creative activity is organized, the better the quality of his work. Usually boards are used for the working surface, but it is better to have a rotary machine for ease of working on the product from any side.
In the end, I would like to add that modeling in kindergarten is important for preschoolers for the development of sensory perception. Children must not only see, but also touch objects.
Panda
You will need: black, white and green plasticine, toothpicks, stacks.
Master Class
- Roll a ball of white plasticine.
- Push through two holes for the eyes.
- Roll balls of black plasticine, then attach and flatten them.
- Roll out a flat oval of white plasticine and attach it to the bottom of the head.
- Attach the black spout.
- Make eyes from white, green and black plasticine, then attach them.
- Make black ears and attach them to the top of the head.
- Roll out a roll of black plasticine, flatten it in the center and bend the ends.
- Roll a ball of white plasticine and glue it to the black blank.
- Connect the workpiece and the head using a toothpick.
- Mold and attach the black lower legs.
- Roll balls of white plasticine and attach them as pads to the paws.
- Draw in eyebrows with a toothpick.
- Roll a ball of black plasticine and attach it in place of the tail.
- Make a bamboo stick from green plate and attach it to the panda’s body.
The plasticine panda is ready! I recommend watching this video!
We sculpt Smesharik Krosh from plasticine. Cartoon. Kikoriki made of plasticine.
Text of the book “Modeling and applique with children 6-7 years old. Class notes"
Daria Nikolaevna Koldina Modeling and application with children 6–7 years old: Lesson notes
From the author
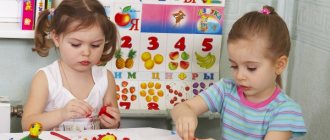
For the harmonious development of a child’s personality, it is very important to introduce him to the world of beauty through visual activities (drawing, modeling, appliqué). Drawing, modeling and applique develop fine motor skills, help shape thinking and develop artistic perception and creativity in children. These activities also occupy one of the most important places in preparing a child for school.
The year before school is a very important period in a child’s life, and all further school studies largely depend on it. If the child is ready for it, he will go to school with joy and learning will be easy and pleasant for him.
Children aged 6–7 years expand their knowledge of fine arts, they get acquainted with works of painting, small sculptures, and the works of book illustrators.
In sculpting
the ability to convey forms, proportions, poses, characteristic features and movements of depicted objects is consolidated. Six-year-old children are able to sculpt sculptural compositions of two or three figures of comparable size, united by a common plot, and make folk toys.
During applique
The ability to cut out parts of objects and entire silhouettes from paper, the ability to cut out symmetrical parts from paper folded in half, and several objects or parts of them from paper folded like an accordion are consolidated. The ability to create a decorative composition from geometric and plant shapes is consolidated. The ability to correctly position an applique on a sheet develops. Acquaintance with the possibilities of the art of ikebana and the technique of openwork cutting continues. In collective work, children learn to plan and coordinate their actions.
In this manual we offer notes on exciting classes in modeling and appliqué.
The classes are organized according to the thematic principle: one topic unites all classes (on the surrounding world, on speech development, on modeling, on appliqué, on drawing) during the week.
A sculpting or applique class is held once a week and lasts 25–30 minutes. Classes in modeling and appliqué do not necessarily have to strictly alternate; for example, you can conduct one lesson in modeling, then three in appliqué, and vice versa. The manual contains 36 notes of complex classes (18 on modeling and 18 on appliqué), designed for the academic year (from September to May).
Read the lesson notes carefully in advance and, if something doesn’t suit you, make changes; prepare the necessary material and equipment.
Preliminary work is also important (reading a work of art, becoming familiar with surrounding phenomena, looking at drawings and paintings).
It is advisable to conduct a lesson on modeling or applique before the children draw on this topic.
Modeling classes are structured according to the following approximate plan:
1. Creating interest and emotional mood (surprise moments, poems, riddles, songs, nursery rhymes are used; acquaintance with works of fine art; reminders of what was seen earlier; the appearance of a fairy-tale character in need of help; dramatization games; exercises for the development of memory, attention and thinking; outdoor games).
2. The process of completing the work begins with an analysis of the depicted object, the teacher’s advice and children’s suggestions for creating the work; in some cases, display of image techniques is used. Next, the children begin creating their own works. The teacher can draw their attention to a successfully started craft; direct the actions of children in need of support and assistance. When modifying a product with additional elements, children should pay attention to expressive means (correctly selected colors and interesting details).
3. Review of finished works (in this case, the teacher gives only a positive assessment). The child should be happy with the result obtained, learn to evaluate his craft and the work of other children, notice new and interesting solutions, and see similarities with nature.
In modeling classes with children 6–7 years old, the following modeling methods are used.
1. Constructive - sculpting an object from separate parts.
2. Plastic - parts of an object are pulled out from a whole piece.
3. Combined - a combination of different modeling methods in one product.
4. Relief sculpture - a three-dimensional image protruding above the plane that forms its background.
Types of reliefs:
– bas-relief – low relief (the image protrudes above the plane by less than half (coins, medals));
– high relief – high relief (individual parts can completely protrude above the plane (walls of architectural structures));
– counter-relief – depressed relief (the image is recessed into the plane).
Let's list the sculpting techniques:
which can be used by children 6–7 years old:
• rolling balls (any work begins with the use of this technique): a piece of plasticine is placed between the palms and the palms are made in a circular motion;
• rolling out columns using palm movements back and forth on a board;
• flattening or flattening of balls and columns between fingers or palms;
• pinching or pulling: pinch the plasticine between two or three fingers and pull lightly;
• pulling out individual parts from a whole piece: with your thumb and forefinger, gradually press the plasticine from all sides (you can roll out the column only on one side and get a narrowed cone-shaped shape);
• pressing indentations on the surface of the mold with your thumb;
• connecting parts into a single whole and smoothing the joints;
• flattening the bottom of the mold by tapping it on a board to make the craft stable;
• drawing on plasticine using a counter-relief method using a stack, a pointed stick;
• decorating crafts with various additional and natural materials: short sticks, straws, cut maple or ash wings, buttons, pennies, woolen threads, etc.;
• decoration of an object with small details sculpted from plasticine;
• mixing several colors in one piece of plasticine: take 2-3 pieces of plasticine, twist them and knead them - you will get multi-colored plasticine.
Secrets of working with clay
Many adults do not really like working with clay, not understanding all its intricacies. Therefore, clay modeling classes are often replaced with plasticine modeling. To understand the secrets of clay, read the following tips carefully.
• A day before class, remove the clay from the plastic wrap, wrap it in a wet rag and put it in a bag.
• Before class, all the clay must be thoroughly kneaded, then divided into pieces and distributed to the children.
• Children bring the clay to full readiness - continue to knead it. If the clay is too wet, it will stick to your hands. It should be kneaded longer until it becomes plastic and will easily come off your hands and roll into a sausage. If the clay cracks - it is too dry - moisten it with a small amount of water and continue kneading until completely ready. If this is not done, the craft will crack when drying. Only clay that is plastic, easily sticks to your hands, and does not crack is suitable for modeling.
• Prepare a bowl of water where you will wet your hands.
• Now you can sculpt your intended object on a wooden plank! This is important because the plastic clay will stick too much and crack.
• The joints of the clay must be moistened with water, otherwise the craft may fall apart when drying.
• Using wet fingers, smooth out any uneven surfaces on the craft.
• If you did not have time to finish sculpting an object in one lesson, carefully wrap the unfinished work in a damp cloth and put it in a plastic bag.
• Dry the clay product naturally for 3-4 days.
• Then you can fire the craft in a muffle furnace at a temperature of 800 °C. After firing, the clay will turn red-brown.
• The finished product can be painted, for example, with tempera, gouache or watercolor and varnished.
• Wrap the remaining mass after modeling again in a cloth and put it in a plastic bag. If a damp rag begins to mold during storage, replace it with a new one and wash out the clay.
• After work, wash your hands under the tap and tidy up your work area using sponges.
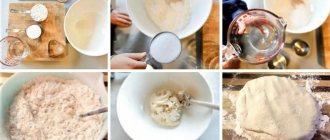
If there is no clay, you can use homemade soft and plastic dough. You can prepare it in two ways.
1st method.
Mix 0.5 cups of salt, 0.5 cups of flour, 0.5 cups of water and 1 teaspoon of sunflower oil. The dough is ready to work.
2nd method.
Mix 1 cup flour, 1 cup water, 0.5 cup salt, 1 tablespoon vegetable oil and 2 tablespoons citric acid. Cook, stirring for 2-3 minutes.
Finished products should be dried on both sides and then painted with gouache.
Let's list the application methods:
which can be used by children 6–7 years old.
• Applique from cut out parts of an object (the object is made up of parts and glued to paper).
• Applique from cut out silhouettes of objects (a composition is made of one or several objects and pasted onto a sheet of paper).
• Decorative applique of cut out stripes and geometric shapes.
• Tear-off mosaic (small circles, triangles, squares or torn pieces of colored paper are glued inside the outline).
• Cutting along the contour (colored paper is torn along the intended contour to convey the texture of the object).
• Rolling napkins (the paper is torn into small pieces, each piece is wrinkled and rolled into a ball).
• Overlay applique (parts of the same shape, but different in size, are glued to each other, starting from the largest to the smallest).
• Openwork cutting.
• Application from dried leaves (the leaves are laid out and arranged into the intended object, glued to a sheet of paper).
• Fabric appliqué – pieces of different fabrics are used to create the desired item.
• Application made of cotton wool (wadding is laid out in a thin layer on velvet paper and glued).
• Applique from floss threads (threads are laid out on velvet paper and glued).
• Application from bulk materials (glue is evenly applied to the surface inside the outline and covered with cereal, sand, shavings from colored pencils or crushed eggshells (at the end of the work, the shells can be painted with paints)), imitation of a fresco.
• Ikebana (drawing up simple bouquet arrangements).
• Collage (combination of various materials in work).
• Volumetric crafts made from thick colored paper that can stand.
• Weave – strips of paper are pulled through a warp that has been cut into strips.
For modeling
from clay and plasticine you will need:
– natural material: pumpkin seeds, sunflower seeds, chestnut fruits, acorns, tree branches, ash seeds, maple wings, cones, shells, beans, peas, small onions;
– additional material: lids from shoe boxes, buttons, beads, matches, juice straws, polystyrene foam, white tracing paper, capsules from Kinder surprises.
To work accurately with plasticine and clay, you need: stacks, a wooden board, a cloth for wiping your hands, small cardboard stands for finished products.
applique classes
you will need:
– lids from shoe boxes, round boxes of processed cheese, colored paper, double-sided colored paper, magazine paper, corrugated paper, colored napkins, white tracing paper, eggshells, fabrics, braid, floss, woolen threads, candy wrappers, polystyrene foam , foil, cereals, small stones, cotton wool, dried leaves, straws for cocktails, jars of Rastishka yogurt, sheets of landscape paper, colored cardboard, pencils, felt-tip pens, good scissors with blunt ends, PVA glue, oilcloth lining and a rag.
Expected skills and abilities
child by the age of seven.
In sculpting:
• knows how to sculpt objects from imagination and from life, conveying their characteristic features;
• knows how to convey the character, proportions, postures and movements of humans and animals;
• has the skills of composing a composition;
• has the skills to convey the relationship of objects by size;
• has the skills to sculpt sculptural groups of 2-3 figures;
• knows how to sculpt forms based on folk toys;
• knows how to decorate a form with relief;
• knows how to perform decorative modeling on a plate with molding and in-depth relief.
In the application:
• knows how to correctly position the appliqué compositionally;
• knows how to create an image from nature and from an idea;
• knows how to cut symmetrical shapes from paper folded in half;
• knows the basics of multi-layer cutting and openwork cutting techniques;
• knows how to create patterns on paper of different shapes;
• knows how to create a decorative composition from geometric and plant shapes;
• has the skills to depict birds and animals based on folk decorative art.
We wish you success!
Annual thematic planning of classes in modeling and appliqué
Table
Class notes
The theme of the week is “Goodbye, summer!”
Lesson 1. Wattle with sunflowers
(Modeling from plasticine in combination with natural materials. Team work)
Program content.
Continue to teach children to creatively compose a collective composition, using previously learned modeling methods. Strengthen the ability to combine plasticine and natural materials in crafts. Develop fantasy and imagination. Continue to learn to understand and analyze the content of the poem.
Handout.
Sheets of cardboard, plasticine, pumpkin seeds, sunflower seeds, thin tree branches, stacks, modeling boards.
Progress of the lesson
Read M. Plyatskovsky’s poem “Sunflowers” to the children:
Under the sun, Under the sun, Right by the path, A golden sunflower Frozen on a thin stalk. Probably an important general, world famous, once ordered him to stand at attention!
Ask the children:
– What is this poem about? (About the sunflower.)
-What does a sunflower look like? (Into the sun.)
Offer to make a wicker fence behind which they grow
sunflowers.
Divide the children into groups of 3-4 people, give each group one sheet of cardboard. Teach your children how to make sunflowers: first you need to roll an orange ball out of plasticine and flatten it a little. Then you need to insert pumpkin seeds (petals) along the edges of the resulting circle, and black seeds into the core. Now show the children how to make a wattle fence by rolling up many long columns and placing them horizontally at the bottom of the cardboard. Tree branches can also be used for wattle fence. Sunflowers should be placed in the background. You can also sculpt a round sun and clouds.
The topic of the week is “What will autumn bring us?”
Lesson 2. Fruits and vegetables
(Colored paper. Three-dimensional applique)
Program content.
Strengthen the ability to cut out identical silhouettes from accordion-folded paper. Teach children to more accurately convey the shape of objects and create a three-dimensional object by folding parts in half and partially gluing them together. Use riddles to develop imaginative thinking.
Demonstration material.
Models of vegetables and fruits.
Handout.
Strips of colored paper 18x6 cm, simple pencils, scissors, PVA glue, glue brushes, rags, oilcloth linings.
Progress of the lesson
Tell your children a few riddles about vegetables, fruits and berries:
The girl is sitting in the dungeon - Scythe is on the street.
(Carrot)
Without windows, without doors, the room is full of people.
(Cucumber)
Scarlet itself, Sugar, Kaftan green, Velvet.
(Watermelon)
Round, ruddy, I grow on a branch: adults and little children love me.
(Apple)
Invite children to look at models of vegetables and fruits and ask them which vegetable or fruit they would like to make. Each child will need to take a strip of paper the color of the selected vegetable or fruit and fold it in three like an accordion. Then draw an outline with a pencil and cut out the fruit or vegetable along the line. You will get three identical silhouettes. Each part needs to be folded in half, apply glue to one of the halves. You need to glue two halves of different parts together so that the other halves remain free. Then you need to apply glue to the halves that remain free, and also glue the third silhouette. You will get a voluminous vegetable or fruit.
Theme of the week: “Nature's Pantry”
Lesson 3. Basket with mushrooms
(Modeling from plasticine using the tape method)
Program content.
Learn to sculpt a basket using the ribbon method, firmly connecting the parts together. Continue learning how to sculpt in several parts. Cultivate compassion and kindness in children.
Handout.
Plasticine, stacks, cardboard stands, modeling boards.
Progress of the lesson
Remember the Russian folk tale “Masha and the Bear” with your children.
Ask the children:
- Why did Masha go into the forest? (For mushrooms.)
Invite the children to help Masha pick mushrooms into the basket.
To make a basket, roll out a long sausage or several sausages, the ends of which are connected to each other. The bottom and handle of the basket are molded separately. The first layer of sausage is placed on the bottom, then it is wound in a spiral, layer by layer. A handle is attached to the top.
Next, the children need to fill the baskets with different mushrooms themselves.
Theme of the week: “Kingdom of Trees”
Lesson 4. Trees
(Colored paper. Applique of cut out silhouettes)
Program content.
Teach children to cut out complex symmetrical silhouettes along self-drawn contours from paper folded in half. Continue to learn how to make a beautiful composition on a sheet of paper from cut out silhouettes. Continue to expand knowledge about different types of trees and their characteristic features.
Demonstration material.
Subject pictures of trees: birch, oak, maple, poplar, spruce, pine, rowan.
Handout.
Halves of landscape sheets, rectangles of colored paper 12x6 cm in orange, red, yellow and green; simple pencils, scissors, PVA glue, glue brushes, rags, oilcloth linings.
Progress of the lesson
While walking, draw children's attention to the structure of the trees, the shape of the crowns and the color of the leaves. You can play the game “Run to the tree that I will name.”
During the lesson, look again with the children and name the trees from the pictures. Give the children two rectangles of any of the four colors and ask them to fold each rectangle in half vertically. On one of the halves you need to draw the silhouette of half the tree so that the fold line is in the center of the trunk, and then cut it out. When the children unfold the prepared parts, they will get trees.
Then the silhouettes of the trees need to be glued onto the halves of the album sheets. You can do this work collectively and then paste silhouettes of trees onto a sheet of whatman paper.
Theme of the week: “Animals are preparing for winter”
Lesson 5. Hedgehog
(Magazine paper. Tearing-mosaic)
Program content.
Teach children to create a three-dimensional image using the “tearing-mosaic” technique. Cultivate neatness. Continue to learn to understand and analyze the content of the poem.
Handout.
A silhouette of a hedgehog drawn on blue or blue cardboard for each child, magazine paper, colored paper, scissors, PVA glue, glue brushes, rags, oilcloth linings.
Progress of the lesson
Read the poem by V. Biryukov to the children:
There is a lot of noise in the forest. Isn't it a bear hurrying towards us? - It's me! - The hedgehog mutters. - It’s quiet today. You won’t get through. And under the paws of the mice the fallen leaves rustle.
Ask the children:
– Who is this poem about? (About the hedgehog.)
- Why does he make so much noise? (There are a lot of leaves in the forest, and they rustle, creating noise.)
First, children cut out the silhouette of a hedgehog from cardboard. Then they tear the magazine paper into strips with a pointed end, about 4 cm long. Then glue is applied to half of each strip and glued along the edges of the outline. The next rows should overlap slightly with the previous ones, creating the image of a voluminous prickly hedgehog.
Separately, the hedgehog's eye, nose and ear are cut out of colored paper and glued on.
Theme of the week: “Feathered Friends”
Lesson 6. Kargopol birds
(Clay modeling)
Program content.
Introduce children to Kargopol products and teach them to see the expressiveness of forms. Learn to sculpt from life in a plastic way (from one piece), observing the shapes and proportions of the parts, and evenly and beautifully place the sculpted figurine on a stand. Strengthen the ability to mark feathers, wings and eyes in stacks.
Demonstration material.
Kargopol clay toys: whistles (tubes, ducks, chickens), figurines of animals (horses, deer, dogs, a fast trio of white horses) and people (a spinner, a sower with a basket, a bearded man with an armful of firewood, a peasant woman with a child).
Handout.
Clay, bowls of water, rags, stacks, boards for modeling.
Progress of the lesson
Tell the children the story of the Kargopol toy:
“In the north, in Kargopol, there is a center for the production of clay toys. In the old days, a Russian peasant could not afford to buy a toy. Therefore, the peasants themselves sculpted toys from red clay, dried them in the hut and fired them in a Russian oven for 6–8 hours. Then they decorated the toys with chalk and stove soot. When there were a lot of toys, they were taken to the market for sale.”
Invite the children to make a Kargopol bird: you need to roll up a column and bend the smaller part up, immediately highlight the neck and head, and pull off the beak with your fingers. On the other side of the column you need to extend the tail. Now all that remains is to install the bird on the sculpted stand.
When the clay dries, you will need to cover the craft with water-based paint or white gouache mixed with a drop of PVA glue.
Apple
You will need: red, green, black, white and brown plasticine, stacks, toothpick.
Master Class
- Roll out a ball of red plasticine.
- Shape the ball into an apple shape.
- Prepare a strip of brown plasticine and cut fine fringe.
- Make a small indentation in the apple for the stamens.
- Cut a small piece of the stamens, twist them and attach them to the apple.
- Make a stalk out of brown plasticine as shown in the image.
- Make a small indentation in the apple and stick the stem.
- Make 2 leaves from green plasticine and draw lines using a stack and a toothpick.
- Stick the leaves to the base of the cutting, then give them a curved shape.
- Make a droplet of white plasticine, flatten it and stick it to the apple as a highlight.
- Roll 5 balls of green plasticine and form a caterpillar.
- Roll 2 very small balls of black plasticine and stick them on as the caterpillar's eyes.
- Stick the caterpillar to the apple.
The plasticine apple is ready!
Modeling from plasticine for children 2 and 3 years old
At the age of 2 to 3 years, a child still cannot cope with ordinary plasticine, so it is worth choosing special soft plasticine for small children.
Children are still learning to control their hands and it is difficult for them to practice modeling. Select tasks that are not difficult for your child so that he can cope with them; this will inspire him, give him self-confidence and he will want to continue to engage in this useful type of creativity.
By the age of three, a child will already be able to:
- tear off pieces from plasticine
- make balls out of them
- flatten them
- stick plasticine to paper and smear it
- crush the balls with your palms
- make sausages
- twist them into rings
- combine all the components into one craft.
The parents' task is to teach their child this.
Show your child
- how to cut a sausage and get rings
- how to cut out figures from flat cake
- how to cut dough into squares, triangles and other shapes
- how to stick various objects onto plasticine smeared on cardboard, for example, seeds, beads, cereals, pasta
The duration of a modeling lesson at the age of 1-3 years is 5-15 minutes and depends on the child’s mood and desire to work with plasticine.
For this age, it is recommended to use plasticine only in primary colors, so as not to overload the child with a large variety and not distract from the modeling activity itself. In addition, if desired, colors can be mixed and new shades can be obtained.
Chamomile
You will need: white, yellow and green plasticine, stacks, boule, skewer.
Master Class
- Make a drop of white plasticine, then flatten it into a petal shape.
- Draw a stack of lines.
- Make 20 white petals.
- Roll up the yellow center of the flower.
- Prepare a strip of yellow plasticine and cut through the fringe.
- Stick a strip around the circle of the yellow center.
- Stick the white petals in a circle, placing them in a checkerboard pattern.
- Cover the skewer with green plasticine, leaving the tip free.
- Make a cake from green plasticine and sculpt a receptacle.
- Stick the bud to the receptacle.
- Draw a mesh texture on the yellow center.
- Make a leaf, draw the texture and stick it to the stem.
The plasticine chamomile is ready!
Modeling a bird from plasticine
Let's blind a parrot. Follow the step-by-step instructions below and you will have a beautiful and talkative bird.
- Take red, yellow, blue, white and black plasticine
- Make an oval body for a parrot from yellow plasticine
- Add a smaller red circle - this will be the head of our bird
- The wings will be blue, to do this, stick two droplets on the sides of the body
- Add a white breast to your parrot
- Make a yellow beak, stick on the eyes and make a crest from the cones
- Let's add another tail and use a stack to push through the grooves on the bird's chest and wings that resemble plumage
- All that remains is to attach the paws and the parrot is ready
This kind of cockerel can be made from plasticine.
This is how a penguin is made from plasticine.
Pendant "Snowman"
You will need: a sheet of cardboard, a simple pencil, scissors, string, tape, plasticine in white, orange, brown, black, blue, purple and green, skewer, stack.
Master Class
- Draw a circle on a piece of cardboard, then cut it out.
- Cover one side of the circle with white plasticine.
- Make oval legs from purple plasticine, then attach them to the bottom of the circle.
- Roll out an oval nose from orange plasticine, then attach it.
- Make eyes and a smile for the snowman from black plasticine.
- Roll 2 buttons from blue plasticine, attach them and use a skewer to make 2 holes in the buttons.
- Roll the purple and blue plasticine into sausages, then form a hat as shown in the image.
- Roll a ball of white plasticine and attach it as a pompom, then use a skewer to create a “fluffy” texture.
- Make stick handles from brown plasticine, then attach them to different sides of the circle.
- Make highlights on the nose and eyes from white plasticine.
- Draw a knitted pattern onto the hat using a skewer.
- Draw lines on the legs as shown in the image.
- Make 3 leaves from green plasticine and roll 3 orange berries, then decorate the hat.
- Attach the string to the back using tape.
The plasticine “Snowman” pendant is ready!
Plasticine skills of a child
What can a 2-3 year old child do with plasticine?
- pinch off a piece of plasticine from a large piece;
- roll out a lump of plasticine between your palms with straight movements (sausages, sticks);
- roll out a lump of plasticine between your palms in a circular motion (ball, apple);
- flatten a lump between your palms (cookies, flatbreads);
- make a depression with your finger in the middle of the flattened lump (bowl, saucer);
- combine two sculpted forms into one object: a stick and a ball (rattle), etc.
Preschool modeling classes are based on these actions. With age, these simple actions and skills need to be expanded and improved.
Ice cream
You will need: plasticine of bright colors, a spatula, a stack, a wooden skewer, beads and rhinestones.
Master Class
- Roll a ball of brown plasticine.
- Flatten the ball into a flat cake.
- Draw lines with a stack, creating a waffle texture.
- Twist the workpiece to form a cup, then secure the edges.
- Roll balls of bright colors of different sizes.
- Use a skewer to process the halves of the balls as shown in the image.
- Place the balls into a waffle cup.
- Decorate the ice cream by attaching beads and rhinestones.
- Make a cherry and attach it to the top of the ice cream.
Plasticine ice cream is ready! I recommend watching this video!
DIY Making Play Doh Ice Cream Popsicles
Crocodile
You will need: green, dark green, white, black and red plasticine, a glass stack, a toothpick, a napkin with a pattern.
Master Class
- Roll a sausage out of green plasticine.
- Cut the blank in half and create three parts from green plasticine: a carrot, an oblong oval and a ball.
- Take the green oval and make a cut, forming the mouth of a crocodile.
- Slap red plasticine into the mouth.
- Roll the sausage out of white plasticine, flatten and cut the cloves, then attach them to the red plasticine.
- Roll 2 green balls and make eyes by attaching white and black plasticine, then attach the blanks to the crocodile's head.
- Treat the body and head of the crocodile with a napkin, giving it a patterned texture.
- Connect the body and head of the crocodile using a toothpick.
- Roll 4 balls of green plasticine and attach them to the paws.
- Make notches on the paws with a stack.
- Roll a sausage from dark green plasticine, flatten it, cut the teeth and attach it to the back of the crocodile.
- Attach highlights to the eyes using white plasticine.
The plasticine crocodile is ready!
Modeling from plasticine for children 6 and 7 years old
You can use regular plasticine or buy different sets, for example, for modeling confectionery products. There are also kits with mass for modeling; they harden well in air and are preserved in the future.
At primary school age, children already know how to independently fantasize and bring their ideas to life. They sculpt more complex figures following step-by-step instructions.
Help your child make a picture from plasticine; he can already make more intricate drawings with a lot of small details, transitions of colors and different textures.
There is no need to limit the time for modeling at this age; let the child do as much as he wants and as much imagination and perseverance as he has.
Grape
You will need: purple, brown and green plasticine, glass stack, thin wire.
Master Class
- Make a rope from purple plasticine.
- Cut it into pieces.
- Roll each piece into balls.
- Make a cone out of purple plasticine.
- Cover the cone with grapes, leaving the top part free.
- Prepare a piece of thin wire and cover it with brown plasticine, as shown in the image.
- Draw the lines to create a branchy texture.
- Attach a wire twig to the top of the grape, then stick the grapes around it.
- Make a cake from green plasticine.
- Outline the outline of the leaf and cut it out, then draw the texture.
- Roll out a thin strip of green plasticine, carefully twist it and stick it to the grapes.
Plasticine grapes are ready! I recommend watching this video!
Air plasticine for children, learning to sculpt roses
How to sculpt a pony from plasticine?
After watching the My little pony cartoon, your daughter will probably want to make the same pony. Let us help her with this.
- Take plasticine of the desired color, pink, purple, red and blue shades are perfect
- Roll a sausage of the chosen color - this will be the body of the pony
- Pull one side of the sausage up into a cone - this will be the neck
- Roll the ball and stretch it out a little, forming the face of a small horse
- Make droplets out of two small pieces and stick them to the top of the muzzle - these will be the ears
- Use a toothpick to press down the pony's nostrils and mouth.
- Roll four cones from plasticine of the main color, cut off a little plasticine diagonally from the narrow side with a special knife, this is where the legs will be attached to the body
- Tap the wide part of the cones on the board to create horse hooves
- Assemble your figurine. Smooth out the joints
- To make the mane and tail, roll several thin multi-colored sausages, connect them together and cut them, stick them to our pony, bend them a little, imitating the curves
- Don’t forget about the eyes, make them not round, but elongated, in the shape of a leaf
Our pony is ready!
You can make several small horses of different colors and you will have many cartoon characters to play with.
You can make a pony in another way, see step-by-step photos below.
Fox made of pine cones and plasticine
You will need: pine cone, orange, green, white and black plasticine, stack, autumn leaves.
Master Class
- Make ears and an elongated muzzle from orange plasticine, roll up a black nose and attach all the parts to the pine cone.
- Make a tongue out of orange plasticine, then attach it.
- Make crescent-shaped eyes from white plasticine and attach green pupils.
- Make eyelashes from cuttings - the tails of leaves.
- Attach the eyes to the pine cone.
- Mold 2 legs and a tail from orange plasticine and make cuts with a stack, as shown in the picture.
- Attach the paws and tail to the pine cone.
- Lay out the leaves and plant the fox.
The fox made from pine cones and plasticine is ready!
How to make a dinosaur from plasticine. Master Class
Dinosaurs are unusual animals that lived in ancient times. During the modeling process, the child can be told facts about their life and varieties.
Step-by-step diagram for sculpting a dinosaur:
- Cut off a third of the green block of plasticine and roll it into a ball-shaped dinosaur head. Next, a triangular shape with soft corners is created from the ball.
- For the body you will need a whole block of green plasticine. It must be kneaded thoroughly, then given an oval shape, which should be transformed by stretching into an oblong drop.
- Using a toothpick, both parts are connected together.
- To make massive dinosaur paws, you need 4 green balls of the same size.
- Sausages are rolled out from the balls, then the legs are formed.
- The paws need to be connected to the body; to do this, their edges should be slightly flattened.
- Making a large collar for the dinosaur. To do this, roll out a cake from a piece of green plasticine.
- An arc-shaped strip is cut out of it in a stack, then a zigzag pattern is created along the edge with a jagged stack.
- The collar is glued to the top of the dinosaur's head and the scalloped edge folds back nicely.
- On the head near the collar we attach a pair of beige horns.
- A green horn is glued to the nose.
- Triangular green plates are attached along the back and tail.
- Now you need to make a two-color plate. To do this, roll a piece of brown plasticine into a sausage, which is then wrapped in a thin black cake.
- From the resulting part you need to form a rectangle and cut it into 7-8 strips.
- Stick them on the back of the dinosaur and press it into the body.
- Attach white eyes with black pupils to the head.
- Along the entire surface of the back of the ballpoint pen, the dinosaur skin is given relief.
- In a stack, stripes are drawn along the collar, the line of the mouth and the tips of the paws.
The dinosaur is ready.
Crow
You will need: plasticine, toothpick, glass.
Master Class
- Roll a small ball of dark gray plasticine.
- Roll a smaller ball of light gray plasticine.
- Flatten the light gray ball into a flat cake.
- Make cuts in a circle.
- Cut off pieces of plasticine to make a star.
- Connect the ball with the star.
- Using a round stack, press 2 holes on the ball.
- Make an oval-shaped bird's body from dark gray plasticine.
- Make the wings of the bird in the shape of flattened drops of dark gray plasticine.
- Make a wavy outline on the wings using a stack.
- Attach the wings to the body.
- Make the crow's paws and attach them.
- Make 3 thin little sausages and attach them to the top of the bird's head.
- Make the eyes of a crow from black and white plasticine.
- Draw the eyebrows of the crow in a stack.
- Attach a small tail to the crow.
- Make a toothpick pattern on the raven's neck.
The plasticine raven is ready! I recommend watching this video!
WE MAKE iPhone X - iPhone 10 FROM PLASTICINE | Video Modeling
Modeling from plasticine for children 4 and 5 years old
At the age of 4-5 years, a child already skillfully handles a modeling knife, his hands are already stronger and he can work with ordinary plasticine.
Children of this age know how to roll balls and sausages, and now it will be more interesting for them to make more complex and interesting crafts themselves.
Invite your child to make a mushroom meadow or forest lawn with bushes and trees around. Maybe the child will want to make something of his own, don’t interfere with this. On the contrary, this is good and fosters independence.
Also, the mother can sculpt one part of the composition, and the child another, then combine everything into one craft. This way the child will feel responsible for his part of the work.
A child at this age can sculpt simple figures of animals, plants, birds, and food for dolls.
You can begin to master the technique of plasticine printing with your child and make simple plasticine paintings and panels. Invite your child to add natural and waste materials to such paintings.
The time of working with plasticine is 10-20 minutes; if the child is very enthusiastic, it can be extended a little, depending on the child’s perseverance.