How to make salt dough?
You will need: a glass of wheat flour, a glass of extra salt, half a glass of cold water, a bowl.
Recipe
- Take a bowl.
- Pour in a glass of flour.
- Add a glass of extra salt.
- Fill with cold water.
- Knead the dough.
The finished salted dough should not stick to your hands or crumble. It should be cool and easy to sculpt. I recommend watching the video master class!
SALT DOUGH | How to make your own salted play dough | A simple salt dough recipe.
How to make salted play dough
Salted modeling dough is kneaded in different ways. The plasticity of the finished material depends on the proportions and composition. In general, the basis is always the same.
We offer two universal recipes that create high-quality salt dough:
Cold water dough
The simplest and cheapest version of the dough is prepared from the following products:
- flour - 200 g;
- salt - 200 g;
- cold water - 125 ml.
Knead the dough as follows:
- Mix dry ingredients.
- Gradually add water to this mixture. Mix well.
- Use your hands to bring the almost finished dough to the desired consistency. It should turn out tight and elastic.
Salt dough: Olimpik 24
Dough in warm water and oil
If the dough is intended for small parts and complex crafts, we recommend making it lighter and more pliable.
To do this, take:
- salt - 200 g;
- flour - 250 g;
- sunflower oil - 5 tbsp. l.;
- warm water - approximately 130 ml.
We will prepare the dough like this:
- Pour salt into heated water. Stir until completely dissolved.
- Gradually pour the oil and saline solution into the flour. Mix thoroughly until smooth.
If you don’t want to tear off the dough into pieces while making crafts, you can pre-roll it. This makes it easier to cut out the bases of the figures.
Dough crafts: School 582
How to dry salt dough?
There are two most common ways to dry salt dough. The first method: the finished craft will dry on its own. The main thing is that it should not be exposed to direct sunlight, otherwise it will crack. The craft can be placed on a flat surface and wait a few days. Second method: dry the finished craft in the oven for 3 to 6 hours (depending on the size of the craft). Drying occurs in batches with breaks. One approach is 1-2 hours. For quick drying in one go, set the oven to 75-100 degrees, and then the craft will dry in an hour. At a temperature of 120 degrees, the craft will dry in 30 minutes, but it is better to dry it naturally.
How to dry dough crafts
Each finished craft needs to be dried. How long it takes depends on the drying method. There are several drying options, choose the one that is convenient based on the size of the product or the availability of time.
Choosing a method for drying products:
- Air dry on a flat surface. It will take a long time to wait for the result; it takes a day for 1 mm of the thickness of the craft. Indentations may appear where the dough comes into contact with the surface, and sometimes you cannot turn the craft over. This option is suitable for small flat products.
- Drying on a radiator. This method is only possible during the heating season. Drying on a radiator takes less time than drying in air. The process takes from 1 to 2 days, depending on the thickness of the product.
- Baking in the oven is a relatively quick method, suitable for large products. You need to dry the craft on a baking sheet.
If there are sudden changes in temperature in the oven, the product may crack, so you need to start drying with the door open, gradually increasing the temperature:
- at 50 degrees - 1 hour with the door open;
- then at 75 degrees - 1 hour, the door is closed until drying is complete;
- then at 100-120 degrees - 1 hour;
- complete drying at 150 degrees – 30 minutes;
- open the door and leave the product to cool.
Combined drying is also possible. First, the craft is dried in the open air or in a radiator, and then in the oven. Suitable for large products.
The time and temperature for baking the craft in the oven depends on the color of the baking sheet and the thickness of the product. The article indicates the temperature for a light baking sheet; on a black one, make an adjustment - 20 degrees lower. The drying time is indicated for products up to 2 cm thick; if the craft is thicker, the time increases by about 1.5 times.
After drying, you need to lightly tap the product: if the sound is loud, the craft has dried. A dull sound indicates that the dough inside is wet, it needs to be dried, otherwise the craft will begin to collapse.
How to color salt dough?
There are two most common ways to color salt dough. The first method: after drying, paint the finished craft with acrylic paints or gouache using a brush. Second method: food coloring is diluted in water, then added while preparing the dough. When the craft is completely painted and dried, it must be coated with transparent manicure or furniture varnish in 2-3 layers. Each layer must dry before applying the next. This way the craft will last for a long time.
How can you dry items?
In addition to the process of sculpting a figure from a salty mass, drying the dough is also an important point. You can perform this operation in the following ways:
- Drying the product in the oven. To do this, place the products on parchment and place them in an oven preheated to 50–80 °C for an hour. The temperature depends on the size of the craft. Then cool without removing from the oven. If you immediately pull out the craft, there may be cracks on the surface.
Oven drying
- Dry at room temperature. This is the simplest but longest process. Thin and delicate crafts are best suited for this. Drying time 1–2 days. After making the item, you need to place it on parchment, away from batteries and electrical appliances. This technique will only harm the product, leaving cracks and uneven drying of the dough.
Salt dough star
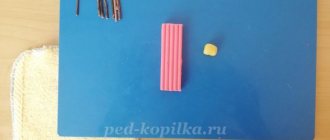
You will need: colored salt dough, glass, clear manicure polish, toothpick.
Master Class
- Roll into a ball.
- Make a flatbread out of it.
- Cut out a star using a stack.
- Brush the corners of the sprocket with a wet finger to make them smooth.
- Make dots with a toothpick.
- Make a smile with your eyes.
- Attach small flat balls of a different color using water to decorate the star.
- Dry the craft.
- Apply varnish and wait until completely dry.
The salt dough star is ready!
Salt dough caterpillar
You will need: colored dough, knife, PVA glue, toothpick, pendant, clear manicure polish.
Master Class
- Roll out the sausage.
- Cut it into 6 equal parts.
- Roll into balls.
- Glue 5 balls together.
- Glue the head.
- Make a nose and eyes, then glue them on.
- Poke a toothpick into the hanging area.
- Dry the craft.
- Apply varnish and wait until completely dry.
- Attach the pendant.
The salt dough caterpillar is ready!
Salt dough apple
You will need: colored salt dough, PVA glue, clear manicure polish.
Master Class
- Make half an apple, make the inside flat, pressing it onto a flat surface.
- Make a thin flat center and glue it to the main part.
- Roll 6 seeds and a stick, then glue to the apple.
- Blind the leaves, then glue them.
- Dry the craft.
- Apply varnish and wait until completely dry.
The salted dough apple is ready!
Salt dough elephant
You will need: colored salt dough, PVA glue, clear manicure polish.
Master Class
- Make the elephant's body by rolling an elongated ball.
- Make 4 legs in the shape of plump sausages.
- Make a proboscis.
- Make the elephant's ears in this way: roll out 2 flat cakes, glue flat cakes of the same shape of a smaller size and a different color to them.
- Make a small ponytail.
- Blind your eyes.
- Assemble the elephant in the following sequence: glue the legs to the body, then glue the proboscis, then the ears, eyes and tail.
- Dry the craft.
- Apply varnish and wait until completely dry.
The salt dough elephant is ready!
Salt dough roses
You will need: salt dough, foil, a candy vase or similar plastic container, gouache, a brush, clear manicure polish, a modeling board, a knife or a stack.
Master Class
- Fill the vase with foil.
- Roll into balls. For one rose you will need 5 balls, for a leaf - 1 ball.
- Make leaves and draw stripes in a stack.
- Make cakes from the balls and form a rose. Roll one cake into a tube, then attach it to different sides of the cake, forming petals.
- Attach roses and leaves to the foil.
- Dry the craft.
- Paint the craft and wait until it dries completely.
- Cover the craft with varnish and wait until it dries completely.
Salt dough roses are ready! I recommend watching the video master class on how to make a rose!
Master class: Modeling a rose with thin petals from salt dough. Master class for modeling rose.
Step-by-step instructions for making dough crafts for beginners
Now that you know how to prepare material for creativity, it’s time to begin the sculpting process itself. Let's start with the simplest. I will show you step by step how you can easily and quickly make a beautiful thing. We will sculpt a cute bear.
We will need:
- Flour;
- Salt;
- Water;
- Cup;
- Acrylic paints or gouache;
- Brush.
Manufacturing process:
1. First, knead the dough: mix half a glass of flour and half a glass of salt, add a little water and mix everything well. Next, wait 2 hours, during which time the dough sits in the refrigerator.
2. Now we start sculpting the figure: we make one medium-sized ball for the head, a larger one for the body and 7 smaller ovals for the paws, ears and nose. We connect everything together. Then we put the product in the oven and dry it for an hour. After drying, take out the craft and cool it.
3. Next we proceed to coloring. Take a brush and the necessary paints. We are waiting for the “Bear” to dry. That's all!!
Advice!! Cover the finished souvenir with varnish. This will make the craft brighter and more practical!!
Thus, the step-by-step instructions for sculpting products from salt dough are as follows:
- knead the dough;
- we sculpt the necessary elements and connect them together;
- dry the work in the oven;
- paint and wait for it to dry.
And remember that the main sculpting techniques are balls and sausages.