Long-term planning for the application for the second junior group for the third quarter “Spring”
Evgenia Val
Long-term planning for the application for the second junior group for the third quarter “Spring”
Long-term planning for the application for the second junior group for the third quarter “Spring”
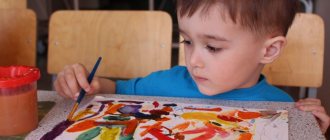
It is not for nothing that applique has become one of the most favorite types of decorative and applied art used in working with children. This is not only exciting and entertaining for the children, but also has a beneficial effect on the development of their mental and creative abilities.
With the children of the second younger group, we continue to make simple applications from ready-made forms, but now creating simple compositions. Here is the result of our joint work. (Just like in the previous publication, I chose the most successful works.)
I present to your attention the lesson plan for application in the second junior group for the third quarter “Spring”:
"Tumblers"
Goal: Continue to develop perception, create conditions for children to become familiar with shape and size. Strengthen the ability to stick ready-made forms, arranging them in a certain sequence. Arouse interest in “reviving” the applicative image. Cultivate accuracy in work.
"Birdhouse"
Goal: To develop the ability to depict objects consisting of several parts in appliqué: determine the shape of the parts (rectangular, round). Strengthen knowledge of colors. Develop memory, thinking, fine motor skills of the hands, and the ability to enjoy the results of one’s work. Cultivate an interest in birds and a caring attitude towards them.
"Decorate the plate"
Goal: To teach children to place the pattern along the edge of the circle, correctly alternating the figure in size and shape. Develop accurate gluing skills. Fix the names of geometric shapes and primary colors. Develop the ability to assemble a whole from four parts. Reinforce ideas about the properties of dishes: they break.
"Rocket in Space"
Goal: Expand children's understanding of space and rockets. Teach children to compose an image from details. Learn to correctly place objects on a sheet of paper, distinguish geometric shapes and correctly name colors. Learn to use glue and brush carefully. Cultivate the ability to enjoy the overall result.
"Beautiful flowers"
Goal: Learn to compose a beautiful whole image from parts of a flower. Cultivate neatness. Strengthen the skills of spreading glue and gluing onto cardboard. Develop aesthetic perception.
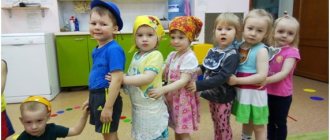
"Chicks in the Meadow"
Goal: to consolidate the ability to compose a composition from several objects, freely arranging them on a sheet of paper; depict an object consisting of several parts. Clarify the idea of the appearance of the chicken; teach children to depict an object consisting of several parts, arranging them correctly. Practice careful gluing. Develop fine motor skills, perseverance, and the desire to finish what you start. Foster independence and creativity.
I hope these materials will be useful to you. Thank you for your attention.
Summary of a lesson on appliqué in the second junior group "Primroses"
OD on artistic and aesthetic development
Application
"Primroses"
Tasks:
Strengthen children's knowledge about spring.
Continue to learn how to lay out finished parts on a sheet, how to correctly build a composition in accordance with the sample.
Continue learning how to use a brush and glue, and carefully paste the image.
Develop fine motor skills of children's hands.
Cultivate attention, perseverance, and independence.
Equipment: Sample, ready-made forms, oilcloths, glue, brushes, coasters, napkins for each child.
Progress of the lesson:
Educator: Guys, what time of year is it now?
What signs of spring do you know?
Finger gymnastics “Flowers grow”
Tall, handsome, arms crossed with arms wide apart
fingers slowly lower.
Flowers are growing here. Palms touching fingers together
And wrists.
And the roots are underground. Hands up, palms with closed fingers,
wrists touching.
They drink water for them. Place your hands down, palms together
reverse side, spread wide
fingers.
Educator: Do you want me to tell you a spring fairy tale?
Then take a seat and listen.
Spring has come. The sun became warmer. (The sun is attached to the board). Every day the sun shone brighter and brighter. The first sprouts appeared from the ground in the flower beds. They reached for the sun.
(Stalks appear). And then, so that the sprouts would not freeze, the sun gave them a ray of its own. (Flowers are attached to the stems). This is how the first flowers appeared.
Do you know what they are called?
Children: Buttercups
Educator: How did flowers appear?
What parts does a flower consist of?
What color is the stem? Flower?
Let us also decorate our flowerbeds on the leaves with the first flowers.
(children lay out the blanks on paper)
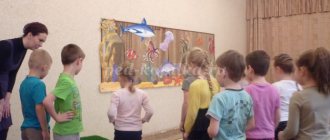
Educator: Do you think we can hang our work on the board now and admire it?
Children: no!
Educator: What do we need to do for this?
Children: stick it!
Educator: Please remind me which side of the part needs to be coated with glue?
Independent work of children.
Physical school
Our wonderful flowers (Children squatting) Bloom their petals. (They begin to slowly get up) The breeze breathes slightly, (Open their arms above their heads) The petals sway. (They rock) Our wonderful flowers close their petals. (Hands down) They shake their heads and quietly fall asleep. (Slowly take the starting position)
Result: Let's pin our work on the board and admire it.
What flowers appeared in our flower beds?
Review of works, positive assessment of each work.
Application in the second junior group
Application in the second junior group
Plan
- Application as a type of activity
- Types of applications
- Program objectives
- Methodology for familiarizing children of the 2nd junior group with the application
- Application as a type of activity
Applique (from Latin appllcatio - to apply, apply) is one of the types of applied art used for the artistic design of various objects (clothing, furniture, dishes, etc.) by attaching cut-out decorative or thematic shapes to the main background.
The originality of the applique lies both in the nature of the image and in the technique of its execution.
The image in the appliqué is highly conventional compared to other types of planar images - drawing, painting. The applique is characterized by a more general form, almost without details. Most often, a local color is used, without shades, and one color is sharply different from another.
The appliqué process involves two steps: cutting out individual shapes and attaching them to the background.
Sometimes the cut out parts are not completely attached to the background, and the applique turns out to be partially voluminous. For example, the petals of a flower are attached only at the middle, and its ends lag behind the background. This gives greater expressiveness to the image. The simplicity and ease of execution of the applique make it accessible to children's creativity. Children can either use ready-made forms, painted in certain colors, or create compositions by cutting out elements of patterns, plot images, etc. Thus, applique classes contribute, on the one hand, to the formation of fine arts and skills, on the other hand, to the development of creative children's abilities.
- Types of applications in kindergarten
Preschoolers master all the processes of making appliqué—cutting and gluing shapes. Preparatory exercises for mastering this type of activity are games with mosaics, with the help of which children, laying out ready-made geometric shapes, become familiar with their features, color, arrangement methods, and principles of creating a pattern.
Cutting without gluing helps master the applique process (children cut paper, making tickets, flags, etc. for the game, learn to use scissors).
In kindergarten, they use such types of appliqué work as gluing ready-made forms (decorative - from geometric and plant forms and object - from individual parts or silhouettes) and cutting and gluing forms (individual objects, plot, decorative).
Preschoolers can cut out shapes in sections or as a silhouette. Composing an object from separate parts is easier for them, like any constructive image in drawing or modeling. Silhouette cutting is more difficult for children, since they always need to compare the general contours of the object with the proportions of its individual parts. Therefore, cutting out complex shapes is included in the program only in the preparatory group.
The application contains great opportunities for the development of imagination, imagination, and creative abilities of children. Thus, the pattern can be made up of both ready-made geometric and plant shapes cut out by the children themselves. The use of ready-made forms in decorative works allows preschoolers to focus all their attention on the rhythmic alternation of elements in a pattern and the selection of beautiful color combinations.
Children use the skills acquired in appliqué classes in other activities, mainly in design, making shadow theater, light decorations, and Christmas tree decorations.
- Objectives and content of application training in the second junior group
- familiarity with the geometric shapes that make up many objects - circle, square, triangle;
- knowledge of colors - red, yellow, blue, green, white, black;
- knowledge of the concepts of “quantity” (one, two, three, many), “size” (large, small, more, less);
- development of compositional skills in arranging shapes in a pattern (in a row, along the edge, in the corners) and parts of objects;
- mastering the skill of gluing forms.
Applique classes begin with the second junior group.
In the fourth year of life, a child is able to translate his simple idea into an image and can master some technical skills. In this regard, applique is a more difficult type of activity in terms of technique than drawing or modeling, since the methods of its implementation are more complex and the result obtained is more conditional.
The development of motor functions of the hand in children of the fourth year of life is still imperfect, so they are not able to use scissors. True, a child can be taught this skill in a family setting. In this regard, the solution of the tasks set by the program takes place in classes with ready-made forms.
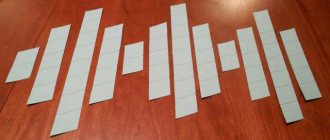
Mastering the skill of making appliqué begins with gluing several shapes in one row on a strip of paper. Even this simple task requires knowledge of the features of the new pictorial form, its name and color, the ability to arrange the forms in a horizontal row, the skill of correctly applying glue and gluing the forms in the right place. So that the child can cope with this task, a circle shape is given for gluing, which is equally symmetrical along the entire contour, has no top and bottom and does not change depending on the location; to place the elements, they offer a narrow strip of paper, on which it is impossible to arrange the circles in any other way than in a row; all shapes have the same color. This makes completing the task easier: children must remember the name of the shape, its color and master the gluing technique.
In the first lessons, sometimes the main difficulty for kids is the gluing process: they need to learn how to hold the brush correctly, pick up a little glue, carefully spread the form on the back side, using a special oilcloth, lay the forms in place with the smeared side, press them with a cloth, do not move them, put them down brush only on the stand. At first, the gluing technique completely absorbs the children's attention.
Further complication of the program material occurs due to the introduction of circles of a different color and their arrangement in alternating colors. Then a new shape is introduced - a square.
When making a composition of squares, you must ensure that they all fit exactly on one side. The composition of the appliques gradually becomes more complicated - children place and stick the shapes at the corners of the square and along the edge of the circle. These elements of the form are clearly highlighted by the form itself and are easily recognized by the child. Gluing in the center is still difficult for children in the younger group.
Along with mastering the principles of the rhythmic arrangement of one or two elements, the program provides for gluing object images, first consisting of one, then of 2-3 parts (for example, a mushroom, a flag, a snowman, a house, etc.).
The difficulty of these tasks is that the object and its parts must be located depending on its design: the stem of the mushroom goes down from the middle of the cap, the roof is located above the walls of the house, etc.
However, kids will successfully cope with such work, since the subject tasks are clear to them in content. In addition, for the image they select objects with a symmetrical arrangement of parts, with shapes close to the geometric ones, which the children became acquainted with in the first lessons.
I. L. Gusarova recommends starting appliqué work in the younger group by completing tasks that have a specific visual task - creating a familiar object. Interest in the topic will help the preschooler overcome both constructive and technical difficulties. A small child understands better the task of putting together an object from 2-3 parts than arranging geometric shapes according to the principle of alternation and symmetry in a pattern. In the first case, he himself will notice the mistakes made, since the logic of the content will be violated. The principle of alternating and repeating pattern elements will be mastered successfully when gluing flags or beads onto a drawn thread.
Thus, for children of this age, each appliqué task, as well as drawing and sculpting, should be associated with a specific image. The teacher’s task is to select appropriate subject names for all decorative tasks of gluing geometric shapes - “decorate a handkerchief” (square ), “paint a plate” (circle), etc.
By the end of the year, children can
Show emotional responsiveness when perceiving illustrations, works of folk arts and crafts, toys, objects and natural phenomena; enjoy the individual and collective works they create.
In the application
• Create images of objects from ready-made figures.
• Decorate paper blanks of different shapes.
• Select colors that match the objects depicted, and at your own discretion; use materials carefully.
- Methodology for familiarizing children of the 2nd junior group with the application
For young children, material for work and the organization of the learning process are of great importance. The material for making the appliqué can be so bright that it can often distract children’s attention from the teacher’s explanations. Therefore, in the younger group, especially at first, ready-made forms for sticking are distributed to each child in a special bag after explaining the task. Children in this group are not yet able to use common material, since they do not know how to distinguish the shapes and colors of elements for gluing.
After the teacher’s explanation has been heard and the forms for sticking have been distributed, the children lay them out on a sheet of paper in accordance with the assignment. The teacher checks the correct arrangement of the elements. Therefore, in the first classes in the younger group, glue is placed on the tables only after the teacher has checked all the work, immediately before the gluing process. This will allow the teacher to monitor the correct construction of the image and help children master the gluing technique. In the future, all equipment, except for color forms, can be prepared in advance.
Examination of an object during appliqué classes will be used to revive preschoolers’ ideas about the features of the shape, color of an object, etc. Since the image in the applique is associated with a large generalization of forms, examination of nature should be accompanied by showing samples made by the teacher, especially in the first lessons.
While showing the sample to the younger group, the teacher clearly names the color of the form and, if necessary, traces it with his finger, emphasizing its features.
Since in the younger group the main task of teaching is to familiarize children with various forms and techniques of gluing, a sample is most often shown for exact repetition. But preschoolers should also be taught to independently solve certain problems during repeated lessons. For example, after becoming familiar with the shape of a circle and the techniques for gluing it on a strip, you can offer to choose circles of any color for gluing beads.
The teacher's demonstration of work techniques is necessary to develop the correct skills in children. Moreover, the demonstration of the most complex techniques is given until the teacher is convinced that the kids have mastered them and can independently apply them in their work.
The teacher also shows the sequence of the application: what form he takes, how he places it on the paper, explains at what distance from it another form should be placed, etc. After laying out, he shows and explains the gluing process if the children have not yet mastered it . The teacher accompanies each action with an explanation.
The demonstration is not carried out in cases where children understand the process of laying out and gluing. The teacher, using the example, explains the task and reminds some working techniques. For children who find it difficult to complete a task, he shows these techniques individually.
Literature
- T.S. Komarova Lessons
in
visual arts
in the second junior group of kindergarten
.
Lesson
notes : Mosaic-Synthesis; Moscow. – pp. 19 – 20,
pp. 22 - 50
- Kosminskaya V.B. and others. Theory and methodology of visual activity in kindergarten: Textbook. A manual for pedagogical students. Institute / V.B. Kosminskaya, E.I. Vasilyeva, N.B. Khalezova and others.
–– M.: Education, 1977. – pp. 182 – 189
- V.B. Kosminskaya, E.I. Vasilyeva, R.G. Kazakova et al. Theory and methodology of visual activity in kindergarten: Uch. A manual for pedagogical students. institutes and special No. 2110 “Pedagogy and psychology (preschool)” /– 2nd ed., revised. and additional
– M.: Education, 1985. – pp. 189 – 203
7