The benefits of step-by-step drawing
Parents should understand that it is much easier to teach a child to portray people using sequential actions than through observations and sketches. In addition, you need to remember the benefits of this method of drawing:
- developing the ability to follow clear instructions;
- the ability to separate an entire object into individual parts;
- the ability to bring your own vision into the picture;
- manifestation of independence.
Required Tools
Before creating your first painting, you need to make sure you have the necessary equipment:
- a workplace with good lighting;
- a simple pencil, you can immediately purchase both a soft and hard version, for a small child - preferably with edges;
- paper - individual sheets or album;
- eraser;
- sharpener;
- colour pencils.
Age characteristics
You can start drawing people step by step until you are four years old. The main thing is that the baby can already hold a pencil and be familiar with the existence of simple geometric shapes. What are the features of drawing at different ages:
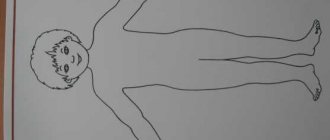
- up to 3 years old, a child will be able to draw a basic man if he uses a prepared template;
- from 3 to 4 years - you can start drawing a person with an image of a snowman or matryoshka doll;
- from 4 to 5 – complicate the picture, add detail to your nesting doll;
- from 5 to 6 – draw a person using simple shapes: ovals, circles, rectangles, lines;
- From 6 years old you can begin to depict people in more detail, draw them in different poses, in motion or at rest.
Lesson summary for the middle group “Human Body”
Zumzum Ibragimova
Lesson summary for the middle group “Human Body”
LESSON SUMMARY
FOR FORMING A COMPLETE PICTURE
PEACE AND HORIZONS EXPANDING
«THE HUMAN BODY!»
Middle group
— formation of children’s ideas about the external features of the structure of the human ;
— introduce the capabilities of the human (I can run, jump, etc.)
;
- develop the ability to consider yourself and each other;
— develop the ability to analyze, compare, and draw conclusions;
Illustrations depicting different people,
Simple algorithm
If you are wondering how to teach a 5-year-old child to draw a person, especially if he has no previous experience in such drawings, then you should start with a simple plan of action. Moreover, it will be correct if you first show how to portray a person, and then, if necessary, guide the baby’s hand, helping to repeat the sequence of actions and the correctness of the lines.
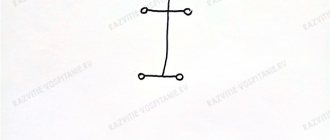
- Draw an oval that will become the head.
- Below it we draw a large rectangle, but at a small distance from the oval. This will be the torso.
- We connect the rectangle and the oval using two straight lines - this is the neck.
- Add four rectangles to create arms and legs.
- On the hands we draw the fingers in the form of small rectangles.
- On the legs we draw some kind of boots.
- On the head (on the sides) we add two circles - these are the ears. We add curls inside them.
- We draw facial features. We do this in the most basic way. The eyes are small circles, the nose is a vertical line, the lips are a concave arc.
- Adding clothing items.
- You can start coloring.
I’ll tell you about myself: I’ve never been able to draw people, or maybe I just didn’t want to learn it. Animals, nature, still lifes - that's it, please. My son also has not yet shown interest in this kind of drawings. He loves to depict various types of transport, buildings and nature.
MAGAZINE Preschooler.RF
Abstract of OD on drawing for children of the preparatory group on the topic: “Drawing a person”Author: Ryzhikova E.A. teacher of kindergarten No. 164 “Vestochka”
Goal: To strengthen children’s ability to graphically model a human figure in motion, observing the proportions of body parts based on the schematic method of drawing with ovals. Reinforce the theoretical part.
NGO "Cognitive Development":
- Encourage drawing large on the entire sheet;
- Practice creating contours with a simple pencil;
- Develop the ability to convey the shape and structure of the depicted object, taking into account the correct proportions of all parts of the body;
- Develop the ability to draw a human figure in motion from different angles (front, profile);
- To teach the ability to convey dynamics in a drawing, depicting different poses of people, through detailing;
- To awaken children’s cognitive activity and interest in creativity;
- Develop hand-eye coordination, speed of action, perception, imagination;
- Stimulate children's independence and creativity in visual arts.
NGO "Speech Development":
- Enrich the dictionary with new words: genre, painting, graphics, sculpture, dynamics, statics, profile, phases, compositional center, proportions, diagram, modeling;
- To develop the ability to correlate words denoting the names of body parts and their location.
NGO "Artistic and Aesthetic Development":
- To introduce a variety of genres in painting, graphics and sculpture (everyday genre, portrait);
- Continue to introduce children to works of art: The image of man in the ancient cultures of Egypt, Assyria, Ancient Greece, Makovsky K. “Children running from a thunderstorm” , Deineka A.A. “Running” , “Girls” , Vasnetsov V. “Alyonushka” , Yablonskaya T. “Morning” , Serebryakova Z. “Whitening the Canvas” , Fedotov P. “Fresh Cavalier” , “Breakfast of an Aristocrat” , “Players” , Repin I. "Barge Haulers on the Volga" .
NGO "Social and communicative development":
- Develop the child’s communication and interaction with adults and peers;
- To develop the ability to act, agreeing on who will draw what, independence in work, accuracy; cultivate interest in joint activities with peers, friendly relationships;
- Learn to evaluate your actions and your work, as well as all work in general.
Form of organization of children: subgroup.
Materials and equipment: interactive whiteboard, projector, presentations on the topic “Human Proportions” , “Man in Motion” , flannelographs, large and small wooden model of a man for a subgroup of children, human body parts made of fabric (for a subgroup of children), felt-tip pen, paper A3 format, magnets.
Preliminary work:
For the teacher:
- Prepare visual demonstration and handout materials (manuals and illustrations);
- Select works of portraiture and everyday life in painting (reproductions and illustrations depicting them) in sculpture, taking into account the basic requirements;
- Enrich the electronic library with photos, illustrations of various sports, examples of professional human activity;
- Create presentations on the topic: “Man in motion” , “Proportions of parts of the human body” ;
- Enrich the corner of artistic creativity with visual and practical material on depicting the human world using various visual means;
- Organize and design a place in the group for displaying children's works;
- Enrich the young artist’s library (purchase art history and specialized literature on this topic);
- Select and produce the necessary didactic games and teaching aids in order to enrich the subject-development environment on this topic: “Geography of the body” , “Depict the movement” , “Assemble correctly” , “Dancing men” , “Collect facial expressions” .
For children:
- Consider presentations on the topic “Man in Motion” , pay attention to the proportions (sizes) of the human body, the nature of poses, dynamics, facial expressions.
- Consider illustrations of works of art that clearly depict a human figure in motion, get acquainted with the genres of portraiture and everyday life in painting, graphics and sculpture.
- Consider albums with types of sports and professions of a person.
Expected results:
For children:
- developing the skills to accurately and expressively depict a person in motion;
- developing the ability to use a pencil fluently;
- developing confidence in one's abilities;
- developing in preschool children an interest in depicting the human world, creating motivation to engage in physical education and sports.
For teachers:
- increasing the level of knowledge in the field of fine arts methodology;
- development of methodological material for teaching children 5-7 years old to depict a person in motion.
Progress: Children enter. There is a large wooden model of a man on the stand next to the interactive whiteboard.
Educator: Do you guys believe that this wooden man is capable of following my commands?
Children: How is that?
The teacher invites the children to stand near the interactive board in a semicircle and look at the “obedient little man” carrying out the teacher’s commands. The teacher models various movements on a wooden model (stands straight with his head bowed, raises his right arm above his head, stands on one left leg, tilts his torso forward, arms to the sides, etc.)
Educator: Now let's try to draw a person.
Children: We don’t know how to draw a person.
Educator: Guys, first of all, please tell me all the parts of the human body?
Children: Head, torso, arms, legs, lower leg, forearm, foot, elbow, neck, shoulders, waist, hips, hand, knee, etc.
Educator: Well done, you named almost all the necessary parts of the human body. And in order to learn how to draw a person correctly, we need to remember the basic proportions (dimensions) of the human body. I suggest you watch a short presentation.
The teacher demonstrates the presentation “Human Proportions” , comments on the slides and shows the main proportions of body parts on a wooden model, on a flannelgraph, then draws a graphic model on paper.
Presentation text:
Slide No. 1. Man, unlike animals, is an upright creature on two legs, the position of the human spine is vertical, while that of an animal is horizontal, supported by four legs (front and back). The human head is a universal measure of the entire figure. Usually 7-8 heads fit into the full height of a person. The shape of the head resembles an inverted egg - a rounded back of the head, a pointed chin.
Slide No. 2. The head rests on the neck (we will further depict the neck with two short lines). The head is rotated by the muscles of the neck, which stands on the shoulders; here the figure has the widest part of the body. The arms are attached to the shoulder joint. The arms are quite long, reaching the middle of a person’s thigh. The elbow is at the level of the waist, the narrowest part of the human torso. The elbow divides the arm into two parts, approximately equal in size, the upper part is the shoulder and the lower part is the forearm, and the arm ends with the hand. The arm bends and rotates at three joints: the shoulder, the elbow, and the hand.
Slide number 3. The torso consists of two parts: chest and stomach with hips. The legs are attached to the thighs. A person’s legs are very long in relation to the body, and roughly divide the entire figure in half. The legs rotate and bend at three joints, the hip, the knee, and the shin. Remember, the kneecap protects the joint and prevents the legs from bending forward; this must be remembered when drawing characteristic movements.
Educator: Now guys, let’s assemble our little man on a flannelgraph and draw a graphic model of a person using a diagram of ovals.
The teacher collects the little man in phases, in a clear sequence. Then, commenting on his actions, he draws a diagram of ovals on a sheet of paper, placing the first figure on the left on a sheet of F4 format (horizontal position).
Description of the drawing sequence:
- We mark the topmost mark of the top of the head and the bottom mark of the feet.
- Draw an oval head
- Mark the neck with two lines
- Draw the shoulders on the left and right, placing them on the same line
- We form the chest and pelvis of two trapezoids, correct and inverted, the large one is the chest, the small one is the pelvis), connecting the two parts at the waist (the narrowest part of the body). The human body is elongated.
- From the shoulder points we draw elongated ovals of the shoulder and forearm, marking the elbow at waist level. Shoulder length, from shoulder to waist. Forearm length from waist to mid-thigh.
- We draw the legs from three ovals. The legs are thicker and longer than the arms. We draw an elongated oval from the points of the thigh, from the thigh to the knee, one part, from the knee to the shin, the second part, both parts are approximately the same in length. The foot is a small oval.
Educator: Draw your little man at rest, upright, in phases, taking into account the proportions of all parts of the body.
Children draw the first diagram of a person from the front. Independent work of children. Monitoring the teacher and helping those who have difficulty. Individual analysis of work.
The teacher suggests taking a short break and doing a physical warm-up: “Little Red Riding Hood and the Gray Wolf”
Goal: Increase the energy level in the group, relieve emotional stress.
Behavior: Children stand in a circle. The teacher offers to play a game. Red Riding Hood will be a small ball that participants must pass to each other in a circle, from the first player to the next. Little Red Riding Hood runs from the wolf, who will come later. The wolf will be a slightly larger rubber ball. The evil wolf stubbornly runs after Little Red Riding Hood in the same direction. If he overtakes her, she must turn around and continue running in the other direction. And one more thing: each player has the right to change the direction in which the Wolf runs. To do this, he simply must say: “Turn!” then the Wolf will change the direction of his movement and Little Red Riding Hood should also change the direction of her running.
Educator: I suggest that after our fun warm-up we continue to work. Guys, you did a good job with the first task, and now let's draw the first simple movement.
The teacher models the movement on a wooden model, then lays out this movement on a flannelgraph, on a fabric model, then draws a graphic model. Invites children to depict a simple movement, first on their wooden men, then on their flannelographs, and then on a piece of paper to draw the movement that they gave their man.
Conclusion: To summarize, the children organize a vernissage of their works. Discuss their own and other people's work. They find errors and give their recommendations.
In subsequent classes, the tasks become more complicated, the movements “Walking, running, sitting, lying down, etc.” are modeled. , from a new angle, in profile. At the next stage, draw a pair composition in which a couple of people are depicted interacting with each other: “In a cafe” , “In a hairdresser” , “Boxers” , etc. Children first model the interaction design on a flannelgraph to understand how to position all the body parts, and then graphically model the resulting movement. On paper with contour lines using a diagram of ovals.
| Next > |
Basics of Proportions
How to teach a 7-year-old child to draw a person if he already has good experience behind him? It's time to introduce him to the correct proportions of the human body.
- The head is outlined.
- A vertical line is lowered, which will include seven more ovals of the same size.
- The center of the chest is at a distance of two measured units (ovals below the main one, which is the head).
- Three units will lead to the navel.
- The pubic bone is marked after four units.
- The center of the knees will be indicated by a measured area of five heads and the distance from the top of the head to the future eyes.
- The middle part of the shin is 7 units.
It is also important to consider the following points:
- the width of the head and the female shoulder are equal;
- The shoulder width of men is equal to one measured unit;
- the width of the chest corresponds to three units;
- the elbow of the person depicted should be at the level where the thigh begins;
- the oval, which represents the torso, should be larger than the one that represents the pelvis.
Progress of the lesson.
(the guys are sitting at the table on their chairs)
- Guys, what holiday is coming soon? (February 23)
-On this day, you and I will congratulate our dads, grandfathers, brothers and our boys, future Soldiers.
- What can you give? And what wishes can you wish for?
(Children suggest what to give; one option is to draw a postcard with warriors .)
Before you start drawing, you need to do finger exercises.
There are five fingers on my hand
Five grabbers, five holders.
To plan and to saw,
To take and to give.
It's not hard to count them:
One two three four five!
The teacher shows the sequence of drawing a man in military uniform .
Children draw a portrait on a postcard. The teacher pays attention to technical skills, if necessary, attracts children to the flannelgraph - to clarify the location of individual parts
2. Then we draw the body, arms, legs.
3. Then we draw the hands, cap, boots.
(rotation in front of the chest with arms bent at the elbows)
They sat quietly in the clearing,
(sit down, hands to knees)
And they flew again.
4. Draw in the eyes, eyebrows, nose, and mouth with a simple pencil.
—Which postcard did you like the most?
Tell me again what holiday is coming soon? Dads and grandfathers will be happy with such gifts.
All the work is good, we tried our best!
Summary of an open integrated lesson (drawing, the world around us) in the middle group: “Spring Forest” Purpose: To form in children a desire to get acquainted with, emotionally perceive works of fine art, and notice expressiveness.
Summary of a lesson on fine arts activities in the middle group “Decorative drawing” “Deer - branchy antlers” Decorative drawing Program content: introduce the gingerbread industry of Russia. Learn to decorate a figurine.
Drawing of an experienced kid
Older children who understand what human figures are like will be able to draw more detailed pictures with a pencil.
- We schematically draw a future person by making sketches. We depict it with simple geometric shapes.
- We draw the neck, make characteristic curves on it, and decide on the width.
- We depict the line of the shoulders, taking into account whether we are a man or a woman.
- We mark the waist; its width also depends on the gender of our person.
- We draw the arms, mark the elbows and hands.
- Let's start with the legs, draw the presence of the knees, make the hips wider than the shins, draw the feet or boots if our little man is wearing shoes.
- We finish drawing the ears, hair, and do the detailing of the face.
- You can start drawing out the details of the clothing.
- We color our picture, bringing the little man to life.
Read also
Topic of the week: “Parts of the body and face”
Topic of the week: “Parts of the body and face” Lesson 20. Grandmother and grandfather (Applying plasticine to the surface) Program content. Continue teaching children how to apply plasticine to a given surface; bring the product to the desired image using threads and plasticine. Consolidate knowledge
Topic of the week: “My Home”
Theme of the week “My Home” Lesson 22. House for a bunny and a rooster (Plasticine modeling) Program content. Strengthen children's ability to bring a product to the desired image using plasticine. Learn to retell fairy tales based on illustrations. Demonstration material. Heroes
Topic of the week: “Parts of the body and face”
Topic of the week: “Parts of the body and face” Lesson 1. Face of a clown (Modeling from plasticine using additional material) Program content. Teach children to roll balls from plasticine and attach them to a given base. Strengthen children’s ability to navigate
Theme of the week: “Transport”
Topic of the week: “Transport” Lesson 25. The train is rushing (Free choice of material) Program content. Learn to depict objects that resemble different geometric shapes (rectangle, circle, square). Draw complex objects with a simple pencil, conveying the shape of the main ones
Topic of the week: “My Home”
Topic of the week: “My Home” Lesson 41–42. Houses of the Three Little Pigs (part 1–2) (Drawing with pastel crayons, sanguine, charcoal, wax crayons) Program content. Continue learning how to make illustrations for fairy tales. Develop the ability to arrange objects on a sheet of paper. Learn
Theme of the week: “My City”
Theme of the week “My city” Lesson 43. The Kremlin (Drawing with gouache) Program content. Cultivate an interest in the history of your hometown. Learn to outline the silhouettes of the towers and walls of the Kremlin with a simple pencil, conveying their shapes and structure. Continue learning to use different shades
Topic of the week: “Parts of the body and face”
Topic of the week: “Parts of the body and face” Lesson 1. There are such boys (Drawing with a simple pencil) Program content. Teach children to draw a happy and sad face with a simple pencil. Learn to analyze and understand the content of a poem. Cultivate benevolence
Theme of the week: “Furniture”
Topic of the week: “Furniture” Lesson 11. Blanket for Vanyushka (Drawing with felt-tip pens) Program content. Teach children to decorate a rectangular object with colored stripes, alternating them by color. Learn to understand and analyze the content of the nursery rhyme. Cultivate benevolence
Theme of the week: “Clothing”
Topic of the week: “Clothing” Lesson 12. My winter hat (Brush painting. Gouache) Program content. Teach children to draw a hat with a simple pencil; paint over with gouache of different colors. Develop thinking, attention. Material. A large sheet with drawn three hats (red,
Topic of the week: “My Home”
Theme of the week “My Home” Lesson 21. Houses for nesting dolls (Drawing with colored pencils) Program content. Teach children to draw small and large objects consisting of a square and a triangle. Continue learning how to compose a plot composition. Cultivate responsive
Topic of the week: “My Home”
Theme of the week “My Home” Lesson 41. Ice hut (Drawing with pastel crayons) Program content. Continue to introduce children to cool tones. Learn to convey the characteristic features of objects using cool colors. Introduce opportunities
Topic of the week: “Parts of the body and face”
Topic of the week: “Parts of the body and face” Lesson 20. Clown mask (Brush painting. Watercolors) Goal. Teach children to draw a clown’s face with a simple pencil, consisting of circles of different sizes; navigate parts of the body and face. Strengthen the ability to analyze content
Topic of the week: “My Home”
Topic of the week: “My Home” Lesson 22. Fence near the house (Brush painting. Gouache) Purpose. Continue to teach children to draw various objects consisting of combinations of lines. Learn to retell fairy tales based on illustrations in the book. Develop speech and thinking. Demonstration
Topic of the week: “My Home”
Topic of the week: “My Home” Lesson 21. Building a house (Modeling from plasticine) Program content. To develop in children the ability to sculpt a house from rolled up columns, placing them on top of each other and firmly connecting them together. Strengthen the ability to use a stack. Develop
Theme of the week: “My friends”
Theme of the week “My friends” Lesson 28. Cipollino (Modeling from plasticine in combination with natural materials) Program content. Continue to teach children to sculpt the figure of a fairy-tale character using a combined method, conveying the shape of the head, torso, legs, arms and observing
Topic of the week: “My Home”
Theme of the week “My Home” Lesson 22. House for a bunny and a rooster (Colored paper. Application from prepared parts of an object) Program content. Cultivate compassion and kindness. Teach children to form a whole from several parts; apply glue to the part and stick it
Source
Recommendations
Parents should understand that teaching a child to draw a human figure can be a difficult task. In this case, the following points must be observed:
- do not push the child, do not expect quick results;
- do not criticize his first attempts, much less laugh at him;
- diligence and consistency of actions, regular training will bear fruit;
- you must always follow the algorithm of actions, do not change points;
- during your first attempts, you can use a template, then samples, and then move on to drawing on your own;
- Praise your child even for the smallest victories.
Now you know how to teach a child to draw a person. Remember the need for consistent training. Never put pressure on your child, demanding quick and high-quality results from him. Do not force drawing if the child does not like this type of activity at all. Creative impulses must come from the heart and be filled with the emotional experiences of the little one.
