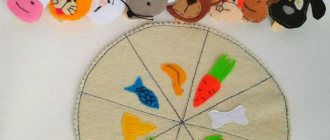
First crafts
One of the most important moments in organizing the process of children's creativity is creating a situation of success. A child, especially a small one, should see and feel that everything worked out for him, that his gift really pleases his parents.
A postcard, applique or three-dimensional model will turn out beautiful if the task is appropriate for the child’s age.
It is not surprising that teachers choose crafts made from colored paper for children as their first experiments. This is a light, pliable material, easy to use and creates a festive mood with its rainbow colors.
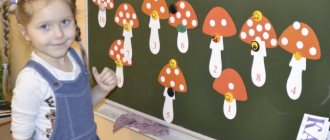
Forming the skill of working with colored paper, as a rule, begins with applications. For the little ones, you need to prepare handouts - pre-cut details of the future picture.
Looking at the sample, children must place them correctly on the base - a piece of paper or cardboard - and then glue them in a certain order.
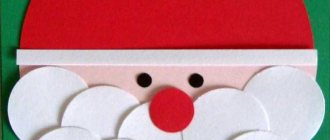
As a gift, a mother can be presented with a postcard with a picture of a flower: a narrow strip-stem, a circle-core, ovals or circles-petals, a pointed leaf are glued onto a sheet of cardboard folded in half; smiling sun: yellow or orange circle, ray stripes, drawn or pasted eyes and mouth; bouquet in a vase: shape of the vase, shape of flowers and leaves.
A baby can surprise his dad, uncle, brother or grandfather with an applique depicting an airplane flying in the clouds, a ship sailing on the waves, or a tank.
Creating simple three-dimensional figures of animals also turns into a fun game, which very young children who have barely learned the basics of working with glue can handle. They are based on a cylinder or cone onto which parts are glued - ears, paws, eyes, noses.
The figures turn out to be very cute and evoke sincere affection. The variety of types of applique and the ease of its production will, over time, in the process of improving skills and abilities, push children to independent creativity.
Children's master class “Tree of Friendship” for 1st junior group
Irina Tripalina
Children's master class “Tree of Friendship” for 1st junior group
Hello, dear colleagues and guests of my page.
I bring to your attention a master class , the purpose of which is to create a collective work on an autumn theme using non-traditional artistic techniques.
- development of ideas about the surrounding world, about autumn features of nature, about types of vegetation;
-development of fine motor skills, creative thinking, attention;
- formation of aesthetic skills;
- establishing emotional contact between children, forming initial ideas about the team.
Materials: 2 sheets of A4 blue colored paper, 1 sheet of green, gouache in 4 colors (red, yellow, orange, brown, black and green markers, brush, jar of water.
A friend will help us in the rain and heat,
He will stretch out dozens of hands
Let's have a short conversation about trees , their differences from bushes, about the color of foliage in summer and autumn.
a tree from their palms together .
One by one, apply gouache to the child’s palm with a brush and leave a “print” on pre-attached sheets of colored paper.
After final drying, we invite the children to look at our tree .
This work is suitable for decorating a group reception .
Templates and stencils
Having learned to confidently arrange a sheet of paper, cut it and glue it on their own, the child can move on to the next stage of mastering applied techniques - working with templates and stencils. This, at first glance, is a simple task, but in fact it requires increased attention and good coordination of movements.
Working with stencils is easier than with templates, so it’s better to start with them. It is important to introduce children to the basic rules: how to economically and conveniently arrange a stencil or template, how to hold it, how to trace an outline with a pencil.
It is better not to rush into moving to this level of difficulty. Failure can lead to disappointment, which can seriously stunt creative growth. Let the first template be a child’s palm: children like to trace their hand, tickling their fingers with a pencil, and there are a great many options for crafts consisting of such details.
Does your palm look like a maple leaf? Let's make a picture with an autumn bouquet! Does it resemble a peacock's tail? Let's glue together a proud, handsome man walking through a blooming garden! Or maybe these are hedgehog thorns?
Let's make an applique with a hedgehog bringing home a fragrant apple! Adults can suggest a direction and, together with young artists, formulate an idea for a paper craft for children, which they will be happy to implement.
Safety precautions at work
When working together with your child to create a craft, you should follow certain safety precautions:
- Avoid contact with parts that are too small.
- Work with scissors and glue only under the supervision of an adult.
- Do not allow paint, glue or other liquid components to get into the child’s eyes.
We recommend reading:
Crafts from plasticine: the best master class for children at school or kindergarten. 90 photos of the best ideas for creating plasticine figuresFelt crafts - the best patterns and templates. Step-by-step instructions and master class for beginners (130 photo ideas)
DIY crafts from egg trays - the best step-by-step master class, with description. TOP 100 photos of original ideas for crafts
If these simple conditions are met, the work will bring only joy and unforgettable impressions to the child.
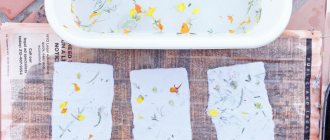
Natural materials
You can learn to love and appreciate nature not only by observing its natural beauty, but also by using its fruits in applied creativity. This type of activity develops associative thinking and, perhaps more than other educational activities, is similar to a game.
Hand-made figures made from cones, acorns, seeds, twigs and shells awaken children's imagination and stimulate cognitive interest. A variety of techniques for working with natural materials allows you to choose the one that best suits your age, training and design.
Themed crafts for children 5 years old will help them get acquainted with the surrounding world of their native land, study the seasonal characteristics of plants, the habits of animals, and make an original and beautiful gift.
A plasticine oval with a pointed nose, studded with cones, ash parachute seeds, sunflower seeds, spruce needles or acorns, turns into a hedgehog; with a long, gracefully curved neck, complemented on the sides with a pair of leaves or large shells - like a swan; a flattened ball with an elongated head, decorated with walnut shells - like a turtle.
A tin coffee can tightly covered with plasticine, decorated with an ornament of seeds, will become a cute vase, and a tea box, covered with peas, leaves or crushed eggshells, will become a box for needlework.
Not to mention the numerous options for making people from cones and acorns, genre scenes from vegetables and fruits, panels from dried flowers and leaves.
Working with natural materials, like any creative activity, is an excellent option for interesting and rich children’s leisure time and an opportunity to create something beautiful and useful that can please friends and family. And this is also very important for children!
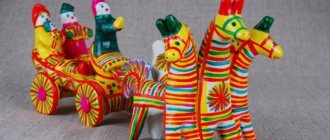
Clay toy
To work with this material, you need to understand what kind of clay there is, and there are two types: mountain and polymer.
Mountain or natural clay has several colors depending on the presence of iron, minerals and salts:
- Red. Holds temperature perfectly. In nature it is brown in color with a greenish tint.
- Blue. It contains many minerals and salts. A very good cosmetic product.
- White. The most affordable of natural clays. In nature it has a dirty dark gray color. It turns white after firing.
The artificial material for modeling is polymer. It has very important properties: heat resistance and ductility.
This type of technologically new material may require firing after modeling and may have the ability to harden on its own.
To work with this interesting product you may need the following accessories:
- Stable and level table.
- A cloth for wiping hands.
- Gloves if you suddenly have to mix the clay yourself.
- Apron.
- Small knife: stationery or pocket knife.
- Molds for applying patterns. They can not only be factory-made, but also be made from improvised materials.
- “Sandpaper” from zero to five.
- Rolling pin for rolling out clay. Any housewife can find it.
- Decorating products.
Available materials
Acquaintance with this type of creativity usually also occurs in kindergarten. The materials used are cardboard and plastic plates, disposable cups, spoons and forks, colored bottle caps, buttons and much more.
Starting with simple crafts, children gradually move on to more complex models that require diligence, good coordination and constructive thinking. Ordinary objects used in everyday life or out of use, which have become crafts, for children - a miracle created with their own hands, a little magic!
Application for March 8
An original craft will be an applique in the shape of a big heart. To make it you will need:
- Colored cardboard.
- Scissors.
- Glue.
- Thread and needle.
First of all, the heart itself is made: a blank is cut out of colored cardboard according to the template. The edges of the future applique are stitched with thick thread to create a relief pattern.
From voluminous woolen threads, a rose or chamomile stem is laid out on glue on top of a cardboard base (at the request of the master). The bud can also be made from a ball of snow-white yarn.
Cotton pads
This material is popular in works with winter and New Year themes. Fluffy snow-white “rounds” seem to be asking to be used in an applique with a snowman! They easily become dense snowdrifts and light snowflakes, but can also be a sheep's coat.
Painted discs can be used in narrative pictures and panels in almost the same way as colored paper. But these works will be distinguished by volume, special warmth and softness.
Pasta
Thanks to the variety of sizes, shapes and even colors, this food product has long established itself as a material for creativity. And not only for children! Not every traditional material can boast such a variety of forms of use - from simple and complex paintings to decorative dishes.
It is better for younger children to master the technology of flat paintings, where pasta can act as sun rays, flowers or flower petals, elements of folk ornament. Later, you can get acquainted with semi-volumetric panels, and then move on to making three-dimensional models.
A rustic house assembled from pasta tubes, flower bouquets from pasta shells or spirals, cups, teapots, candlesticks or boxes are excellent DIY craft options for children 9 years old and older.
Folk themed rag dolls
To bring such a doll into the world we will need:
- Fabric size: forty by fifteen centimeters (white, variegated and plain).
- A small “rag” for an apron, ten by eight centimeters.
- We will use the yarn to make hair.
Stages of making a doll:
- We make the body. Place padding polyester on a piece of white fabric and fold the fabric in half.
- Head. We make a twist at the end and secure it with thread.
- Hands. Fold the fabric in half and tie the edges.
- We fasten the body and arms with thread. Using thread we make a cross-shaped pattern on the chest. This will connect the arms and body. We wrap her belt. We tighten the thread.
- Create an underskirt. Folds form on plain fabric. We fasten the skirt with threads. We put a skirt on the doll
- Attach an apron and belt. We tie the fabric for the apron with a thread to the front (front) part of the doll.
- Making hair. We wind the yarn onto thick cardboard in several layers, then cut the yarn from one edge. Align the bun and secure it to the head.
The above examples are not all that is in the tradition of making “Russian folk toys”. With this article I wanted to attract as many people as possible to the study of native traditions, rituals and the history of Russia in general.
Plastic bottles
Once you are carried away by this type of creativity, you can not only surprise your friends with your wild imagination, but also, in the meantime, decorate a summer cottage for the delight of your beloved grandmother! So, a squad of cheerful gnomes can line up along the garden path, and one plastic bottle of any size is enough to make each of them.
It is enough to cut off the bottom and paint with paints, drawing a suit, hat, hair, beard, eyes, nose and mouth. Of course, creating complex models requires the participation of adults, since it involves the use of sharp knives, such as stationery knives.
But most of the work - cutting, coloring, assembling - the child can do on his own.
Before you begin this work, you should carefully consider the procedure, prepare all the necessary materials and follow the step-by-step instructions for making crafts for children, invented independently or taken from other sources.
Plastic construction, in a sense, is akin to Lego: it combines three-dimensional parts made from source materials of suitable shape (bottles of different sizes and shapes).
So you can make the heroes of your favorite cartoons - Winnie the Pooh, Minions, Stitch or Pony, characters from folk tales - the Old Man, the Old Woman, the Fox, the Wolf and the Hare, and make themed compositions. And during the summer holidays, the dacha will turn into a Magic Land!
Cereal applique
Materials you may need:
- Glue.
- Thick cardboard.
- A finished picture or photograph from which the master will work.
A wide variety of cereals are used: millet, rice, pearl barley. A circle is drawn on the cardboard, indicating the boundaries of the application. Next, coat the base areas with glue, and place the cereal of your choice on the surface.
Different details of the design are decorated with different grains. If desired, the glued cereals can be painted with ordinary watercolors.
Salty dough
An amazing material that successfully competes with plasticine, natural and polymer clay and other plastic masses. Its beauty for children's crafts also lies in the fact that the finished product can be colored at your discretion, using an unlimited number of shades.
The dough itself is prepared from flour, salt and water, taken, for example, in the amount of 300 g X 300 g. X 200 ml respectively. Completely dissolve fine salt in cold water, and then gradually add flour to it, stirring as long as possible. Knead the mixture on the table until smooth.
The required softness, density, viscosity and stickiness are achieved by adding little by little (if necessary) water or flour. The finished dough is wrapped in film and kept in the refrigerator for about 3 hours. Although not edible, the eco-friendly, hypoallergenic material is ready for use!
Kids will be happy to knead it, roll it out and twist it, smear the parts one on top of the other, cut them into a stack, creating the effect of fur or grass. This is an excellent option for making crafts for Children's Day - individual or collective - in which you can make children's dreams, fantasies and desires come true
Whether it be games with friends and fairy-tale characters, flying on an airplane or firebird, traveling to distant lands or meeting aliens - salt dough will make the work expressive and bright, and the process of creating it enjoyable.
Speaking about the development of creative abilities, a few words should be said about the role of adults in the development of a little master. After all, the best incentive to encourage a child to learn and create is a keen interest in his activities on the part of his parents. In joint creativity, spiritual intimacy is born. Studying technologies and techniques together allows you to get to know each other better.
Repeat at home what your child learned in kindergarten or at school, get acquainted with interesting new products offered by teachers and craftsmen, look at photos of crafts for children, and figure out together how you can make the one you like. And please each other and your loved ones with masterpieces made by yourself.
GCD move:
Conversation on the topic “All nations should be friends ”
.
(The teacher brings in the globe)
Guys, look, what is this object in my hands? (Globe)
.
That's right, the globe is a model of our planet Earth , on which lives
many different peoples. What is shown in blue on the globe? (Seas and oceans)
Yellow? (Land)
.
What about green? (forests)
.
There are many countries on our planet, large and small, in which people of different nationalities live, they speak different languages, they have different traditions and customs, as well as national costumes.
All nations are different, but everyone should be united by friendship and respect , so that there should be no wars and strife in the world.