Decorative drawing in the middle group
Decorative drawing - creating abstract rhythmic patterns and compositions to decorate objects. Drawing ornaments has a beneficial effect on the development of creativity, fine motor skills, imagination and fantasy, abstract and spatial thinking, sensory perception and the child’s intellectual abilities for synthesis and analysis. Acquaintance with decorative drawing begins in this group; in general, 8–10 lessons per year are devoted to teaching the skills of making patterns.
Decorative drawing tasks
Within the framework of the general topic “Decoration of clothes” the following general tasks can be distinguished:
- mastering the skills of compositional placement of large and small geometric elements in the rhythmic combination of a pattern on the silhouette of a sweater; the silhouette is outlined using a stencil, can be divided into strips or provided with its entire surface for decoration. This topic is offered to children after studying decorative drawing on stripes and teaches them to use decorative elements to decorate a product;
- learning the harmonious combination of different colors, improving color rendering.
- developing the ability to use a brush, mastering more complex technical techniques (light dot stroke, applying a stroke with the entire surface of the brush in the process of drawing stripes).
Children learn to alternate stripes, dots and strokes
Drawing tools and techniques in the middle group
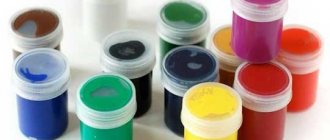
Classic drawing tools:
- with a simple pencil;
- colored pencils;
- wax crayons;
- felt-tip pens;
- brush using gouache - rhythmic application of paints with a brush, creating an ornament in a geometric or floral style. The main task is to teach students to compose organic, holistic compositions from identical patterns;
- brush using watercolor paints. For creative activities with preschoolers, classic and honey watercolors are used.
Non-traditional drawing tools and techniques:
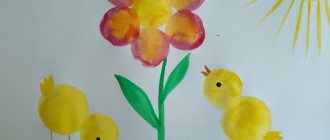
- finger painting - based on a print and requires further refinement of the image using various tools and available means (stacks, cotton swabs and disks, etc.). Initially, children master the techniques of dot, stroke and spiral, then, as their sense of color, rhythm and spatial composition develops, they learn to mix colors and achieve the desired coloristic execution;
- vertical poke with gouache using a hard semi-dry brush without using water to obtain a visual effect of texture (volume, relief);
- drawing with crumpled paper - drawing an image using a ball made from a crumpled piece of paper;
- drawing on crumpled paper is an interesting way of obtaining a three-dimensional image from the bends of a previously crumpled and then slightly smoothed sheet of paper.
The finger technique is easier to perform, which is why some children love it very much.
Drawing techniques in the middle group
In drawing classes, children also learn and consolidate the following skills:
- Hatching is a fairly simple, but expressive and effective way of conveying the rhythmic image of a plant or geometric pattern using soft pencils, wax crayons or felt-tip pens. Drawing with strokes helps not only to convey the beauty of the pattern, but also to develop fine motor skills, which is very important for solving the problem of preparing for writing. Types of shading:
- vertical - the strokes lie in a vertical direction, pressing tightly against each other. Using pencils of different colors, you can achieve the effect of a smooth transition of various shades;
- chaotic - strokes are densely applied in a free direction, then they are brought to the image by additional drawing of external contours.
- diagonal - strokes are applied at an acute angle;
- horizontal is a rather complex technical technique, since it requires the child to change the usual position of his hand in the process of drawing;
- formative - the most difficult method, requiring an image of the shape of an object, for example, a cloud or the crown of a tree.
- Techniques for applying dots and rhythmic brush strokes in gouache painting.
Children master dot and stroke techniques in gouache painting
- Regulating paint set, color selection, soft shade transfer thanks to mixing primary colors and special techniques for working with watercolors.
Children learned techniques for mixing colors using watercolor techniques
The procedure for completing work on the topic “Decorating a sweater.”
During the pedagogical demonstration, the teacher is recommended to show on the board or easel the drawing of the techniques named by the children, and then show an example of step-by-step drawing of a pattern on a sweater. You can look at examples of finished works on a given topic and invite the children to determine with what techniques these drawings were created and in what sequence.
Decoration with paper strips and pencil drawing.
To decorate a sweater, paper strips are selected according to the size of the neck, cuffs, and elastic bands
Gluing paper strips
Draw vertical lines with a pencil
Alternating pencil lines on a sweater
We draw rings in the shoulder area, placing them in a semicircle
Hatching elements
Draw rings along the bottom edge of the sweater and cuffs, paint over them with shading
We draw similar elements along the central transverse line of the product
Drawing patterns with a pencil and decorating with plasticine elements.
Designing the neckline, cuffs and elastic bands with pencil lines
Drawing zigzag lines with a pink pencil
Drawing zigzag lines with a green pencil
Rolling plasticine elements
Attaching plasticine balls by flattening
Sweater decorating process
Finished work
Creating a pattern using a stroke.
Applying strokes of the same color diagonally
Applying strokes of a different color diagonally to mirror previously applied strokes
Decoration with strokes of the neckline, cuffs, elastic bands
Drawing a pattern using lines and dots.
Marking of neckline and cuffs with lines
Cuff and neck design
Drawing lines: alternating lines of different colors
Drawing Dots: Rhythmic Repeat
Drawing with watercolors: toning, lines and rings.
Dividing a workpiece with a horizontal line
Toning the top of the sweater
Tinting the bottom of the sweater and sleeves with a different color
Drawing zigzag lines (alternating)
Sweater neck design
Drawing rings (alternating in a checkerboard pattern)
Drawing with gouache: circles and dots.
Marking of neckline, cuffs, elastic with lines
Drawing dots: alternating dots of two colors
Drawing circles in a checkerboard pattern
Drawing circles of a different color
Drawing dots along the bottom edge of the sweater and sleeves
Drawing dots of a second color
Drawing dots in the center of circles
Finished work
“Winter patterns”: drawing lines and dots with gouache on a colored base.
Let's start drawing Christmas trees at the bottom of the sweater: repeating diagonal lines
Repeat diagonal lines in mirror position
In the middle we mark the trunks of the Christmas trees with vertical lines
Drawing dots in a checkerboard pattern
We design the cuffs, neckline and elastic band
Finished work
“Spring patterns”: lines, circles and dots in gouache on a colored basis.
Marking of neckline, cuffs, elastic with lines
Drawing circles in the center of the workpiece in a checkerboard pattern
Drawing vertical lines from the circles to the bottom edge
Drawing diagonal lines - sun rays
Drawing dots in the center of circles
“Summer patterns”: lines, circles, gouache strokes on a colored basis.
Drawing the neckline, cuffs and elastic with horizontal lines and vertical strokes
Rhythmic repetition of horizontal wavy lines - sea
Circle at the top of the sweater by class=”aligncenter” width=”425″ height=”425″[/img] Drawing strokes to the sides of the circle - rays of the sun
Rhythmic repetition of ticks - seagulls
Examples of finished works on the topic “Decorating a Sweater”.
Exhibition of finished works
Alternating lines
Alternating lines
Repeat diagonal lines
Exhibition of works
Work examples
Line pattern
Work examples
Work examples
Exhibition of works for March 8 on the theme “Sweater for my beloved mother”
Work examples
Decorative drawing training
Decorative drawing has its own functional features - it allows you to focus more on those nuances that general drawing cannot always use: free imagination first obeys the clear structure of the pattern, and then learns to create such a structure.
Stages of training
The first steps to get acquainted with decorative drawing are reminiscent of tasks associated with gluing ready-made elements of a composition. Children master the ability to draw straight lines, and between them place dots and strokes alternating in color, shape and size, gradually complicating the pattern combination by adding new elements.
The simplest decorative element in terms of execution technique is a brushstroke, since it does not require precise coordination of movements and is obtained as a result of a light touch on the paper. Therefore, it is advisable to start drawing up decorative patterns with strokes, then connect the dots. Dot painting is based on the vertical movement of the hand and touching the brush only with the tip, and therefore requires more confident and developed motor skills.
The compositional solution of the first works in the decorative genre will consist of an elementary rhythmic reproduction of the same basic element, for example, a circle.
The child masters the first stage of creating a pattern based on the repetition of one element
The next level of complexity is associated with mastering the principle of alternation, since it is based on a combination of several forms. For four-year-old children, it is enough to use two elements, different in shape and color. Gradually, the level of tasks increases due to the introduction of new artistic elements into the pattern and the creation of more complex compositions. Children also actively use the techniques of drawing rounded shapes that they learned at the previous stage of learning.
Photo gallery: “The principle of alternating elements in shape and color” (presentation for the lesson)
You can start with a limited set of paints
Mixing paints to create new colors is quite interesting.
Humanity has been using such ornaments for a very long time.
Blank templates will help you create a beautiful clothing gallery
Young artists show their imagination
Topics “Decorating a Sweater”: options and wording
This lesson topic is related to the study and decoration of clothes and is offered to children after they have completed simpler tasks that gradually become more complex, for example:
- scarf (stripe);
- handkerchief (triangle);
- napkin (square);
- apron (square or oval);
- hat and mittens.
T.S. Komarova, in her work “Visual activities in kindergarten: middle group,” suggests holding classes in November and emphasizing the need for warm clothing according to the season to maintain health.
Table: possible lesson topics and their content
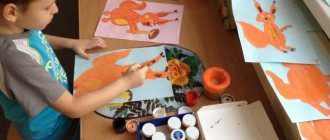
| “Sweater for my friends” (drawing using non-traditional finger technique) | Objectives: introduce finger painting techniques; develop initiative, consolidate knowledge of colors; learn to make a basic pattern. Equipment: two dolls - a boy and a girl, gouache, silhouettes of sweaters of different colors, sketches of sweaters with different patterns. |
| “Lacy Sweater” (painting in gouache using cotton swabs) | Objectives: learn to apply a pattern to a sweater template using a simple pencil and ruler; Using a cotton swab and white gouache, outline your openwork patterns. |
| “Sweater in the style of Dymkovo ornament” (drawing in traditional techniques using brushes and paints) | Objectives: to consolidate the ability to decorate the silhouette of a sweater using Dymkovo painting; teach the selection of colors in accordance with the color of the sweater; cultivate aesthetic taste and perception. Materials: cut out silhouettes of sweaters of different colors, paints, brush, water jar, napkin, music, table with elements of floral patterns. |
| “Sweater for a bunny” (drawing using traditional techniques using brushes and paints) | Objectives: to strengthen children’s ability to decorate items of clothing using lines, strokes, dots, circles and other familiar elements; decorate clothes cut out of paper with stripes; teach the selection of colors in accordance with the color of the sweater; develop aesthetic perception, independence, initiative. Equipment for the teacher: pictures of sweaters with different patterns, toys: a wet hare, a dry hare, a sweater knitted onto a toy, a magnetic board. Equipment for children: sweaters cut out of thick paper, brushes, paints, jars of water, napkins. |
| “Decorating sweaters for boys and girls” (drawing using traditional techniques using brushes and paints) | Objectives: to reinforce the idea of winter clothing and the importance of warm clothing for maintaining health; teach awareness of gender differences among peers; consolidate the ability to create a pattern on a strip using lines, strokes, dots, circles and other familiar elements; learn to choose color combinations. Demonstration equipment: boy's sweater, girl's sweater. Handout: sweater templates, paints, brushes, brush holders, napkins. |
| “Sweater for a doll” (painting in gouache using cotton swabs) | Objectives: to strengthen children’s ability to decorate items of clothing using lines, strokes, dots, circles and other familiar elements; decorate clothes cut out of paper with stripes; learn to select colors according to the color of the sweater; develop aesthetic perception, independence and initiative. Materials: paper dolls, sweaters cut out of thick paper in different colors, paints, gouache, brushes, cotton swabs, glasses of water, presentation on the topic: “Clothing.” |
Photo gallery: children's work on a sweater stencil for drawing in the middle group, painted with gouache using cotton swabs - “Lacy Sweater”
Yellow and white create a feeling of warmth
Green is one of children's favorite colors
Red and white - a classic holiday combination
Contrasting combinations look beautiful
Individual approach
In any visual arts lesson, the teacher should not forget about the individual approach. This is important, since in the middle group children with a penchant for drawing are already clearly identified. Their talent needs to be supported and developed. For example, a child who has quickly and efficiently completed the main task can be offered another blank of a more complex shape - let the child decorate it with a different pattern.
For individual work, you can offer your child a sweater template that is more complex in shape.
Stages of the lesson and methodological techniques
Long-term plans, based on standard educational programs, include four drawing classes per month. The total duration of the lesson should not exceed 20 minutes. Methodological manuals also recommend performing physical exercises (finger, breathing, motor exercises) for 2–3 minutes inside the class to relieve psychological stress and achieve mental and physical relaxation.
Organizational part
The information and familiarization stage (3–5 minutes) involves awakening children's interest in the task. It is necessary to use game events that stimulate curiosity, cause a positive emotional reaction and activity. Motivating techniques can be the appearance of a toy character, reliance on a well-known fairy-tale plot, demonstration of pictures, a musical break, a surprise, introduction to new knowledge, or the personal artistry of the teacher.
Setting up a demonstration stand will help guide children to the topic of the lesson.
Table: “We decorate a sweater with a Dymkovo ornament” (an example of the organizational part of the lesson, author T. Korobskikh)
| № | Replies from the teacher | Expected answers (children or teacher) |
| 1 | Who will tell me what I have in my hands? | (Paper cut) sweaters |
| 2 | Guys, today let us paint sweaters with Dymkovo patterns! | Yes! |
| 3 | Who can tell me a little about this painting? | Children's answers (if any) |
| 4 | Are you at a loss? Fine. I'll read you a poem! | ...Smoke comes out of the chimneys in a column, Only everything around is in a haze, Blue distances, And the large village was named “Dymkovo”. They loved songs and dances there, Wonderful fairy tales were born there, And they sculpted them from clay. All the toys are not simple, But magically painted, Snow-white, like birch trees. Circles, squares, stripes - A seemingly simple pattern, But I can’t take my eyes off . |
| 5 | Guys, who can tell me what elements we will decorate the sweater with? | Circles, dots, squares |
| 6 | But besides these elements there are others. Let's look at a table with other elements. | (We show a picture with Dymkovo patterns) |
| 7 | Who can tell me what kind of painting this is? | Dymkovo painting |
| 8 | Who can tell me the elements of painting? | Dot, comma, square, stripes, circle |
| 9 | Let's remember how to draw these elements. Who will help me? | (If desired, children show drawing techniques on an easel) |
Folk art is a beneficial material for activities with children
Table: “Sweater for a bunny” (an example of the organizational part of the lesson, author A. Dmitrieva)
| № | Step | Step Contents |
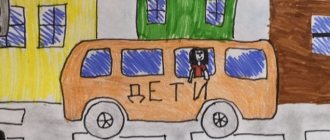
| 1 | Creating a problem situation | The teacher brings Bunny into the group, who “cries loudly.” The hostess abandoned the bunny - The bunny was left in the rain, he couldn’t get off the bench, he was completely wet. (A. Barto) - Guys, what happened to Bunny? (got wet in the rain). The children look at the Bunny and make sure that he is really wet. - The bunny got wet, his sweater became wet, the colors turned pale, the drawing on it was gone. How can you help Bunny? (draw a pattern) |
| 2 | Topic message | Today we will decorate a sweater with lines, dots, circles and other familiar elements; for this we will need paints of different colors! |
| 3 | Didactic exercise “Be attentive” | Red - clap your hands, Yellow - stomp, Green - squat, Blue - hands up. |
| 4 | Start transition to show | – You see, Bunny, how many bright colors we have. Guys, are you ready to help the bunny? Yes (they sit at the tables). – What kind of paint is not on the tables? (orange). What should you do to make it appear? (children's answers). Mix red and yellow paint. |
| 5 | Pedagogical demonstration | Invite them to remember and show decoration techniques at the board. Displaying examples of sweater decoration on the board: - Look, Bunny gave each of you a sweater, let's decorate the sweater! |
| 6 | Finger gymnastics | And so that our patterns turn out beautiful, we first warm up our fingers. Once upon a time there was a bunny (clap hands), Long ears (three fingers in a fist, index and middle - ears). The bunny is frostbitten (they clench and unclench the fingers of both hands) The nose is at the edge of the forest (rubbing the nose). The nose is frozen (they clench and unclench the fingers of both hands), the tail is frostbitten (they wave their hand, pretending to be a tail). And he went to warm up (“they turn the steering wheel”) to visit the kids. It’s warm and quiet there (they unclench the fists of both hands), there is no Wolf (they clap their hands), and they give carrots for lunch (they stroke the stomach with the palm of the dominant hand clockwise). |
Photo gallery: “Sweater for a bunny” (presentation for class)
Characters from poems and fairy tales will help motivate children
What child wouldn't want to do something kind for a bunny?
It is important to explain the task clearly to the kids
Joy is a great reward for creativity
Practical part
The practical stage includes an explanation and demonstration by the teacher of the drawing method (2-3 minutes).
When teaching decorative drawing, demonstration is required, since children are learning composition of an abstract nature for the first time, and an understanding of the rhythmic patterns of the pattern can only appear in the process of copying the skillful movements of the teacher’s hands. To consolidate new skills, you can give a similar task to create a geometric or floral ornament, for example, on strips of colored paper, but made in a different color scheme and without relying on a sample.
The process of mastering decorative drawing contains two stages:
- First, children accurately reproduce the pattern according to the samples made by the teacher. The teacher shows and explains how the pattern is built, what components it consists of, and in what sequence the composition is created. The teacher suggests a specific color design. Students duplicate the design without changes, otherwise they may get carried away and avoid the task of repeating the decorative pattern.
At first, children simply learn to repeat patterns after the teacher.
- In subsequent classes, including those devoted to decorating clothes, children are given more freedom: the teacher does not require exact copying of the sample, so after familiarizing themselves with the examples, the child can create his own drawing, showing imagination and creative imagination, but in compliance with the rhythmic principles of composition. In the process of explaining the task, the teacher offers to choose the color, number and location of the strokes made, etc. The teacher shows templates cut out of paper and offers to decorate them, in the form of a conversation discusses with the children what familiar elements they will use, in what order they will place them, asks Show the technical methods of doing the work at the board.
Works done by children independently using elements of non-traditional techniques