Abstract of an art lesson on the topic: “Decorative drawing”, 1st grade
MBOU Secondary School No. 29, Ekaterinburg
Primary school teacher Syomina Serafima Andreevna
Art lesson in 1st grade
Art lesson on the topic:
"Decorative drawing"
The purpose of the lesson:
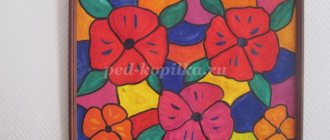
create a composition “Bouquet of Flowers” using the “nitcography” technique.
Tasks:
- teach children to work using the “nitcography” technique;
- teach children to coat the thread with paint to the desired consistency;
- teach children to place the thread on paper to create a pattern;
- teach children to press paper with thread to create a pattern;
- teach children to complement the pattern with various elements to create a recognizable image (leaves, stamens, small details);
- teach children to place objects on a sheet of paper;
- teach children to mix paints.
I. _ Organizing time.
II . Explanation of new material.
A)
Introduction.
Guys, have you ever given a bouquet of flowers as a gift? Did they give it to you? What is a bouquet? Bouquet
- These are cut or picked flowers, matched to each other.
Yesterday, while preparing for your lesson, I learned from this book that in every nationality, bouquets are composed differently and differ significantly from each other. I was very interested in Japanese bouquets. Japan is a small country located on islands. The Japanese take great care of their greens, because... it purifies the air and that is why their bouquets are famous for having few flowers in them. Japanese bouquets are built according to this principle. Their bouquets use dry branches, leaves, and maybe just one flower or several. Each of their bouquets has deep meaning and has its own name. The Japanese are famous for their ikebana, which is the Japanese word for flower arrangement. According to the rules, in relation to ikebana, flowers are arranged in a vase in a “natural form”. The stems of each flower should stand independently and nothing should obscure them.
When someone from the family comes from the forest or garden, they probably bring winter or summer bouquets? Are every flower visible in these bouquets or are they obscured by each other? Russia is a big country and we arrange bouquets in an oval. Our bouquets most often turn into a broom. If you are arranging a bouquet, you need to make sure that every leaf and blade of grass is visible. Russian bouquets follow two main directions: 1) natural, i.e. in a vase, flowers stand the same as in nature; 2) decorative, where attention is paid to shapes and contours. The shape of the bouquets can be round and freely assembled, one-sided when the bouquet is placed against the wall, vertical, massive, etc.
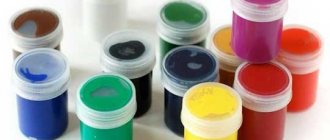
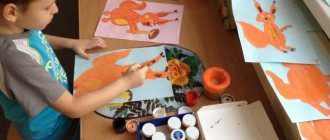
Today you will be artists and your task is to create a beautiful bouquet using an unusual technique - thread printing. Your brush today will be a thread with which you will draw various patterns. But you will definitely need a brush and gouache to apply color to the thread.
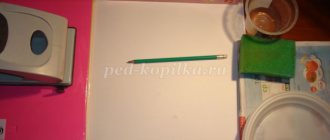
In front of you you see half a sheet - this is a palette on which you will smear the thread with paint and also mix the paints to obtain the desired color. Also in front of you is the sheet that I distributed to you. It is a training one, you will practice creating a pattern on it. And each of you has two threads, one for the training pattern, the other for depicting our bouquet on a blank sheet.
b)
Explanation of new material.
Let's look at the illustrations I drew. We see that the bouquets are all different both in shape, number of flowers, and color scheme. You need to remember that the higher the pattern, the lighter it is, the lower it is, the darker it is. For the top patterns it is better to take yellow or orange paint, for the patterns below - red, burgundy and for the bottom patterns - blue.
Take the training sheet, place it in front of you, fold it in half crosswise and open it. Take a thread, fold it in half, wet its two ends in water so that they do not “diverge” while working. Fold the thread in half, but so that the end of the thread with the loop is slightly higher than the wetted end of the thread. Fold the thread in half again, aligning the ends (the loop should be located opposite the loop). And once again fold the thread in half and again the loop is opposite the loop. Please note that the end of the thread soaked in water does not participate in folding; we need it in order to hold on to it while drawing.
Place the folded thread on the palette, leaving the wetted end outside it. Take a brush, soak it in water and put on it the paint that you like best, and with the brush you begin to completely paint the folded thread, except for the wetted end. After the thread is dyed, turn it over and coat the other side with the same paint.
Then you take the dyed thread and carefully unroll it, because... she might get confused. After the thread has been unrolled, you need to remove excess paint from it. Holding the wetted end of the thread with your right hand, run two fingers of your left hand - thumb and index - along the thread, removing excess paint. Your hands will be dirty, but that's the technique.
Take a training sheet, already folded in half, attach a thread to the fold line so that its soaked end extends beyond the sheet. We will pull the thread for it. With the other end of the thread you begin to draw loops, one loop is larger, the other - smaller in it - and bring the same end to the fold line so that it also extends beyond the sheet.
Place the clean side of the sheet on the side of the sheet with the thread, press firmly and, holding both ends of the thread, pull it out, you can pull it at one end. Then open the sheet and see what happens. And the result was beautiful patterns, similar to flower petals.
The second time you also fold the thread, put another paint on the brush and remember, the higher the pattern, the lighter it is, the lower it is, the darker it is. Take less paint, because... The thread is cotton, it absorbs well, remove the excess paint again, also apply the thread from below, just below the already obtained pattern, press the paper tightly, pull out the threads and see what happens.
Whoever has space left at the bottom of the sheet can make a third pattern in the same way.
In the bouquet we must add leaves. You need to mix paints on the palette. What colors are the leaves? (Green, yellow).
We will mix these paints, adding white so that the flowers do not get lost against the background of the leaves.
The leaves will “extend” from the fold line. Having loaded the brush with paint, I smear and stretch, press the brush and stretch.
Decorate the middle of the leaves with stamens. In a flower, this is the place where the pollen is found. We will depict them with thin lines coming out from one point.
V)
Use of technological maps.
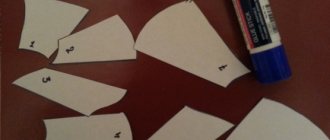
Let's look at a diagram that shows the patterns you can make with thread. You can also come up with your own patterns.
Don’t forget, the higher the flower is, the lighter it is, the lower it is, the darker it is. For the top colors it is better to use yellow or orange paint. For lower flowers - red, burgundy, and for the lowest ones - blue. We will use green paint for the leaves.
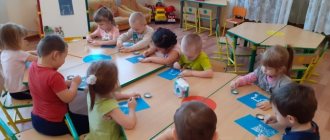
III . Independent activity of children.
A)
drawing a pattern on a practice sheet;
b)
choosing a color for drawing a bouquet;
V)
location of the pattern on the sheet.
IV . Individual work with children.
A)
help position the thread on the practice sheet;
b)
help choose colors for the bouquet;
V)
help place the pattern on the sheet.
V. _ Analysis of children's work.
5
— Did you like our exhibition? How? (bright colors, flowers, beautiful horses, like in a fairy tale, etc.)
-What do Gorodets masters draw on everyday objects? (Children, following the teacher, find a horse, birds, leaves, roses, bushes, buds, daisies and name them.)
Let's play: “I will show you pictures. If the picture shows a Gorodets painting, then clap your hands, if it’s something else, then stomp your feet.”
— What material are all these products made of? (made of wood)
Yes, Gorodets painting is done only on wood.
— What paints do the masters of Gorodets painting use? (green, shades of red, shades of blue, yellow, white, black).
Guys, do you want to become master artists? Come to our workshop.
Gorodets patterns
What a joy for the eyes
Craftswomen are growing up
Maybe among us too.
(Children come to table No. 4 with blank cutting boards)
Nowadays, the natural yellowish color of the tree is used as a background, just like your leaves.
On the tables you see blank cutting boards. But the pattern on them is not complete. Something is missing. We will try to decorate them,
Riddle: She won't feel hot in the heat. She is in the water, she is ... (bathing). (Show picture)
Let's try to draw it?
What colors will we use? To draw a kupavka you need to draw several stages. Let's go to the first table.
First stage: underpainting. We will mark this stage in pink.
First you need to draw a circle of any color - underpainting. Educator: Look at your colors. Do you have all the necessary paints? What colors are missing?
Children: Pink
Educator: What should we do?
Children: We need to mix the paints.
Educator: What colors need to be mixed to get pink?
Children: Add a little red paint to the white paint.
(work with the palette, repeat the rules of working with a brush)
In order for our circle to turn into a beautiful flower, we move on to the second stage.
Second stage - Tenevka
Our underpaintings are dry. The brushes are thin.
On the top of this flower you need to draw a small ball and draw a sickle (arch) inside.
To get an arc of a beautiful shape, you need to start painting with the tip of the brush, lightly touching the surface. Towards the middle of the arc, we gradually increase the pressure and finish drawing again without pressure
Next we begin to draw the petals of our kupavka
We draw petals - arches. We start with the central petal (in the center of the crescent) and symmetrically draw the remaining petals. We mark this stage in red.
Physical exercise “Flower”
The last stage is Revitalization. The paint has dried and there is white paint on your table.
When everything dries well, you need to paint a white color with a thin brush.
We mark this stage in white.
So we have a smart swimsuit. What three stages did you go through to draw this flower?
Now let’s go to our boards and paint them, place our beautiful bathing suit and complete the pattern
- What wonderful work you have done!
We painted flowers
Unprecedented beauty.
There is no end to that beauty
That's all for Gorodets.
“Now, my young masters, I ask you to stretch your hands over your work and make a movement as if you were rolling a ball.” Now put it to your heart and repeat after me: “We take with us everything important that happened to us today, everything we learned.”
Reflection.
-What did we draw today?
— What colors were used in stage 1? In the second? In third?
— A revival is applied to wet or dry paint.
We went through many stages and drew beautiful swimming pools. I think that the knowledge you gained today will be useful to you.
Exhibition of works.
You will turn around yourself and turn into teachers.
Thanks everyone for participating.