Interactive coloring book. Master class with photos. Presentation
Master class “Technological technique “Interactive coloring” when creating an interactive game”
Author Natalya Sergeevna Rostova, teacher of the first category, MBDOU “Kindergarten No. 155”, Nizhny Novgorod. The master class is intended for educators, teachers and parents. Goal: to use the features of technological techniques when creating interactive games. Objectives: - reflect the specifics of the technological method; — teach how to use the features of interactive coloring when creating an interactive game; — improve pedagogical competence; — expand the possibilities of using ICT technologies when working with children. To create an interactive game you need: - a PC; — pictures for assignments; — tasks selected in advance for children, appropriate for their age; - Computer and PowerPoint skills. It’s easy to create interactive games for preschoolers yourself if you master a few technological techniques. One of these is interactive coloring - an outline image (coloring) is given and after the child completes the task, part of this image is colored. After completing all the tasks we receive a color drawing. The technology for creating interactive coloring books is easy to master using the capabilities of Microsoft Office Power Point. Progress of creating the game: Stage 1. Preparing images for interactive coloring On the Internet we find a coloring image or draw a contour coloring ourselves and save it on the computer. When saving the file, give it a name, for example, 1.jpg. It is best to create a folder in advance in which we will save all the images for coloring. For example, I have an owl.
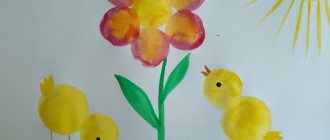
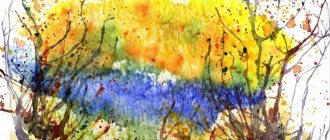
This is what it will look like after filling in all the elements.
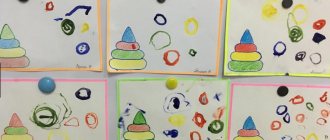
To fill parts of the coloring book and save images with filling, you will need a graphics editor. You can use the Paint.net program. Launch the Paint.net program, select File - Open, specify the path to the coloring image that we saved. To fill parts of the image, use the Fill tool and select the fill color in the Palette panel. After selecting the Fill tool, fill part of the coloring with the desired color. Select File - Save As. In the Save As dialog box, enter the file name 2.jpg and click Save. We continue to sequentially fill in the coloring elements and save images with the names 3,4, 5, 6, etc. We will get the following images.
Stage 2. Creating a game. Let's launch PowerPoint. Let's create a slide, select Insert - Picture. Open the folder in which the coloring files are located and select image 1.jpg. Select Insert – Shapes – Rectangles.
After designing the slide, we will create copies of it. To do this, right-click on the slide and select Duplicate Slide. Duplicate the slide until we have as many slides as the number of coloring images that were saved (not counting the title slide).
In the Insert Picture dialog box, select the following image 2.jpg.
The picture will be placed in the place where the first one was. On the remaining slides we change the images in the same way. To do this, right-click on the image and select Edit Picture. The pictures cannot be moved to create the feeling of one picture that is gradually being colored. You should get the following slides. We select tasks and answers to them - correct and incorrect.
Adding animation to objects: Adding animation to correct and incorrect answers, hyperlinks and triggers, control buttons.
Select the object, set the animation (Tab “Animation” “Animation Settings”). Add effect (in/highlight/out). Trigger/switch setup. Accompany with sound effects. For the correct answer, let's create a hyperlink. Select the correct answer and select Hyperlink on the Insert tab. In the Insert Hyperlink dialog box, select Place in Document - Next Slide - OK. Thus, when demonstrating a presentation, when you click on the correct answer, a hyperlink will work and the next slide will open, on which one of the coloring areas will be filled (at the same time, transition effects should not be set for the slides so that the slides change imperceptibly).
On the last slide, do not forget to praise the child for his work and insert a picture, for example, a fireworks or an emoticon clapping his hands. Stage 3. Final Design a title slide, a slide with the rules of the game, a slide with links to the sources used.
Testing the game - check the animation of all objects several times. Save the game. Select File - Save As. Specify the file name and file type. I wish you success in creating interesting interactive games.
In the modern world, they are the path to children’s successful acquisition of knowledge, and for teachers and parents they are a tool for monitoring the child’s level of assimilation of this knowledge. For a teacher or parent, this is also a kind of test that will allow you to find out gaps in children’s knowledge and allow you to work on them in a timely manner and fill them. Presentation on the topic: Specifics of the technological technique interactive coloring
We recommend watching:
Interactive games for literature lessons in grades 5-11 Interactive game for primary school students “Wild Africa” with presentation Quiz with answers and presentation for schoolchildren in grades 7-8. Artists of Udmurtia Development of communication skills of children 5-7 years old in theatrical activities
Similar articles:
Interactive game “Me and my children’s organization” for students in grades 5-9
Legal game for grades 8-11 “Our choice is our future!”
Methods of conducting physical education classes in kindergarten
Morning exercises in the preparatory group in a playful way
Teasing games for children 5-6 years old
Sakhalin children imitated a bear at the presentation of drawings
On April 18, a festive presentation of creative works dedicated to the indigenous peoples of Sakhalin took place in the concert hall of children's art school No. 4.
— Before starting to draw, the guys visited our neighbors, the Erudite library, at a very interesting event. There they learned a lot of new and interesting things about the life, way of life and culture of the indigenous peoples of the North. It was this new knowledge, as well as the wonderful fairy tales of the Sakhalin writer Vladimir Sanga, that inspired our children to create their colorful works, astv.ru was told at the regional center of folk art.
The presentation was opened by Olga Khuryun, a specialist at the Sakhalin Regional Folk Art Center. She herself is of Nivkh origin, she spoke about the life, way of life and culture of her fellow tribesmen. It was more likely not a story, but communication with young viewers in a language that was very accessible to them. The children, drawing from the storehouses of their memories, answered the guest’s questions with pleasure. The story was accompanied by a colorful presentation.
Olga Yuryevna showed and then played the Nivkh game with the audience. Dressed in the national costume of the Nivkhs, she demonstrated a women's dance with twigs to the accompaniment of a shaman's tambourine. This is an imitation of the movements of a bear, an animal sacred to the Nivkhs. The beats of the tambourine also encouraged young spectators to dance.
The children got acquainted with the paintings of the Sakhalin artist Givi Mantkava, many of whose paintings are dedicated to the life of the northern peoples.
The presenter, fine arts teacher and organizer of the presentation, Nina Nelyubina, noted the great importance for the development of Nivkh culture of the creative and social activities of Vladimir Sanga, the founder of Nivkh literature, the author of the Nivkh primer and textbook. It was based on two of his fairy tales that the students performed their creative works.
The first fairy tale is “The Bear and the Chipmunk.” First, viewers saw a funny film on this topic created by Inna Chekicheva, an employee of the Erudite library. Then the children's drawings were shown on the screen.
The second block of the presentation was structured in the same way. The children watched the animated film “Kyk-kyk,” created by Inna and her husband and voiced by People’s Artist of Russia Klara Kisenkova, and then watched the students’ works themselves.
In conclusion, the guests were asked to choose the three best, in their opinion, paintings, which were placed in the hall and in the foyer. The winning works were:
- 1st place – Slezkina Taisiya. "Family".
- 2nd place – Verminskaya Yanina. Illustration for the story “Kyk-kyk” by V. Sanga.
- 3rd place – Svinitskaya Varvara. "The Bear and the Chipmunk."
Presentation for children 6–7 years old “How to draw a swallow step by step”
Ekaterina Novikova
Presentation for children 6–7 years old “How to draw a swallow step by step”
Artistic and Aesthetic Development Drawing 6–7 years old “ Swallow ”
How to draw a swallow step by step
You can draw birds at any time of the year, because they are very beautiful. For example, like a swallow . The main part of the body is no different from other birds, but the tail is long and has a slit in the middle. Therefore it resembles a fork . You can also notice another feature of this bird - its wings, which are curved, sharp and long. The color of the swallow in the drawing will be very simple. To color it, it will be enough to have three colored pencils - black, red and brown. If desired, can be complemented with other shades.
Necessary art materials for drawing a swallow :
white sheet of paper and eraser ;
pencil for sketching a bird of medium hardness;
colored pencils from beige to black.
Stages of drawing a swallow :
drawing a bird like a swallow from the head. Let's draw this part on a piece of paper in the form of a circle. To it we will add the upper part of the body, which will have a rounded shape.
We draw long arched lines from the sides of the body to outline the frame of future wings. You should know and remember that in such a bird they are long, sharp at the ends and slightly curved in shape. We also draw two lines from the lower part of the body, which we then connect together using additional lines. This is how we get a tail for the bird, which looks like a fork due to the deep cut.
the swallow's head . To do this, add a beak on the left side and begin to draw the outline of the head. In the middle of the figure, add an eye and begin to draw the outline of a different color of feathers.
Now let's move on to drawing the outline of the wings, because for a bird these are very important parts of the body. In the middle of the figures we outline the outline of a sharp change from one color of feathers to another.
We remove the auxiliary circles and arcuate lines in the middle of the drawing, which helped to obtain such a charming image of a spring bird. Once again, with a simple pencil, we will go through the contour: both external and internal. Let's pause for a short time to draw small details in the middle.
The lower part of the bird's head has a red tint of plumage. Therefore, we take a red pencil in our hands and paint over part of the drawing along the contour. Using a darker shade we create a shadow under the beak. We will create the beak itself in a dark brown color, but for the base shade we will use a light tone. Next, take a darker shade of brown to get the desired beak color.
Using a black pencil, paint over the entire surface of the tail and head, as well as small areas of the wings.
If you wish, you can use a gray and beige pencil to get interesting highlights on the white areas of the wings and belly.
This brings us to the end of the drawing lesson, where we created a lovely drawing of a swallow with colored pencils. This image evokes a good mood and immediately brings to mind the warm rays of the sun.