Non-traditional drawing techniques for children in kindergarten and school
Children and creativity are inseparable concepts. The child learns about the world around him, trying to reflect it in play, modeling and drawing. After all, at heart, every child is a singer and musician, artist and sculptor. Creative impulses in children are often associated with artistic activity, and a child’s visual creativity is an ideal opportunity for the manifestation of his imagination. This is an important condition for the normal development of the baby.
Non-traditional drawing techniques for children in kindergarten and school - this does not mean something complicated. Quite the opposite - this kind of drawing turns art classes into fun. Here it is not at all necessary to have complex pencil and brush skills. With simple unconventional drawing techniques, a child is able to create beautiful drawings and paintings, and this will give him an amazing creative experience with an excellent final result. He himself will be drawn to art when he feels that he can create beauty with his own hands.
The content of the article:
Unconventional drawing methods
For children, non-traditional drawing techniques are a wonderful way to create small masterpieces. It turns out that your palm can turn into a pink elephant, a simple blot can become a tree, and a carrot and potato can surprise you with unusual patterns.
For example, children 3-4 years old can be offered:
- finger painting
- palm painting
- thread prints
- prints made from potatoes or carrots.
With children 5-6 years old you can try:
- prints-pictures
- plasticine printing
- leaf prints
- palm drawings
- painting with cotton swabs
- magic strings
- monotype.
And with children 7-8 years old you can master more complex techniques:
- drawing with crumpled paper
- drawing with soap bubbles
- painting with salt
- blotography
- plasticineography
- grattage
- frottage.
For children, modeling from plasticine is a whole world full of variety and experiments! Under your strict guidance, your child can make all kinds of crafts from plasticine. Step-by-step modeling for children will be the best guide for creating various fairy-tale characters, animals and plants.
Hand drawing
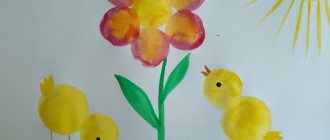
Drawing with pens is the first technique that little children can master very early. The drawing comes out quickly - this is extremely important, because kids cannot do one thing for a long time. Dip a child's hand in paint and let the child make an imprint on the surface of the paper. See what it's like. Ask your little one what needs to be completed to make an animal or bird. The missing details can be drawn with your fingers.
Interesting! DIY Christmas tree decorations for the New Year 2020
Finger painting
A little artist will have a lot of fun finger painting, leaving colorful prints on paper.
In creativity classes or for a school autumn exhibition, the most popular materials for creating crafts are cardboard and colored paper. Therefore, we hasten to present you paper fantasies or ideas for autumn paper crafts for school.
Techniques for painting with watercolors on wet paper
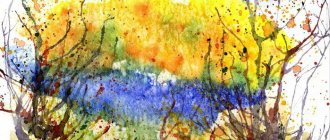
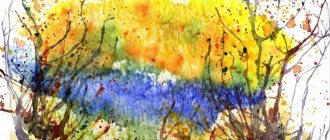
To create small masterpieces you will need a sheet of thick paper, watercolor paints and a brush. Help your child wet the sheet evenly, but make sure there are no puddles. Let him put some paint on his brush and start creating. Each stroke spreads across the paper in a new tone, beautifully transitioning into a different shade. Now is the time to show your child how colors are mixed and explain what shades are.
Tell your child that all movements should be done easily and smoothly; there is no need to press the brush into the paper, as many children like to do. A light touch is enough. This technique works well for drawing backgrounds. And after drying, you can continue to draw the rest of the drawing.
Drawing using the Glue Pictures technique
To draw in this style you will need a glue gun. Help your child draw outlines on paper with hot glue and fill in the image with paint. Thanks to the glue, the paint does not flow beyond these contours. It turns out something like a stained glass image. Using this technique, you and your child can create a real stained glass window on glass, but then instead of simple watercolors you will need to buy water-based acrylic paints.
Traditionally, on New Year's Eve, kindergartens hold exhibitions of bright crafts and creative works by children, which decorate the kindergarten on the most magical days of the New Year holiday. We offer you a variety of ideas for DIY kindergarten crafts for the New Year 2021 .
Watercolor drawings with wax crayons
To draw a picture using this technique, you need: a landscape sheet, wax crayons, watercolor paints, a squirrel brush, leaf templates.
Let your child, with your help, draw several different leaves on the sheet. The drawing must be arranged according to the size of the leaves - first large, then smaller. Let the leaves overlap each other - because that’s how nature does it.
Now take wax crayons and trace the outlines of the leaves; for this you will need crayons in warm colors: yellow, red, orange, brown, burgundy. You can use several colors in one sheet. Don't forget to draw veins on each leaf, except rowan ones
Interesting! Crafts on the theme “Autumn” for kindergarten: photos, ideas and master classes
And now it’s time to use watercolors - start painting not the leaves, but the album sheet from the upper left corner. Show your child how to add other colors so that one shade flows smoothly into another without clear boundaries. In this way we gradually fill our sheet with autumn colors.
Drawing with fun prints
Plasticine stamps
It is very simple and convenient to make stamps from plasticine - just give a piece of plasticine the desired shape, decorate it with patterns (lines, dots) and paint it in the desired color.
Thread stamps
To create interesting “striped stamps” you can use threads that need to be tightly wound around an object. Then the threads are painted with thick paint in the required color. Now only imagination will tell you how to apply a “striped pattern” to the surface of the paper.
Rolled cardboard stamps
By rolling a piece of cardboard into a roll, you can get an original stamp for “roses”. And if you cut a “round piece” from a toilet paper roll and give it the shape of a leaf, then your child can create a beautiful composition on his own.
4. Leaf prints
This technique is familiar to many. To stamp a leaf, you can take any pretty leaf and apply ink to the side with the veins. Then apply the painted side of the sheet to the paper and iron it. After a few seconds, you can carefully lift the leaf - its imprint will remain on the paper.
Imprints of potatoes, carrots, apples
This is a fairly popular technique for young children. You will need any vegetable or fruit and gouache. Then everything is simple - dip the object in paint and make an imprint on paper.
Stamps can be made from apples, potatoes, carrots, peppers and other vegetables or fruits. The easiest way is to make a stamp from potatoes. If you have metal cookie cutters, simply press the cookie cutter into the potatoes and use a knife to carefully trim off any excess pieces around the edges.
Drawing with soap bubbles
It will be very interesting for the child to draw a picture with soap bubbles. To do this, add any soap solution and paint to a glass of water and use a straw to make a strong foam. Carefully place a sheet of paper on the bubbles and wait for the first patterns to appear. You can lift the paper - the bubble patterns are ready.
Painting with salt
To add a whimsical texture to the background of your painting, you can use salt when depicting any landscape. While the paint has not yet dried, the background must be sprinkled with salt. It absorbs excess water, sticks and creates a very interesting effect. Excess salt should be carefully shaken off after drying. Unusual light spots will remain in its place.
There is another incredibly interesting option for painting with salt. To do this, you need to draw a picture with a pencil, and then circle it with PVA glue. It can be a simple flower, patterns or geometric shapes. We don't regret glue. Sprinkle the design generously with salt, and then carefully shake off the excess onto the tray. Now let's add colors - you can paint with a brush, or you can take a pipette and apply colored water drop by drop onto the drawing. You will be able to see how the drops spread and create bright patterns and shapes.
Drawing with crumpled paper.
Using a crumpled napkin or paper you can create an unusual texture. There are two ways to do this technique:
- Liquid paint is applied to the paper, and after some time, while the sheet is still wet, a crumpled napkin is applied to it. It will absorb excess moisture, and a characteristic mark will remain on the sheet.
- You need to apply paint to a crumpled lump of paper or napkin, and then apply prints with the painted side.
Monotype
This unusual drawing technique is based on a unique print that can only be produced in a single copy. Therefore, it is impossible to create two absolutely identical drawings.
Interesting! Crafts made from plasticine. Step-by-step modeling for children
It is necessary to bend a sheet of paper in half, and close to the fold on one half, draw some shape with paints. Then fold the sheet and iron it with your hand - you get a symmetrical print. Now only the imagination of the young artist will tell you what happened.
Nitcography
This drawing technique is like real magic. The thread needs to be dipped into the paint so that it is well saturated with it. Then lay out this thread on the paper in “curls”, and bring one end beyond the sheet by 5-10 cm. On top of the sheet with the thread is covered with another sheet of paper, on top of which you need to put some kind of weight, for example, a book. All that remains is to pull the protruding tip of the thread and lift the top sheet. The unusual picture is ready.
Drawing with cotton swabs
The principle of this technique is that the child paints over the picture with dots. To do this, you need to dip a cotton swab in paint and apply dots to the drawing, the outline of which has already been drawn.
Drawings using scratch technique
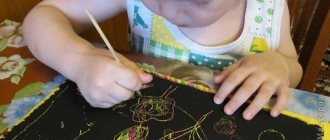
The word “grattage” comes from the French “gutter” (scrape, scratch). To start working in this technique, you need to prepare cardboard, which is covered with a thick layer of wax or multi-colored oil pastels. Then apply a layer of dark paint to the surface of the cardboard with a wide brush or sponge. When the paint dries, use a sharp object - a toothpick or a knitting needle - to scratch the design. Thin monochromatic or multi-colored strokes appear on a dark background.
Each of the non-traditional drawing techniques is a little game for a child. Their use gives children a sense of relaxation, develops imagination and gives complete freedom for self-expression.
