The role of using non-traditional drawing techniques in the artistic development of preschool children
As mentioned above, the use of non-traditional drawing in kindergarten is beneficial for children. Due to the fact that completely atypical objects can be used in drawing, preschool children are given the opportunity to think outside the box. It turns out that they are having fun and usefully spending their time. They experiment with different painting techniques and try different ways of expressing themselves. Classes develop observation skills, creativity, and artistic taste. The educational process turns into a fun game. Therefore, modern methods of creative activities are increasingly being used in kindergartens. Diagnostics of the use of non-traditional drawing methods in kindergartens shows good results.
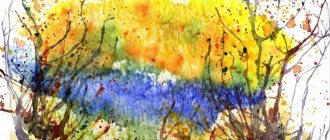
Unconventional spray painting technique
Non-standard methods of drawing are always fun, emotional and creative. The result of such creativity is beautiful and unusual, even if the child has no artistic skills.
Drawing with a sponge and cotton swabs
Description
One of the most striking non-traditional techniques is painting with a sponge and cotton swabs.
A foam sponge is dipped into paint, then it is used to make prints that create texture on objects: tree crowns, animals, clouds.
Imitation of the painting “Starry Night” with cotton swabs
Or, as an option, paint is applied to a bunch of cotton swabs, and images are drawn point by point: spruce, teapot, rowan branches or lilac.
Drawing lilacs with cotton swabs (lesson for this painting)
Examples
It is convenient to use a sponge to convey the roughness of an image, fluffiness, and volume. Geometric shapes, such as squares, look great. It is best to use gouache.
Drawing a tree with a sponge
Cotton swabs work well for small round objects: dandelions, daisies, snowflakes.
Colored dandelion drawn with cotton swabs
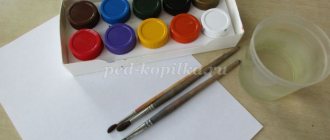
What materials are needed
To successfully use this technique you will need:
- gouache or watercolor;
- glass of water;
- cotton buds;
- sponge or parts of a sponge.
Additionally, you can take a plate into which the paint will be poured, and paper napkins.
Instructions and video
In the video, the artist first draws the outline of a tree with a thick brush and a branch with a thinner one.
Then he takes a sponge, dips it in paint and makes a voluminous crown. To finish, draw snow with cotton swabs.
Drawing with an iron sponge
Another very interesting way to create an original painting. Instead of a soft sponge, use an iron scrubber. Use point movements to change the texture of an already applied layer of paint or create a new color layer, as the author of the next lesson does.
In this case, the author first applies acrylic paints to the canvas, distributes them with a brush, and only then works with an iron sponge. The lesson is suitable for beginners, and its result can inspire everyone! Try it and you will definitely succeed.
Topics for drawing in kindergarten
The topics of drawing in preschool classes can be very diverse. Typically, educators rely on seasonality. Therefore, for example, in autumn it would be relevant to paint a yellow-red landscape or use fallen leaves in the process itself.
For younger children, it is better to choose well-known objects: animals, flowers, trees. These topics are always relevant, and they can be done with almost any drawing technique.
Note! If you don’t have enough ideas for drawing, you can always use thematic literature with examples of work. Or you can get advice on unconventional drawing methods from more experienced teachers.
Spray technique
Description
Another interesting unconventional drawing technique, although it requires a lot of additional materials. To prevent drops of paint from staining everything around, cover the surrounding surfaces with oilcloth. It is best to paint over a sink or bathtub.
The paint is mixed with water to the consistency of thick sour cream. The brush or toothbrush is wetted in water, and excess moisture is shaken off. Splashes cover individual areas of the canvas. If necessary, the position of the hand changes, and the paint is sprayed horizontally, vertically, etc. If you need to increase (decrease) the size of the drops, the bristles are brought closer (further away) from the paper.
Examples
Trees, leaves, the sun and other natural phenomena are produced interestingly using the “spray” technique.
tree created using the spray technique - lesson
You can use stencils, cover certain areas of the sheet with them, and cover the background with splashes of paint.
Autumn forest using spray technique
Instructions
Video lesson that can be used as instructions.
The author makes a spray with a workpiece that is pre-coated with acrylic varnish.
Video tutorials on painting using the spray technique
I have put together three video lessons on this drawing technique.
How to draw dandelions
A master class that beginners can take as a basis for drawing. The author sprays three tones of blue paint onto white paper. Then use a cotton pad to wipe away any excess drops in the middle of the pattern. The stems of the flower are already drawn in them with a brush.
How to draw winter
Great tutorial showing how to spray paint a snowy landscape.
Still life with flowers using spray painting
Master class on drawing a still life with flowers
It is carried out by two people - an adult and a child.
Types of non-traditional drawing in kindergarten
What is especially valuable about non-traditional methods is that most of them can be done by young children, in contrast to the usual drawing with a brush or felt-tip pens and pencils. For middle-aged children (4-5 years old), more complex techniques are available, which are performed with the help of adults. Children aged 6-7 years can use all non-traditional methods independently.
The following describes various methods for practicing non-standard drawing, as well as recommended ages for children.
Fingergraphy
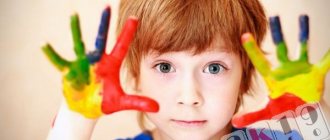
The simplest and most common method of non-traditional technique is drawing with fingertips. Special finger paints are well suited for this; you can also use gouache or watercolor, after wetting it with water.
All that is required of the child is to dip his finger in the paint and leave a print on the paper. It’s fun to decorate the templates this way (you can print them out or draw them by hand):
- Add leaves to the bare tree;
- On the stem and core - petals;
- For the ladybug, make spots on the back;
- For the New Year tree - toys;
- White spots on the fly agaric cap;
- Butterflies have spots on their wings.
Note! Any picture can be fully colored using fingerprinting or the missing elements can be added.
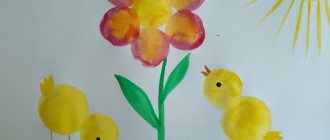
Drawing with palms
This method can be considered the next step after finger painting. The entire palm will be involved here. The same paints can be used as for fingerprinting. Here are some options for drawing with your palms:
- Chick. You should apply yellow paint to your palm and leave an imprint on the paper - you get a body. Then apply paint to the fist and thus make a head for the chicken. All that remains is to add the beak, legs and eyes.
- Fish. To do this, you can apply different colors to your palm, then leave an imprint on the paper and add eyes and fins to the image.
- Tree. To do this, use brown or black palm print paint. Then decorate the resulting tree with leaves using fingerprinting.
- Peacock. This beautiful bird will come from two or more handprints. Then you should draw the head, paws, eyes and decorate the tail.
- Flower. It is worth using bright paint to leave an imprint. Then add a stem with leaves to it.
Cockerel made from a palm print
Note! The open palm most closely resembles a bird. Therefore, using this technique you can make any bird of your child’s choice.
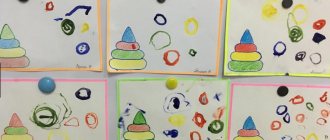
Drawing with cotton swabs (poking method)
This method is reminiscent of fingerprinting, but it uses an alternative tool for making a print - a cotton swab. The mark it makes is small and more round, so this method is good for drawing spots on animals. Another option is to completely paint the image with pokes, thus obtaining a mosaic effect. Using cotton swabs you can draw the following:
- Grains from a mouse or chicken;
- Rowan berries;
- Snowfall;
- Rain;
- Starry sky.
Drawing beautiful holiday flags in the second junior group
You can also use a few pokes to create an object of the required shape, for example, tree leaves or flowers.
Note! You can draw with several sticks at once; for convenience, they can be secured with a string.
Drawing with bulk substances
For this method, you can use salt, sand or any cereal. Drawing occurs in stages. First, you should put some design on the paper. Then drop PVA glue into certain places and sprinkle them with salt or cereal. After drying, shake off excess. The result will be an unusual three-dimensional drawing. You can experiment with this method of drawing on the following topics:
- Winter forest;
- Fireworks;
- Snowstorm;
- Pattern on butterfly wings;
- Flowers.
Snow-covered birch tree made with salt
Note! It is more interesting and colorful to use colored grains or sand. To do this, you can use food coloring or buy ready-made colored sand.
Drawing with crumpled paper
For this method it is more convenient to use gouache. You will need a small piece of paper that needs to be crumpled. Then dip this lump in paint (if necessary, add water to the gouache) and begin to apply it to the paper. The drawing turns out airy and light. Here are some ideas of what you can draw this way:
- Lilac branches;
- Dandelions;
- Clouds;
- Snowy spruce trees;
- Blooming meadow.
Lilac branches
Note! In this way you can color the image in an unconventional way. For example, make a shaggy cat or a fluffy owl.
Drawing with threads in kindergarten
Thread drawing can be a little challenging for preschoolers, so it is recommended to do it with older groups. This is a rather complicated technique and little ones cannot cope with it. To create such a pattern, you need to prepare threads (it is advisable to choose thicker ones, for example, wool). Next, you need to cut a thread about 30 cm long and dip it thoroughly in paint. Then you should place the thread on the paper, for example in a loop, and pull it down. For convenience, you can use two sheets of paper to properly press the thread on both sides. Another option is to fold the sheet in half and thread the thread inside. You can create a variety of patterns, for example:
- Abstraction;
- Flowers;
- Snail (the thread for this should be folded into a spiral);
- Butterfly.
Note! Nitography is the most complex drawing technique for children. But the result is very unusual, and the creation process is interesting and will appeal not only to children, but also to adults.
Monotype
This is a technique of creating an image using a print. A suitable method for kindergarten is when a sheet of paper is folded in half and an image is painted on one side. The design is then pressed onto the other half of the sheet, thus creating a symmetrical image. What can you depict using this technique by drawing only half of the image?
- Butterfly;
- Reflection in the water of the landscape;
- Ship with reflection;
- Vase with flowers;
- Sun;
- Tree.
Landscape with reflection using monotype technique
Note! Monotype is interesting because its result can be unpredictable. The resulting drawing always comes out unique.
Drawing with foam rubber in kindergarten
The execution process and the result are ultimately similar to drawing with crumpled paper. For this technique you will need a piece of foam rubber or a dishwashing sponge. Foam rubber does not need to be soaked in water; it should be immediately dipped in paint. Ideas for images using this technique:
- Snowman;
- Christmas trees;
- Tree crown;
- Winter in the forest.
Landscape painted with foam rubber
Using this technique, you can paint animals, then they will look fluffy.
Blotography
The essence of this method is to initially drop paint onto a piece of paper, forming a blot. Then you should supplement it with various details, obtaining some kind of drawing. This method perfectly develops children's imagination.
To get blots or splashes of paint on paper, you can use a cocktail straw. Using the same tube, you can inflate the blot, obtaining the desired image, for example, the following:
- Tree branches;
- The man's hairstyle;
- Any character.
Note! You can supplement the image with the same paints or felt-tip pens, or even plasticine.
Drawing with wax crayons
Wax crayon can be replaced with a paraffin candle. The essence of this technique is that with the help of a chalk you can draw any design, which will then not be painted over with watercolors and will appear on the surface. Examples of possible images:
- Fireworks in the night sky;
- Sea bottom;
- Cloudy sky;
- Stained glass.
Card file of conversations in the middle group with goals
Note! If you use white chalk, you can make a secret drawing or note, since the image on the paper will appear only after using paint.
"Secret" image
Spray
Creating an image using this technique involves splashing paint onto paper. To do this, you can use a toothbrush or a hard brush. In this case, the splashes are small and distributed chaotically. Therefore, it is better to use stencils to obtain a drawing of the desired shape. This could be a stencil:
- Christmas trees;
- Cat;
- Colors;
- Tree.
Note! In addition, with the help of spraying you can fill in the background of the future drawing. It could be grass, starry sky, snowfall.
Drawing on wet
In this method, paint is applied to a damp surface. As a result, you can get a blurred background for your future drawing. At the preparatory stage, it is better to mark the future drawing with a pencil on a sheet of paper. This should be done before you need to wet it with water. Do not wet it too much; excess water should be removed with a sponge. Watercolor on wet paper will spread evenly from the brush. This way you can let the different colors mix on their own, so the color transition will look even. What can you draw on the raw side, except for a plain background:
- Setting sun in the sky;
- Clouds and storm clouds;
- Flowers;
- Trees;
- Sea bottom.
Note! After the background has dried, you can add any details to the drawing: birds, fish or an outline.
Batik
This is a technique of painting on fabric. For this activity you will need a piece of white cotton material. For kindergarten, the simplest painting option is suitable - knotted. To do this, you need to tie several knots on the fabric, then dip them in paint. After drying, the knots should be untied - interesting patterns will remain on the fabric.
Drawing with traffic jams in kindergarten
Balsa wood stoppers are great for making circular impressions on paper. It is better to take several corks so that you can use each one for a different color of paint and do not mix them. Using this technique you can draw:
- Berries;
- Caterpillar;
- Chickens;
- Leaves;
- Flowers.
Note! If you cut the cork, you can give the prints a different shape.
Stamping
This technique is quite simple to implement and is suitable even for younger kindergarten groups. The idea is to dip a stamp in paint and leave an imprint on the paper. Moreover, you can choose anything as a stamp, for example, the following:
- Leaves;
- Vegetables;
- Fruits;
- Twigs.
Note! It is very convenient to cut stamps of various shapes from potatoes. You can also make stamps from foam sponge.
Ebru
The Ebru technique involves painting with liquid paints on water. Paint and water have different densities, so you can make some kind of pattern on the surface of the water. Then a sheet of paper or cloth is applied to the surface, and the design is transferred to the new surface. Water can be made more dense with a special solution, which is sold in an art store. Thanks to this, the paint does not dissolve in water, but remains on the surface in the form of a film. You can drip the paint onto the water and then use a stick to make patterns.
This technique is suitable for older groups of kindergarten or lower grades of school. Exercises with ebru can be turned into a fabulous game. Children of all ages really like this technique. Without any special skills, already in the first lesson you can feel like an ebru master.
Drawing on water using the ebru technique
Acrylic pouring technique
Description
This is an abstract painting with liquid acrylic on canvas, which is called Acrylic fluid art. Paints are diluted with water or a special solution so that they can flow freely over the paper. You can pre-mix several colors. If you add liquid PVA or car oil to acrylic, you will get additional effects.
Abstract fill with a shout
Beginners use the simplest technique. The canvas is tilted in different directions, liquid acrylic (approximately the consistency of shampoo) is freely poured over it.
Examples
The popularity of this method of drawing is explained by the lack of a unified technique (no matter how paradoxical it may sound). Each painting with liquid acrylic is unique; the filling cannot be repeated. The process of painting itself is reminiscent of psychological relaxation: the canvas will absorb everything that is in your soul. You let the paints flow freely across the paper, and you don’t know what will come out. And this is the main advantage of technology.
Acrylic pouring - sea and sand dunes
Acrylic pouring - river and sand
Abstract acrylic pouring in dark colors
What materials are needed
For successful creativity you will need:
- acrylic paints;
- thinner (the simplest is water);
- plastic cups and mixing sticks;
- canvases;
- gold leaf, car oil, glitter - to give additional effects;
- disposable towels, oilcloth, robe - for protection from paint.
The list of basic materials is elementary - canvas, acrylic paints and water. But even with such a minimal set the work turns out excellent!
Instructions
I recommend watching the video for beginners
The author mixes yellow paint in a plastic cup and dilutes it with an acrylic compound (40% liquid PVA glue + 60% water). The composition varies from artist to artist.
Similar actions are repeated three more times with different colors. Then the artist mixes the colors together and begins to create.
One stroke painting
Description
The “one stroke” decorative painting technique is very popular, which translated from English means “one stroke”. It was invented in Europe. Among the Slavs, this technique is known under the term “Khokhloma”. The upper part of the brush is dipped in paint of one color, the lower part in the second. In one motion, images of flowers, trees, and animals are applied. The meaning of the technique is a smooth transition from one color to another. This makes the image very bright and realistic.
Examples
As a basis, you can take a cardboard blank, for example, a flower. You need to paint it with a brush with a beveled edge; it is convenient for making halftones. By painting the petals one by one, you will end up with a wonderful bud.
Birds and portraits come out well with this technique. First, a blank is created on a sheet of white paper with a simple pencil. The brush is dipped in two paints and drawn over the surface of the drawing. It is important to tilt and rotate the brush correctly.
Blue firebird painted using the one stroke technique
Drawing a carnation using the one stroke technique
Blue flower using one stroke technique
What materials are needed
To successfully use this technique you will need:
- paints with an acrylic base of medium viscosity;
- synthetic brushes with smooth and beveled edges;
- container with water.
At first, you can use regular gouache.
Instructions
The technique of drawing with one stroke is shown in the video lesson
The artist teaches techniques for putting paints on a brush and two basic strokes.
The materials you will need are 1 paper plate, 1 flat brush, two colors of paint (white and green), paper towels and a glass of water.
Video lessons of drawing with one stroke
I chose two videos on the technique of drawing with one stroke.
Bud and rose in one stroke
Good master class for beginners
The artist dips the top of the brush in white paint and the bottom in burgundy. And he draws a flower on white paper.
Christmas tree in 2 minutes: draw with “one stroke”
In this lesson, the artist draws a New Year's tree.