Unconventional drawing in the second junior group
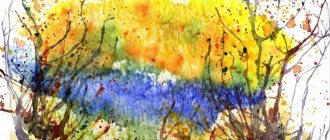
An unconventional way of drawing is, first of all, artistic effectiveness and unpredictability of the result. The technique includes unusual techniques for performing work that do not require special skills. This option can be reminiscent of an exciting activity that will allow kids to unleash their creative potential in a minimum amount of time. This method offers budding artists creative freedom.
An unconventional drawing method for younger children
For example, if a child smears his finger in paint and draws with it, or leaves his palm print on the drawing, the teacher will not punish him. The process is completed only by adding elements to obtain the desired result. Drawing turns into real fun.
What does the use of non-traditional techniques give to students?
Even at an early age, children want to reflect their impressions and explore the world around them through visual activities. Visualization of sensations helps them with this. Therefore, the child strives to make a drawing with one finger on the foggy glass.
Note! Some kids need a stick to draw pictures in the sand or chalk for the asphalt.
Existing non-traditional drawing techniques in kindergarten in the 2nd or 3rd junior group according to the Federal State Educational Standards method, which allow you to quickly see the results of your activities. This technique greatly simplifies the process when solving some teacher problems in methodological terms. Presentation of the drawing contributes to:
- development of creative abilities;
- formation of a non-trivial view of the world around us;
- nurturing independence.
The importance of classes
Even at 3 years old, children find it difficult to hold a brush in their hands. Not everyone is equally interested in visual arts. Therefore, in order to present your child with artistic creativity in all its glory, it is necessary to choose an appropriate theme. The drawing process must be turned into exciting entertainment. Teachers recommend conducting various experiments, for example, using unusual materials (leaves, sand, salt).
The use of alternative non-traditional drawing techniques for children aged 3-4 years has the following meaning:
- Full mental development of the child, increasing self-esteem, overcoming all fears.
- Development of abstract thinking.
- Formation of a holistic perception of the subject.
- Creating all kinds of conditions so that the baby can reveal his creative potential and freely express his individuality.
- Introducing children to the properties of various materials.
- Development of tactile sensations.
Consultation on the topic “Non-traditional drawing techniques with young children”
Consultation on the topic
“Non-traditional drawing techniques with young children”
Preschool childhood is a very important period in the life of children. It is at this age that every child is a little explorer, discovering the unfamiliar and amazing world around him with joy and surprise.
I draw - my hands are covered in paint, this is a small thing for me, I paint with bright paint, he will look at me. In kindergarten we paint ears, noses and eyes. We get little faces and messy children.
Unconventional drawing with young children
Preschool childhood is a very important period in the life of children. It is at this age that every child is a little explorer, discovering the unfamiliar and amazing world around him with joy and surprise. The more diverse children's activities are, the more successful the child's diversified development is, his potential capabilities and first manifestations of creativity are realized. That is why one of the closest and most accessible types of work with children in kindergarten is visual, artistic and productive activity, which creates conditions for involving the child in his own creativity, in the process of which something beautiful and unusual is created.
Non-traditional drawing technique is a new direction in art that helps to develop a child comprehensively. Non-traditional drawing techniques when working with children contribute to the development of children's artistic talent.
The ability to draw appears in children at an early age, when they draw with their fingers on foggy glass or with chalk on wallpaper. As many adults know, conscious movements of the fingers lead to the activation of speech activity. The more we devote
attention to this, the faster the process of speech production will go. In the process of drawing, a child experiences various feelings: he is happy about the beautiful image that he himself creates, and he is upset if something doesn’t work out. By connecting and combining simple elements, our kids develop imagination, spatial and imaginative thinking. When using non-traditional drawing techniques, both hands work, and this allows for excellent coordination. And never say that it turned out badly, because our children need confidence in their abilities. For a child, creativity is a process, not a result.
While drawing, I came across the fact that kids are afraid to draw. They feel like they can’t do anything, that they don’t know how to draw, or that they just don’t want to get their hands dirty. But over time, looking at their peers, they slowly became involved in the process so that sometimes it was impossible to tear them away from their activities. I started my work with the simplest techniques of non-traditional drawing: drawing with cotton swabs, stamps, foam rubber, glue brush, only then I added drawing with fingers and palms. After all, not all children can immediately dip their finger into a jar of paint or completely lower their palm into a plate with the same paint. But before you start drawing directly, you need to get the child interested in it. Therefore, when teaching young children, I used games, poems, nursery rhymes, riddles, played out the plot of the future drawing with the help of various toys, objects, pictures; used finger and movement games and musical works. The children quickly became interested in the process, and it was possible to hold their attention longer, as well as set them up for a positive motive for the activity.
What techniques are used
Modern methodology contributes to the implementation of the educational task when performing work.
Note! A similar technique is considered for children from 3 to 4 years old. In addition, you can organize additional interesting activities with minimal financial costs.
What technique is used in practice?
Drawing with cotton swabs
An unusual drawing technique develops a sense of rhythm and color. Cotton swab (stick) - a popular drawing technique is called the “poking method”. When creating a drawing, it is impossible to do without a cotton swab, container, and wet wipes. When creating a new material, little artists place a stick in a container of paint, and then apply imprints to the drawing.
Cognitive interest of preschoolers
Important! Young artists can depict a river, rainbow, grass, rain, snow, sun, tree, sky or something else.
When creating a drawing using a cotton swab on the theme “Trees when autumn comes,” the teacher must show the children how to properly hold this object in their hands.
Instructions: Children receive blanks of tree trunks with branches, cotton swabs, and paints.
Important! To make it easier for the children, you can mark the area of the drawing, indicating the exact location of the foliage.
Finger painting
To implement this method, you can do without certain material. For example, a teacher prepares paint in advance with wet wipes.
Note! Implementing teamwork based on this technique is a great idea for both educators and preschoolers.
The teacher takes into account the mental and physical characteristics of the children and prepares a topic for drawing in advance, for example, “Foliage of autumn trees.” The teacher provides the little artists with a template - a large tree.
Other themes are also covered, such as “Winter” or “Summer is Coming.” In kindergartens, the finger painting “Snowflake” is most often created. To perform it, paints and pencils are used.
Instructions: The teacher distributes A4 sheets. The guys must draw a snowflake. To complete the work you will need a blue and white pencil.
Drawing with palms
This method is not the most accurate, since children must draw with their palms. Before creating a drawing, the teacher must prepare a shallow container of paint. Pour some water inside and drip some gouache.
Note! Using this method, you can easily create collective drawings, for example, “Fish in the Aquarium”, “Our Aquarium”, “Merry Matryoshka”, “Firebird”, “Winter has come”.
Instructions: The teacher shows the children the finished substrate. The drawing is created on a sheet with a blue background. The guys must completely dip their palm into the container of paint. Then the teacher calls on the kids to go to the table where the aquarium is located, stand in a circle and leave their imprint there with their thumb up or to the side.
There is no need to put a mark on the one that the first comrade has already put. The teacher also warns that the fish must be located at a certain distance from each other. Then make an eye for your fish using white paint. Dip your index finger into black paint, make a pupil and carefully draw a line near the mouth.
Drawing with soap bubbles
This technique is the most difficult. Here children will have to show their imagination (open mind). Before starting to draw with soap bubbles using the preschool method, the teacher prepares material in the form of liquid soap, baby shampoo, water, watercolors (food coloring), cocktail tubes, and spoons.
Planning a walk in a preparatory group in winter
Initially, the teacher prepares the mixture, and then pours the mixture equally into small glasses. You can prepare the paint by diluting soap with water (the ratio should be 10:1). After obtaining the mass, the addition of dye and a little gelatin or glycerin is required. Thanks to these components, the bubbles retain their shape for a long time. The finished mixture will have to be placed in a cool place (away from the sun) and kept for 2 days.
Important! It is recommended to strain the mass through cheesecloth. The finished mixture should be placed in the refrigerator for 10 hours. Having received the material, you can make a outlined and regular print.
Instructions: The teacher invites the children to take a sheet of paper, a container with soap solution, straws and disposable teaspoons. Children must blow into the tubes to create foam. Next, a mass of one color is collected and laid out on a sheet. The balls should be placed far from each other. Once the shape of each print is dry, children can add a string to each ball.
Drawing with stamps
Drawing with stamps can reveal the possibilities of using familiar objects as art material. This method promotes the mental development of the child.
Note! When drawing with a stamp, a child develops an interest in inventive art, which leads to increased self-esteem and the development of coordination of movements.
Foam rubber impression
The main goal of this method is to introduce students to an unconventional method of drawing using the “foam rubber imprint” technique, and to develop the ability to arrange the elements of a drawing on a sheet of paper.
Educational qualities: fosters a love of fine arts and nature.
Developmental qualities: to develop aesthetic perception, a creative attitude to work, attention, memory, spatial thinking, fine motor skills of the hands, a sense of composition, color, color perception, to form in children a stable interest in visual arts, creative imagination.
MAGAZINE Preschooler.RF
Drawing lesson notes. Drawing in an unconventional way using foam rubber. “The leaves are falling in our garden”Purpose of the lesson: To introduce children to the technique of applying foam rubber. Continue to introduce the technique of drawing with cotton swabs. Give a general idea of leaf fall. Develop creative imagination, memory, fine motor skills of the fingers; activate the dictionary on a lexical topic.
Materials for the lesson: Landscape sheet with a depiction of a tree trunk, stencil, piece of foam rubber, cotton swabs, gouache in yellow, red, orange and green colors, napkins.
Organizing time.
Reading a fairy tale.
Autumn has come. The entire forest is strewn with yellow leaves that rustle underfoot, gradually turning brown and black from dampness. The strongest oak leaves last the longest, but they too will soon fall. Little Hare, Little Squirrel and Little Fox decided to clean up the clearing where they had been playing all summer. Having made brooms, the animals swept the clearing clean. A huge pile of leaves had formed behind a tall pine tree.
It's time for lunch. The little hare, little squirrel and little fox ran to their homes. Mothers were waiting for their babies and prepared them a delicious lunch. After tasting the hot soup and drinking a compote of sweet wild berries, the animals gathered again in the cherished clearing.
But what is it? Instead of a beautiful, neat pile of colorful leaves, they saw a tousled pile. Some of the leaves were lying nearby.
- Who was doing this mischief here? Whose hands is this? - they were loudly indignant. A golden-haired girl came out from behind the trees in response to the noise. It was beautiful Autumn. The animals told her about the mischief maker who had created chaos in the clearing.
- This is my brother, the Autumn Wind, testing his strength. Let's put the leaves together in a hole and cover it with old branches. From there, my flighty brother will no longer be able to get them.
And so it happened. And then Little Hare, Little Squirrel and Little Fox listened to the stories of the Autumn Beauty about what she does in the autumn months: September, October and November.
And when December comes, the beautiful Autumn gives her magic wand to Aunt Winter.
Surprise moment.
The heroes of a fairy tale come to visit the children; bunny, squirrel, fox and bear. They tell the children about autumn in the forest. The bunny and the squirrel will change their fur coats, the bear will go into hibernation. And the leaves on the trees change color and then fall off (leaf fall). Bear invites the children to play a game before he goes to bed.
Game "Collect leaves" .
Multi-colored leaves are scattered on the carpet, and three children are given a basket each. 1 - collects red leaves, 2 - yellow, and 3 - green.
2. Drawing.
Warm up for fingers
Let's go for a walk, let's start collecting leaves: Red leaf, yellow leaf... And then let's count:
One two three four five! How many leaves did you collect? Five! We will play with autumn leaves.
Guys, winter will come soon and all the beautiful leaves will be covered with snow, so to remember such beauty, let's draw colorful leaf fall.
We take a blank (trunk), dip a piece of foam rubber in paint and apply it to the branches. Below, near the trunk, we make a green meadow, also using foam rubber and green gouache.
3. Analysis and exhibition of works.
| Next > |
An example of a lesson plan on non-traditional drawing in a junior group
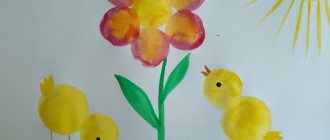
Summary of a drawing lesson using non-traditional techniques in the first junior group: “Flowers of unprecedented beauty.” The plan for this outline is drawn up by the teacher. Young artists are introduced to a new technique of unconventional drawing - “Painting with a palm and a sponge”.
An example of a note on drawing using non-traditional techniques
The teacher says that when spring comes, all nature wakes up after winter. During this period, all trees and shrubs begin to turn green. The very first spring holiday is Mothers' and Grandmothers' Day. Next, the children are shown illustrations of flowers. In addition, the teacher teaches how to convey the image of flowers, structure and shape using a sponge.
The project is aimed at developing creative imagination in children of primary preschool age through the use of non-traditional drawing techniques. These techniques allow the child to express with interest his impressions of the world around him in his drawings. An unconventional approach to making images is self-education and the development of children's intellect; it encourages the child's creative activity and teaches him to think outside the box.
Preview:
Municipal autonomous preschool educational institution
Combined kindergarten No. 9
Lesson notes for the younger group
on artistic and aesthetic development.
Topic: Drawing with foam rubber “Koloboks”
Pakhorukova Elena Gennadievna
Summary of a lesson on artistic and aesthetic development in the younger group.
Drawing with foam rubber “Koloboks”.
Topic: Drawing with foam rubber “Koloboks”
Goal: to help children master a new way of depicting - drawing with a foam sponge, which allows them to most vividly convey the depicted object.
Educational: cultivate a friendly attitude towards fairy-tale characters
Developmental: create conditions for the development of creative abilities, develop fine motor skills; develop children's creative imagination
Equipment: 1/2 landscape sheet, a set of gouache paints, a piece of foam sponge, a thin brush, a glass of water, a napkin
Educator: Once upon a time there lived an old man and an old woman. They wanted something tasty. The old woman baked a bun and set it to cool by the window. And the bun jumped from there and rolled. Why did he roll? (Children's answers)
Educator: He left his grandmother, he left his grandfather. Who did Kolobok meet in the forest?
Educator: Who else?
Educator: Who else?
Educator: Why did he leave them? (Children's answers: they all wanted to eat it)
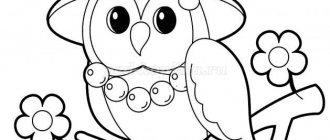
Educator: Yes, guys, they all wanted to eat it. So they told him: “Kolobok, Kolobok, I’ll eat you!” " Kolobok is sad and bored alone. He wants to play with someone or at least talk. Kolobok really wants to find himself a friend. Guys, let's roll a Kolobok out of plasticine. Let's make eyes so that Kolobok can see, and a mouth so that he can speak. And let's play with our friends - Koloboks.
Musical physical school
1.Look at the bun, determine its shape, relative size, location, color.
2.Explanation by the teacher of a new way of depicting - drawing with a sponge.
Educator: Guys, look at our bun. Today we will try to depict it on paper in an unusual way: we will draw with a piece of foam sponge. If you dip a sponge in paint of the desired color (yellow), and then lightly press the painted side onto the painted surface, you will get a print that will give the line volume and fluffiness. The next print should be applied side by side, leaving no free space between the previous and subsequent ones. When the outline is ready, fill the space inside with prints.
3.Add details to the drawing: with a thin brush, draw the eyes, nose, and mouth of the bun.
4.If desired, make a bright background around the kolobok in the same way, using another, clean piece of foam rubber.
During the work, the teacher monitors how the children draw: he reminds them not to put a lot of paint on the foam rubber, but only lightly touch the surface of the paint so that the print has an air-colored surface.
The works are hung out at the exhibition and the children, together with the teacher, admire the work done.
Source