Master class 1. How to draw an autumn tree: draw a tree using the “poke” method
Even small children can draw a tree using the “poke” method.
The master class is conducted by Vera Parfentyeva, a reader of “Native Path”, a technology teacher, the head of an art circle for preschool children, a participant in our Internet Workshop of educational games “Through play - to success!”. To draw a tree using the poke method you will need:
- gouache paints,
- brushes No. 2, No. 4,
- white watercolor paper A 4.
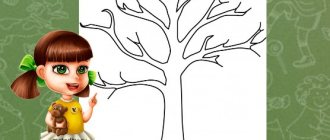
We will paint this tree immediately with paints without first drawing the outline. The crown of the tree will consist of 3 tiers of different sizes. We will draw it as follows.
Step by step description of drawing a tree
Step 1:
In the center of the upper part of the sheet of paper, using a brush No. 4 with yellow paint, draw a dotted contour in the form of a cloud on the upper tier of the tree crown. The brush must be held vertically. You need to paint with the tip of the brush, making “pokes”. Then, inside the contour using the “poke” method, we will paint over this tier.
Step 2: Stepping back from the first tier down approximately 1 - 1.5 centimeters, as in the first point, we point-draw the second tier of the crown a little larger than the first. I say approximate because the size of each tier will be completely different for everyone. Therefore, every little artist will orient himself in size relative to the sheet. The contour should not be perfectly smooth and symmetrical along the edges relative to the center.
Step 3: Similar to the previous points, inside the contour using the “poke” method, paint over the second tier and draw the third tier. Let's fill it inside the contour. Make sure that the brush is always directed vertically.
Step 4: Apply dotted orange paint to all three tiers of the autumn tree. We apply orange paint mostly on the left side at the bottom of the crown, creating darker spots, because Let's conditionally choose the lighting on the right. Therefore, the right side should be lighter than the left.
Step 5: Using the “poke” method, we’ll paint the grass under the tree first with yellow paint, then with orange.
Step 6: Using a brush number 2 with brown paint, paint the trunk between the tiers. Moreover, it is better to draw it from the bottom up, since the tree grows, gradually narrowing the trunk towards the upper small tier. It is advisable to take paint in two shades: dark and lighter. Then the texture of the bark will stand out on the trunk. Let's draw the branches.
Step 7: Since we conventionally assumed that the light falls on the tree from the right, we will add thin lines along the trunk on the right side with yellow paint.
I would like to add that children of different ages completed the task. Some completed the drawing of an autumn tree entirely on their own. For others, I helped them first draw on the outline and trunk with a pencil.
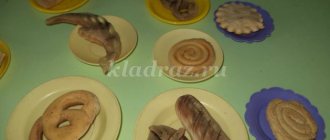
Examples of children's drawings of autumn trees
Summary of a lesson on fine art activities (drawing) in the middle group “Autumn Tree”
Summary of a drawing lesson in the middle group
Topic: "Autumn tree."
Tasks:
Teach children to draw an autumn tree, correctly conveying its structure (the trunk is wide at the bottom, narrow at the top; the branches are thick at the bottom, thin at the top).
Practice the ability to draw thick lines with the whole brush, thin lines with the tip of the brush, leaves with the brush method.
Strengthen the ability to place the image in the center of the sheet.
Develop imagination and creativity.
Cultivate the desire to achieve good results.
Materials:
½ landscape sheet, gouache (brown, red, orange, yellow), brush No. 3, jar of water, cloth.
Progress of the lesson
The children stand in a semicircle.
The adult asks if the children know what time of year it is. Asks to name the signs of autumn. (throws the ball to the children).
Mystery
We saw him dressed in spring and summer.
And in the fall, all the poor girl’s shirts were torn off.
What say this? (Tree)
Children sit down on the floor.
Conversation about a tree.
There are many trees in our city. Why are trees needed? Trees provide oxygen. Clean the air.
(Appearance of the Taratun bird in the spaceship).
Dialogue with the bird Taratun
V. - Hello, who are you?
T. -I am the bird Taratun, who came to you from the planet Kaptun. Our planet is dying. I was sent to you for help, for a tree, because it releases oxygen and cleans the air. Give me a tree and I'll fly home?
V. - Taratun, do you know what a tree looks like?
T. - No.
V. – Our guys know, and we will definitely show them what a tree looks like. We will plant a whole alley of trees for you so that the air on your planet Kaptun becomes clean.
T. - Great. Thank you.
Children stand in a line, answer questions and show the structure of the tree with their movements.
How a tree grows (from bottom to top), what it holds on to (why the tree doesn’t fall). At the bottom of the tree the trunk is wide, at the top it is narrow.
The branches of the tree grow from the trunk. Small branches grow from a large branch.
There are leaves on the branches. What color are the leaves in autumn?
The wind blows in our faces
And the tree shakes.
The wind is getting quieter and quieter.
The tree is getting higher and higher.
What a beautiful alley it turned out to be.
T. -Thank you, friends. Load the trees into my spaceship and fly to the planet Kaptun.
V. - Why, Taratun, we won’t give you the guys. Guys? How can we help the planet Kaptun? We will draw trees with you. And we will send them to the planet Kaptun.
T. – Great, we have technology on the planet, and we will bring your drawings to life. We will have trees growing, a whole alley of trees. You friends will save our country Kaptun.
Children go to the tables.
How to draw a tree: creative tasks for children
— What two groups are tree species divided into? (deciduous and coniferous)
- Name the species of deciduous trees (Rowan, aspen, poplar, linden, elm, autumn, maple, birch and others).
-What tree did you depict? Think about whether it is possible to depict coniferous trees using this technique?
— Try to draw a pine tree using this technique? How can I do that? (For more information about drawing a pine tree, see the article “Drawing Summer”).
- Consider the shape of the tree. Are the crown and trunk dimensions the same at the top and bottom? What is the difference? How can you get this result when drawing a tree?
— Why is autumn called golden?
— Read to children or learn poems about autumn:
If the leaves on the trees have turned yellow, If the birds have flown to a distant land, If the sky is gloomy, if the rain is pouring, This time of year is called autumn. (M. Khodyakova “Autumn”)
Following summer, Autumn comes. The wind sings yellow songs to her, lays red leaves under her feet, flies like a white snowflake into the blue. (V. Stepanov “Autumn is Coming”)
An autumn tree can be drawn not only using the “poke” method, but also using other techniques. How to do this is in the step-by-step master classes below.
Topic: Drawing an autumn forest
For work you need to prepare: - gouache paints; - white A4 album sheet; - a flat, wide brush (for example, No. 12), - fallen leaves from different trees.
How to draw an autumn forest with children using the technique of leaf prints on paper: step-by-step description
Step 1. Draw the sky on the background.
Let's start with decorating the background. Place the A4 size sheet horizontally. Dip the brush into white and blue paint and, moving from left to right, paint the sky and blur it a little with water. Going down the sheet, we try to take more white paint onto the brush than blue. The sky can be drawn on 1/4 sheet.
Step 2. Draw the earth on the background.
Invite the children to remember what colors autumn has? Let them think about how old trees differ from young ones? What trees will they depict in the drawing? Let's paint the ground with fallen leaves using brown-green paints by moving the brush from left to right.
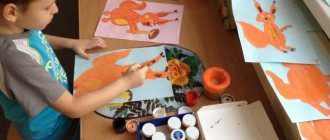
Step 3. Draw a tree using the technique of leaf prints on paper.
Choose a piece of paper you like, preferably a large one. We paint it on the reverse side with paint of any color in accordance with the colors of autumn. This is an important nuance, since the veins on the back of tree leaves are more pronounced, which means they will give us a more beautiful print.
Reminder: In this painting technique, the paint should be thick enough. Do not wet the brush too much in water, otherwise the print will be smeared.
Also paint the tail of the leaf.
Then you need to take a leaf, place it carefully on the prepared background in the background so that there is no shift of the leaf on the paper. Cover the top of our sheet with a paper napkin. It will protect your work from smearing the paint that has come out from under the piece of paper. Next, you need to press the napkin with your palm or lightly stroke it with your fist.
Remove the napkin. Carefully remove the leaf by the tail.
So the first painted tree appeared in our autumn forest!
Step 4. We draw large old trees with leaf prints.
Similarly, we draw several more trees with prints of different large leaves and paints of different colors. These are old trees, they are larger in size. Try coloring the leaves in several colors. This is what happened to four-year-old Nastenka.
Step 5. We draw young trees and bushes with imprints of leaves.
Now let's select a few smaller leaves - these will be young trees and shrubs. Let's paint them with different autumn colors and make prints in the foreground. Thus we get a landscape - an autumn forest. This is the autumn forest seven-year-old Lisa painted with leaf prints.
LiveInternetLiveInternet
Quote from message in the evening
Read in full In your quotation book or community!
Teach your child to draw a “fairytale tree”!
The point of our drawing master class is that it is quick, simple and beautiful. I dare to assure you that the “fairytale tree” can be done by a child from three years old and by parents who don’t even realize that they also know how to draw.
For work we will need:
• sheets of paper of any format (I chose A4 for working with paints, but a regular sheet of writing paper, usually used for a printer, will do); • paints (gouache or watercolor) of any colors; • brushes (any kind, but not small ones, I prefer kolinsky brushes from No. 2 and above); • jar for water; • cloth; • and most importantly – a good mood.
We soak gouache paints: this is done very simply - add a drop of water from the tip of the brush to each paint.
Let's start drawing the tree trunk. To do this, take paint of any color on a brush. For me it is brown and blue, but any other color is quite possible, from orange to purple. Using a brush, draw a vertical line approximately in the center of the sheet and make several branches from it.
Then we take another paint, either related (red-brown) or in contrast (yellow-blue). And draw another vertical line next to the previous one.
There may be several such lines. The main condition: they must be multi-colored.
Add a few more branches.
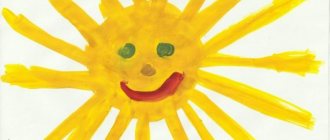
Next, we again take any paint we like on the brush, and use the brush to “paint” the leaves on top of the trunk and branches. This can be done even with your finger, which is especially important for the youngest artists.
Dip a brush or finger into another paint, preferably in contrast, and “paint” it on top of the foliage. The thicker the paint layer, the more interesting and voluminous the crown will be. Using the same paints, you can cover the roots of trees with fabulous colorful vegetation.
We add a new color, because “you can’t spoil porridge with oil!” Look, it’s already turned out quite elegant. And here the smallest artists can deservedly be proud of their wonderful tree! After all, if you place the drawing in a frame, you will get a picture that can decorate a room in your house, and will also please your grandmother, whom your baby will surprise with a gift made with his own hands.
Those who still have patience can create a background for our wonderful tree. Here I can only advise one thing: on the side where the crown and trunk are lighter, make the background darker, and on the side where the crown and trunk are darker, it is better to make the background lighter. You choose the color arbitrarily.
Now we put our dried work on the floor and see what is missing: color, brightness, thickness? We correct errors and enjoy the results.
Photo by Maria Belikova
A series of messages “for children”:
Part 1 - The most expensive children's toys Part 2 - The main rules of communication with a child ... Part 6 - Russian beauties Part 7 - How to arrange a bathroom for a child Part 8 - Teach your child to draw a “fairytale tree”! Part 9 - Simple patterns of beautiful paper snowflakes! Part 10 - Buy Romer car seats at a good price! ... Part 19 - EASY AND BEAUTIFUL NEW YEAR'S COMPOSITIONS WITH YOUR OWN HANDS FOR CHILDREN AND ADULTS!!! Part 20 - Amazing New Year's Angel made from napkins!!! It can be a good decoration when serving a NEW YEAR'S TABLE, and when decorating a Christmas tree! Part 21 - DIY Christmas tree decorations!!! Easy and original!
Miracle tree
Vasilyeva Alevtina Petrovna Naumova Galina Petrovna teachers MBDOU “Kindergarten No. 11 “Rucheyok” of a general developmental type with priority implementation of activities for the artistic and aesthetic development of children” in the city of Cheboksary, Chuvash Republic
MIRACLE TREE summary of organized educational activities for children of the middle group
Educational field: “Artistic and aesthetic development.”
Type of children's activity: “Perception of artistic art. Visual activity."
Advertising message
Age category: middle group children.
Integration with other areas: “Speech development”, “Cognitive development”, “Socio-communicative development”.
Program content:
- Educational objectives:
- Teach children to create a fabulous image of a tree in a drawing.
- Continue to introduce non-traditional drawing materials.
- Developmental tasks:
- Development of prerequisites for the value-semantic perception of the natural world;
- Develop creative imagination, the choice of image methods and visual material depending on the conveyed image;
- Develop children's thinking, imagination and curiosity.
- Educational tasks:
- To cultivate responsiveness, goodwill, to evoke positive emotions in children, to bring joy to children.
- To cultivate aesthetic taste and accuracy in performing work.
- Vocabulary work: explain to children the concepts: artist, tripod easel.
- Individual work: to activate inactive children: Lesha I, Artema D., to help formulate their ideas, guesses, hypotheses.
- Preliminary work:
- Reading the fairy tale by K. I. Chukovsky “The Miracle Tree.”
- Examination of illustrations, “Miracle Tree”.
Equipment: Illustrations for the fairy tale “The Miracle Tree”, pictures of trees, felt-tip pens, magic brush (prop), audio recording of classical music; drawing materials: sheets of white A5 paper, paste, brushes, PVA glue, gouache, water in cups, cotton swabs, felt-tip pens, pencils, crayons, colored sand, plasticine, watercolor, palette, millet.
Move.
Introductory part (Children playing in a group)
Educator : - Look, guys, what an interesting book Sophia is considering, you and I have already read it. Who remembers what the book says and who its author is?
Children: - “The Miracle Tree”, and it was written by Korney Ivanovich Chukovsky.
Educator : -How did you guess that this is a miracle tree? (children's answers).
Slide No. 1 (The ball flies).
Educator : -Guys, a ball has arrived to us. Look, there is something attached to it. This is a letter, and guess who wrote it using the riddle.
Slide № 2
I have a pencil, Multi-colored gouache, Watercolor, palette, brush, And a thick sheet of paper, And also a tripod easel, Because I...
Who is an artist? What does an artist do? (children's answers). What does an artist have? What does the artist paint on? Why is it called a tripod?
I suggest reading the artist's letter.
Slide № 3
“Amazing trees grew in a wonderful forest. There was a disaster on the island; all the trees disappeared somewhere. Animals and birds were left without shelter. And everything went dark around. Please help me draw wonderful trees so that the island will once again sparkle with beauty and magic, so that birds and animals can return home. I can’t do it alone, so I wrote you this letter.”
How do you think we can help the Artist? (Children's answers).
Now I will touch each of you with the magic brush that the artist sent us, and you will turn into a miracle - artists, and you and I will find ourselves in a creative workshop.
1, 2 ,3 ,4, – Everyone has turned into artists!
Artists use various materials to paint. I suggest you come to our workshop and choose what you need for work.
-What might your “miracle tree” look like? (It may be similar in shape to birch, oak, and maple).
-What should a tree be like so that there is plenty of space for birds and animals? (It should be lush and spreading).
-Anya, what materials will you use to depict the tree? Andrey, what kind of tree will you draw?
Kostya, what will your tree be like? (Children's answers).
-Think about where we start drawing a tree? (We will start drawing the tree from the trunk).
- Right. What else needs to be drawn to make a tree? (Branches).
That's right, branches.
(Knock on the door, entrance of the toy artist).
- Guys, someone is knocking on our door, I suggest you take a look. This is an artist! He came to us not alone, but with a magical Christmas tree. The artist painted such a beautiful Christmas tree. She is very cheerful and wants to play with you.
- Guys, let's play?
Physical exercise “Christmas tree”.
Slide № 3
Educator: -Well done, now I suggest you sit down and continue your work.
I wish you good luck and creative works. Don’t forget to keep your back straight while drawing and not disturb the children sitting next to you. Let's get started.
Artist: -What wonderful trees you make. Well done!
Slide № 4
(Children work independently to calm music).
Artist: -That’s how many beautiful, colorful trees our birds and animals will now have.
Artist: -I suggest wandering through the fairy-tale forest, admiring the unusual trees of other children. Who wants to talk about their tree? What material did you use for painting? (Children talk about their tree, give it characteristics, for example, this is the tallest and densest tree, birds will settle on it. And on this tree there is a hollow for a squirrel).
The final part.
(The artist proposes to make an exhibition of trees on stands).
Artist: - Thanks, guys. What a magical, wonderful forest we have. We will protect the trees. Why do we need to protect trees? (They decorate our nature, make the air clean).
Artist: - Guys, what did you like most today? What material did you use to draw the miracle tree? What grows on your trees?
And I, guys, will tell you that you are not only real artists, you are also great, you did a good deed today - you helped birds and animals find a home.
I completely forgot, I brought you colored pencils so that you could draw just as beautifully.
Children: - Thank you!
Artist: - Thank you, guys. Goodbye! Syvă pulăr, now! (leaves).
Children: - Syvă pulăr!
Educator: -Well done, guys! What would you like to draw in your next lesson? (children's suggestions). Okay, we'll wait for the next lesson.