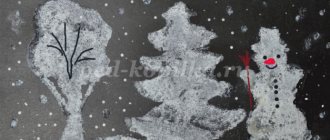
Design of a modeling lesson in the second junior group “Fluffy Clouds”
author: Krasnoshchekova Irina Anatolyevna
Teacher of MBDOU PGO "Kindergarten No. 40 of a general developmental type", Sverdlovsk region, Polevskoy city, 2021
Design of a modeling lesson in the second junior group “Fluffy Clouds”
Design of a modeling lesson in the second junior group “Fluffy Clouds”
Krasnoshchekova Irina Anatolyevna
Target:
Teach children to create relief images from plasticine - pinch off pieces and apply to the background, attach with their fingers. Arouse interest in creating a beautiful fluffy cloud from pieces of plasticine of different (blue) colors. Develop hand motor skills. Strengthen your fingers and hand.
Tasks:
- develop the ability to pinch off pieces of plasticine, apply to the background, attach, smear with fingers;
- arouse interest in creating a beautiful fluffy cloud from pieces of plasticine of different (blue) colors;
- diversify the ways of dividing plasticine into parts (pinching off, tearing off, unscrewing);
- develop a sense of form, texture, tactile sensations;
- develop fine motor skills.
Contents of educational activities
Introductory part (motivational stage).
Materials:
silhouettes of clouds made of light blue or white cardboard, plasticine blue, light blue, white, stacks, wet wipes, sun (toy).
Progress of the lesson:
The teacher raises the sun above his head, brings the silhouette of a cloud to it, covers the sun with a cloud and reads Berestov’s poem:
"The cloud and the sun again
Started playing hide and seek.
Only the sun will hide -
The cloud will burst into tears.
How can the sun be found?
A rainbow is laughing in the sky"
The teacher invites the children to play hide and seek with the sun - to make beautiful fluffy clouds. Gives the children silhouettes of clouds and offers to decorate them so that the clouds become fluffy. Children take the silhouette and trace the outline with their finger.
Children's activities:
listen to the teacher, select clouds, trace the silhouette with their fingers.
Expected Result:
gather children's attention and interest them in doing plasticine work.
Main stage
The teacher shows the children a way to create the image of a fluffy cloud: a piece is pinched off from a block of plasticine, crumpled in the palms of their hands, applied to the cloud, and pressed. Such actions are carried out with three colors of plasticine.
Children's activities:
observe and repeat the teacher.
Expected Result:
- develops the ability to pinch off pieces of plasticine, apply them to the background, and attach plasticine;
- consolidation of knowledge about the colors used; development of fine motor skills; senses of color, tactile sensations; development of a sense of form and texture.
Final part
(reflective stage)
The teacher invites the children to look at the resulting plasticine clouds. Set up an exhibition.
The teacher asks questions:
- what did we sculpt from plasticine? - children's answers: Clouds.
- What color was the plasticine? - Children’s answers: blue, light blue, white.
— what phenomena can be observed when clouds appear and it rains?
Expected Result:
the ability to evaluate the results of one’s activities is formed, as well as the skill of maintaining a dialogue with the teacher.
Junior group. Early childhood, nursery. Children 1-4 years old
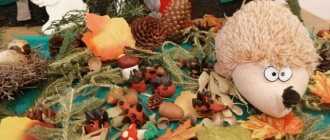
Summary of a lesson on plasticineography with natural materials in an early age group “Where does the mouse live?”
“Where does the mouse live?”
Summary of a lesson on
plasticineography with natural materials in an early age group. One of the priority types of visual activity for pupils of the first (1.5–3 years)
junior group is modeling. This type of creativity engages receptors on...
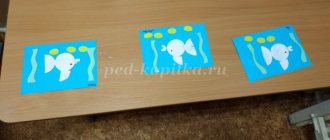
Master class on making a group stucco painting “Autumn in the Forest” (plasticine), for children 3–4 years old
Dear colleagues! In my classes on artistic and aesthetic development, I often use an unconventional method of drawing, sculpting or appliqué. One of the new unconventional drawing methods is “ plasticineography ”
I really like it because... This technique develops...
Work plan for plasticineography in the second junior group in kindergarten
Municipal preschool educational institution
Kindergarten No. 15 “general education type”
Self-education plan on the topic: “Development of fine motor skills in preschool children through plasticineography” (second junior group)
2018-2019.
Completed by teacher: Muravyova Elena Aleksandrovna
EXPLANATORY NOTE.
Currently, teachers and specialists in the field of early development insist that the development of intellectual and thinking processes must begin with the development of hand movements, and in particular with the development of movements in the fingers. This is due to the fact that the development of the hand plays an important role in the formation of the brain, its cognitive abilities, and the formation of speech. This means that in order for a child and his brain to develop, it is necessary to train his hands. This is what will later give him the opportunity to easily learn new things, be it a foreign language, writing or mathematics. The development of fine motor skills is also important because the child’s entire future life will require the use of precise, coordinated movements of the hand and fingers, which are necessary to dress, draw and write, as well as perform many different everyday and educational activities.
“Plasticineography” helps prepare a child’s hand for writing. The more often a child models from various materials (plasticine, dough, clay), the more actively his general and visual inclinations develop.
Relevance of the program
is that the development of fine motor skills and manual skill in art classes contributes to the development of sensorimotor skills - consistency in the work of the eye and hand, improvement of coordination of movements, flexibility, strength, accuracy in performing actions, correction of fine motor skills of the fingers. Children master the skills and abilities of working with tools (in drawing - a pencil and a brush, in appliqué - scissors and a brush, in modeling - a stack). In these classes, children develop the ability to operate an instrument.
Younger preschool age is characterized by increasing cognitive activity, interest in the world around them, the desire to observe, compare, and the ability of children to realize the goals set for them.
Plasticineography is one of the relatively recent emergence of a new genre (type) in the visual arts. The benefits of this type of creativity for the development of a child include the benefits of drawing and modeling. In addition, when a child creates a picture from plasticine, he rolls out and smears the plasticine, thanks to which he learns to feel his hands better and control them more confidently.
The concept of “plasticineography” has two semantic roots: “graphite” means to create, draw, and the first half of the word “plasticine” implies the material with which the plan is executed.
This genre is the creation of stucco paintings depicting more or less convex, semi-volume objects on a horizontal surface, using unconventional techniques and materials. For example, decorating the surface with beads, plant seeds, and natural materials. In some cases, using the plasticineography technique, a product is modified, which leads to the creation of original works. For example, a landscape is graphically depicted on a flat surface, and foreground details are depicted using plasticineography.
The program is aimed
on the development of personality, its creative potential, artistic abilities, moral and aesthetic development of children. Stimulates forms of personal self-expression. Provides emotional development of the child.
Feasibility
program “Plasticineography” is explained by the fact that the main material in it is plasticine, and the main tool is the hand (or rather, both hands), therefore, the level of skill depends on the mastery of one’s own hands. This technique is good because it is accessible to children of different preschool ages, it allows you to quickly achieve the desired result and introduces a certain novelty into children’s creativity, making it more exciting and interesting, which is very important for working with children.
Classes provide a great opportunity for the development and learning of children, contribute to the development of mental processes such as attention, memory, thinking, as well as the development of creative abilities. Plasticineography promotes the development of perception, spatial orientation, sensorimotor coordination of children, that is, those school-significant functions that are necessary for successful learning at school. Children learn to plan their work and complete it.
The purpose of this development:
Development of fine motor skills in preschool children through plasticineography.
By doing plasticineography, the child develops manual skill, strengthens hand strength, the movements of both hands become more coordinated, and the movements of the fingers are differentiated, the child prepares the hand for mastering such a complex skill as writing. This is all facilitated by good muscle load of the fingers.
One of the undoubted advantages of plasticineography classes with preschool children is the integration of subject areas of knowledge. The activity of plasticineography allows you to integrate various educational spheres. The topics of the classes are closely intertwined with the lives of children, with the activities that they carry out in other classes (to become familiar with the surrounding world and nature, develop speech, etc.).
The program is developed taking into account artistic and educational technologies that reflect:
1. The principle of accessibility - teaching and raising a child in an accessible, attractive and age-appropriate manner: games, reading literature, looking at illustrations, productive activities.
2. The principle of humanism is an individual-oriented approach and the comprehensive development of the child’s personality.
3. The principle of activity - the development of fine motor skills is carried out through a type of children's activity - modeling.
4. The principle of integration is the combination of the main type of activity with the development of speech, with play activity, with the development of cognitive processes.
5. The principle of consistency is the solution of assigned tasks in the system of circle work.
Development tasks:
— Learn to convey the simplest image of objects, phenomena of the surrounding world through plasticineography.
— Teach the basic techniques of plasticineography (pressing, smearing, pinching, pressing).
— Learn to work in a given space.
— Learn to accept a task, listen and hear the teacher’s speech, act according to the model, and then according to verbal instructions.
— Learn to examine various objects (subjects) using visual and tactile sensations to enrich and clarify the perception of their shape, proportion, color.
— To develop the skills of careful work with plasticine.
— Cultivate responsiveness, kindness, the ability to sympathize with the characters, the desire to help them.
— Foster a desire to participate in the creation of individual and collective works.
— Develop fine motor skills, hand coordination, eye control.
— Develop children’s visual activity.
— Develop the plot and game concept.
— Develop interest in the process and results of work.
— Develop an interest in teamwork.
This program is designed for children 3-4 years old.
Duration of implementation: 1 year.
Work on developing plasticineography skills is carried out in several stages:
Stage No. 1. Preparatory
Tasks for the child:
- Master the pressing technique.
- Master the technique of pressing.
— Master the technique of smearing plasticine with your fingertip.
— Master the correct placement of the finger.
-Master the technique of pinching off a small piece of plasticine and rolling a ball between two fingers.
-Learn to work in a confined space
Stage No. 2. Main
Tasks for the child:
— Learn not to go beyond the outline of the drawing
- Learn to use your finger to smear plasticine all over the drawing, as if painting it.
- Use several colors of plasticine
- Learn to get things done
- Learn to do your work carefully
— Learn to perform collective compositions together with other children
-Learn to restore the sequence of actions performed
— Learn to act like a teacher
— Learn to act according to the teacher’s verbal instructions
Stage No. 3. Final
Tasks for the child:
- Solve creative problems independently.
- Choose a drawing to work on yourself.
— Form a personal attitude towards the results of your activities
Class structure:
1. Introductory part: organizational aspect, integration (reading fiction, finger gymnastics).
2. Main part: explanation and practical activities.
3.Final part: finger play and summing up - praising the children for the work and beauty of the created composition.
Expected results:
Plasticineography contributes to the development of the educational program. By the end of the year, children:
Implement cognitive activity. All selected material for classes with children has a practical orientation, relies as much as possible on their life experience, helps to highlight the essence of the characteristics of the objects and phenomena being studied, and activates images and ideas stored in long-term memory. They allow them to clarify the knowledge they have already acquired, expand it, and apply the first versions of generalization.
They get acquainted with works of art, poems, nursery rhymes, and finger games.
Develop sensory standards. Sensory development occupies one of the central places in working with children in plasticineography. Children develop tactile and thermal senses of their fingers. The need for tactile and thermal senses with the tips and pads of the fingers is determined by the practice of life and should become a necessary phase of learning and accumulation of the child’s sociocultural experience.
But the main significance of plasticineography classes is that at the end of training, the child develops hand skill, strengthens hand strength, the movements of both hands become more coordinated, and the movements of the fingers are differentiated. This is facilitated by good muscle load on the fingers. Children develop pincer grasping, i.e., grasping a small object with two fingers or a pinch; they also know how to independently carry out movements in all its qualities: strength, duration, direction, etc.
Classes are held once a week:
15 minutes in the 2nd younger group;
Classes are held both frontally and collectively. In the evening, in the block of joint activities with children. When developing this program, the most interesting available topics and plots were selected that could attract the child and help him open up. For each lesson, appropriate games with movement, finger exercises, and warm-up for the arms are selected. To solve the assigned problems, all the child’s analyzers were used as much as possible during the classes: auditory, visual, tactile, etc. The classes are entirely held in the form of a game. Game techniques ensure the dynamism of the learning process, maximally satisfy the child’s needs for independence - speech and behavior (movements, actions, etc.). The use of games in teaching children plasticineography helps to activate children's activities, develop cognitive activity, observation, attention, memory, thinking, maintains interest in what is being studied, develops creative imagination, imaginative thinking.
Lesson plan for plasticineography for 2018-2019
September
2nd
"Kolobok is rolling along the path"
Learn to roll the ball in a circular motion between your palms, flatten it, transforming it into a disk, and stick the resulting ball to the track.
3rd
"Apples on a plate"
Teach children to pinch small pieces of plasticine from a whole piece and roll them into balls with a diameter of 5-7 mm, press the index finger on the plasticine ball, attaching it to the base, place the balls at the same distance from each other; develop an interest in working with plasticine.
4th
"Mushrooms"
Continue to master the skills of working with plasticine: roll out a ball, flatten it (mushroom cap), roll out a sausage (mushroom leg), connect both parts, place them in a clearing (green cardboard), develop the ability to make an object from two parts, connect them correctly.
3rd
"Autumn Tree"
Continue to master the techniques of plasticineography: stick autumn leaves on a drawn tree: pinch off plasticine from a large piece, roll out small balls, stick them to twigs. Reinforce the names of flowers, learn to use different colors, consolidate ideas about trees in the fall.
4th
“Let’s decorate the doll’s dress”
Teach children to independently pinch off small pieces of plasticine from a piece and roll them into balls with a diameter of 5-7mm. Continue to teach how to attach “peas” at the same distance from each other. Develop fine motor skills and support children’s desire to finish what they start.
October
November
Continue to develop skills in working with plasticine: roll out balls (try to make them the same), stick them on a base (cardboard), act like the teacher; develop an interest in working with plasticine; develop fine motor skills.
2nd
"Car wheels"
Continue to master plasticineography techniques: smearing plasticine without going beyond the contour (round wheel). Cultivate accuracy when working with plasticine. Develop finger strength.
3rd
"Ladders"
Strengthen the ability to roll plasticine between the palms, making short and long sticks; work carefully, place finished products on the board.
4th
"Bowls for bears."
Practice rolling balls out of plasticine using circular movements of your hands, and flattening a lump in your palms; teach, make a depression in it with your fingers, develop an interest in modeling.
Expand your understanding of winter, consolidate knowledge about the signs of winter. Continue to teach children to press the plasticine ball with their index finger, attaching it to the base, and place the plasticine balls at the same distance from each other. To develop children's interest in working with plasticine.
2nd
"Snowflakes"
Conversation with children about winter. Formation of emotional perception of the surrounding world. Reinforcing the technique of rolling out sausages and flagella of different lengths. Encouraging originality in creating snowflakes.
3rd
"New Year's toy"
To form in children a generalized idea of Christmas tree toys. Create a stucco painting with a convex image. Repeat the techniques of rolling out the ball, sausage, and spreading. Develop children's creative imagination.
4th
"Decorating the Christmas tree"
Continue to teach children to pinch small pieces of plasticine from a piece and roll them into balls with a diameter of 5-7 mm, press the plasticine ball with your index finger, attaching it to the base, smear the plasticine on the cardboard using a pressing movement of the finger.
December
January
4th
"Balls big and small"
Reinforce the concept of size (large and small). Reinforce the techniques of rolling out the balls using circular movements of the palms, flattening them, pressing them onto a plane. Develop finger strength, cultivate accuracy in working with plasticine.
Continue to teach children to pinch small pieces of plasticine from a large piece and roll them into balls with a diameter of 5-7 mm, press the plasticine ball with your index finger, attaching it to the base, smear the plasticine on the cardboard with a pressing movement of the index finger; develop an interest in working with plasticine.
3rd
"Plane in the Sky"
Continue to master plasticineography techniques: Rolling out sausages, flattening them on a template (sky), flattening the tail of an airplane. Work according to the example of a teacher, rejoice at the result obtained, cultivate accuracy in work.
4th
"Checkbox"
Teach children to independently pinch off small pieces of plasticine from a piece and roll them into balls with a diameter of 5-7mm. Continue learning how to attach “peas” to the flag template. Develop fine motor skills and support children’s desire to finish what they start.
February
2nd
"Radiant Sun"
Continue mastering plasticineography techniques. Teach, using a pressing movement of the index finger, smear the plasticine on the template, roll out the sausages (rays), stick to the template. Strengthen the ability to carefully use plasticine in your work. Develop fine motor skills.
3rd
"The icicles are crying drip-drip-drip"
Reinforce techniques for working with plasticine: rolling out sticks of different lengths, pressing them onto cardboard, encouraging them to make droplets: pinching off small pieces, rolling with two fingers, pressing against an icicle.
4th
"Fence for a house"
Reinforce plasticineography techniques: rolling out sausages (identical), attaching them to each other near the drawn house. Develop finger strength.
March
April
2nd
"Traffic light"
Fix the traffic light colors. Continue mastering plasticineography techniques. Teach, using a pressing movement of the index finger, smear the plasticine on the template (traffic light), roll out the stick, stick it to the template. Strengthen the ability to carefully use plasticine in your work. Develop fine motor skills.
3rd
"Cloud"
To develop children's practical skills in creating a given image (cloud) through plasticineography. Develop fine motor skills when performing techniques for working with plasticine (pinching, rolling, smearing).
4th
"Decorating an Easter egg"
Introduce the holiday of Easter. Reinforce plasticineography techniques: pinching off a small piece, rolling out balls with two fingers, pressing an egg onto the template. Encourage the use of multiple colors to create a bright, colorful look. Create a desire to please loved ones.
May
A week
Lesson topic
Target
1st
“The buds are swelling and the leaves are blooming”
To develop interest in the world around us, realistic ideas about nature and plants, and to introduce children to the signs of spring. Continue to master the skills of working with plasticine. Pinch off and roll sausages of different lengths, long and short tree branches. Roll up lumps, buds, place them throughout the tree, lightly pressing on them, turn them into leaves.
2nd
"Victory Salute"
Introduce the holiday of Victory Day, with festive fireworks, reinforce the techniques of plasticineography: rolling out multi-colored sausages, rolling out balls, pressing them onto a base (cardboard). Develop finger strength.
3rd
"Caterpillar"
Teach children to act by demonstration - roll balls from plasticine and place them on a thin stick; develop an interest in working with plasticine; develop fine motor skills of the hands.
4th
"Ladybug"
Reinforce plasticineography techniques: rolling out a large and small ball, flattening, pressing against a template (leaf), pinching off small pieces, rolling out the balls with two fingers (black dots), pressing the balls to the body, to complete the image, make antennae and paws.