Cycle of observations “Over a living object”
CYCLE OF OBSERVATIONS OF A TURTLE
(senior group)
Observation No. 1. “Meet the turtle?”
Target:
Clarify with your children the features of the external structure of a turtle - this animal is not like others.
The body is covered on all sides with a shell, which consists of separate scutes; the shell is flat below, convex on top, it is very hard and strong. There are openings in front and back through which four legs, a head and a tail emerge or are retracted under the shell. The turtle is a calm animal, you can pick it up, it’s heavy because it’s in a shell, it eats good things, its name is... (give a nickname). She is accustomed to children, and children to her.
Progress of observation:
The teacher shows the animal, says that it will live in a corner of nature, and asks to say what it is called. The children answer: “Turtle.” The turtle is placed on the floor and given the opportunity to examine it for one to two minutes. Then he wonders why this animal is different from others. Children notice that the turtle’s body is covered with a shell. Then he takes the turtle in his arms, circles the sitting children, shows: the shell covers its entire body, only the head and legs are visible from under the shell. Each child strokes the turtle, examines the pattern on the shell, traces it with his hand, lightly pressing on the shell, and makes sure that it is hard.
- How is a turtle different from other animals?
— What color is a turtle’s shell?
- How big is it?
- What does it feel like? The teacher invites the children to touch the turtle shell.
- What do you think the turtle needs it for?
— How big are the legs of a turtle? What are on the feet (claws)? What do you think - what are they for the turtle?
The teacher tells (in case of difficulty) that under natural conditions a turtle lives in the steppe or desert. There is a lot of sand there and her claws help her move through the loose sand.
The teacher suggests giving the turtle a nickname and observing how it moves.
Observation No. 2. “What conditions does our turtle live in?”
Target:
Make sure that conditions have been created for the turtle that meet its needs.
A spacious terrarium in which she can crawl; sandy soil in which she can dig, a grotto with a light bulb in which she can bask (turtles are heat-loving animals), various food and good attitude from children: children grow greens for her and treat her to fruits. Under these conditions, the turtle feels good and does not get sick.
Progress of observation:
The teacher draws the children's attention to what conditions have been created for the turtle.
- What is the name of this spacious house where the turtle lives?
— What is inside the terrarium? That’s right, it’s convenient for her to crawl in sandy soil; she digs it.
- Why, guys, is there lighting here? That’s right, the light bulb illuminates and creates heat, because the turtle is a heat-loving animal.
The teacher puts different food on a plate and offers to feed the turtle. Children treat the turtle with cut greens, fruits, and vegetables and watch how it eats. The children watch what kind of food she eats more readily. It is necessary to place a bowl of water in the terrarium.
The teacher shows a pre-prepared picture depicting a steppe or desert, talks about the turtle’s lifestyle in the wild, and finds out whether they have created good living conditions for it in the group.
Then the children and the teacher create a model “Conditions necessary for the life of a turtle.”
Observation #3 “How does a turtle walk?”
Target:
Show that the turtle moves in a peculiar way - it walks slowly, alternately moving its legs and raising its body, it cannot run quickly.
It is difficult for her to walk on a smooth floor; it is easier on sand, carpet, or grass. In an unfamiliar place, she often stops and hides in her shell. The turtle has peculiar legs: short, thick, wide, covered with skin with short, blunt and strong claws, the front legs are turned to the sides. Such legs are not adapted for fast walking.
Progress of observation:
The teacher asks a riddle:
He lives calmly, is in no hurry,
Carry a shield just in case
Under him, without knowing fear,
Walking... (turtle)
The teacher invites the children to watch how the turtle moves - fast or slow? That's right, the turtle moves slowly. Sometimes they even say about slow people: “He walks like a turtle.”
Look carefully, why does the turtle move so peculiarly?
-What do her legs look like? Are they short or long? Thick or thin?
- What are they covered with?
-What's on your feet? The teacher offers to touch the claws. What do they feel like?
— What can you say about the front legs, what do they look like?
- Why do you think the turtle’s legs are designed this way? That's right, guys, a turtle has peculiar legs: short, thick, wide, covered with thick skin; with short, blunt and strong claws. The front legs are turned to the sides. Such legs are not adapted for fast walking.
Observation No. 4 “How long does a turtle live?”
Target:
Teach children to determine the age of a turtle by the scars on its shell (“growth rings”).
Each scar is one year's growth. A turtle can live a long time if it has good conditions. You can take even better care of it: wipe the shell from dust, lubricate the dry skin of the neck and legs with an oily swab, and take it outside in warm weather.
Progress of observation:
The teacher asks a new riddle:
Guess who it is
Does he wear a bone coat?
The teacher draws the children's attention to the pattern on the shell, invites them to look at it and trace it with their hand. What does he look like?
- What do you think this pattern says? Maybe some of you know?
If the children find it difficult, the teacher says that he can find out how old the turtle is. To do this, he invites several children to count the number of circles on the plates of the shell (they are also called “growth rings”): how many circles, how old is the turtle.
Children, together with the teacher, find out how old the turtle is.
Next, the teacher talks about how the turtle lives a long time if good conditions are created for it.
- How do we take care of our turtle?
The teacher finds out what needs to be done in a corner of nature so that the turtle has a good life (what to put on the bottom of the terrarium, what needs to be planted so that it is the same as in the wild). Shows children a new way to care for a turtle - wipes the shell from dust, lubricates the dry skin of the neck and legs with an oil swab.
— Why do you think this needs to be done? That's right, the turtle itself cannot take care of itself (like, for example, a cat licking itself with its tongue), and in order to be healthy and not get sick, you need to take care of your skin and shell.
Observation No. 5 “How does a turtle camouflage itself?”
Target:
Clarify with the children the color and shape of the turtle’s body. Show that they make it invisible against a brown-yellow, sandy background, among stones; especially when she is motionless. The color and shape of the body are camouflage.
Progress of observation:
The teacher gives the opportunity to look at the turtle again and clarifies with the children the color and shape of the body.
—What is the body of a turtle covered with?
-What else does the turtle have?
— What shape does the shell have?
- What colour is he?
- Remember where in nature, in what area does a turtle live?
- Is it good or bad that her body color has this color? Why do you think?
The teacher shows a pre-prepared picture depicting a steppe or desert, talks about the way of life of a turtle in the wild, and about whom the turtle should be afraid of. Children, looking at the picture, see that the color and shape of the turtle’s body make it invisible against a brown-yellow, sandy background, among stones, especially when it is motionless. That is, the color and shape of the turtle’s body are camouflage.
Young ecologist. System of work in the senior group of kindergarten. For working with children 5-6 years old
Progress of the lesson
Part 1.
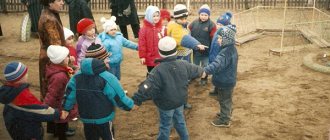
The teacher arouses children's interest in autumn natural phenomena using poetry, riddles, and music. Then he introduces them to the “September” calendar page, draws attention to the lines, the cells of the days of the week, the weather, and the place for a drawing on the theme “Wildlife.” He says that today—Monday—observations of nature on the site will begin and that the results of observations should be sketched in the calendar using symbols (icons).
Part 2.
Introducing children to icons. The teacher demonstrates the “Symbols” page, clarifies the sequence of days of the week, the color of each day, and examines with the children the icons indicating weather phenomena and animals.
To clarify the understanding of the symbolism of the icons, the teacher conducts game exercises with the children like: “I thought of a day of the week, which is indicated by blue (yellow or other) color. What day is it? Show it on your calendar." Or: “I wished for a sparrow. What icon does it represent? Show". And so on.
3rd part.
Formation of practical skills in the depiction of icons. The teacher invites the children to use a stencil to draw 3-4 squares - “days of the week”, then paint over the contours in two ways - without a stencil and with it. Draws attention to the thoroughness of painting, specifies what day (by color) this or that child depicted.
Children practice drawing icons indicating weather phenomena, learn to draw a human figure, color this icon in accordance with the weather, and depict birds and insects. They draw new squares and learn to depict sunny or rainy weather in them, try to draw bird icons.
During the walk, the teacher organizes weather observation. Invites everyone to look at the sky and say what color it is, what is on it (clouds, clouds, sun), whether it is raining. Determines the weather based on the state of the sky (cloudy, sunny, cloudy, rainy). Then the children determine whether there is wind (they look for signs by which it can be detected). The teacher gives another definition of the weather: windy (quiet). Finally, temperature features of the weather are discussed. The teacher draws the children's attention to their clothing, its correspondence to the weather and season, and asks them to define the weather (warm, cool, very warm, a little cool, cold). To summarize, for example: today the weather is sunny, quiet, warm. The teacher invites the children to remember this definition in order to record the results of the observation in the nature calendar after the walk.
In the group, everyone gathers near the calendar, figuring out which icons should be used and where to mark the weather. The teacher helps those who want to draw icons and color in the Monday box.
Tuesday.
When organizing observations, the teacher can use the technique of comparison: “Children, you, of course, remember what the weather was like yesterday and how we marked it on the calendar. I wonder if the weather is the same or different today? Look at the sky and tell me what it was like yesterday and what it is like today... That’s right, yesterday the sky was blue, clear, the weather was sunny, but today the sky is cloudy, whitish, the blue is not visible at all. We can say about this weather that it is cloudy. Now determine if there is wind and compare with yesterday’s weather.” Children look for and name signs of wind, compare the weather. The teacher summarizes: “Yes, there is a strong wind today, they say about this weather that it is windy. Now tell me whether it is warm or cool today and how you are dressed - the same as yesterday or differently. Maybe today your mothers dressed you warmer than yesterday?” Helps children figure out what changes have occurred in their clothes. Gives a general definition of the weather: “Well, we found out: today the weather is cloudy, windy, cool. Remember this because we will be marking the weather on the calendar again.”
In the group, after the walk, the procedure for filling out the calendar is repeated: the teacher clarifies the day of the week with the children, helps them find the right cell on the calendar page, determine which icons should be used to mark today’s weather, and fill in the corresponding cells. Everyone looks at the calendar together and compares the weather on Monday and Tuesday using the icons.
Wednesday.
In order to make it interesting for children and the teacher, a new technique is used in observing the weather - play. When getting the children together for a walk, the teacher suggests taking one of the dolls with them: “Children, your favorite bunny whispered to me that he would also like to go for a walk. Let's take him with us!"
Observation is carried out according to the same pattern as in previous days. The children tell the story to the bunny, who has never been outside before and doesn’t know anything and doesn’t know how to determine the weather condition by the sky, wind, or clothes.
The teacher encourages children to make independent judgments and statements. The bunny is used for the same function when filling out the calendar. The technique will give a good result, and children will be involved in the situation of teaching the bunny only if the teacher plays his role, uttering remarks, questions, and performing simple actions on his behalf.
Thursday.
In an effort to increase the level of activity of children, the teacher uses a new technique: at the beginning of the walk, he gives everyone the task of observing the weather on their own, so that later in the group they can talk about it and fill out the calendar correctly.
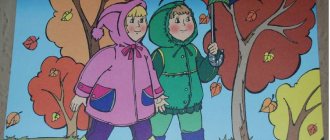
During the walk, all children are observed to observe the vegetation of the site and its seasonal condition. The teacher carefully examines one of the trees with the children (then it will be sketched in the calendar), finding out what the tree is called, what color its leaves are, which leaves are more yellow or green, where the yellow leaves are located and where the green ones are, whether there are fallen leaves under the tree leaves and what color they are, where there are more leaves - on the tree or under it, does the tree look beautiful with multi-colored leaves. Then other trees and shrubs in the area are discussed and signs of autumn are looked for.
It is important that the teacher draws children’s attention to the beauty of autumn colors and encourages them to independently find beauty in nature, for example: “Guys, let’s move away to look at the trees from afar. Admire them and tell me who likes which tree and why, that you noticed something beautiful.” You need to listen carefully to the children’s answers, and then say something like this: “I’ll also tell you about what I like. I admire the mountain ash every day. It is very elegant, with clusters of bright berries and slightly reddened leaves, carved like lace. The birch tree is beautiful in a different way: its small leaves began to turn yellow on the top. It’s like putting on an autumn hat! But the lower branches still hang in green braids. And a Russian beauty stands on a white leg in a green sundress and a yellow hat!”
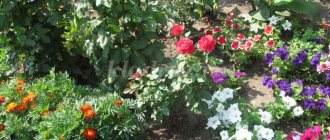
Then the vegetation cover of the earth is examined and its seasonal state is determined. We need to draw the children’s attention to the fact that the grass is still green, the fallen leaves stand out brightly on it, they have not yet withered and have a pure yellow color, and that there are many flowering plants around. Let the children look and name them.
In the group, all the children are given a lesson in visual arts - each child draws a tree, which was examined in particular detail, and the cover of the earth. The size of the paper on which children draw corresponds to the size of the “Wildlife” column in the calendar. The teacher instructs them to draw as accurately and believably as possible what they observed - the most similar drawing will be placed on the calendar. The drawing technique and materials can be any, the main thing is the similarity in the rendering of natural objects. At the end of the lesson, everyone looks at the drawings and together chooses the most successful one. To clarify the accuracy of the image, the drawing can be compared (from a room window or on a walk) with nature. The teacher, in the presence of the children, corrects the drawing and places it on the calendar.
Friday.
Having gone for a walk with the children, the teacher gives them the task of finding out what animals are found during this period of September (early autumn), that is, what birds can be seen, insects, worms, and snails discovered. Asks children to observe animals - to clarify in what place they were found, what they are doing (for example, in relation to insects - are they actively moving or frozen). A small group of children (3-4 people) is assigned to observe the weather.
At the end of the walk, the teacher discusses the children’s independent observations with the whole group - finds out what and where animals they met and what these animals did. Praises those who did not forget to complete the task. Then he offers to listen to the guys who were asked to observe the weather. The children tell the story, the teacher helps them maintain consistency, and involves everyone else in assessing the correctness of the observations and the story. In conclusion, he summarizes: “Today is Friday. You and I watched the weather for five days in a row. It was different every day. Today, as the guys correctly noted, the weather is cloudy, windy, and cool. This kind of weather often happens in the fall.”
In the group, the guys who observed the weather mark it on the calendar. The teacher helps them do everything right. The rest of the children are asked to depict in the “Wildlife” column the animals they found on the site.
In the evening, everyone looks at the calendar page together. It turns out that there are two days left until the end of the week - Saturday and Sunday. The teacher invites the children to independently observe the weather these days and talk about it on Monday.
Cyclic observations and methodological development on the topic
Cyclic observations.
In addition to the content, it is extremely important to determine the organizational and methodological form of conducting observations with children of those natural objects that are constantly located near them. Observations are best done in the form of cycles.
The inhabitants of this corner of nature live next to preschoolers throughout the school year - this circumstance leaves a special imprint on the pedagogical process: it is impossible for children to become indifferently accustomed to them over this long period. The pedagogical process should be structured in such a way that children’s interest in living beings constantly increases, so that they constantly expand their understanding of them, increase the volume of specific knowledge, so that by the end of the school year any child of senior preschool age could become a guide to a corner of nature - smartly and it’s interesting to talk about its inhabitants. These requirements are met primarily by such a form of pedagogical work as observation cycles, which are carried out not in the classroom, but at various routine moments in everyday life.
A cycle is a series of interconnected observations of a specific object in a corner of nature or a site in a kindergarten. Each of the observations in the cycle has its own content, its own purpose, does not repeat other observations, but is interconnected with them. In total, all observations of one cycle form in children specific and distinct ideas about a given object - its structure, functioning (various manifestations, behavior), living conditions. The cycle of observations allows the child to sensory and independently acquire a system of specific knowledge about the animals or plants that live in his neighborhood.
The cycle of observations as an organizational and methodological form of the pedagogical process has a number of advantages. In the cycle, the entire volume of knowledge is distributed into “portions”, which ensures their gradual and more reliable assimilation. Each subsequent observation allows children to demonstrate new aspects and features of an already familiar natural object, while simultaneously clarifying and expanding existing ideas.
The advantage of the cycle is its length in time - the distribution of observations, following one after another, for a sufficiently long period. Repeated (but with different content) reference to the same object for 1-3 months forms in children a stable cognitive interest in it. And as a result, preschoolers have a need for new observations, which they carry out independently (which is especially valuable), without the encouragement and guidance of the teacher. And, finally, conducting a series of observations in everyday life at different scheduled moments saves time for classes and makes work with children varied.
The cycle is carried out over a long period of time - one or two observations are planned per week. Thus, the presented cycle of 8 observations can be implemented in practice with children of older groups in 1.5-2 months. Such rather long-term communication between preschoolers and the inhabitants of the aquarium contributes to the development of their interest in this natural object.
A separate series of observations is compiled for each animal in a corner of nature in all age groups - children should know and love those pets who are their permanent neighbors. Special observation cycles are devoted to representatives of the plant world - indoor plants, spruce and birch (rowan, chestnut, apple, etc.) on the preschool site, primroses, as well as wintering birds, and frequently encountered insects. Everything that is constantly near the child must be noticed by him, must attract his attention, and arouse interest.
Hamster observation cycle
1. Hello, I'm a hamster!
Target. Induce an emotional positive attitude towards the hamster, a desire to watch him.
Progress of observation: Look. Who is this? Is the hamster big or small? Is this an adult animal or a baby? What color is a hamster? What is his body covered with? What kind of fur does he have? Pet him. Does a hamster look like a mouse? How is it similar? What is the difference? Let's call him Peak, like the mouse we read about from Vitaly Bianchi. Do you agree? What is the hamster doing? How is he behaving? Is he afraid of us? Where is he going? What helps him? Look and remember where the Peak is. Close your eyes, now open them. Where is he now? What is he doing? Is a hamster a calm animal or an active one? Is it easy to catch him?
Self-observation task. The hamster is a very interesting and funny animal. Watch him. If you see something interesting in his behavior, tell us all.
2. Let's make a good home for the hamster.
Target. Show that good conditions for a hamster, under which he will feel normal and not get sick, are a spacious cage (or aquarium), bedding made of sand or sawdust, a house or hole in which the hamster will build a nest, a ladder, a running wheel, a device for the toilet. Learn to provide assistance in equipment (apartment) for the animal.
Progress of observation: Let's see where Peak lives? What kind of house is it convenient for him to live in - spacious or cramped? What's at the bottom of the house? Is the sand clean? What needs to be done to keep it clean? Sveta, help me collect sand from the cage and sift it. Why do you need sand in a cage at all? Where did Peak make his nest? That's right, in the house. This house is like a mink. He likes to hide and sleep in it. He stores his supplies in it. What else is there in a hamster cage? Does he use stairs? What kind of jar is this? That's right, toilet. A hamster is a very clean animal, and we must help it and maintain cleanliness. Is it good for Piku to live in his house if all the conditions have been created so that he does not need anything? So that Peak doesn't get bored, let's put a wheel in the house and see what he will do with it?
3.Is the hamster okay in its new environment?
Target. Learn to notice how the hamster behaves in a new environment (the teacher moves the hamster to a new house in advance), what actions it performs, and evaluate them correctly. Determine the hamster’s well-being, teach him to draw conclusions by answering the questions: Is his home well organized? What is missing and what can be improved?
Progress of observation: Where does Peak live? What is a hamster cage? Does he have a good house? How can you determine this? (observe his behavior). Let's watch the hamster. What is he doing? What are you doing? (He walks around the walls, sniffs, moves his nose and antennae. He examines everything, climbs everywhere. He gets acquainted with the situation. He found out everything, he has nothing to fear. He is not afraid.) What do you see at the bottom of the cage? Why did we put sand there? What kind of jar is in a hamster cage? (Toilet). Can he be called clean? What is a house for him? (Mink). Why does a hamster need a mink? who else lives in the same place as Peak, that is, in a hole? (Mouse). What is Peak doing in the hole? What actions does it perform with the wheel? Isn't Peak afraid? Is he sick? How to determine this? When is it more common to see a hamster, during the day or in the evening? What is this connected with?
At the end of the observation, you can invite the children to draw Peak in his house.
4. What and how a hamster eats.
Target. Find out what and how a hamster eats? What food does he prefer? (Do not feed the hamster until observation).
Progress of observation: Guess the riddle:
- Gray animal, lives in a group,
He's friends with the guys
Carrots, grain nibbles.
What is our hamster's name?
What is he doing? What do you think he's looking for? (I'm eating.) Yes, we haven't fed him yet, and he's hungry. What can we offer him? What should I treat you with? Let's give him some bread. Sasha, put some bread in Pika’s house. What does he eat?
Let's give Peak the oats. Will he eat it? How is he behaving? Where does he take it? For what? (Makes supplies.) Let's treat him with carrots. Did he like her? How does he eat carrots? What is he doing with her? What kind of teeth does he have?
What do you think he liked most about the food? Why?
At the end of the observation, give the task to observe what food Peak likes the most.
5. How a hamster stores supplies
Target. Show that the hamster has cheek pouches in which he can carry food to his nest - store it.
Progress of observation: What food does Peak like most? Let's check. Sveta, put different food on his plate. What is he doing? Which food did you take first? Does he love him? What is he doing now? (We collect food.) Look what’s happening to him (He’s inflating like a balloon). Where did he go? How did you return from the house? (Thinner). What did Peak do again? What did he become again? What do you think the hamster is doing in the house? (Leaves food, makes supplies). What helps him carry food (cheek pouches.) What do they look like? what do we use to carry food? (In the bag). Is a hamster thrifty? Who else, like the hamster, makes supplies? (Mice). What kind of teeth does he have? That's right, sharp ones - he should definitely be given tree branches so that he can sharpen his teeth. At the end of the observation, invite the children to put a twig in the hamster's cage.
6. A hamster is a clean animal.
Target. Learn to notice how Peak eats dinner, washes himself, brushes his fur, carefully uses the toilet, and what actions he performs.
Progress of observation: Let's give Peak a treat. Tell me how he eats. (Wipe with a napkin). So Peak ate, let's see what he did? (Wash.) Show me how. How does he clean his fur? Pet the hamster. What kind of fur does he have? (White, soft, short). What kind of jar is this? (Toilet.) Does Peak use it? Who saw it? Does he use the toilet carefully? What one word can be used to describe Pika, who takes care of himself, washes himself, brushes his fur, and goes to the toilet carefully? (Clean). Is he feeling well? (The peak is cheerful, active, the fur is smooth and shiny.) Invite the children to sketch how the hamster takes care of itself.
7. How does a hamster rest?
Target. Find out the animal's resting and waking patterns during the day. Observe where.
Progress of observation: During what part of the day do we most often see Peak? How is he behaving? What is he doing? Conclusion. During the day the hamster sleeps more, he becomes more active in the evening, but at night he is awake. This means that the hamster is nocturnal.
8. How is a hamster different from a mouse?
Target. To consolidate ideas about the external appearance of the animal (the body is round, plump, the head is large, there is almost no neck, there are small ears on the head, eyes like beads, a movable nose, around which there are many whiskers. The legs are short, the fingers are small with sharp claws. The body is covered with soft fluffy hair reddish in color.) The hamster differs from the mouse (and from other animals) in that it does not have a tail.
Progress of observation: Where does our Peak live? Tell us what he is like. What kind of fur does he have? Pet him. What is he doing now? What helps him run? What kind of legs does a hamster have? What do you see on his paws? What helps him run without bumping into objects? What are his eyes like? What is the hamster doing now? (Sniffs everything.) What does he use to do this? What's his nose like?
What else helps him learn about danger? What kind of ears does he have? How does he listen? In what position are his ears? Whole body? Does he have a neck? Who does Peak look like? How is he different from a mouse? What animals also do not have a tail, like Pika?
9. How does a hamster move?
Target. Clarify how the hamster moves (walks, runs, jumps, runs nimbly in a wheel; can climb. Doesn’t run very fast: legs are short). A young hamster moves a lot, an adult sleeps more (especially during the day).
Progress of observation: What does Peak do? (Runs around the cage) Let's look at his paws, what kind of paws are they, long or short? Which paws do you think are more comfortable and faster to run on, short or long? What's on a hamster's paws? (Claws) What are they? (Curled.) What do they let the hamster do? (It’s good to climb, hold tightly to the bars of the cage.) Which of you can name the most movements that a hamster makes? (Walks, runs, climbs, jumps, runs in a wheel). Can a hamster be called a nimble, agile animal? Is our Peak an adult or a young hamster? How do young animals behave? What about small children? (They move a lot and play.) How do adult hamsters behave? (They sleep more.) And our hamster? Invite the children to observe the behavior of the animal and compose the story “Our funny hamster.”
10. When is a hamster hard to spot?
Target. Clarify ideas about the camouflage coloration of a hamster. Develop observation skills and the ability to reflect cause-and-effect relationships in speech.
Organization. There is sand at the bottom. On the sides of the cage are sheets of paper, red, white, brown.
Progress of observation: Children observe and note when the hamster is clearly visible and when - not so much. Let's see what the hamster does? Do we see him well? Let's see when the Peak will be invisible, against what background? Which paper is closest in color to the color of a hamster? Here Peak stands on a white background. Do we see him well? Here he comes to another wall and stands against a red background. How do we see it? Against what background is Peak invisible? Why? Tell me, what is the name of the coloring that makes the animal invisible? And when is the animal invisible—when is it motionless or when it runs around the cage? Let's get a look. Close your eyes, now open them. Do you see Pika? Where is he located? What is he doing? The sand at the bottom also helps the hamster - it makes it unnoticeable. In the wild, hamsters live in the sand.
Offer to sketch a hamster and what helps him become invisible.
Long-term plan for cyclic observations for children of senior preschool age
Svetlana Baranok
Long-term plan for cyclic observations for children of senior preschool age
Long-term plan
cyclic observations of objects of the plant world
with children of senior preschool age
September Birch
1 Week
Birch observation
Goal: To develop in children the ability to see the uniqueness of each tree, highlighting characteristic features and changes associated with the time of year. Fostering a caring attitude towards the plant as a living organism.
Week 2 Observation of birch bark :
Goal: Forming a caring attitude towards trees, clarifying the idea of bark and its purpose, encouraging children to recognize birch by appearance and touch. Cultivating a love for nature.
Week 3 Observation “How a birch tree prepares for winter”
Goal: To develop in children an understanding of how birch helps itself prepare for winter, the idea that everything in nature is interconnected. Fostering a desire to show care for living things.
Week 4 Observation of leaf fall
Goal: To develop the ability to establish the simplest connections between the phenomena of living and inanimate nature (it got cold - the leaves turned yellow, etc., encouraging children to recognize a plant by its leaf.
5 week
Observation “Useful properties of birch and its use in everyday life”
Goal: Expanding children’s of the benefits and importance of birch in human life, developing children’s desire for a healthy lifestyle, and developing a caring attitude towards their health with the help of a system of knowledge about the role of trees in human life.
October Rowan
1 week Observation “What rowan looks like in autumn”
Purpose: To clarify the name of the tree, the shape and color of the leaves and fruits.
Week 2 Observation “Rowan in golden autumn”
Goal: To develop in children the ability to admire the beauty of the surrounding trees and the desire to take care of this beauty.
3 week
Observation “Rowan during leaf fall”
Goal: To deepen and generalize children’s of preparing trees for winter. Activate the words: leaf fall, clusters, purple-red.
Week 4 Observation “Rowan - bird feeder”
Goal: To cultivate in children an interest and kind attitude towards birds and nature in general.
November Thuja
1-2 weeks
Observation “Comparison of thuja and spruce trees”
Goal: Expand children's understanding of coniferous trees . By comparing trees, learn to identify signs of similarity and difference. Develop thinking, coherent speech (reasoning, proof)
. Foster a humane and valuable attitude towards nature.
3-4 weeks Observation “What kind of cones does the thuja have?”
Purpose: By comparing the cones of thuja, spruce and pine, identify their similarities and differences. Highlight what is special about thuja cones.
December Spruce
1 Week
Observation “How to recognize spruce?”
Goal: Examine the spruce, name the characteristic features of its structure, the signs that distinguish it from other trees.
Week 2 Observation “What kind of needles do you have?”
Goal: Conduct an observation so that children can see that all the branches of the spruce tree are covered with needles that grow instead of leaves. The needles are short, sharp, prickly, dark green in color, covered with dense skin, do not fall off if touched
3 week
Observation “Compare a spruce with a toy tree”
Goal: Clarify with children the difference between a natural spruce and a toy (a live one grows on the site: in addition to the trunk, branches, needles, it has large roots, with the help of which the tree receives moisture and nutrients from the ground and is firmly held in one place). A toy Christmas tree is inanimate, made of artificial material, it has no roots, it does not grow, you can play with it, you can decorate it with toys.
Week 4 Observation “How old is our spruce?”
Goal: Show children that the spruce tree grows new branches every year. By counting the rows of branches from bottom to top, you can find out the age of the spruce .
Week 5 Observation “Who can offend the spruce and how can we help it?”
Goal: to show children that different circumstances and people can damage a living spruce. A very strong wind can break the trunk, branches, and uproot the tree from the ground. If there is little snow, the spruce and its roots may freeze in the frosty winter. A person can damage a spruce tree if he breaks branches and decides to cut it down for the New Year holiday. You can help the spruce tree: dig snow to the trunk to make it warmer, carefully shake off the branches from heavy snow, and handle it carefully.
January Oats
1-2 week
Observation “Growing oat seeds”
Goal: Expanding children's of growing plants (oat seeds)
3-4 week
Monitoring the growth of oats
Goal: To show children in practical activities how the growth and development of plants depends on living conditions and proper care for them; develop curiosity, attention, and the ability to draw conclusions based on what you see.
February Bow
1 Week
Onion observation (1)
Goal: To clarify the idea that green onions can be grown from a turnip bulb if you create favorable conditions for it, that is, plant it in water, place it in a warm and bright place.
2 week
Onion observation (2)
Goal: Identify the changes that occurred with the bulbs over the week. Sketch what you see.
3 week
Onion observation (3)
Goal: Detect changes in the condition of the bulb; growth of roots and greenery. Link these changes to the presence of conditions necessary for growth (heat, water, light)
.
Compare the bulbs and detect differences in their condition. Draw the results of the observation .
Week 4 Observing onions (4)
Goal: To teach children to notice changes in growing bulbs and associate them with environmental factors; notice differences in the growth of greenery in different bulbs. Establish their reasons.
Week 5 Observing onions (5)
Goal: To detect further changes in the growth of bulbs, a difference in the state of greenery, which is caused by unequal conditions. Summarize the results of experimental onion germination: the best greenery is from the bulb that has all the conditions (water, heat, light)
.
March Branches in a vase
1 Week
Observing branches in a vase (1)
Purpose: To show that favorable conditions are created for cut branches (warm room, warm water, light is not needed at first. These conditions should affect their condition.
2 week
Observing branches in a vase (2)
Goal: Detect changes in the condition of the branches - notice swollen buds, clarify their living conditions, expose them to light, add nutrients, sketch the branches.
3 week
Observing branches in a vase (3)
Goal: Note changes in the condition of the branches (opening buds, leaves, improve conditions by adding sweetened water. Note the beauty, make sketches.
Week 4 Observing branches in a vase (4)
Purpose: To detect changes in the condition of branches, the appearance of leaves and roots. Add water with nutrients. Enjoy the beauty. Sketch the branches, oh
. Compare the pages and discuss how the branches blossomed.
April Mother and stepmother
1 Week
Watching mother and stepmother (1)
Goal: Continue acquaintance with medicinal plants;
2 week
Observation (2)
“Mother and stepmother - what is she like?”
Goal: To learn to find the first spring flower and recognize it by its characteristic features (short stem with scales; the flower is yellow, round, looks like a tiny basket; there are no leaves).
Week 3 Observation (3)
“Where do mother and stepmother grow up?”
Goal: To draw attention to the fact that the first flowers appear in sunny places (where the snow has melted and the ground has warmed up)
.
Week 4 Observation (4)
“What kind of leaves do mother and stepmother have? Why was she called that?
Goal: To determine with the children the shape, size, color, number of appearing leaves of the mother and stepmother; note the different nature of the surfaces of the upper and lower sides of the plant leaf (the underside is pale green, warm and soft to the touch, like a “mother”
, the upper side is dark green, smooth and cold to the touch, like
a “stepmother”
.
May Apple tree
1 Week
Observation (1)
“Apple tree – what is it like?”
Goal: Expand the ideas received earlier; know the structure of the apple tree: the trunk decreases upward, the crown looks like a circle or an egg; buds are growth buds (with leaves)
and fruit
(floral)
.
Introduce the structure of a flower, its significance for the apple tree (fruits grow)
.
2 week
Observation (2)
“Our apple tree is growing”
Purpose: Continue to observe the growth of the planted apple tree in the kindergarten area. Pay attention to the changes that have occurred: the apple tree has grown, the trunk has become thicker, the branches have stretched out.
3 week
Observation (3)
“Does the apple tree need sun?”
Goal: To introduce the role of light, conduct experiments so that children understand: awakening in spring is associated not only with warming, but also with an increase in the amount of light coming from the sun.
Week 4 Observation (4)
“How does an apple tree grow?”
Goal: To help children generalize ideas about the growth and development of an apple tree, sequence, and establish connections between plant growth and between stages of development.