For children of preschool age, you can come up with many entertaining activities, a special place among them is occupied by modeling from plasticine. Thanks to this type of creativity, parents will be able to instill in their child a love of creativity, develop fantasy, imagination, and fine motor skills. In addition, by making figures from plasticine, the baby learns to be independent.
Donut
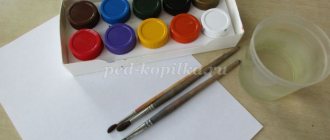
You will need: plasticine of bright colors, a stick, a plastic spatula.
Master Class
- Roll out a ball of yellow plasticine.
- Flatten the workpiece and press the center with the round tip of the stack-bulk.
- Trim off excess plasticine from the back side.
- Make a cake from pink plasticine.
- Attach the doughnut to the donut base and make a hole in the center.
- Roll plasticine flagella in bright colors.
- Place the flagella in the freezer for 5 minutes.
- Remove and cut the frozen flagella into small pieces.
- Decorate the donut by adding sprinkles.
The plasticine donut is ready!
Husky
You will need: plasticine of gray, white, black, blue, red and yellow, toothpick, stacks.
Master Class
- Roll a ball of gray plasticine.
- Stack 2 triangles at the top of the ball.
- Attach 2 flat triangles of white plasticine.
- Cover the bottom of the ball with white plasticine.
- Roll out an oblong oval from white plasticine and attach it as a muzzle.
- Roll the nose out of black plasticine and attach it to the muzzle.
- Make eyes from blue, black and white plasticine and attach them to white triangles.
- Make a tongue out of red plasticine and secure it.
- Make the lower part of the mouth from white plasticine and attach it under the tongue.
- Make 2 triangles from gray plasticine and attach them as ears.
- Work out the features of the muzzle with a stack.
- Make a body out of gray plasticine, insert a toothpick and secure the head.
- Cover the dog's belly with white plasticine.
- Roll 2 sausages from gray plasticine and attach them as front legs.
- Make 4 white plasticine cakes and attach them to the paws as shown in the image.
- Roll a sausage out of gray plasticine and mold a crescent-shaped tail.
- Stack the ponytail, adding fluffiness, then attach it.
- Make a collar from blue plasticine, and make a clasp from yellow plasticine, then make holes with a toothpick.
- Draw the ears, muzzle and paws with a stack.
Plasticine husky is ready!
Other ideas
What else can be molded from light and pliable plasticine? After watching the video tutorials, you can easily create funny figures. For example, create a lion cub basking in the sun. Or the lazy Seal. Make a muzzle from a gray circle. For the body you need a thick sausage. Insert the backrest into it and connect it to the head. Decorate the flippers and face. The technology resembles the design of a dolphin. Use a sharp stick to create a relief silhouette.
A pineapple
You will need: yellow, green, dark green and any color plasticine, stack, toothpick.
Master Class
- Roll a ball of brown plasticine (you can use leftover plasticine of any color for the base).
- Give the ball a pear shape and make the base stable.
- Roll out a ball of dark green plasticine, then roll it into an oval shape.
- Make a larger cake from yellow plasticine.
- Combine the green and yellow cakes, then roll them out.
- Turn the workpiece over with the yellow side up and draw a grid with a stack.
- Wrap the brown pineapple with a yellow tortilla.
- Trim off excess plasticine and smooth the joints with your fingers.
- Make oblong leaves from green plasticine and cut out the jagged outline.
- Stick the leaves to the top of the pineapple as shown in the image.
Plasticine pineapple is ready! Also check out the champagne and candy pineapple.
Panda
You will need: black, white and green plasticine, toothpicks, stacks.
Master Class
- Roll a ball of white plasticine.
- Push through two holes for the eyes.
- Roll balls of black plasticine, then attach and flatten them.
- Roll out a flat oval of white plasticine and attach it to the bottom of the head.
- Attach the black spout.
- Make eyes from white, green and black plasticine, then attach them.
- Make black ears and attach them to the top of the head.
- Roll out a roll of black plasticine, flatten it in the center and bend the ends.
- Roll a ball of white plasticine and glue it to the black blank.
- Connect the workpiece and the head using a toothpick.
- Mold and attach the black lower legs.
- Roll balls of white plasticine and attach them as pads to the paws.
- Draw in eyebrows with a toothpick.
- Roll a ball of black plasticine and attach it in place of the tail.
- Make a bamboo stick from green plate and attach it to the panda’s body.
The plasticine panda is ready! I recommend watching this video!
We sculpt Smesharik Krosh from plasticine. Cartoon. Kikoriki made of plasticine.
Apple
You will need: red, green, black, white and brown plasticine, stacks, toothpick.
Master Class
- Roll out a ball of red plasticine.
- Shape the ball into an apple shape.
- Prepare a strip of brown plasticine and cut fine fringe.
- Make a small indentation in the apple for the stamens.
- Cut a small piece of the stamens, twist them and attach them to the apple.
- Make a stalk out of brown plasticine as shown in the image.
- Make a small indentation in the apple and stick the stem.
- Make 2 leaves from green plasticine and draw lines using a stack and a toothpick.
- Stick the leaves to the base of the cutting, then give them a curved shape.
- Make a droplet of white plasticine, flatten it and stick it to the apple as a highlight.
- Roll 5 balls of green plasticine and form a caterpillar.
- Roll 2 very small balls of black plasticine and stick them on as the caterpillar's eyes.
- Stick the caterpillar to the apple.
The plasticine apple is ready!
Plasticine mosaic
Children know what a mosaic is and how to play it from the age of three.
Therefore, it is not difficult for them to understand how to fill silhouettes from the inside with plasticine balls.
- Adults can only prepare templates for drawing and visual material in the form of pictures.
- The difficulty of appliqués made from small pieces is that the manufacturing process takes a week.
- But such a drawback does not affect the mood of preschoolers; their interest in the craft does not disappear.
Chamomile
You will need: white, yellow and green plasticine, stacks, boule, skewer.
Master Class
- Make a drop of white plasticine, then flatten it into a petal shape.
- Draw a stack of lines.
- Make 20 white petals.
- Roll up the yellow center of the flower.
- Prepare a strip of yellow plasticine and cut through the fringe.
- Stick a strip around the circle of the yellow center.
- Stick the white petals in a circle, placing them in a checkerboard pattern.
- Cover the skewer with green plasticine, leaving the tip free.
- Make a cake from green plasticine and sculpt a receptacle.
- Stick the bud to the receptacle.
- Draw a mesh texture on the yellow center.
- Make a leaf, draw the texture and stick it to the stem.
The plasticine chamomile is ready!
Pendant "Snowman"
You will need: a sheet of cardboard, a simple pencil, scissors, string, tape, plasticine in white, orange, brown, black, blue, purple and green, skewer, stack.
Master Class
- Draw a circle on a piece of cardboard, then cut it out.
- Cover one side of the circle with white plasticine.
- Make oval legs from purple plasticine, then attach them to the bottom of the circle.
- Roll out an oval nose from orange plasticine, then attach it.
- Make eyes and a smile for the snowman from black plasticine.
- Roll 2 buttons from blue plasticine, attach them and use a skewer to make 2 holes in the buttons.
- Roll the purple and blue plasticine into sausages, then form a hat as shown in the image.
- Roll a ball of white plasticine and attach it as a pompom, then use a skewer to create a “fluffy” texture.
- Make stick handles from brown plasticine, then attach them to different sides of the circle.
- Make highlights on the nose and eyes from white plasticine.
- Draw a knitted pattern onto the hat using a skewer.
- Draw lines on the legs as shown in the image.
- Make 3 leaves from green plasticine and roll 3 orange berries, then decorate the hat.
- Attach the string to the back using tape.
The plasticine “Snowman” pendant is ready!
History of origin
The invention of the modeling substance is attributed to 2 scientists. Franz Kolb invented the material for making models at the end of the 19th century. William Harbutt invented plastic mass
in 1987. It was later discovered that both substances have identical structure and uses. That's why they got the same name.
This is interesting! The first plates were made only in a gray shade. Only years later it gained popularity and the mass began to be painted in different colors.
Now the material is in wide demand. It is used in various industries (modeling, handicrafts, animation, child development, etc.). The use of plasticine has been going on for more than a century. Lots of crafts
and compositions are recorded in the Guinness Book of Records.
Ice cream
You will need: plasticine of bright colors, a spatula, a stack, a wooden skewer, beads and rhinestones.
Master Class
- Roll a ball of brown plasticine.
- Flatten the ball into a flat cake.
- Draw lines with a stack, creating a waffle texture.
- Twist the workpiece to form a cup, then secure the edges.
- Roll balls of bright colors of different sizes.
- Use a skewer to process the halves of the balls as shown in the image.
- Place the balls into a waffle cup.
- Decorate the ice cream by attaching beads and rhinestones.
- Make a cherry and attach it to the top of the ice cream.
Plasticine ice cream is ready! I recommend watching this video!
DIY Making Play Doh Ice Cream Popsicles
Crocodile
You will need: green, dark green, white, black and red plasticine, a glass stack, a toothpick, a napkin with a pattern.
Master Class
- Roll a sausage out of green plasticine.
- Cut the blank in half and create three parts from green plasticine: a carrot, an oblong oval and a ball.
- Take the green oval and make a cut, forming the mouth of a crocodile.
- Slap red plasticine into the mouth.
- Roll the sausage out of white plasticine, flatten and cut the cloves, then attach them to the red plasticine.
- Roll 2 green balls and make eyes by attaching white and black plasticine, then attach the blanks to the crocodile's head.
- Treat the body and head of the crocodile with a napkin, giving it a patterned texture.
- Connect the body and head of the crocodile using a toothpick.
- Roll 4 balls of green plasticine and attach them to the paws.
- Make notches on the paws with a stack.
- Roll a sausage from dark green plasticine, flatten it, cut the teeth and attach it to the back of the crocodile.
- Attach highlights to the eyes using white plasticine.
The plasticine crocodile is ready!
Modeling methods
To move on to a specific type of composition creation, the child must be taught in stages.
First, they study with him a separate technique for making parts (sausages, balls, etc.). Then they show what other manipulations (pinching, pulling, cutting) can be performed with the material. The knowledge gained during the exercises is consolidated and the child is offered one of three ways to work with plasticine:
1. Sculptural. The craft is made from a whole piece, without adding elements. Children learn to distribute plasticine proportionally using these techniques
:
- stretching;
- topping;
- smoothing;
- rolling out.
2. Constructive. The product is assembled from different parts. First, prepare the largest part, and then attach the small ones to it. The method teaches children to distinguish small objects from large ones.
3. Combined. Includes the two methods above. The body is made from a single piece. Other parts are made separately and attached to the finished figure.
Modeling methods are divided into types based on the plot.
Subject - the production of a separate character or object.- Subject - creating a group of objects interconnected (depicting scenes from fairy tales, poems, stories).
- Decorative is an art form for creating compositions from folk art.
To make crafts easier, there are special devices. Stacks
– these are also
tools
for modeling. With their help, small parts are made that cannot be aesthetically created with fingers.
Stacks
There are
metal
, plastic, silicone, wood. The choice of devices depends on the future product.
Don't miss: Travel games for kids in the car
Grape
You will need: purple, brown and green plasticine, glass stack, thin wire.
Master Class
- Make a rope from purple plasticine.
- Cut it into pieces.
- Roll each piece into balls.
- Make a cone out of purple plasticine.
- Cover the cone with grapes, leaving the top part free.
- Prepare a piece of thin wire and cover it with brown plasticine, as shown in the image.
- Draw the lines to create a branchy texture.
- Attach a wire twig to the top of the grape, then stick the grapes around it.
- Make a cake from green plasticine.
- Outline the outline of the leaf and cut it out, then draw the texture.
- Roll out a thin strip of green plasticine, carefully twist it and stick it to the grapes.
Plasticine grapes are ready! I recommend watching this video!
Air plasticine for children, learning to sculpt roses
Princess
You need to be as careful as possible and try hard to create such a beauty. We start with a beige oval. It should be sharpened on one edge to highlight the chin. Press down gently, creating hollows for the eyes. We create the face itself: eyes, nose, mouth. We make a cone for a skirt from a turquoise block.
Note!
Autumn crafts for the autumn holiday from leaves, fesalis, plasticine, vegetables - come up with a creative name, create masterpieces
What craft materials to use for creativity: non-traditional, foamed, soft or natural pieces made by yourself
- New Year's crafts from pine cones: what you can make from pine cones with your own hands, a guide with step-by-step master classes
The hem is made in the shape of a bell. Show off your waist by cinching your figure. From short pieces we weave a yellow braid for Elsa from plasticine. Recommendation: In fact, the pattern of sculpting a person is quite complex; in the preparatory group, children will cope together with the teacher.
We connect the neck and chest with a beige layer. Add puff sleeves to open parts of the arms. We draw stripes on the skirt and decorate it with numerous homemade rhinestones. After connecting all the details together, adjust them to achieve a natural look. The hairstyle can be complemented with a crown.
Fox made of pine cones and plasticine
You will need: pine cone, orange, green, white and black plasticine, stack, autumn leaves.
Master Class
- Make ears and an elongated muzzle from orange plasticine, roll up a black nose and attach all the parts to the pine cone.
- Make a tongue out of orange plasticine, then attach it.
- Make crescent-shaped eyes from white plasticine and attach green pupils.
- Make eyelashes from cuttings - the tails of leaves.
- Attach the eyes to the pine cone.
- Mold 2 legs and a tail from orange plasticine and make cuts with a stack, as shown in the picture.
- Attach the paws and tail to the pine cone.
- Lay out the leaves and plant the fox.
The fox made from pine cones and plasticine is ready!
Species diversity
Initially, there are two types: based on paraffin or wax. They are divided into:
- Medium density mass. Used for normal work. Easy to knead, holds any shape;
- Soft (waxy). Great fun for kids. It does not need to be kneaded first. Easy to smear;
- Sculptural. It is designed for children over five years old. It is designed for modeling wireframes;
- Ball. Does not stain hands or surfaces.
Crow
You will need: plasticine, toothpick, glass.
Master Class
- Roll a small ball of dark gray plasticine.
- Roll a smaller ball of light gray plasticine.
- Flatten the light gray ball into a flat cake.
- Make cuts in a circle.
- Cut off pieces of plasticine to make a star.
- Connect the ball with the star.
- Using a round stack, press 2 holes on the ball.
- Make an oval-shaped bird's body from dark gray plasticine.
- Make the wings of the bird in the shape of flattened drops of dark gray plasticine.
- Make a wavy outline on the wings using a stack.
- Attach the wings to the body.
- Make the crow's paws and attach them.
- Make 3 thin little sausages and attach them to the top of the bird's head.
- Make the eyes of a crow from black and white plasticine.
- Draw the eyebrows of the crow in a stack.
- Attach a small tail to the crow.
- Make a toothpick pattern on the raven's neck.
The plasticine raven is ready! I recommend watching this video!
WE MAKE iPhone X - iPhone 10 FROM PLASTICINE | Video Modeling