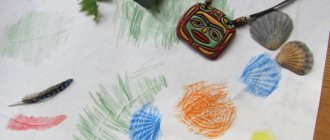
Drawing for a child is an integral part of development. Through the drawing he shows his perception of the world around him, his mood, his dreams. The pointillism drawing technique for children is unconventional, and therefore very interesting to learn. The main idea is to obtain a complete image from separate points. In kindergarten, different materials are used to study pointillism - stamps, plasticine and others. We suggest mastering the method using cotton swabs and paints.
Description of the technique
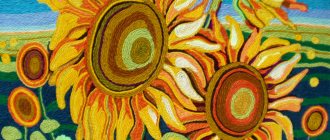
Pointillism comes from the French Pointillisme, which literally means “point” (from point - dot). The technique came to us from France, where it was first used by Georges Seurat, a post-impressionist artist and founder of neo-impressionism. Thanks to the successful combination of colors, his painting “Sunday Afternoon on the Island of La Grande Jatte” became especially famous. The second striking example of pointillism is the work of Paul Signac “Harbor in Marseille”.
The peculiarity of the paintings is that they are made with separate strokes. The colors do not mix, but the eye perceives the image as a single whole. It is important to note that strokes do not always have a regular, round shape. These can be oblong lines, dots, rectangles, etc.
How to draw with children?
It’s good to start introducing pointillism to children with a short presentation of paintings made in this technique.
To arouse interest, you can start the lesson with a story about how, in skillful hands, even a simple point comes to life. At the end of the theoretical part, an example of a picture to be drawn should be shown.
When choosing an image, you need to take into account age characteristics:
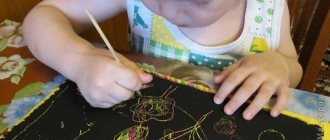
- In the middle and junior groups of kindergarten (4–5 years old), children are provided with blanks with an outline for drawing using the pointillism technique. For example, coloring pages with animals (chicken, fish) or toys. Images should be as simple as possible. There is no need to use a lot of paints at once. For the first lesson, you can limit yourself to one color.
- In the older group (6–7 years old), children can independently draw an object on a given topic. First, an outline is drawn with a cotton swab, and then the middle is filled with the selected color. At this age, it is recommended to use several colors.
Pointillism. Drawing technique for children with cotton swabs
Pointillism.
An unconventional technique of painting with cotton swabs. Author : Lavrenko Tamara Mikhailovna, additional education teacher, Municipal Budgetary Educational Institution of Preschool Youth and Youth Center, Yeisk, Krasnodar Territory Description: the material can be useful to teachers of preschool and additional education, teachers, children and their parents. Purpose: use in drawing classes, in circle work, interior decoration, as practical work when getting acquainted with non-traditional drawing techniques. Goal: to develop fantasy and imagination in children through an unconventional drawing technique: with cotton swabs. Objectives: - to introduce the movement of fine art “pointillism”; — expand knowledge through familiarity with non-traditional drawing techniques, as a means of developing children’s interest in fine art. — teach practical skills in the field of visual arts using cotton swabs; — create conditions for self-realization and stimulation of the growth of children’s creative potential. *** What is unconventional drawing? This is creativity that does not adhere to the classical traditions of artistic representation. Drawing in non-traditional techniques is free from the canons of academic drawing, it is more simplified and accessible to children’s perception and therefore delights, surprises and develops children’s imagination. Unconventional painting uses a variety of unusual materials. You can depict what you want, how you want and with what you want.
Pictures made using any or several methods at once turn out unusual, interesting and fabulous. One of the types of non-traditional drawing techniques is drawing with cotton swabs. It turns out that cotton swabs can be used not only for their intended purpose. With their help, you can also draw, and develop children in the process of creativity. This method is very simple. You just need to dip a cotton swab in gouache and make an impression on paper. You can come up with any pattern and use the “poke” method to create an unusually beautiful picture. Children love this drawing method very much. Drawing with cotton swabs can be called a type of pointillism. Pointillism is a unique movement in painting, which translated from French means “painting with dots.” Many artists painted paintings of this kind. For example, paintings by Georges Seurat are recognized as masterpieces. He is considered the founder of this technique. The 19th and 20th centuries were rich in new trends in art. Artists experimented a lot, looking for new expressive forms and possibilities. And as a result of such searches, pointillism appeared in painting. Georges-Pierre Seurat is the founder of neo-impressionism, a French artist who introduced into painting the method of creating pictures by applying many adjacent dots of pure contrasting colors to the canvas (pointillism). Neo-Impressionism influenced many famous painters of the time. Eiffel Tower.1889
Seine at La Grande Jatte, spring 1888
Powdering girl" 1889-90
Drawing with cotton swabs is a very unusual and interesting technique. It is important that when creating a picture, paints should not be mixed with each other. In this case, the distance from one point to another can be large, or, on the contrary, you can place the points close to each other. Preschool children learn to draw with cotton swabs:
Children of primary school age can be taught to draw with cotton swabs, especially since it is still difficult for them to draw with a brush using the pointillism technique. But a cotton swab is more convenient and simpler, in addition, it does not need to be washed.
However, despite its apparent simplicity, it is also a lot of work.
When drawing using the pointillism technique, coordination of movements, accuracy and precision are trained, and fine motor skills of the hands are developed.
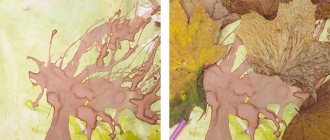
Drawings supplemented with dots look very impressive, for example, ready-made landscapes painted in watercolor or gouache, where snow, rain or parts of plants, animals and birds are painted on the already dried paint layer using cotton swabs.
Landscapes depicting rounded shapes: clouds, forests, trees are good for using the pointillism technique.
The technique of drawing with dots is unusual, interesting and quite simple. I recommend this technique when drawing flowers: lilacs, dandelions.
Sometimes I use templates to perform this technique. Drawing using the pointillism technique provides a wide opportunity to create real children's “masterpieces.” Even if children work according to a template, the result is different for everyone, because each child has his own individual perception, his own characteristics of character and handwriting. These are the interesting things that come out of mastering this technique.
Works of children 7 - 8 years old.
We recommend watching:
Unconventional drawing technique pointillism Pointillism is a drawing technique for children with cotton swabs. Master class with step-by-step photos for children Drawing “Sea Turtle” for children 7-8 years old step by step with photos Drawing “Carnival “Fiesta Patronal”. Portrait of a conquistador” step by step with photos. Primary School
Similar articles:
Pointillism for children. Master Class
Drawing on the theme Autumn in the preparatory group
Non-traditional drawing techniques for preschoolers. Leaves imprint
An unconventional drawing technique using a print for preschoolers. Master Class
Materials and drawing rules
Drawing with cotton swabs is a relatively clean technique. There is no need to cover the tables with oilcloth.
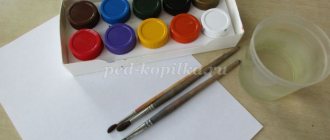
Prepare materials:
- paper, cardboard (can be colored) or coloring;
- paints (watercolor, gouache);
- cotton swabs - according to the number of colors used;
- a glass of water.
Drawing rules:
- Hold the stick perpendicular to the paper.
- After dipping the cotton wool into the paint of the desired color, leave prints with short pokes.
- Fill in the outline first and gradually move from the edges to the center.
- Use a separate cotton swab for each color.
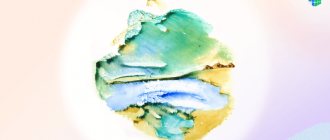
Drawing a winter landscape
In winter, learning to draw with cotton swabs will come in handy. Using the pointillism technique, you can easily and quickly depict snowflakes. For winter themes, colored cardboard is used as a basis - blue, black or gray. White color is clearly visible against a dark background.
Examples of children's drawings on the theme “winter fantasy”:
Children's work always turns out different, even if only one sample was taken. The drawing reflects the individual vision, character, knowledge, skills and abilities of the little artist.
When children master drawing with cotton swabs, it will be useful to conduct a lesson using several non-traditional techniques at once. The purpose of the lesson is to consolidate knowledge and teach the child to use available objects to obtain the desired texture and realize a creative idea.
Experienced teachers and doctors believe that drawing plays an important role in the development of children. Exercises have a positive effect on the central nervous system. They promote the development of speech skills and fine motor skills. Non-traditional techniques are notable for the fact that they make it possible to introduce very young children to art, since they do not require skillful brush strokes or pencil strokes. Mastering the technique of drawing with a cotton swab is not difficult. During the lesson, each child will be able to feel like an artist creating a work of art.
An unconventional drawing technique using the “poke method”. Master class with photos
Master class “Magic Wands” Non-traditional drawing technique using the “poke method”.
Author: Krutenkova Alena Dmitrievna, additional education teacher, MBOU DO "House of Children's Creativity" p. Molchanovo, Tomsk region The master class is intended for organizing teachers, additional education teachers, primary school teachers, educators of students aged 5 years and above. Works performed using the “poke method” can become a collective endeavor when decorating holidays, interior decoration and a gift for family and close friends. I recently mastered the non-traditional drawing technique “poke method”. At first I didn't like her for some reason. But for the summer camp they requested activities that would contribute to the development of children and create a situation of success. “Nitkografija” (can be viewed here /blogs/al-na-dmitrievna-krutenkova/nitkografija.html), “Monotype” and other methods of non-traditional drawing were already well established. At my own peril and risk, I decided to try drawing with cotton swabs using the “poke method”. That’s why I called the master class “Cotton swabs”. At first I didn’t even have any special thoughts: I decided to let each child write his name along the outline. While the kids were working, I carefully watched them, advised them, and made notes. What worked was that each child liked his own name, which his parents gave him. I wasn’t the only one who liked the result of the first experiment. At the planning meeting, they decided to give the children a task: to make an inscription with cotton swabs: “Happy Birthday!” DOL "Voskhod" - 35 years! We printed out letters and numbers for the children on the computer so that a consistent style was maintained, and distributed a sheet of paper to each child. Children were able to surprise adults again! Each letter was interesting and unusual in its own way. After such experiments, we began to work based on plot pictures: observe, notice, create. We added toothpicks to the cotton swabs - it turned out even more interesting. It turns out that when creating drawings using the “poke method” you can play with color, tone, pressure, and saturation of dots on a sheet of paper. Naturally, the drawings turn out to be decorative, unusual, and most importantly, the children always succeed. Worked with different age categories of children. I printed out drawings on the computer for the little ones, and their main task was not to go beyond the boundaries of the drawing; the older children created their own masterpieces. Goal: creating conditions for experimental activities of students. Objectives: - to introduce children to the unconventional drawing technique of the “poke method”; - create a situation of success in class; — consolidate the technology of tone stretching, the ability to mix paints mechanically; - notice the connection between fine art and geometry; - develop fine motor skills of the hands; - cultivate accuracy and patience; - promote individualization, self-expression, self-realization. Materials and tools that will be useful to you: - Whatman paper, format A-4; - cotton swabs, toothpicks; - gouache; - palette; - a jar for water; - napkins.
So, good luck! For MK I decided to draw a simple plot. Let's make a sketch of the future composition. Mark the stems on a piece of paper with a light touch of a pencil.
Let's mark the place of the bud as an oval. At the top is the largest flower, the second is smaller and below is the smallest. Let's draw three ovals.
Let's mark the center of the ovals.
Let's mark the middle of the colors.
Let’s designate 4 petals: draw them along the guide lines of the stem and class=”aligncenter” width=”439″ height=”625″[/img] Add 4 more leaves to each flower.
Add leaves to the flower using wavy lines.
Use an eraser to remove unnecessary lines. The sketch is ready!
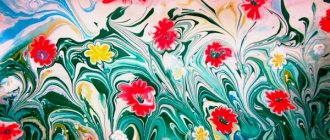
If the children get thick lines, I suggest they go over the entire drawing with an eraser, the drawing is still visible - the work will only benefit from this. On the palette we will use different shades of blue, crimson and green. You can see how to prepare different shades at the link /blogs/al-na-dmitrievna-krutenkova/cvety-dlja-mamy.html. We begin work by filling the background: from top to bottom.
Don’t forget to play with shades of blue (white + blue): our background goes from light to dark. Well done, the background is ready!
We also fill the flowers in the work using the “poke method” from top to bottom, in order: large, medium, small. We begin to fill the flower from the central petal: along the contour we apply a bright crimson tone.
Then we fill the petals inside, row by row. Each subsequent row is a tone lighter. The lightest shade of crimson runs through the center of the petal.
Filling the core of the flower. We'll paint the stems bright green. We fill the leaves with a lighter tone (instead of white paint we use yellow paint, then the green color will appear), but do not forget the main rule: all work is done from top to bottom.
Your drawing is almost ready.
Now look carefully at what happened (move the drawing about a meter from your eyes). The core of the flower is faintly visible. Take and increase the density of the dots, while not forgetting to keep the oval shape. Apply a darker color along the bottom of the middle oval. Along the upper part of the oval - light and white: this creates volume. Use a toothpick to make small accents in the composition. Let's paint burgundy along the outline of the flower petals, and dark green paint along the leaves. Congratulations! Your drawing is ready! You can put it in a frame and give it to your mother, grandmother, or simply decorate your room.
I give examples of the first letters filled in using the poking method.
Scene pictures. First steps. Small sketches. I wish you creative success and unusual drawings!
We recommend watching:
Unconventional drawing technique Blotography. Master class Drawing a landscape using the combined technique “wet on wet” and “dry on dry” Non-traditional methods of drawing in kindergarten for older preschoolers Drawing techniques. Blowing
Similar articles:
Drawing autumn leaves, grades 1-2