“Cut out and paste whatever you want.”
Summary of educational activities. Applique according to plan: “Cut out and paste what you want”
Methods and techniques
implementation of the content of educational activities: artistic expression, conversation, partial display, self-analysis of one’s works.
Integration of educational areas “Social communicative development”
,
“Speech development”
,
“Physical development”
.
Target
:
1) Formation in children of the ability to create a variety of images
in the application.
2) Formation of the ability to compose a subject image from individual parts
Tasks:
Educational
: Continue practicing cutting strips in a straight line, cutting out a circle, square, oval, rectangle. Learn to think through the selection of parts according to shape and color. Reinforce techniques for careful gluing.
Developmental
: develop imagination, creativity, sense of composition and color.
Educational
: to cultivate interest in activities.
Organization of the environment for educational activities:
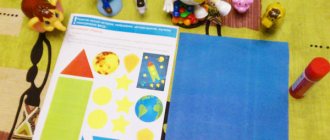
Strips, colored paper, scissors, white paper ½ album sheet for gluing images, an envelope with geometric shapes, a magazine with illustrations, glue, a glue brush, a napkin, an oilcloth (for each child).
Progress of the lesson:
Guys, today on my way to our kindergarten, I met the postman, and he gave us such an envelope. I don’t know what’s in it yet, I’d like to find out with you, do you agree? Are you also interested in opening the letter? Guys, this envelope contains such interesting figures. Guys, can you tell me the name of these figures? (showing figures: oval, circle, 3 rectangles, 1 square). The guys guessed correctly. Now let's look at paintings depicting geometric shapes. Guys, what is shown here? (children's answers).
Educator: On your tables are everything you need for the lesson: scissors, glue, a glue brush, a napkin, colored paper, a landscape sheet and figures. The teacher reminds about safety precautions when working with scissors
: Scissors are not a toy. They should be used only for their intended purpose and only at the table.
— Scissors cannot be taken without permission
— Scissors should not be placed on the edge of the table, they can fall and injure
— Do not run your hands over the open blades of the scissors, they are sharp and you can get hurt
— Scissors cannot be passed with the blades forward, pass the scissors with the rings forward.
— Scissors should not be held with the blades facing up or toward you, as you may stumble and get hurt.
- Scissors cannot be used to cut on the go
When working, carefully monitor the cutting direction.
Don't cut with scissors as you go.
Paper flower applications step by step
Let's try to make a flower arrangement on a sheet of cardboard. It will include several different flowers with petals and grass.
To make a symmetrical flower, you need to fold a piece of paper in two or more times and cut out a shape. On the reverse sheet you will get exactly the same figure. Let's cut out a bell like this:
- A blue sheet of paper is folded in half.
- Half of a bell flower is drawn on the bend.
- The figure is cut out. The result is an even cup of the flower.
- You can add shape to the petals by trimming them as needed.
- The flower is cut along the midlines between the petals.
- The petals are placed on a sheet of cardboard, pulled apart and glued at some distance from each other.
- Bowls of flowers can be decorated with circles or flowers of a smaller size.
To cut a buttercup, you need to do it a little differently.
- The square sheet is folded diagonally, then along the midline of the triangle, then again along the midline.
- A petal is drawn on the bend. It can take the shape of any shape, be smooth or pointed.
- When unfolded, a flower with eight petals is obtained.
Instead of one whole flower, you can get several separate petals of the same shape:
- The paper is folded like an accordion.
- A petal is cut out.
- The flower is folded in parts.
- The core is glued between the petals.
For the integrity of the composition, you need to cut out the grass. This can be done in several ways:
- Take an oblong piece of paper.
- The leaf is torn into separate pieces in the form of blades of grass, or simply torn at the top.
- To create a different type of grass, it is cut into equal pieces, then each piece is folded over the top and glued to the background.
- Another version of grass is cut with curly cloves.
- To create a bush, you can fold a leaf in half and cut out half of the bush, then open it.
All cut out parts need to be combined with each other on a sheet of cardboard. The flower arrangement can be considered complete.
Features of the activities of children of different ages
Step-by-step instructions on how to make a children's applique are not always required. If experience in performing such crafts exists, then the principle of action is clear. All that remains is to understand the intricacies of performing a specific job.
Simple applications for children 2 - 5 years old
Even the smallest children, 1–3 years old, can start making appliqués. There is nothing difficult in this activity. At the same time, children need to do everything under the close supervision of an adult.
It is important to set a feasible task, and carry out the process in a playful way, which will additionally captivate the child. It is advisable to choose a picture that is not only simple, but also understandable to the baby.
Usually these are people, animals, trees, houses without unnecessary details.
Applications for children 6 - 8 years old
Most likely, instructions for children on how to make an applique if the child is over 3 years old will not be needed. Age and existing skills usually allow you to independently cope with the task.
If the child is still new to the intricacies of the process, then you can offer him simple pictures. It is also advisable for an adult to cut out all the details. If a child regularly performs similar tasks, then working with the simplest images may become boring. In this case, it is appropriate to take a more complex picture. It is permissible to draw contours on the base, and invite the child to arrange the details himself. You can follow a ready-made example or use your imagination. A child of 5–7 years old can already be trusted to cut out simple details.
Applications for schoolchildren
It is usually not necessary to work using a master class for beginners if we are talking about school-age children. In this case, the entire process from start to finish can be entrusted to the young creator. The child can choose the level of difficulty for himself and organize the progress of the work.
If difficulties arise, you can always turn to elders for help.
Application using cutting technique
This technique is especially popular among beginners. Because it is very simple, but guarantees a good result. After all, crafts made using this technique look beautiful.
"Airplane"
We will need:
- Colored paper: gray, blue, yellow;
- Blue cardboard;
- Simple pencil;
- Brush;
- PVA glue;
- Black felt-tip pen.
Application stages:
- On blue cardboard with a simple pencil we draw silhouettes of the sun, clouds and airplane. To highlight a brighter outline, they can be outlined with a black felt-tip pen.
- Next, to make a paper appliqué, you need to tear the colored paper into pieces of different sizes. Using a brush, apply glue to the silhouette of the airplane and glue it with pieces of gray paper. When everything is glued, you can make the airplane several windows and a front windshield from blue paper, gluing it on top of the gray paper.
- Using exactly the same steps, we cover the sun and clouds.
"Ship"
To complete this work we will need:
- Colored paper: white, green, red, brown;
- Blue cardboard;
- Black felt-tip pen;
- PVA glue;
- Brush;
- A simple pencil.
Application procedure:
- We take cardboard and draw on it with a pencil a sketch of our future ship with a double sail and a flag, you can also draw waves and seagulls. Next, we outline the outline with a black felt-tip pen to make the picture brighter.
- To decorate, tear colored paper into small pieces; if desired, you can use scissors. When we have several bales, we begin to seal the ship. White and green are used for the sail, red for the flag and brown for the ship. Thus, an applique of torn paper is obtained.
Winter applications for children
Bear on an ice floe
This master class presents a simple three-dimensional applique “Bear on an Ice Floe”, made of blue and white paper and cardboard.
Read more: applique “Bear on an Ice Floe”
Trees in winter
A simple winter applique made of cotton wool “Trees in the Snow” for children's creativity. A child-friendly plot, easy actions, and a combination of textured materials. How to interest a child in creative activities? This is a question many parents ask. Try offering your child to work not with colored paper or plasticine, but with cotton wool. Using this material, you will get an interesting winter-themed applique.
Read more: winter applique made of cotton wool “trees in the snow”
Applique with a voluminous bullfinch
You can start working on this craft with a riddle. Let the child try to guess the bird whose breast is brighter than the dawn. It is by their bright red breast that we recognize bullfinches. In today's master class we have the application “Bullfinch on a branch”.
More details: applique with a bullfinch on a branch
Insect stencils
Children enjoy stenciling familiar objects. At 3-4 years old, they already know many insects, they are able to vary the color, if it is an applique made of paper, or select a piece of paper with a suitable pattern.
Teachers distinguish between several types of stencil applications:
- plot (from a fairy tale or cartoon);
- thematic (on a given topic - season, holiday, landscape);
- substantive (depict a recognizable object or item);
- decorative (applique as part of a postcard or panel in the interior).
Small children unmistakably recognize butterflies and caterpillars, bugs and spiders. These objects can be easily completed using a template using scissors on colored paper.
The adult must complete some stages independently, and entrust the most accessible part to the child. First you need to print out a stencil for the applique on a printer - your child can cut out a tulip and a ladybug according to the outlined template.
Caterpillar
The simplest technique is application of colored circles. It helps a small child realize a single whole consisting of identical fragments.
Depending on age characteristics, adults can choose any method of performing the “Merry Caterpillar”:
- with a body in the form of an “accordion”;
- from flat colored circles;
- with a “walking” body made according to a template.
To complicate the task, suggest adding a plot to the picture - “communication” with a beetle, spider or butterfly. Let your child choose what color the flowers and bugs will be. Then the cute, big-eyed insects will bring maximum pleasure to the child.
Butterfly
Bright images help develop a child’s color perception, so in preschool age children are often offered a stencil of butterfly wings for applique made of fabric or paper.
When creating a plot picture with insects, select simple shaped elements. Openwork butterfly wings with piercing elements are best offered to older preschoolers. It is better to entrust kids with making a butterfly with symmetrical triangular rounded wings.
Small children should not be entrusted with making appliqué with large butterfly wings - their hands are not so skillful to complete the task as accurately as possible.
Ants
The work of cutting out parts of the applique along the finished contour is the simplest thing that can be offered to children. However, children aged 2-3 years may not know what ants are.
An offer to do work with unfamiliar insects will not arouse enthusiasm. Offer to watch a cartoon about ants to inspire your child:
- "Ant Antz";
- "Ant's Journey"
- "The Adventures of Flick";
- "Dragonfly and Ant";
- “Bugs. Adventure in the Valley of Ants" and others.
Offer to create an image of the main cartoon character in the simplest presentation, but let the child find a place for each template.
The task can be complicated if the child is no longer very small - let him supplement the application with other objects from his favorite cartoon. The paws and antennae can be made from yarn or drawn on with a marker.
Snail
Children 4-5 years old often know what a snail is, so they will willingly take on the application. A shy character with horned eyes hides in a spiral-type house, which children cannot always accurately outline on a pre-prepared stencil.
The simplicity of the object is that the snail has only 2 parts - a spiral shell and a body consisting of a sole-foot and a head. This is an amazing animal that is like no other. Therefore, it is worth having a preliminary conversation about understanding the world around you. The child must understand the purpose of the snail's body parts.
A simple snail stencil for applique, consisting of a body and a shell, can be easily made cute with large eyes with eyelashes. The spiral sink can be additionally decorated with transverse stripes.
Great creative range - a common composition with a snail. She can crawl along an aquarium or the seabed, walk among flowers, or communicate with a moth while sitting on a mushroom cap.
Ideas for crafts “children's applique”
If kids are just learning how to make children's applique, then it is better to choose elementary variations for creativity. These are simple flat pictures that are most often created using a template. Parents or educators can cut out parts for subsequent stickers. The kids will only have to attach the components to the base. It is better for adults to check the correctness of drawing up the picture.
Toddlers can make mistakes. If the child is already independent, then for creativity you can offer more complex options. These are crafts with a lot of details. You can entrust the arrangement of elements to your child.
If children are already confident in using scissors, then it is permissible to give them the opportunity to cut out the components themselves. The most interesting variation of the application is a three-dimensional picture. There are different ways to achieve this effect.
Volumetric flower applications step by step
There are several possible techniques for creating three-dimensional flower appliqué.
- Several petals of the same shape, two leaves, a core and a stem are cut out.
- Each petal is folded in half and glued to the cardboard on one side.
- The core and stem are glued between them.
- On both sides of the stem, sheets are glued to one side.
A simple volumetric applique is complete.
There are other options for creating volume on paper. Let's depict a flower growing from the ground.
- Several strips are cut from paper. These will be the petals of the flower.
- Grass, stems and leaves are cut out of green paper. The yellow one is the core.
- The strips are twisted into petals and glued together.
- A ring of glue is drawn on a cardboard base. The petals and core are glued to it.
- Grass, stem and leaves are glued to the bottom.
The volumetric paper flower is ready.
Let's make a paper vase filled with fluffy flowers:
- Using templates, identical flower bowls of different sizes are cut out.
- The petals are bent upward using a ruler. This will give the flowers volume.
- Smaller flowers are placed inside larger ones.
- A vase is cut out from the template and glued to cardboard.
- At the top of the vase there are double flowers.
The application “Flowers in a Vase” is ready.
