OD summary for application in the middle group “Rocket”
Lesson summary on application in the middle group “Rocket”
Target:
teach children to cut out shapes and glue them onto a sheet of paper.
Objectives:
- teach children to hold scissors correctly;
-develop a sense of composition in children: teach how to harmoniously place details on a sheet of paper, create a beautiful composition; - stick parts onto the surface of the sheet; - develop creativity and fine motor skills in children; - evoke positive emotions in children; - expand your horizons. Methodological techniques:
introductory conversation, demonstration of visual material, teacher’s story, physical exercises, finger gymnastics.
Materials:
black cardboard, silver rectangle, blue square, scissors, PVA glue, glue brushes, rags; visual pictures depicting space, a portrait of Yu. A. Gagarin, video “Rocket Launch”
Progress of the lesson
Flashback: Guys, April 12 is Cosmonautics Day. Do you know why our country celebrates this day? (No) - Because on April 12, 1961, a man flew into space for the first time. It was Yuri Alekseevich Gagarin, our compatriot. (the teacher shows a portrait of Gagarin) - During the launch, a flame broke out in the rocket engines, the rocket took off and disappeared into the blue sky. (video “Start of the ship”) Yuri Alekseevich was the first to see the entire Earth from space. (the teacher shows an illustration of the planet Earth from space) Play: Guess the riddle: She spread her scarlet tail and flew away into a flock of stars. Our people built this Space... (Rocket) So you and I are now going to build a rocket, but first, let's warm up.
Fizminutka
Everything is ready for the flight, (raise your hands forward, then up.) All the guys are waiting for rockets. (connect your fingers above your head, imitating a rocket.) There is little time for takeoff, (march in place.) The astronauts stood in a row. (stand up with a jump - legs apart, hands on the waist.) Bow to the right, (to the left, bend to the sides.) Let's bow to the ground. (bends forward.) The rocket flew. (jumping on two legs) Our cosmodrome is empty. (squat down, then rise.)
Now let's make some rocket appliqués. The black background is space. We will make rockets from geometric shapes. We take a silver rectangle - this is the body of a rocket without a nose - and paste it onto the background - the “night sky” is inclined at an angle as if the rocket is flying into space. Then we take the square and cut it diagonally into two triangles, leave one triangle unchanged - this is the nose of the rocket - and glue it above the body rectangle; We cut the second triangle in half into two small triangles - these are the wings of the rocket - and glue them to the sides of the body (bottom). Before we get started, let's stretch our fingers.
Finger gymnastics
In the starry sky, the stars are shining (we show the stars, fingers intertwined) An astronaut flies in a rocket (we depict the flight of a rocket: join hands at the top) The day flies, the night flies (we bend our fingers) And looks down at the ground (we depict a porthole)
Educator: Now let’s go to the tables. Let's get to work. (Children choose materials and create their own “Rockets” applications. The teacher helps.)
- Guys, look how wonderful the work turned out. How many different missiles do we have? Today, like real astronauts, we visited space. Did you like it? Children's answers.
How to make a rocket applique
We printed the template with the applique details on a color printer, and used a sheet of blue colored paper for the background. Such an application can be made entirely from colored paper, simply cut out templates for the rocket parts from multi-colored paper: a green rectangle, red and blue triangles, yellow stars and flames, and a picture of the planet Earth and the Sun can be cut out from any magazines. But since I had a ready-made template, we used it.
My son has already learned how to use scissors, so I entrusted him with cutting out the parts for the rocket appliqué. If your baby does not yet know how to cut out on his own, then you prepare all the details for the rocket appliqué yourself.
Even though not everything worked out smoothly and perfectly, for me the most important thing is that he “from start to finish . All their favorite toys gathered to see and hold this: baby mammoth, Mario and everything, everything, everything.
Lesson applique - rocket
My son carefully cut out every detail using small child's scissors with rounded ends.
Lesson applique - rocket
Lesson applique - rocket
Lesson applique - rocket
Lesson applique - rocket
After all the parts were cut out, he laid out the rocket on a blue background according to the pattern.
Lesson applique - rocket
Then he began gluing the pieces together using pencil glue. He coated each part with glue and glued it himself.
Lesson applique - rocket
Lesson applique - rocket
Lesson applique - rocket
Lesson applique - rocket
Lesson applique - rocket
Lesson applique - rocket
Lesson applique - rocket
Paper applique for children
Paper rocket applique for children
Paper applique for children
It turned out to be a wonderful picture - a rocket applique, it’s not a shame to put it in a frame and show it in kindergarten.
Paper applique for children
That’s what we did, framed it and put it on a shelf, waiting to go to kindergarten, it’s even a pity to part with it.
You can easily repeat this application or make something of your own, special.
Good luck to you and your baby!
How to make a paper rocket that flies
Not only boys, but also girls will love this type of entertainment. For this task you will need:
- paper;
- adhesive tape or electrical tape;
- scissors;
- ballpoint pen or cocktail tube;
- glue gun (PVA glue takes a very long time to dry).
Stages of work:
- A sheet of paper needs to be cut into 2 halves, about 5 cm wide.
- If you have a cocktail straw, use it. You can also take a disassembled ballpoint pen.
- A piece of electrical tape must be attached to one of the prepared halves. By wrapping a piece of electrical tape around the handle, you get a rocket body.
- Screw the entire piece of paper onto the handle, securing it with adhesive tape. After this, the base can be freely removed from the body. Trim uneven areas with scissors.
- Cover one side of the case with electrical tape or duct tape.
- Prepare 3 pieces of adhesive tape. From them you need to make stabilizers for the rocket (tail fins).
- To make the tail fin, you need to fold one piece of tape, without gluing it completely, cut the tape with scissors at an angle of 45 degrees. The result is a triangular stabilizer shape. You need to make 3 fins.
- Using sticky pieces of tape, the tail fins are attached to the base of the rocket. They must be glued at the same distance around the base.
- Make a cone from the second half of the paper, which is attached to the body.
- Cut off the excess part of the nose and cover the cone with adhesive tape.
- Fill the cone 3/4 full with glue, and insert the sealed part of the rocket body into the cone with glue. Wait until the parts stick together.
To launch, you will need a cocktail straw or a disassembled ballpoint pen (inserted into the rocket body). Holding it with both hands, you need to blow hard. For higher flight, use a pump.
How to make a paper rocket using origami technique
Origami, which means “folded paper” in Japanese, came to us recently. Now this is a fairly developed art form. If you do not have much experience, you should use regular thick paper, it is easy to work with. It is recommended to fold complex figures from wrapping paper, parchment, or crepe, which hold their shape well.
There is a more complex technique called modular origami, where a figure is assembled from a large number of small parts of the same size
This activity may seem difficult at first, but persistence will bring results.
A simple paper rocket
You will need a square sheet. If you have thick, single-sided colored paper, this is what you need.
Stages of work:
- The sheet is folded in half horizontally, then vertically to mark the lines.
- Unfold the paper.
- Fold the top side of the square towards the middle line.
- Turn the workpiece over.
- Bend the upper corners in the middle vertical line.
- Bend the edges to the side to form wings.
- They turn the rocket over.
(in senior speech therapy group)
Software tasks:
- clarify and activate vocabulary on the topic “pets”,
- learn to navigate on a sheet of paper,
- indicate the direction of movement with the words: “left”, “right”, etc.,
- fix the main colors;
- fix counting within 10 (direct and reverse), names of geometric shapes, introduce trapezoid and rhombus;
- develop logical thinking, memory, imagination, creativity, learn how to perform general composition in appliqué;
- cultivate accuracy in work and good feelings.
Equipment:
pet toys, tickets, sets of geometric shapes, rockets, sheets of colored paper, mugs, cards with drawings of robots, pencils, brushes, glue, napkins, oilcloths, rocket parts, starry sky.
The course of direct educational activities.
1. Introductory part.
Attention! Attention! Everyone! Everyone! I hasten to inform the guys who love science fiction and adventure that mysterious and exciting events await us today. We are about to make a fantastic flight into space, where you will meet miracles and unknown discoveries. Guys, what can you fly into space on? (On a rocket!)
2. Consolidation of what has been learned.
Who controls the rocket? (Cosmonauts.)
Who was the first astronaut on the planet? (Yu. Gagarin.)
Yes, the first person to go into space was Yuri Alekseevich Gagarin, but Belka and Strelka went there even earlier. Who do you think it is? (These are dogs.)
Guys, are dogs domestic or wild animals? (domestic)
That's right, well done!
3. Didactic game “Who’s missing?”
In order for us to go on a flight, we need to test our memory, because many tests await us in flight, let’s play the game “Who’s missing?”
Look carefully at the animals, are they domestic or wild?
Marina, count how many animals there are.
Denis, who's first?
Natasha, who is standing last?
Now close your eyes, I will remove someone, and you must name who is gone.
Well done, fully prepared for the flight.
4. Rocket trip.
And now I will give you tickets that you need to decipher and take a seat according to the ticket.
Misha, who is on your ticket? (Cows.)
How many? (two.)
Look for the number 2 and take your place. (Children take seats according to their tickets.)
So, everyone took their seats, fastened their seat belts, and adjusted their headsets.
(Music. Rocket launch.)
5. Didactic game “Determine the route of the rocket”
And here we are in space. Now you are all commanders of the ship and control your rocket. And the rocket will be a circle, space will be a blue sheet of paper. Place the circle on the bottom piece of paper. The rocket rises quickly, but falls sharply down. Where is the rocket? (At the bottom.)
Now she flies to the upper right corner. Where is the rocket now?
(Children change the route according to the teacher and, answering his questions, say where the rocket is: in the center, in the upper left corner, etc.)
Guys, you showed aerobatics! Well done!
6. Didactic game “Fix the hole”
Oh, guys, something flashed behind the rocket window. So this is a shower of meteorites. They collided with our missile and damaged it.
Now you are all engineers and designers. We need to repair our spaceship.
What color is our rocket?
(In front of the children is a rocket with holes in the form of geometric shapes. There are geometric shapes on the tray. Children put and identify those holes that are suitable for repair.)
Now name the figures that you needed for repairs
(children call).
7. Introducing new geometric shapes.
Children, you have two figures left on the tray that are of no use to you.
Tell me, who knows what they are called?
(If they cannot answer on their own, the teacher invites them to count the sides and angles.)
Yes guys, these are quadrilaterals because they have four corners.
(Then the teacher introduces the children to new figures: rhombus and trapezoid, showing them.)
Guys, the task was very difficult, but you all did it well.
I'm very glad for you. And now I propose to leave our rocket and rest a little.
7. Physical school
And now you and I, children, (Marching in a circle.)
We're flying away on a rocket.
Rise up on your toes, (Rise up on your toes, pull your hands up, clasping them.)
And then hands down. (They lower their hands.)
One, two, stretch. (They reach up again.)
Here's a rocket flying up. (They run in circles on their toes..)
8. Didactic game “Fix the robot”
We rested a little, we return to our rocket, our flight continues. Oh, guys, while we were away, we got a letter. From whom do you think? (From aliens.)
Yes, from aliens. Let's read it.
Dear children - earthlings, we turn to you with a huge request. Our robot assistants have broken down. We kindly ask you to fix them.
(the children are given cards with two robots drawn on them: one is working, and the second is missing some parts. The children must see and complete them.)
Guys, the aliens sent you photographs of the cosmic sky in gratitude for your help.
9. Application “Rocket”
And I suggest you make our rocket out of geometric shapes and glue it to this photo. First, the silhouette of the rocket needs to be laid out on the table and then pasted on. (Independent work, individual assistance.)
These works will remain with you as a memory of our journey.
10. Return to Earth.
Guys, a signal has been received from the Earth’s space center to return home to Earth.
Now, pay attention! The descent and countdown begins. Close your eyes and count in a low voice 5
to 1. — The rocket made a soft landing thanks to the well-coordinated and friendly work of the crew. Thank you all very much!
11. Summary.
Guys, did you enjoy our trip? What did you like most? (Children's answers.)
An application for Cosmonautics Day for kindergarten is a great opportunity to tell children about a huge breakthrough in the development of all mankind - the first flight of our Soviet man into the vast and unknown space.
While the children are working on the application, the teacher can read them interesting passages from the biography of Yu. Gagarin and talk about the process of his preparation for a rocket flight. Or you can arrange a thematic exhibition from the applications and ask the children to independently prepare a short story about space.
This option is appropriate if only the senior group created an application for . The older group of children already have the skills to prepare and deliver messages.
To create an applique, we suggest using different materials - then it will be much more interesting for the kids to work. So, you may find it useful:
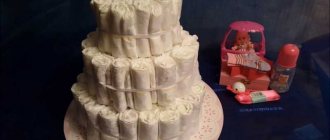
- cardboard (plain or coated, as well as golden foil);
- cylinders from disposable towels or toilet paper rolls;
- colored paper;
- semolina;
- office glue (PVA);
- scissors, pencils, stationery knife, ruler and other auxiliary tools.
Let's get started!
We take a sheet of black cardboard as the basis for our application.
We arm ourselves with a stationery knife and pick up a cardboard roll.
We cut the roll into two halves - this way, one roll can be used to create two works.
We cut out narrow triangles (about three pieces) from blue paper and bend them in half (lengthwise). You can immediately cut triangles from the folded sheet, then they will turn out smoother.
Glue the triangles to the base of the half roll.
Make the free part of the cardboard roll slightly pointed.
Glue the rocket onto a black cardboard sheet.
Cut out a petal from golden foil cardboard or foil. We cut out a petal of the same shape, but larger, from red paper.
Glue the golden petal inside the red one.
Now we fix this composition at the base of our rocket - we get tongues of flame.
Cut out a ring from red paper and stick it on the front of the rocket.
Take a sheet of golden cardboard. You can replace it with foil, but cardboard is easier to work with.
Cut out the sun from this sheet.
Glue the sun to our picture.
We make another planet from silver cardboard - with a ring. Glue that too.
We arm ourselves with semolina.
For convenience, scatter it on a flat surface (for example, a plate).
Lubricate the surface of our space with glue and sprinkle with semolina.
We got a wonderful landscape - a rocket rushing into the distance between the planets and placers of the Milky Way.
The application for Cosmonautics Day is ready! The kindergarten preparatory group can easily cope with this work, since they already know how to handle all the materials and tools.
Watch how to make a wonderful application for Cosmonautics Day in the video: