Drawing lesson “Night City” in the preparatory group
Natalya Fomenko
Drawing lesson “Night City” in the preparatory group
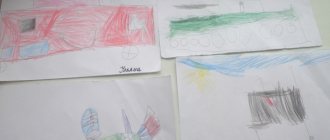
Goal: To encourage children to convey in their drawing a picture of an evening city , color scheme: the houses are lighter than the night air , lights are burning in the windows.
develop independence in completing tasks;
the ability to experience positive emotions from cognitive, productive activities.
develop aesthetic feelings (colors, compositions)
;
consolidate the ability to draw up your plan, compositionally arrange the image on the sheet;
consolidate the ability to evaluate an expressive solution to a topic;
consolidate the ability to write a composition into a sheet of paper, draw different buildings , depict the foreground and background.
Encourage children to draw a city at night using dark colors.
Dark cardboard;
Night city images .
Benefits of drawing a city
The very process of drawing a city with a pencil or other methods contributes to the rapid development of abstract thinking and plot perception, especially in young children. However, choosing a city and cityscape image has certain advantages:
- The ability to display the city (houses, streets, auxiliary elements - cafes, signs, benches) allows you to perceive and convey the perception of the surrounding world from different angles. For example, it is possible to depict a city not only at a right angle, but you can also draw a top view of the urban area. Or get a little creative and paint a fairy-tale city in the clouds. The imagination of a child or an adult allows you to recreate the most unusual scenes.
- Along with generally accepted artistic techniques, the master has the opportunity to choose original ways of depicting reality. For example, a forest city with funny inhabitants, drawn with fingers and paints. This technique is very popular among child psychologists and rehabilitation doctors.
- Using various drawing techniques, the artist can illustrate his own books, magazines, and comics. Ready-made images can be an excellent decor in a bedroom or living room.
The depiction of a city, as a rule, involves the need to draw a large number of small details.
This is a great opportunity for children to learn perseverance and discipline.
Progress:
1. Draw rectangles in the form of houses with a simple pencil.
2. Paint at home with watercolors.
3. Paint windows in houses .
4. Use brown to paint the tiles of the houses .
5. Paint the trees with light paint.
6. Use black paint to outline all the small details .
7. Paint the starry sky with yellow paint.
Photo report “Drawing lesson in the senior preparatory group “Dad’s Portrait” Objectives: Learn to draw a male portrait, trying to convey the appearance features, character and mood of a particular person (dad,...
Final integrated lesson in the preparatory group “Let’s save the city of Mathematics” “Let’s save the city of Mathematics” Goal: consolidation and generalization of acquired knowledge. Objectives: Educational: - continue to teach children how to compose.
Summary of direct educational activities on drawing in the preparatory group “Evening City” Objectives: 1. Encourage children to draw a night city using dark colors 2. Develop a sense of composition and color 3. Strengthen the skill.
Summary of a lesson on artistic creativity in the senior group “Night City” Summary of a lesson on artistic creativity in the senior group “Night City”. Elena Vladimirova. Goal: Formation of ideas in children. Master class “Drawing a night city” It’s dark outside the window... We sit, looking out the window. The cat is sitting and I am sitting. The cat looks, and I look... We see windows, we see roofs... And above the roofs, higher. Drawing lesson “Mom and I are walking in the park” in the preparatory group On March 25, a directly educational organized activity was carried out - drawing on the topic: Mom and I are walking in the park. In progress. Drawing lesson “Rowan Branch” in the preparatory group Goal: to create a favorable atmosphere for communication, to prepare children for the upcoming activity. Educational task: to educate.
Lesson on the development of mathematical concepts “Journey to the city of geometric figures” in the preparatory group Dear colleagues! I bring to your attention a summary of the lesson on the development of mathematical concepts in the preparatory group on the topic.
Drawing lesson in the preparatory group “Soldier on duty” Program content: Educational objectives: teach children to create an image of a warrior in a drawing, using a stencil, to convey characteristic features. Drawing lesson in the preparatory group on the theme “Space” using the “spray” technique Summary of the drawing lesson in the preparatory group “Space” Irina Shatanova Drawing: “Space” Goal: to teach children a new method.
Source
Drawing the city from the front
The first and easiest project for a beginning artist is a full-face view of the city. In this case, great attention is paid not to drawing details, but to the relative position of the lines.
The artist's most important task is to depict the street and surrounding houses as the artist's eye perceives this view. Instructions on how to draw a city step by step with a pencil:
- A sheet of ordinary white paper is placed in front of you on the table (in its longitudinal axis). This creates more free space for displaying houses.
- Next, you need to visually mark the middle of the sheet. A horizontal stripe is drawn just below the marked plane. The line should go through the entire sheet.
- On the right and left, along the very edge of the sheet, two vertical lines are drawn.
- The four extreme points on the vertical lines are marked with a pencil, and four diagonal stripes lead from these points. All diagonal lines must converge at one point. This technique allows you to depict a city street in real space (at the desired angle).
- The space between the two diagonals will have to be filled with details of the house facades. To do this, a series of vertical stripes are drawn inside, which indicate the boundaries of neighboring buildings.
- To depict the side edges of residential buildings, it is necessary to draw several horizontal strips. Excess lines will be removed later using an eraser.
- The next task of the master is to draw the central avenue. From the central point where all the diagonals converge, draw two more oblique lines. The drawn lines point downwards. Marking the boundaries of the sidewalk and avenue.
- Oblique lines are brought to points at an equal level, and two horizontal stripes are drawn from them. This technique allows you to display the exit of the avenue onto the central roadway.
Further creative work consists of drawing the details. Using double lines, they add volume to the curbs; draw a double strip in the center of the roadway, the width of which increases towards the bottom of the sheet.
On the facades of surrounding buildings it is necessary to depict window openings, doors, and maybe table signs that complement the image of the city.
On the topic: methodological developments, presentations and notes
So, visual activity for children with mental retardation needs targeted development. However, forward movement in this direction will be impossible.
Summary of direct educational activities in drawing in the preparatory group on the topic “Portrait of Mother.”
Notes on drawing in the preparatory group “Ladybug”. Goal: teach children to draw a ladybug. Objectives: develop artistically.
Progress of the lesson: Knock on the door, Dunno comes in: - Oh, where did I end up? Educator: - Guys, did you find out who it is? (children's answers) - Dunno, firstly, you need to say hello (Dunno says hello), and secondly.
Summary of direct educational activities in drawing in the preparatory group on the topic “Night City” Educational area: artistic and aesthetic development (drawing) I.
Authors: Kolesnikova Yu.B., Kuzmina V.N., teachers of MBDOU “Kindergarten No. 96”.
Summary of direct educational drawing activities in the preparatory group on the topic “City (village) in the evening.”
Source
View overlooking the town
Another interesting project for creativity is drawing a city plan. This image allows you to see the city from above. The piece of paper may turn out to be a really existing city, and then the artist will need a real plan-project.
Or it could be an illustration for a storybook or comic book, depicting a fantastical plan. Instructions on how to obtain an image of the city plan:
- On a sheet of paper (in the longitudinal axis) the contours of the city boundaries are outlined.
- The entire available area must be divided into districts. On the map, such divisions look like double lines that indicate roads.
- The depiction of residential areas depends on the scale of the map. The roofs of multi-story buildings are depicted as squares.
The view of the city from above includes overpasses, railway tracks, which are drawn as a double strip with parallel sleepers and rails. If the scale used allows, then road markings and a city park are displayed.
City Park
Every city has a green area intended for the recreation of citizens. Here you can take a break from the bustle and noise of cars, enjoy the singing of birds, clean air and the pleasant smell of flowers. This is an ideal place for those who love to paint nature.
We propose to depict a city park made using pencil technique. The plot is not very complicated; even a beginner can cope with the depiction of a simple green area. The main details here will be a flower bed and a children's playground.
Sequence of artistic work:
- Start from the background.
- In the middle of the sheet, draw a fence along the entire length with four posts and rectangular areas between them.
- Behind the fence, draw multi-story buildings of different heights with windows. Window frames can be made vaulted, square and rectangular.
- Move to the foreground.
- From the bottom left corner to the middle of the fence, make a path with ragged edges of grass.
- On the left side, next to the path, place a wooden fence made of pegs and crossbars. Behind it, draw a multi-colored flower bed with tulips.
- All that remains is to paint over it. Shade the sky blue, make a light pink imitation of a sunset closer to the fence. Paint the path the same color.
- Paint the fence pink.
- Each pillar should cast a shadow.
- Plant some trees in the park.
- Place a swing not far from the fence and a slide in the foreground.
- Draw children playing.
City in the clouds
The image of a fairy-tale city floating in the clouds will require more painstaking and perseverance from the master. In addition, colored pencils are required to draw details. Instructions on how to depict a drawn city:
- On a sheet of paper, draw two lines emanating from one point. One line goes to the right, the second - to the left and up.
- Two vertical stripes drawn from the extreme points allow you to display the walls of buildings. The fairy-tale city will be surrounded by a high wall, at the ends of which there are towers.
- Inside the resulting basic figure, details are drawn: the central entrance to the city. To do this, draw an arch in the form of a double arc, the steps are double stripes, the size of which decreases towards the bottom.
- To depict the end towers, you need to draw three vertical stripes, the central one of which has a smaller height. The upper points of the lines are connected to each other, indicating the observation deck of the tower. The lowest points will be hidden under the clouds.
- One spire of the end tower will remain hidden under the clouds, the second is drawn in the form of a cone located on the upper platform.
The contours of the cloud curtain are drawn with a simple pencil (the shape and size depend on the wishes of the artist). It is necessary to ensure that the clouds envelop not only the lower steps and the bottom of the city walls, but also partially hide the spiers of the towers.
