Lesson 1. Cubes
Goals. Teach children to paint with stamps using wooden figures; navigate on a sheet of paper; clarify and consolidate knowledge of colors and shapes; develop interest and a positive attitude towards drawing.
Materials. Paints - gouache or watercolor; a large sheet of paper for a collective drawing, sheets of A4 paper (according to the number of children); wooden figures - cubes (with a smooth surface, not treated with varnish or paint); polyethylene covers; water in cans; rags, napkins; multi-colored cubes from a building set.
Technique. Drawing with a stamp.
Progress of the lesson
Prepare the paints and pour them into the lids. Before starting work, show the kids the colorful cubes. Tell them that today they will paint cubes.
Educator. Look what I brought you today. That's right, these are cubes. Let's not just draw, but print them. See how this can be done quickly and easily.
Show how to pick up a stamp cube, dip one side of it in paint, apply it to the paper and press down, then carefully lift it - a bright imprint will remain on the paper.
When changing paint, use a sponge to wash off the previous paint from the cube and wipe it dry with a cloth.
Invite the children to take turns printing the blocks on a large piece of paper. Monitor the consistency and quality of actions, if necessary, help and correct errors. At first, you should use one ink and print squares of the same color (so that you do not have to wash the cube before changing the ink). You can use several cubes - each for a specific paint.
Give the children paper and encourage them to print the blocks themselves. Help place the prints evenly over the entire surface of the sheet of paper.
Subsequently, teach children to apply paint to the surface using a brush. In this case, you can use several colors - each cube turns out to be different colors.
Lesson 2. Balls
Goals. Teach children to paint with a stamp using cut vegetables; navigate on a sheet of paper; clarify and consolidate knowledge of colors and shapes; develop interest and a positive attitude towards drawing.
Materials. Paints - gouache or watercolor; a large sheet of paper for a collective drawing, sheets of A4 paper (according to the number of children); carrots cut crosswise; polyethylene covers; water in cans; rags, napkins.
Technique. Drawing with a stamp.
Progress of the lesson
Before class, prepare the paints and pour them into the lids. Tell the children that during the lesson they will draw colorful balls.
Educator. Let's not just draw colorful balls, but print them. Now I will show how this can be done quickly and easily.
In front of the kids, cut a washed carrot of medium length and thickness in half, then show how to pick up half a carrot, dip the cut side into the paint, apply it to the paper, then carefully lift it - a bright imprint will remain on the paper. When changing color, wash off the previous paint from the cut surface of the carrot and wipe dry with a cloth. Accompany each step of the action with an explanation.
Have the children take turns printing circles on a large piece of paper. Monitor the consistency and quality of actions, if necessary, help and correct errors. At first, you should use one paint and paint circles of the same color (so that you do not have to wash the carrots before each change of paint). Or use several carrot halves, each for a different color.
Then give the children paper and encourage them to draw the balls themselves.
Subsequently, you can teach children to apply paint to the cut surface of carrots using a brush. In this case, use several colors - each ball will turn out to be different colors.
Lesson 3. Stars
Goals. Continue teaching children to draw using a stamp; navigate on a sheet of paper; clarify and consolidate knowledge of colors and shapes; develop interest and a positive attitude towards drawing.
Materials. Paints - gouache or watercolor; a large sheet of paper for a collective drawing, sheets of A4 paper (according to the number of children); several pieces of carrots cut across with an asterisk cut out on the cut; polyethylene covers; water in cans; rags, napkins.
Technique. Drawing with a stamp.
Progress of the lesson
Before starting the lesson, prepare the paints and pour them into the lids.
In front of the kids, cut washed carrots of medium length and thickness in half, then cut out a star on the cut (prepare several of the same shapes in advance). Show how to print figures using this stamp.
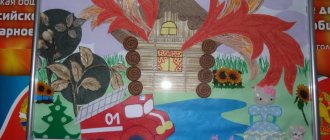
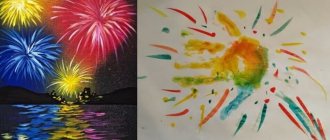
Invite the children to take turns printing stars on a large sheet of paper and come up with a plot for the drawing on their own - it could be flowers in a clearing, stars in the sky, or multi-colored holiday fireworks. You can use different paints.
Then give the children paper and invite them to print the stars themselves, coming up with a name for their drawing.
Lesson 4. Towers
Goals. Continue teaching children to paint with stamps using wooden cubes; maintain rhythm when using two colors; navigate on a sheet of paper, place the prints in a certain way relative to each other; clarify and consolidate knowledge of colors and shapes; develop interest and a positive attitude towards drawing.
Materials. Paints - gouache or watercolor; sheets of drawing paper in A4 format (according to the number of children); wooden figures - cubes (with a smooth surface, without varnish or paint); polyethylene covers; water in jars; rags, napkins; multi-colored cubes from a building set. Technique. Drawing with a stamp.
Progress of the lesson
Before class, prepare the paints and pour them into the lids.
Show the kids the cubes and ask them to build tall towers out of them, alternating two colors. When the towers are ready, compare them in height. Tell the children that today they will draw towers of blocks using paints on paper.
Show the children how to stack the prints on top of each other (in this activity, the paper is placed vertically). To make it easier for them, you can use one color at first, then alternate colors next time. You should also draw a line at the bottom of the sheet to indicate the surface on which to place the cubes.
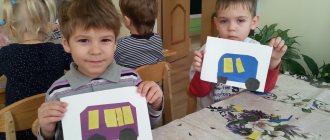
Give the children paper and encourage them to print the towers themselves. If necessary, help position the prints one above the other.
Ways to organize children's activities
The fact that children love to draw is no secret. But for 3-4 year old children this doesn’t always work out successfully. Alternatively, you can use children's stamps. The ones bought in the store look like the real thing, which in itself arouses the interest of children. But the resulting drawings turn out to be characters from cartoons and fairy tales, parts of a single picture, for example a landscape, realities of our world that little ones are just getting acquainted with (vegetables, animals), funny emoticons, etc. A set of stamps can be selected or ordered individually for each child, depending on his age and interests.
Another thing is children's stamps made with their own hands. After all, if you initially involve children in this process, the seals will turn out exactly the way they want them to be.
Goals and objectives of using nitcography
So, what are the benefits of thread printing and thread writing techniques?
- Children get acquainted with new drawing methods that are just gaining popularity.
- Babies develop visual perception. They constantly have to look at individual objects and think about how to assemble them into a single picture or diagram. In addition, they improve the eye. They have to select those threads that are ideal in size for their design.
- Preschool children develop fine motor skills. This is very important especially in our time, when parents are trying to simplify their child’s life in any way, for example, buying clothes with zippers and shoes with Velcro instead of laces.
- Thanks to nitcography, creative thinking and imagination improves. For some children, a blank sheet of paper is an insurmountable barrier. They are unsure of themselves and are afraid to start something new. Nitography helps them to relax.
Plus, such techniques teach children perseverance and concentration both on the lesson as a whole and on individual details of the drawing.
Materials for practicing nitcography
Nitography combines the use of rather unusual combinations of materials and tools. You will need:
- Working surface. This is the basis. It is desirable that it be rough. There are no restrictions when it comes to color. Choose what you like. You can take cardboard or any other thick paper, fiberboard, a piece of flannel fabric, a piece of plain carpet, etc. An A5 size base is sufficient. For variety, make templates for future drawings in advance.
- Wool, acrylic or cotton thread with a diameter of at least 2 mm. For kids in the middle group of kindergarten, you can take a nylon cord with a thickness of about 4 mm. The main thing is that it should not slide. Pre-cut the threads into pieces of the required length. Older preschoolers can do this on their own.
- PVA glue with a brush.
- Napkins, oilcloth, scissors.
- For thread printing, you will also need toothpicks or thin sticks, with which the child will align the drawing.
If necessary, you can take pencils, markers and other additional devices.
If you decide to start thread painting, prepare an A5 landscape sheet, threads about 45 cm long, multi-colored gouache, brushes and jars in which you will dilute paints with water.
Not only for play, but also for business
There are also functional children's stamps that will really help in life, but for adults. For example, parents, sending their children to kindergarten, school, or camp, often embroider their first and last names on their clothes - a kind of identification mark. You can get rid of this need for many years if you order a stamp with the child’s data. With its help, I put a mark on the back of the clothes - and the child will always be able to identify his pajamas or blouse.
A children's stamp will also help a teacher or primary school teacher. After all, they usually evaluate the work of their students with the help of drawings or funny faces. And with such an assistant it will be much easier and faster.
What are the benefits of using such stencils?
First of all, this is a very exciting activity for kids, which will help organize their leisure time for quite a long time. With children's stamps, children will learn about the realities of the world, develop imagination and creative thinking, and learn communication. It is also important that seals contribute to the development of fine motor skills, coordination of movements, and teach them to plan their activities.
"Flowers for Mom." Lesson notes on non-traditional drawing with stamps
Svetlana Stolyarchuk
"Flowers for Mom." Lesson notes on non-traditional drawing with stamps
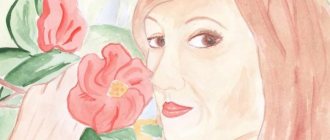
Strengthen children’s ability to depict in drawings the structure of a flower (stem, leaves, petals)
using a variety of materials.
Educational: To introduce children to non-traditional drawing techniques - the technique of drawing “ stamps ”
.
Continue to learn how to make additions to the drawing that enrich its content. Use familiar drawing techniques when completing the drawing . Instill interest in an unconventional type of drawing .
Developmental: Develop aesthetic feelings, accuracy, imagination, creativity; ability to draw with different techniques .
Educational: To cultivate accuracy and composure when performing work techniques; listening skills; the ability to perceive the beauty of the surrounding world.
Develop skills of kindness and cooperation.
Equipment and materials: Picture “Spring”
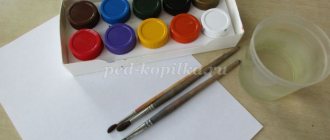
, gouache, sheets of paper, napkins;
illustration of flowers , cotton swabs, bottle caps.
Planned results: Children learned about a new type of unconventional drawing - drawing “ stamps ”
Preliminary work: Reading fiction; memorizing poems and proverbs about mother; examination of illustrations depicting flowers , application “ Flowers in a vase ”
game
“Gardener”
, looking at illustrations of
flowers , drawing flowers using different techniques : circular movement of the brush, dipping.
Targets: The child shows curiosity;
inclined to observe and experiment.
Children are included in the group - welcoming children with guests!