Composition options based on theme
In the visual arts program for the middle group, mushroom sculpting is offered to children in October (after all, these are the same gifts of autumn as vegetables and fruits). The topic can be defined more specifically, for example, “Handsome Fly Agaric” or “Boletus”, focusing on the characteristics of a particular mushroom.
You can suggest a topic such as “Mushrooms for a hedgehog” (squirrels, forest animals). The teacher plays out a specific image of an animal in the motivational part of the lesson.
In addition, the children can sculpt mushrooms in the clearing. This can be individual (3-4 mushrooms on the grass) or a collective composition. In the second case, the teacher prepares a large base: it can be a sheet of A3 cardboard, painted green, artificial grass, moss, etc.
The clearing (the basis for collective modeling) is prepared by the teacher using cardboard, paper, artificial grass and other materials
Another version of the theme is “Basket with mushrooms.” Again, it can be played out as individual and collective work. The children can make small baskets where they will place their mushrooms (several pieces), or the teacher prepares a basket in advance (for example, from cardboard strips), and the children put their mushrooms there.
Each child builds a basket in the most convenient way
During the lesson you can also sculpt mushrooms and berries (fruits of the forest) at the same time. For example, on the cap of a large mushroom or next to it there may be a raspberry or a sprig of currant made of plasticine.
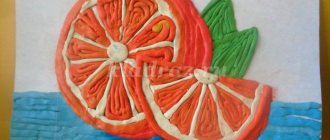
The simplest fungus application
Preschoolers can make a mushroom from different materials. To complete a creative task, you will need a dense base - a sheet of cardboard or plywood on which mushrooms will “grow”.
A simple application of colored paper “mushrooms” is the most affordable option. There are other methods - using natural and available materials:
- “mushroom” applique from cereals (semolina, buckwheat);
- smooth made of fabric (on glue) and voluminous (sewn with overcasting over a layer of padding polyester);
- from cotton pads;
- break appliqué;
- combined works (using dry leaves and herbarium, fabric and paper).
To make the paper work beautiful, it is done according to the white mushroom template for applique. This is a popular theme for exhibitions of work, which are often held in kindergarten and junior school groups.
Implementation of an individual approach when sculpting mushrooms
Since the image of a mushroom in modeling can be embodied with varying degrees of complexity, this topic is very suitable for implementing an individual approach in class. Thus, children who have well-developed fine motor skills can work on the craft in more detail, marking the “skirt” of the mushroom and drawing notches-plates in a stack.
The same applies to the number of elements of the composition. As part of the theme “Mushrooms in the Meadow,” some will make just two mushrooms, while others will make a whole large family.
When sculpting mushrooms, you can successfully use an individual approach
Mushroom applique for school children
Grown-up children are not interested in making primitive fungus; they are more willing to take on the development of non-standard techniques. They can “revive” the Boletus Mushroom or Fly Agaric by adding facial features to fabric appliqué with a felt-tip pen or using embroidery.
Helpful advice! The fly agaric hat and skirt can be made using different techniques. Invite more talented girls to make an appliqué of fly agaric from satin on burlap (canvas) as part of labor classes. Decorate the hat with pearl beads, crochet the skirts, and embroider the grass with thin ribbons or yarn.
Drawing a background for the applique is one way to complicate the task. It could be a forest or mountains with a river in the distance, and in the foreground of the image there are mushrooms with a hedgehog and a snail. Some students manage to create a realistic image.
Schoolchildren can decorate the grass in some complex way, adding spikelets and felt leaves. Offer to enliven the mushroom appliqué with insects made of beads or three-dimensional characters made of fabric. Creative tasks develop children's artistic taste and reveal hidden talents.
Photo gallery: works of secondary group students
The teacher gives the children free-shaped green cardboard with wavy edges (clearing), leaves and blades of grass.
The children sculpted the basket from a long yellow rope of plasticine.
Each child can make any number of mushrooms
An original idea is to make a large stump out of cardboard on which children's plasticine mushrooms will grow
All mushrooms are arranged in a collective composition using artificial grass and appliqué
Mushrooms are supplemented with a plasticine basket and dry leaves
In the middle group, the guys can quite realistically depict a fly agaric, even sculpting its characteristic skirt
Fly agaric is a beautiful bright mushroom that children always like to sculpt
A shaggy green rug is ideal for creating the look of a clearing.
A bright fantasy composition is placed on a cardboard clearing stand
Plasticine fly agarics can be placed on real moss
Modeling classes always captivate preschoolers, especially when they make familiar objects that can be observed in nature or everyday life. Students in the middle group are already creating more realistic images of mushrooms, paying attention to the characteristic colors, shapes, and details. Children can organically complement the composition with suitable elements (grass, basket, berries). The main thing is to teach kids specific modeling techniques and inspire them to be creative.
MAGAZINE Preschooler.RF
GCD for modeling in the middle group “Mushrooms”Tasks:
- Strengthen the ability to sculpt familiar objects, use familiar techniques: rolling plasticine with straight and circular movements, flattening with palms.
- Learn to sculpt with your fingers to refine the shape.
- Lead to a figurative assessment of work.
Material: Presentation “Mushrooms” , pictures and dummies of mushrooms, plasticine, modeling board, model of an autumn forest, ball, dry and wet napkins
Progress:
Educator: Guys, I suggest you guess the riddles (the teacher uses ICT with the presentation “Mushrooms” )
Educator:
He grew up in a birch forest. Wears a hat on his foot. The leaf stuck to it on top. Did you find out?
Children: It's a mushroom! Educator: In the soft grass at the edge of the forest there are red ears everywhere.
Golden sisters are called... Children: Chanterelles Teacher:
White dots on red - Poisonous mushroom, dangerous. There’s no point in talking here - Don’t disrupt...
Children: Fly agaric
Educator:
He will be born in an aspen forest, No matter how he hides in the grass, We will still find him: He is wearing a red hat.
Children: Boletus
Educator: That's right, these are mushrooms. Where do mushrooms grow?
Children: In the forest.
Educator: Children, can all mushrooms be picked in the forest?
Children: No
Educator: Let's remember which mushrooms are edible and inedible
Ball game "Edible, inedible"
Educator: Well done, you remembered everything.
Educator: Well done! Guys, take one mushroom at a time, look at them carefully and tell me how they are similar?
Children: Mushrooms have a stem and a cap.
Educator: That's right, children! How are they different?
Children: Mushrooms come in different sizes and different colors.
Educator: That's right, children! Today I suggest you make mushrooms from plasticine. First, I will tell you how to sculpt mushrooms. First, I will sculpt the stem of a mushroom, take a piece of plasticine and roll it between my palms with forward and backward movements. This is how the mushroom stem turned out. To make a mushroom cap, I take another piece of plasticine, put it on my palm, roll it out in a circular motion to make a ball, then put this ball between my palms and flatten it. Like this. Now I will connect the cap and the stem, I have such a beautiful mushroom. What is the name of this mushroom? (Boletus) Guys, do you understand everything? You can start sculpting. But first, I suggest you stretch our fingers. Watch and repeat after me.
Finger gymnastics “A crow walked across the field”
A crow walked across the field, carrying six mushrooms in the hem: Russula, boletus, boletus,
Milk mushroom, honey fungus, champignon, If you haven’t seen it, get out!
Independent activity of children, provide assistance if necessary.
Bottom line
Educator: Guys, look what beautiful mushrooms we got. Ilyusha, tell us how we used our palms to make mushrooms? (straight and circular) Roma will tell us what parts the mushroom consists of (leg and cap) And Sasha will show us what mushrooms we made (Boletus, boletus). Children design an exhibition of creative works “Mushrooms” .
| Next > |