What a beautiful time of year - winter! Fluffy snow, sledding, frosty cheeks. And how great it is to come home from a walk, drink tea and do what you love! Draw, make appliqués, sculpt from plasticine, create!
We offer you the most interesting winter crafts for school and kindergarten : we will make fairy-tale characters, invent clothes out of paper, sculpt Christmas trees and animals in winter clothes, and do winter plasticineography. Many crafts come with ready-made templates for printing. If you don't have much time or don't have colored paper, print them out. They are especially convenient if you want to make New Year cards for a large number of friends.
The ideas in this collection can be used as creative activities for your advent calendar. You will find a lot of inspiration and creative ideas for activities with children throughout the winter.
Crafts “Christmas trees”
We offer you 4 options for how to make a craft with a Christmas tree. We will make cards, applications and a New Year's toy.
New Year's card "Delicate Christmas tree"
Let's make a postcard - a transformer. When closed, the Christmas tree looks like an ordinary one, but as soon as you open the postcard, the holiday begins!
Craft “Christmas tree” from a sleeve
Crafts made from bushings are a special love! Such affordable material and so many interesting things you can make from them, for example, a Christmas tree. To do this, we will fold the sleeve in half and make cuts. The final work can be used as a Christmas tree decoration. This craft can be done by children aged 3 years and older.
You can think about what a green beauty might look like in the “Living Christmas Tree” master class. Download the finished template. Children under 4 will need help cutting out as the lines are curved.
Or make an applique from paper circles. For children under 4 years old, make a lot of blanks from colored paper and show them how to fold them. Then they can handle it themselves! As an additional decoration, we use semolina, which is so similar to snow.
For older children (from 6 years old), we invite you to try out elements of the origami technique to create your own New Year’s cards. Three craft options for your choice!
Didactic preparation of classes
The formation of ideas about the human body begins from early preschool age. Educational classes using colorful pictures “Parts of the human body” are carried out in preschool educational institutions and at home with parents.
Moms and dads set goals unconsciously, they simply strive to expand the child’s range of knowledge. Kindergarten teachers formulate goals and objectives for each lesson on the topic, based on the order of the lesson, the age of the preschoolers and the novelty of the material.
Goals
Among the goals of developmental and training sessions are the following:
- To give an idea of the human body, its parts and structure through play.
- Expand the vocabulary of a preschooler.
- Develop a desire for a healthy lifestyle, caring for yourself and your health.
On a note! When planning lessons on the topic “Parts of the human body for children in pictures,” choose clear, bright pictures where all organs are shown separately. This way, kids will better remember and understand new information.
Tasks
If the topic “Parts of the Human Body” is being taught to children for the first time, then pay special attention to introducing children to vocabulary and to activating attention and interest in anatomy. In subsequent lessons, reinforce the material, promote independent activity, and use the creative potential of preschoolers. For one lesson, it is enough to select 3-4 feasible tasks.
Educational objectives for classes:
- Give an idea of the human body, parts of the body, sensory organs and their functions (done in lesson 1 on the topic).
- Learn to correctly name and show the main organs (mandatory task for 2 and subsequent lessons on the topic).
- Give an idea of the individuality and similarity of the body structure of different people.
Developmental tasks:
- Learn to correlate words and actions.
- Develop thinking, memory, imagination.
- Provoke and improve monologue and dialogic speech.
- Develop the ability to defend your opinion and use evidence in a dispute.
- Develop fine motor skills (finger gymnastics as a warm-up, creative tasks).
- Develop articulation.
Educational tasks:
- Support the desire for a healthy lifestyle.
- Cultivate a friendly attitude towards others, interest in other students in the group.
- Teach to listen to others and not be afraid to make mistakes when answering questions.
- Develop independence.
Fairy tale characters
It is impossible to imagine the New Year without Santa Claus. He is the symbol of the New Year, which occupies the minds of all boys and girls. Let's figure out how to make Santa Claus out of paper. And so that you can play with it, let’s glue it to a skewer (or twig). You can make other New Year's characters and stage a real home performance!
Pattern applique “Snowmen”
In the master class “Applique - Snowmen Pattern” we will learn how to cut out even circles, form a uniform composition and learn the basics of creating patterns. This application is suitable for children aged 3 years and older and will be interesting for older children who can add additional elements to it. Take the idea and repeat it with other fairy-tale characters or make a magical forest.
Application “Snowman with a gift”
Or you can make a snowman who will give candy to friends and family. An excellent option for a DIY gift for the New Year for which the only materials you need are paper.
Papier-mâché snowman
I really like this “Snowman” craft, but it can’t be done in one go. The napkin base should dry thoroughly. This will take a couple of days. Children will love the papier-mâché technique, which can be used to form three-dimensional shapes.
Winter clothes
We associate winter with snow, New Year and, of course, cold. To avoid freezing, we wear warm clothes and winter accessories. Look at the crafts we made on the theme of winter clothes.
Application “Winter hat”
What does your head get cold without in winter?
Of course, without a warm winter hat. Let's make a beautiful head pattern with a pompom from paper and plasticine. In this master class, your child will learn how to make beautiful patterns from plasticine and an interesting technique for folding paper patterns. Children from 5 years old can handle this craft. Watch a detailed master class here
Application “Mittens” made of paper and plasticine
To keep our hands from freezing, we wear warm mittens! Ours will have very beautiful patterns, which we will draw with markers and felt-tip pens. And we will definitely make decorations from plasticine: flagella and circles. This applique can be made for a New Year’s card or hung in a frame on the wall to create a festive mood.
Detailed master class here
DIY New Year decorations for the home
Sometimes the preparation for the holiday is much more interesting than the holiday itself! Does this happen to you? When we prepare for the New Year, we decorate the house, put up a Christmas tree and hang garlands. We will tell you what crafts you can make with your children from scrap materials.
New Year's wreath made of paper and pompoms
How beautiful New Year's wreaths look on the doors of the apartment. And we will make one from paper and pom-poms. To do this, we will cut out fir branches from paper, draw patterns on them and decorate them with multi-colored pom-poms. What kind of wreath will you make?
Craft “New Year's boot”
Or you can make a personalized boot from cardboard. Look how hard Varya tried and decorated her felt boots with stickers. This is a very simple and easy craft that children from 3 years old can handle.
Do you remember how they used to sew elastic bands to mittens? And we decided to make a pendant from cardboard and white paper mittens. It turned out great!
Pendant “Winter City”
Another pendant is a winter city, which we decorated with snow wool and sparkles. As a basis, we took a piece of cardboard, of which so much remains after the goods are delivered. Cardboard from boxes makes very strong crafts.
We not only decorated the house, but also came up with a winter crown! Download a ready-made template or make a sample with us. Sequins are suitable for decorations, you can take nail polish with sparkles or simply paint with felt-tip pens.
Progress of the lesson
A lesson in a preschool institution can be structured according to the following approximate plan:
| Lesson stage | What does it include | Duration | |
| 1. | Organizing time | We activate the children's attention to the beginning of the lesson. We greet you, seat you, create silence. | 1-2 minutes |
| 2. | Introductory part | We motivate interest in what is happening. You can ask a provocative question (Who knows how many body parts a person has? And others). Or tell an interesting story about a fairy-tale character who could not find and list all the parts of his body. Offer to help the character. | 3-4 minutes |
| 3. | Setting the task and goals of the lesson | We discuss with the children what we will do in class today, what new and interesting things we will learn (with children 3-4 years old), and create a problematic situation with children 5-6 years old. | 1-2 minutes |
| 4. | Games | Choose games aimed at memorizing the names of organs and their functions. Games can be carried out in the form of physical education. | 4 minutes |
| 5. | Warm-ups | Finger gymnastics. Performs two tasks: developing motor skills and learning the names of each finger | 3-4 minutes |
| 6. | Practical part | Let's look at the pictures. We find parts of our body from a friend, on a doll. We color, we draw. | 10 minutes |
| 7. | Reflection, summing up | We evaluate the lesson: liked it - didn’t like it. What new did you learn? Brief repetition of the main points (vocabulary). You can include riddles in reflection. | 2-3 minutes |
For children 2-3 years old, finger gymnastics replaces games and warm-ups. Can be used at the reflection stage. Learn memorable poems, show how to stretch your fingers and palms yourself.
This finger is grandpa, This finger is grandma, This finger is dad, This finger is mom, This finger is me, That’s my whole family!
Children bend their fingers on each hand separately and shake their fists intensively on the last lines.
Exercises
Use during the practical phase of the lesson. You will need pictures of “Body Parts” for children for clarity and example.
- Making up a person
Each child is given pictures of one part of the human body. The finished version is created in a group. Organize a competition for the elders to see who can assemble the person correctly the fastest.
- Where is the couple?
Mix up body parts for children in pictures. One pile should contain paired and unpaired parts. Task: to separate images based on pairing. Legs, ears, eyes, hands - in one, the rest - in the other.
- Call me kindly
I don’t have a hand, but a little hand, not a head, but a little head... It is advisable to combine lexical exercises with physical warm-up (stroking legs, arms, shaking your head, stretching your body to height). When naming a word, preschoolers look at pictures or photos for children “Parts of the human body.”
Important! Images cannot be printed in black and white. Pictures for viewing should be bright.
Games
Carry out game exercises in a group, actively. The main goal of the games: to provide new information in a memorable form. Positive emotions simplify the process of assimilation and consolidation.
- Why are they needed?
A game in the form of a question and answer. There are several answer options: detailed or yes - no. For children 3-4 years old, the following version of questions is suitable: Are ears needed to hear? YES! Do you need legs to eat? No! And so on.
For preschoolers in the middle group, ask a direct question: Why do they need legs, a head, etc. If possible, ask to justify the answer, give reasons.
- Robot
One child stands in the center of the group and completes several tasks from the children. For example, turn your head, wave your hand. The main thing is that when setting a task for a robot, preschoolers should use the names of body parts.
- Guess how much
The teacher shows a selection of photos on the topic “Sense organs pictures for children” and asks. How many ears, nostrils, tongues, eyes does a person have? Asks you to prove the correct answer by showing yourself.
Skeletal system
Digestive system
Respiratory system
Circulatory system
Puzzles
Lay out pictures or photos for children on the topic “Body Parts” on a large table. Gather the kids around him. Make riddles, the answer will be a raised card with a picture of the answer. Be sure to ask the respondent to name the correct organ and show it to yourself or a neighbor.
- No one sows them, no one plants them, they grow on their own! (Hair).
- In two holes the air wanders, then comes out, then comes in. (Nose).
- I’ll open my stable and show my friends the little white sheep. (Lips, mouth, teeth).
- If it weren't for him, no one would say anything. (Language).
- Ten brothers live in different houses. (Fingers).
- What do you need most at lunch? (Mouth).
- People have it. Animals have it. The person is smarter. (Head).
- Do you hear the water babbling? Wash your face more often... (Persons).
On a note! Riddles about parts of the human body can be presented in a presentation, followed by the correct answer in pictures for children.
Winter plasticineography
Santa Claus's house
Do you know where Santa Claus lives? We fantasized about this topic and decided that grandfather lives in a very nice red house with a huge snowdrift on the roof. And always with a round window from which he waves to all the kids! We made Santa Claus from plasticine using the reverse plasticine technique in a sour cream lid.
In this master class we combined plasticineography classes and watercolor painting. It will be interesting and will keep the child busy for a long time!
We really love it when the city is covered in snow. We invite you to depict a beautiful country house using plasticine. Let's learn how to sculpt patterns from plasticine and draw a monochrome background.
How to make plasticine cards
For the New Year we often make plasticine cards. To make them last longer, you can fix them on top with varnish. Look at the postcards we made with the children using the plasticine technique.
- Christmas tree made of flagella and circles;
- making a snowflake from flagella (a rather difficult and painstaking task);
- New Year's balls using the smearing technique (a simple and easy master class for children over 3 years old).
See plasticine New Year here
Winter plasticineography for children from 3 years old
Make an applique with a warmed dachshund. We will learn how to make flagella and make a sweater out of them.
A penguin with a warm heart, he really wants to please your loved ones. Great idea for a card. You will need black paper, a white pen (can be replaced with gouache) and plasticine. Remember that if you do not have some material or tool, you can always replace it with an alternative (white pen for gouache, plastic eyes for plasticine eyes, black paper can be drawn with gouache on white).
We sculpt from plasticine on a winter theme
If your child loves to sculpt with plasticine, see what we can offer for creative inspiration. With the help of detailed step-by-step visual diagrams, you can sculpt winter animals and learn how to sculpt different textures.
How to make a Christmas tree from plasticine: 7 detailed instructions
7 detailed diagrams for sculpting a Christmas tree from plasticine are waiting for you. Look how bright and beautiful they are! This is a very useful master class for developing fine motor skills and more. Plasticine has a calming and positive effect on children.
You can make funny hedgehogs from plasticine, which are insulated: put on hats, scarves and mittens. See detailed instructions for modeling in the diagrams. Recommended for children over 5 years old.
Or this New Year's pig. Children will practice making clothing items and learn how to make textures from plasticine using stacks.
Photo report “Subject developmental environment in the first junior group”
Olga Zhigalova
Photo report “Subject developmental environment in the first junior group”
Educator: Zhigalova O. Yu.
One of the important conditions for educational work in a preschool institution is the correct organization of the subject-development environment .
When creating a developmental space in a group room, it is necessary to take into account the leading role of play activity in development, this in turn will ensure the emotional well-being of each child, the development of his positive sense of self, competence in the field of relationships with the world, with people, with himself, inclusion in various forms of cooperation, which are the main goals of preschool education and upbringing.
When creating a developmental environment for children of primary preschool age, first of all, we paid attention to creating conditions that ensure the safety and psychological comfort of each child in the group . We strived to ensure that the atmosphere in the group was close to homely and cozy.
Functions of a subject-related environment in the junior group :
Cognitive – satisfies the child’s need to master the world around him, stimulates cognitive activity;
Communicative – stimulates speech development, allows the child to learn the basics of communication and interaction;
Wellness – stimulates motor activity, enriches motor experience, introduces to the culture of health;
Creative – introduces children to creative activities, promotes self-development and self-realization.
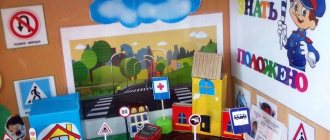
In our group, the subject-development environment is divided into corner-centers for children’s independent activities:
Fine Arts Center:
Objectives: To develop interest, attention, curiosity, and emotional response of children to individual aesthetic properties and qualities of objects in the surrounding reality.
Center for Psychological Relief
Objective: reducing the child’s anxiety level, performs a calming and relaxing function.
Music and theater center:
Objectives: Development of auditory perception and attention; formation of performing skills; development of children's creativity based on literary works.
Nature Center:
Objectives: Environmental education and education of children. Foster love and respect for nature.
Center for role-playing games.
Objectives: to promote the emergence of the game; develop the ability to choose a role and perform several interrelated actions in the game; formation of communication skills in the game; development of imitation and creative abilities.
Physical Culture Center:
Objectives: Create conditions for physical exercise in a group , stimulate children’s desire to engage in physical activity.
Sensory center.
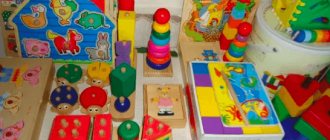
An important condition promoting sensory development is a specially organized developmental environment , which includes: a teaching table, pyramids, different colors, different shapes and textures, lacing, a variety of inserts, educational games, large mosaics, volumetric inserts of 5-10 elements, prefabricated toys, a set of geometric figures, objects of various geometric shapes, insert boards, insert frames.
Book Center:
Objectives: Formation of listening skills, ability to handle a book.
My kids love it when we read books with them and look at pictures, so here we have a lot of bright, colorful and interesting literature on the program.
Our favorite center in our group is the construction center. After all, it contains construction sets of various shapes and sizes, from different materials, as well as characters and cars for playing out buildings. The main tasks of this center are to develop the desire to build buildings according to one’s own design, to develop fine motor skills of fingers and hands, and to acquire the ability to build furniture, slides, and houses.
LOCKER ROOM AND BOOTH MATERIAL IN LOCKER ROOM
in the group is accessible to every child, is age appropriate and takes into account their individual characteristics and developmental capabilities.
