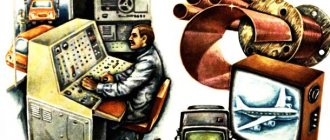
Abstract for children of senior preschool age “Living and inanimate nature”
Abstract of GCD in the senior group on the topic “Living and inanimate nature”
Target:
To introduce children to the concept of “Living and inanimate nature”, to develop cognitive activity in the process of experimentation;
expand knowledge about the properties of water. Objectives:
- develop curiosity, memory;
— develop active speech skills, enrich active vocabulary; - promote the development of cognitive interests; -expand knowledge about living and inanimate nature, show their interdependence; - learn to quickly find the correct answer to a question; - generalize and clarify previously acquired knowledge about the properties of water; — develop skills in conducting experiments; - expand and activate children's vocabulary; — develop the ability to independently draw conclusions based on practical experience; — cultivate caution when working with water. Methods and materials
: playful, practical, verbal, visual
Individual work
: activate inactive children
Equipment:
- diagram of wildlife; — pictures of living and inanimate nature; - chest; - 3 cups (with water, with soil, empty) for each and spoons according to the number of children; - sponges according to the number of children - saucers according to the number of children.
Progress of the lesson:
—
Educator: Guys, say hello, we have guests today. (Children say hello). The teacher reads a poem: Here on earth is a huge house Under a blue roof The sun, rain and thunder live in it (1 slide) Forest and sea surf, (2 slide) Birds and flowers live in it, (3 slide) The cheerful sound of a stream. You live in that bright house (4 slide) And all your friends. Wherever the roads lead, you will always be there. This house is called the nature of our native Earth (5 slide). Today we will talk about nature - What is nature? (Children's answers) This is correct - flowers, rivers, trees, plants, people, animals, air, water, mountains, stones, stars. – All nature can be divided into two huge worlds: the world of living and inanimate nature. Living nature is everything that grows, breathes, eats, develops. Inanimate nature is everything that does not breathe, does not grow, does not develop. This diagram will help us determine what belongs to living nature and inanimate nature (shows diagram 6 slide). You and I already know how to use diagrams as assistants, with their help we learned poems and composed stories.
Let's look at this diagram. What do you see in the first square? (children's answers)
This is the first sign of living nature - it is growing.
The second sign of all living things is that they breathe, in the diagram this is indicated by small circles as if it were air.
What do you think the cup sign means? (children's answers)
But the arrows mean movement. All living things move.
The next sign of living nature is that all its objects reproduce.
We conclude…..every living thing grows, breathes, eats, moves, multiplies. And the inanimate
Children: Doesn’t grow, doesn’t breathe, doesn’t eat, doesn’t move, doesn’t reproduce Educator: Well done! I’ll check you out, now let’s play the game “Living and Nonliving.”
The teacher explains the rules:
Determine whether the images on the cards belong to living or inanimate nature. You need to place cards with images of inanimate nature on the white field, and cards with images of inanimate nature on the red field.
Children: Lay out the cards on two fields: living objects on the red field, non-living objects on the white field, explaining their action by referring to the diagram.
Educator: Well done, guys, laid out the cards correctly. (children sit on chairs).
Educator: (7th slide) Guys, do you know that living organisms cannot live without inanimate nature. Without water, heat, light, air, more than one living organism cannot survive, and that means you and me. Therefore, we can say that living and inanimate nature live side by side, they help each other, they are friends. They are interconnected.
The recording sounds alternately - birdsong - the sound of the wind - the sound of rain
Educator: Who is this, (What is this)
Children: Birds, wind, rain
Educator: This is living or inanimate nature
Children: - the sound of the wind - inanimate nature
- birdsong - wildlife
-rain - inanimate nature Educator: Guys, what does rain consist of?
Children: Water Educator: That's right, rain is water. Today we will continue to explore the waters. Let's remember what properties of water we already know. And our collage will help us with this.
Children: Water is transparent, colorless, has no shape, tasteless, etc. Educator: And today we will learn another property of water by conducting experiments. Everyone, sit down in our laboratory.
Children: Sit down Teacher: Let's remember the rules of behavior when conducting an experiment? Children: Do not make sudden movements. To talk loudly. Proceed strictly according to the instructions. Don't disturb each other. Educator: Correct
Experiments: 1 “Where did the water hide?” The water was absorbed into the sponge.
2 “Water and Earth” Water penetrated into the earth
3 “Water purification” Water seeped through the gauze and cleared of debris
4 “Blooming Flower” The water was absorbed into the paper and the paper straightened out
5 “Magic chest” Educator: So we learned about another property of water. And what Children: Water penetrates, seeps.
Educator: You guys worked very well today, together, and I want to treat you to juice.
What is juice?
D: it's liquid
Q: You are right, juice is a liquid, just like water. Help yourself, how do you feel?
D: it will also seep into us. You can feel the juice seeping through. We drink, and the juice penetrates us. So glad. And it was a pleasure to explore with you today. You were very careful when performing the experiments. What did you like today?
Children: Share their impressions of the lesson. They say that they learned something new. Educator: let's ask our guests, what did they learn new today?
Let's say goodbye to our guests, get dressed and go outside - breathe fresh air!
Crafts from pine cones
Cones occupy a leading position among natural materials used for crafts for kindergarten. While walking through the forest or park, the desire to fill your pockets with them arises involuntarily!
Pine trees make beautiful hedgehogs, lambs, owls, penguins and deer; spruce trees can be used to make butterflies with wings from dried leaves, foxes and squirrels. And if you attach loops to the little animals, silver or gild them, then full-fledged Christmas tree decorations are ready.
Cones are also used for interior decoration. Paint it in different colors and put it in a wide transparent vase - why not decorate the table? Or make a New Year's wreath decorating the front door or a candlestick.
Hedgehog made of cones
Materials:
- pine cones;
- plasticine;
- white gouache;
- brush;
- green cardboard;
- colored paper;
- scissors;
- a simple pencil;
- PVA glue.
Make a cone-shaped muzzle from brown plasticine and stick it to the base of the cone. Under the cone, make four legs from equal-sized pieces of plasticine, rolling them into small sausages.
The black ball is the nose. The eye consists of two parts: roll a white ball and flatten it, on top there is a black ball, very dotted, press lightly. Paint the ends of the cone scales with white gouache. Place plasticine apples or mushrooms on the hedgehog's back.
It is better to make crafts for school more complex in compositional terms. For example, make a clearing out of green cardboard, onto which you can paste flowers and leaves cut out according to a template (you can download from the Internet), make several mushrooms, and around it there is a family of hedgehogs: two larger ones and several hedgehogs.
Christmas tree
Materials:
- pine cones;
- plasticine;
- white gouache;
- brush;
- cotton wool;
- white cardboard for the stand;
- red cardboard or foil for the star;
- a lid from a gift box or a plastic shallow bowl;
- beads
Use white plasticine to attach the cone to a circle of cardboard. Roll New Year's balls of different colors and sizes from plasticine and secure them between the scales of the pine cone. Even a three-year-old can easily cope with such a task.
You can make a festive spruce forest. Why cover the cones with frost - white gouache, not completely, but the tips. Secure it with plasticine at the bottom of a lid or bowl, cover it with “snow” (cotton wool), and decorate it with beads. You can place stars cut out of red cardboard or foil on the tops of your heads.
Crafts made from nuts
From walnut shells you can make figurines of mice, turtles, spiders and beetles, as well as baskets and cradles. Whole nuts can be used to decorate a Christmas tree by wrapping them in foil and making loops; together with the cones, they can be used to make wreaths and candlesticks.
Little mice
Materials:
- walnut shells;
- plasticine of different colors.
Fill the shells with brown plasticine and turn them over. For each mouse, make plasticine blanks of the same color: 2 round ears and a thin tail, 3 small black balls for the eyes and nose. You can use bright colors for the tail and ears: it’s more fun.
If you need to complicate the work, place several mice on a sheet of cardboard around a triangular piece of cheese made of yellow plasticine with black holes of different diameters.
Wooden crafts
April 1 is International Bird Day, which means that thematic classes, conversations, promotions and competitions for birdhouses and crafts are held in gardens and schools.
Spring crafts from natural materials dedicated to the arrival, life and protection of birds can be made in the form of compositions using driftwood or wood cuttings.
"Bird's Nest"
Materials:
- cardboard box lid;
- moss and lichen;
- snag;
- dried grass or straw;
- maple or ash lionfish, leaves for wings and tail;
- two pine cones (a large open one and a small one);
- white, gray, yellow and black plasticine;
- green gouache;
- brush.
The outer walls of the lid should be painted green. Line the lid with moss and lichen to create a forest clearing, with a snag in the background. Place a nest of dry grass or straw under the snag.
Place colorful eggs made of white and gray plasticine into the nest. Place the mother bird on a snag. An open pine cone is a body, a small dense cone is attached to it with plasticine, on the pointed end of which you need to attach a small beak of yellow plasticine.
Wings and tail can be made from dried leaves or lionfish of maple, ash (“airplanes,” as they are called), placing them on plasticine. The legs are also molded from yellow plasticine.
Crafts on a tree cut
Materials:
- cutting down a tree with a radius of 8 cm and a thickness of 1.5 cm;
- branched twig;
- 3 flat pebbles;
- a simple pencil;
- acrylic paints;
- rubber glue.
If the tree was cut by dad or grandpa, it must first be sanded. Ready-made saw cuts can be purchased at craft and hobby stores. On the cut, mark with a pencil the place for the branch at 1/3 level from the bottom edge. The twig is smeared with glue and glued.
Using a pencil, you need to draw branches with leaves on top or on the sides. Paint with acrylic paints. Make birds out of pebbles. To make the craft look brighter, the birds can be covered in different colors: yellow, gray, white.
When the layer is dry, paint the eyes and nose in the form of a triangle in black, using orange. Glue the birds as if they were sitting on a branch.
Microorganisms
Microorganisms
Microorganisms can rightfully be considered the first living beings on the planet. They originated long before the appearance of humanity and even animals. This is the longest living form of life.
Microorganisms originated millions of years BC, however, having come such a long way, they are still the most common forms of life. They can be found in every ecosystem. Microorganisms are microscopic single-celled creatures found absolutely everywhere. They cannot be seen with the naked eye, but a microscope is used to study them. Among the wide variety are bacteria, fungi and viruses.
The survival rate of microorganisms is simply colossal - they do not care about almost all environmental conditions. These creatures can be found in hard rocks. The main feature of microorganisms is intensive reproduction in favorable conditions. Genes are transmitted horizontally - they do not need to pass on genetic data to descendants to spread their influence.
Development occurs thanks to other living beings. This factor is decisive in any habitat. Some types of microorganisms survive even in the vacuum of space.
There are dangerous and beneficial microorganisms. Thanks to the latter, life on the planet develops, but the harmful ones only worsen the situation, destroying everything around. Sometimes harmful microorganisms are beneficial - some viruses can cure serious illnesses in people.
Interesting: Why do the seasons change? Description, photo and video
Crafts made from stones
Flat pebbles painted with acrylic paints look very colorful.
With children of preschool and younger school age, you can make simple ladybugs, berries, or simply paint stones with different patterns (dots, spots, stripes), and older children will be able to depict an owl, a cat, a house, and can cope with more complex crafts.
In order for the paint to stick better, it is recommended to first coat the stone with a layer of PVA glue diluted in water 1:1; such a primer will ensure a more even application of the paint. The finished product, when the paint has dried, is varnished (do it together with adults).
Materials:
- pebbles;
- acrylic paints;
- brush;
- PVA glue for primer;
- varnish (for fixing).
Ladybug
The top of the stone is covered with red paint. After drying, it is turned over and the “belly” is painted over with black. On the back, draw a semicircle in black and paint over the head, draw a line of wings in the middle and place the spots symmetrically.
Crafts from chestnuts
Chestnuts are universal in use, like cones and nuts. The difficulty is that they have a hard shell and to make beads, insects (spider, beetle, ant, caterpillars), figurines of men, horses, you will need the help of adults to pierce holes with an awl.
Mushroom clearing
Materials:
- chestnuts;
- plasticine;
- cardboard, wicker plate or lid from a small box;
- dry grass, leaves, pine needles.
Chestnuts, both in color and shape, resemble the caps of boletus mushrooms, strong, shiny mushrooms that grow in whole families in the grass. Make thick legs from white plasticine and attach them to the gray base of the nut.
Place the mushrooms in a clearing, which is sprinkled with grass, pine needles and dry leaves. If you don’t have them at hand, you can make an impromptu clearing on cardboard, which is covered with plasticine on top. Mushroom stems can be surrounded with plasticine “grass”.
Crafts from leaves and seeds
In this category, applique takes 1st place, which can be designed simply on paper or cardboard, or you can make a painting or panel.
Applique meadow
Materials:
- black velvet paper;
- dried leaves;
- straw;
- ash lionfish;
- Dill seeds;
- dried cereal panicles;
- PVA glue;
- scissors;
- Frame.
The sheet is positioned vertically. The composition is being thought through. Using glue, cereals, straws and dried leaves are glued on, imitating grass in a meadow. Daisies are made from ash tree lionfish. From dill seeds - herb inflorescences.
Above the meadow is a butterfly, the body and head of which are carved from leaves, and the wings are birch and linden leaves; tendrils made from blades of grass.
It’s good if the leaves are of different colors: yellow, orange, red. But it also looks stylish in shades of yellow. The picture can be placed in a frame under glass - why not an original gift in eco-style?!
Crafts from acorns
These nuts do not have such a hard shell as walnuts and chestnuts, which makes them suitable even for making jewelry.
Beads
Materials:
- acorns;
- ready-made wooden or plastic beads;
- needle;
- strong thread;
- scissors.
Making beads will be interesting for a girl of 9-10 years old, when she already has the skills to handle a needle. You need to thread a thread (preferably a longer one) into a needle and start planting acorns, preferably across, alternating with beads. When the string of beads reaches the desired length, tie the ends and trim.
Three piglets
Materials:
- acorns;
- moss;
- branches;
- matches;
- plasticine;
- pruner
The craft looks like this: on a moss meadow there is a house made of branches and plasticine, and next to it are three pigs made of acorns. Each piglet has legs made of matches (sulfur heads - “hooves”), ears, a snout and a tail made of pink plasticine. The eyes are black.
The caps of acorns can be used as mushroom caps; all that remains is to mold them into white or yellow legs and place them around the clearing. The fairy tale plot is ready!