Why is sunshine produced?
We all strive to decorate our house or apartment. And children are very drawn to all sorts of cool things. Then parents and children develop objects for play in the form of a luminous miracle.
Paper sun patterns can enhance any room. Little children often play with them and wear them as flutes on their clothes. It happens that you need to attach a sun even to a school jacket, backpack, or bag.
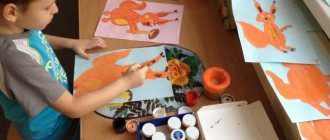
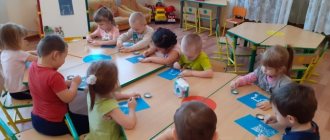
Finger painting
As I already said, we started painting with finger paints around the age of 1 year. And they did it in the bathroom. Then we switched to paper.
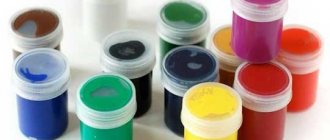
Finger paints are safe and do not require the use of water. You can replace them with gouache.
The simplest thing you can do is draw dots with your fingers:
- grains for birds, peas;
- apples, berries, cones, balls for the Christmas tree;
- watermelon seeds;
- raindrops, snow, animal tracks;
- spots for giraffe, ladybug, leopard.
You can draw dots with your fingers using ready-made templates.
DOWNLOAD TEMPLATES for finger painting in one file.
And of course, let the baby smear the paint all over the sheet with his fingers and palms.
From a disposable plate
When thinking about how to make a sun from scrap materials, you can turn to a simple way of creating crafts from a plastic plate and paper applications.
To make it you will need: a plastic plate, sheets of colored paper, napkins, glue, scissors, colored pencils.
The procedure for creating crafts step by step:
- Place the child’s palm on a sheet of colored paper and trace it. Do this 5-7 times. You can use not only the hand of one child, but also the hands of different children or family members.
- Cut out the palms. Also cut out a circle from colored paper.
- Draw the face of the sun on the circle.
- Glue the palms to the plate, attach the face on top.
- The craft is ready. Alternatively, you can use compressed yellow napkins rather than your palms. Then the sun will turn out fluffy.
Possible subtleties
In order to get irresistible beauty, you have to think carefully. After all, to do this you need to somehow embellish your product in an original way. A photo of the sun craft will help in this process.
There is a huge amount of product design available on the Internet. You can give preference to any of them that you like the most. There are many people who come up with their own options for the design and decoration of their trinket.
Society is always chasing something, trying to do things, satisfy personal needs. Favorite activities appear in the role of an assistant. The most important thing is attention, patience, free time. It is important to be able to manage talent. Individuals must remember this.
From threads
A sun made from threads will lift everyone's spirits and become a cheerful decoration for any occasion. This craft can be used as a heating pad for a teapot or as a hot stand. To work you will need yellow and red yarn, cardboard, scissors, glue, and beads for the eyes.
Instructions for creating a sun from threads:
- Create a base from cardboard. This is a rectangle, slightly wider than the radius of the sun.
- Wrap the threads around the rectangle in a fairly dense layer.
- On one side, thread one thread under the threads. This can be done in advance. Pull the thread and tie.
- Cut the threads from the other end of the cardboard. Remove the cardboard and arrange the threads in a circle. Tie the ponytails in a circle.
- With the second tier, tie the ponytails of the sun from the adjacent ponytails of the first tier.
- Use red yarn to make a smile and a nose. Form eyes from beads.
Advice. You can weave wire into the sun - then you can hang it. You can also starch the threads after shaping the toy.
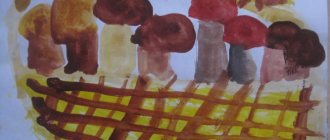
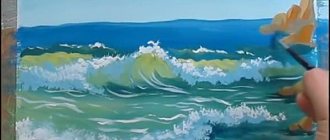
Dawn
In ancient religious teachings, it was customary to consider the sun to be a god who rides across the sky every day on a shining celestial chariot. Some believers, such as the worshipers of Amun-Ra in ancient Egypt, even performed rituals designed to awaken or revive the sun after its daily death - sunset. Accordingly, dawn is a symbol of birth and new beginnings. Due to its metaphorical nature, the appearance of the sun over the horizon has always inspired writers and artists. Dawn is a common feature in works of art and photographs. And, for example, beach sunrises, such as the one presented in this drawing lesson, are used in advertising to promote vacations in the tropics and exotic places.
It's actually not difficult to figure out how to draw a dawn. A sheet of paper is enough for this. You also need pencils, colored markers or paints to color the drawing. You can draw a sunrise in five minutes.
Made from plasticine
Plasticine crafts will allow children to dream up their imaginations and make original, sculptural products. For this you will need materials: cardboard for the base, multi-colored plasticine, a plasticine knife, beads and paper.
The procedure for creating crafts:
- First make a yellow ball. Form a pancake out of it - this will be the base and the face of the sun.
- Make sausages from orange and red plasticine and flatten them. These will be long rays. The red rays should be shorter than the orange ones.
- Create oblong, voluminous ovals from yellow plasticine. Flatten them and form them into petals. These will be wide rays.
- Place rays of different shapes on the base around the face of the sun.
- Check the composition of the rays and fix them on the base. Use a knife to form veins on the rays.
- Use beads and paper to make eyes on the disk, and use a plasticine knife to cut out small details and a smile.
From felt
The sun is easy to make from felt. This material can be used to create a real theater that will illustrate how the sun moves over the Earth throughout the year. Children will be able to clearly understand and even explain to their younger brothers and sisters why the seasons change.
To create a theater you will need cardboard, felt, scissors, thread and a needle and felt-tip pens.
The procedure for creating the Theater of the Sun:
- Stretch a piece of felt onto a cardboard base.
- Using felt blanks, cut out: different types of sun according to the seasons, grass, flowers, fruits, berries, autumn leaves and snowdrifts.
- Sew eyes and tongues on the suns, finish drawing the faces.
After this, you can create scenes with the sun and seasons.
From plastic bottles
A sun made from plastic bottles, plastic containers and other waste materials will look interesting in a garden plot or school yard. To do this you will need a lot of plastic bottles, oil paints, cardboard, glue and scissors.
The procedure for creating a sun step by step:
- The bottles must be completely painted yellow. To do this, they can be lowered into a bucket of paint. The bottles must be completely dried.
- Cut a strip of cardboard 70-100 cm long and 7 cm wide, form a circle from it. Paint it completely yellow. Paint the strip yellow.
- From a sheet of whatman paper, make a drawing of a circle with a diameter the size of a cardboard ring, and draw stripes around the perimeter. Cut out the circle, color it yellow and draw a face based on the sketch. Glue the circle to the ring using strips.
- Glue the bottles with corks to the cardboard along the perimeter of the ring.
The volumetric garden sun is ready.
Stages of work
The masterpiece of the radiant luminary is presented in different ways. But in any case, first everything necessary for the work is prepared, a sketch is made, then everything is put together.
If you make the sun with rays on cardboard, you will need an image and color. You can insert some rhinestones, threads, ropes, stones.
If the sun is made of fabric, then you need to take a sheet on which a circle is drawn. You can give it arms and stripes. Then you have to fold it in half to form a shape.
On the second one, you need to draw another circle, cut it out, having previously installed a hole. Then everything is connected with glue or threads.
Everything is sheathed, there is empty space inside. Add cotton through the hole created and sew it up. Our creativity is ready! But if you wish, you can add eyes, a smile, a tongue, a nose, or write something on the rays.