Interesting ideas and design schemes
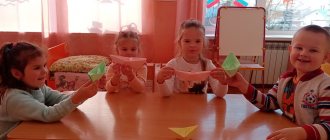
For older preschoolers, the greatest pleasure comes from activities that contain a play element. To maintain interest in paper design among students, it is necessary to select unusual topics for classes, use a game form of learning, and select objects for design that will be suitable for children’s play activities.
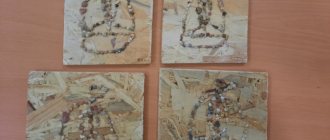
Photo gallery: templates for paper construction
Sample
Sample
Sample
Sample
Sample
Sample
Sample
Sample
Sample
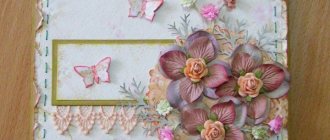
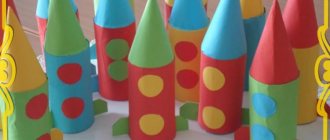
Photo gallery: examples of ready-made paper crafts
Example of paper construction Example of paper construction
An example of design from paper An example of design from paper with additional drawing according to plan
An example of a paper design using the origami technique (applique)
An example of a paper design using pasta to complete the design
An example of designing from paper using the origami technique and simple drawing. An example of designing from paper. An example of designing from paper. Using crafts in the game
Options for completing the task
Example of paper construction
Example of paper construction
Example of paper construction
Example of paper construction
Example of paper construction
Example of paper construction
Example of paper construction
An example of a paper design using the origami technique
An example of designing from paper using drawing techniques An example of designing from paper using drawing techniques
Video: paper construction lesson on the theme “Gift for Dad”
Video: paper art design in kindergarten
Video: open lesson on paper construction on the theme “Aquarium”
Video: paper construction on the theme “Year of the Rooster”
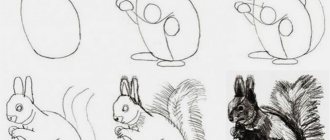
Zadachi:Teach children to fold paper in different directions, giving it the shape of a dog.
Continue to improve children's skills to make correct, clear folds, and fold a square diagonally.
Strengthen the technique of performing the basic form “simple triangle”,
consolidate the ability to use the tearing technique when decorating crafts.
Expand knowledge about the world around us, that people need friends.
Develop imagination, creativity, and ingenuity.
Develop fine motor skills of hands in the process of work,
continue work on audio automation L.
Cultivate accuracy in work and love for pets.
Material : square sheets of paper 10x10 cm in two colors: white and brown, black and white paper, scissors, glue, brushes, dog toy, basket, clothespins, hearts.
Preliminary work: reading stories, poems, asking riddles, looking at illustrations, encyclopedias.
Integration: NGO “Cognition”, NGO “Artistic Creativity”.
Methodology: communicative, activity-based, problem-search.
GCD move:
Q : Children, what time of year is it now? (Winter)
V - l: Let's speak a pure phrase, emphasizing the sound L in our voice. Everything is white, white, white.
There was a lot of snow.
These are fun days -
All on skis and skates.
V— l: The day has come. I will smile at you, you will smile at me, and smile at each other and think: how good it is that we are here together today. We are calm and kind, friendly and affectionate. We are healthy.
Q : Take a deep breath and with a sigh forget yesterday’s grievances, anger, and anxiety. Breathe out of yourself the freshness and beauty of white snow, the warmth of the sun's rays, the purity of rivers, the love of animals.
Q : Children, do you have pets? Do you play with them? (Yes)
V - l: And today an unusual guest came to us, he is very sad, because he has no one to play with. Guess who it is?
Lies - silent:
If you come up, we’ll grumble. Who goes to the owner; She lets you know.
Vs : That's right, it's a dog. Look how sad she is. How can we help our guest? (Play)
V - l: But he will go home and will be left alone again. How else can we help him?
Children : He needs friends.
V - l: Yes, that's right. One is not bored when there are many friends.
V— l: Look what a friend I made to our guest. He is beautiful, like a real dog. Do you want to learn how to make one? (Yes). Now I will teach you how to make a paper dog.
V - l: Get comfortable around me and watch carefully how I will do the dog and learn.
Q : Let’s take a sheet of paper to work with. What shape is it? (square).
Q : I bend our square diagonally in half, matching the corners and sides, and smooth the fold line well with my finger. What line is this? (this is the fold line).
Q : What shape did our leaf become? (Triangular). Mark the middle of the large side by folding the top corners and pinching the fold point. What is this point called? (bending point).
In - l : Place your finger at the bend point, bend the upper right corner down - forward. We do the same with a different angle. Let's turn our craft over. We bend the top corner down towards ourselves, holding the sheet of paper with the other hand. Bend the bottom corner up. What did we get? (muzzle).
V - l: Now I will show you how to make the torso. Take a piece of paper and make a “basic triangle” out of it. What triangle? (basic) How do we do it? (fold the sheet diagonally).
B - L: Bend the lower right corner to the left to the middle, put a finger and bend it back. What happened? (torso). We glue them together. So I got a dog. But is she missing something? What? (eye, nose, mouth). You will do this yourself.
V— l: You looked and listened to me for a long time and were probably very tired. Let's take a little rest.
Physical education for a minute.
Once - bend over, straighten up. Two - bend down, stretch.
Three - clap your hands three times. Three nods of the head.
Four arms wider Five, six - sit down quietly.
V— l: Now, now you try to make the dogs yourself. Come in and sit at the tables. You have papers of different colors. Think about it and choose what kind of dog you will make: white with black spots - a Dalmatian; or brown with white spots - St. Bernard. So, everything is clear to you, you remember everything. But before you get started, let's stretch your fingers.
Finger gymnastics.
On a visit to the big toe, They came straight to the house:
Index and middle, Nameless and last Himself, little finger - baby, Knocked on the door. Together fingers are friends. They cannot live without each other.
Q : Do you remember what I did at first? What then? What we got.
V - l: Let's now glue the dogs to a clothespin and put them in the basket next to our guest.
V - l : Children, look how you turned out? Which dog did you like the most and why? Now I will give you hearts, and you will glue them to the dog you liked.
V— l: Well, we’ll end our lesson on a cheerful note, with the song “Friendship.”
Abstract of GCD on Construction from paper strips Senior group.
Design from paper strips
Senior group.
Topic: How Ten Handles helped weave rugs
Program content:
Introduce weaving as a type of decorative and applied art and weaving as a universal design technique. Arouse interest in mastering the method of weaving from ribbons or strips (optional) for the manufacture of original household products (rugs, napkins, bookmarks). Develop dexterity, accuracy, eye, sense of rhythm. Cultivate a love for your home, a desire to bring man-made beauty and comfort into your home life.
Materials, tools, equipment.
Demo material
:
card No. 2
from the set “We design in the spring”;
wickerwork (hat, bag, napkin), several rugs made by the teacher and parents from different materials (paper, ribbons, braid, straw, twigs), pieces of gauze or burlap for examination, garden net. Practical material for children to choose from
: forms for weaving - rectangular and square sheets of thick paper or cardboard with cuts
(see picture on page 111)',
laces, ribbons, braid, ready-made strips of paper, cardboard, newspapers, straws, colored paper with marks for cutting into strips, flexible twigs (for example, willow branches); scissors, glue, colored paper and paper silhouettes (flowers, birds, butterflies, leaves), decorative buttons for decorating wicker rugs.
Basic concepts and methods of activity.
An idea of weaving. The concept of the whole and its constituent parts; the ability to identify an algorithm as a pattern in the alternation of any elements or their characteristics; ability to cut paper into strips (by fold, mark and by eye); weave strips according to a pattern or condition, following the algorithm for a beautiful pattern.
Preliminary work.
Introduction to weaving as the oldest form of decorative and applied art. Creating a collection of wickerwork (baskets, bags, bags, belts, straps, bracelets, hair decorations, etc.) with the help of parents. An exercise in cutting paper into strips along a fold, a mark, or by eye (preparing paper strips for weaving).
GCD content
Before the educational situation begins, the teacher tells the children about weaving and invites them to examine a small piece of coarse, rare weave fabric. Having interested the children, he asks them to take their jobs. He asks if he was able to see the intertwining threads with the help of a magnifying glass. Draws children's attention to pieces of gauze lying on the tables. Children are convinced that the threads in the gauze are also intertwined, forming a visible mesh. Then the teacher informs the children that thin threads can be intertwined with a special device - a loom. But if instead of threads you take laces, ribbons, braid, strips of paper or cardboard, then you can use them to weave rugs and blankets for toys, napkins, belts, and collage paintings for your home. Today we will weave beautiful rugs. And the Ten-Handed doll will help us.
The teacher shows the children card No. 2
(see “Materials...”), suggests looking at the rugs and explains that they are all made from different materials - paper, fabric, straw, plasticine, but the method of making them is common -
weaving.
Introduces weaving technology using the example of a paper rug.
- We prepare the base for the rug - bend strong paper or thin cardboard in half, make cuts and open it. We select multi-colored ribbons or paper strips.
- We take one ribbon and begin to weave, threading it alternately through the warp strips: under/over under/over... Then we take a ribbon of a different color and thread it side by side, but only in reverse - over/under, over/under...
- We continue to weave, alternating ribbons to create a beautiful pattern. We secure the ends of the ribbons or strips with glue.
The teacher invites children to choose materials of their choice (paper, cardboard, ribbons, braid, laces, plasticine, straw) and weave a rug. Children construct rugs using the “weaving” method, admire them, and show them to each other. This work continues in individual cultural practices.
Understanding the result.
Children master the “weaving” technique and transfer the method to new situations (to new material). And they are happy that they turned out such beautiful rugs - cheerful, elegant and cozy.
Independent activity.
In the afternoon, children decorate the rugs as they wish: glue flowers, insects, leaves, tie or glue buttons, tie bows, etc. The teacher helps set up the exhibition for parents.
Integration of activities.
Children find a place for their products in the play and household space: they lay out rugs in the toy corner, cover tables with them; They hang them up like collage paintings and give them to parents. They practice counting according to conditions (for example, count only the red stripes, who has the most, etc.).
Senior group. Senior preschool age. Children 5-6 years old
Children's master class on making a three-dimensional applique “Bouquet for Mommy” from paper for older preschoolers
Dear colleagues, I bring to your attention a children’s master class on making a three-dimensional applique “Bouquet for Mommy”
. This work can be done together with children of older preschool age. Target . Making a gift for mom. Tasks . Learn to make voluminous flowers from...
Master class on paper origami “Frog-wah” for children from 5 years old
The frog model is very popular in origami. There are very realistic complex models, there are jumping frogs that can jump; children love them very much. The kids and I learned how to make frogs that flap their mouths. We would like to share a master class on making a frog -...