Drawing on a wet sheet outline of a drawing lesson (senior group) on the topic
Program tasks:
Teach children to draw in an unconventional way “on a wet” sheet.
Learn to convey composition in a plot drawing.
Develop multidirectional, fused, smooth movements of the hand, visual control over them, imagination, fantasy.
Instill in children the desire to achieve results.
Material:
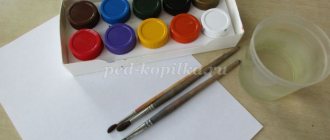
A white sheet of thick paper, watercolor paints, a foam sponge, brushes (No. 6 and No. 3), napkins for each child.
Methodical techniques:
Demonstration and explanation by the teacher.
Game situation using literary words.
Observing children's work.
Analysis of work by the teacher and children.
Preliminary work:
Reading the fairy tale by A. S. Pushkin “The Tale of the Fisherman and the Fish”; viewing illustrations for this work; looking at pictures and photographs depicting marine life.
Choose the right paper.
As mentioned above, paper texture plays an important role when you write wet on wet. Hot pressed paper (smooth texture) has less absorbent, so colors will float on the surface longer.
Cold-pressed paper (semi-smooth texture) and rough paper (dry without wringing), on the other hand, absorb water much faster.
Preview:
Teach children to draw in an unconventional way “on a wet” sheet.
Learn to convey composition in a plot drawing.
Develop multidirectional, fused, smooth movements of the hand, visual control over them, imagination, fantasy.
Instill in children the desire to achieve results.
A white sheet of thick paper, watercolor paints, a foam sponge, brushes (No. 6 and No. 3), napkins for each child.
Demonstration and explanation by the teacher.
Game situation using literary words.
Observing children's work.
Analysis of work by the teacher and children.
Reading the fairy tale by A. S. Pushkin “The Tale of the Fisherman and the Fish”; viewing illustrations for this work; looking at pictures and photographs depicting marine life.
Q. Today, guys, in our drawing lesson, the paints will not behave quite normally, they will blur, go beyond the scope of your drawing. The extraordinary lightness of colors, obtaining new colors directly from the drawing, will make your work surprisingly interesting. And we will draw “on a wet” sheet.
Q. I’ll tell you and show you what it is now.
The main tool today will be a sponge. We will wet our sheet with it. The sheet is wetted with quick movements (teacher demonstration), the hand moves freely. And then paint is applied “on the wet” sheet. The brush lightly touches the sheet, the paint lays down beautifully, forming magical shimmers.
Q. Guys, do you want to feel like wizards?
Q. So, if you and I want to feel the magic, then we need to say magic words that will make our drawing magical, amazing and fabulous.
The little star in the sky sways meekly
(arms raised up, fingers spread wide, arms swaying slightly)
The boat is rocking in the white fog,
There are wonderful colors in that boat
(arms down, slightly apart, body swaying left and right)
Fables and fairy tales whisper in it
(hands to lips, head turns left and right)
The wind gently rocks the boat
He invites us to the magical kingdom
(children sit on chairs, at tables)
B. Now I’ll read you an excerpt from a fairy tale, and you can guess it.
“There lived an old man with his old woman, by the very blue sea”
D. This is a fairy tale (children's answers)
V. Correct, listen further:
They lived in a dilapidated dugout, the old man caught fish with a net, and the old woman spun her yarn. The grandfather was kind, and the old woman was calm, and they had peace and harmony in the house. And nature was calm: blue sky, calm sea. And in this calm sea lived a kind, magical “goldfish”. But she did not live alone.
Who else do you think lived in her magical land - the underwater kingdom?
V. Well done! Guys, what paint will we use to paint a quiet, calm sea?
D. blue, blue - (children's answers)
D. orange, yellow - (children's answers)
Q. Look how I will draw the sea. I wet the sheet with a sponge with quick movements, from left to right. With a brush, from above, I sweep over the entire sheet. Try it!
And with the help of a thin brush we will paint the sandy bottom, algae, and maybe one of you will draw a “goldfish” or its fairy-tale palace.
(children do the work, the teacher observes the drawing, and if the children have difficulty, conducts an individual demonstration)
(when all the guys have finished drawing, lay out the leaves on one large table, you will get an “underwater kingdom”)
Q. Guys, look what a huge calm blue sea we have. And the inhabitants of the kingdom move calmly in the water among the green algae. And because the sea is peaceful and calm, there are a lot of goldfish, they are all so bright and beautiful. When I look at your drawings, I feel that only goodness triumphs in this magical land.
Progress of the lesson:
Educator: guys, what seasons do you know?
Children: winter, spring, summer and autumn.
Educator: That’s right, what time of year do you like best and why?
Educator: guys, I agree with you, all seasons are beautiful, each time is beautiful in its own way. What do you think is the name of the time of year in nature when nature awakens from winter sleep and lives in anticipation of warmth and sun?
Educator: That's right, spring! Guys, listen to what an affectionate and gentle word - spring! Something joyful and restless sounds in this name! Yes, spring brings the joy of life to everyone, nature awakens from sleep.
I want to read a poem about spring, and you close your eyes and imagine what I will read about...
The snow is still white in the fields,
And in the spring the waters are noisy -
They run and wake up the sleepy shore,
They run and shine and shout...
Drawing using the “wet on wet” technique
Valentina Dedova
Drawing using the “wet on wet” technique
Drawing in unconventional ways is a fascinating, fascinating activity that allows you to introduce not only children, but also adults to creativity.
• landscape sheet for drawing or white cardboard ;
• squirrel tassels of different sizes;
• a glass for water.
Both older and younger preschoolers can draw on a wet
The album sheet is moistened with a thick painting brush or sponge . Draw on wet sheet with light touches of the brush. When you touch a brush with paint to a wet sheet , the paint should spread approximately 1-2 centimeters in diameter around the brush.
If the paint does not spread, it means that the sheet was not wetted enough. If the paint spreads very much, then excess water needs to be removed with a dry brush or sponge.
When drawing on a wet sheet, at the initial stage you need to give the child the opportunity to tinker with the paints, feel the pressure and see the result.
Has the blot spread? Smile! It can always be turned into something interesting or funny.
This method of working allows you to obtain light, transparent colors with soft transitions. You can draw on a wet sheet whatever your child’s imagination dictates.
I suggest drawing together : sun, rain, sunset.
When the sheet dries a little, you can finish drawing a small plot .
Consultation for parents “Using non-traditional drawing techniques in kindergarten and at home” Drawing in non-traditional ways is a fascinating and fascinating activity for children that surprises and delights. Plays an important role.
Unconventional drawing techniques Drawing in unconventional ways is a fascinating, fascinating activity that surprises and delights children. Basic principle of operation.
Source
Lifting of paint from the surface of the paper.
As long as the paper is still damp, you can easily make adjustments if something goes wrong. Just blot your brush thoroughly and lift the paint off the paper. In some cases, it may be necessary to change the water to clean water before lifting. The trick here is that a wet brush absorbs more water than it releases, so it will pick up wet pigment from the surface of your painting.
Also, you can make some adjustments when the paper is dry, but there is a chance that your painting will lose its freshness and look overloaded.
Note: Pay attention to the pigments you use: some are harder to lift than others.
Lesson notes. Drawing on wet paper “Autumn Landscape” (preparatory group)
Karpovskaya Svetlana
Lesson notes. Drawing on wet paper “Autumn Landscape” (preparatory group)
Summary of drawing lesson " Autumn Forest "
for
the preparatory group
Topic: Drawing on wet paper “ Autumn landscape ”.
Goal: To introduce children to the new wet -on-wet drawing .
Educational: Learn to work at an intensive pace, without letting the sheet dry out, as this is important for the “ wet on wet drawing . Improve the technique of painting with watercolors;
Developmental: exercise students in creating a color composition, conveying impressions of autumn ;
Educational: to cultivate interest in knowledge of nature and display of ideas in visual activities.
Form of the lesson : Practical lesson .
— Verbal (conversation, explanation, poetry)
— Visual (slide show)
— Practical (completing a practical task)
— Game (sedentary game “Guess what kind of leaf?”)
Equipment and material: White sheets of paper , brushes of different sizes, watercolor paints, jars of water, rags, paintings depicting autumn , projector, audio recording with works by P. I. Tchaikovsky “Seasons”, painting by I. I. Levitan “Golden” autumn ".
Seize the right moment.
If you apply paint when there is a sheen to the paper when it's wet, the colors will spread over a large area of your painting, creating vague shapes. When you need to make a soft, but not too diffuse brush stroke, simply wait until the surface is not glossy, but still damp and cool to the touch.
The water/pigment ratio is also very important. In the picture above, the first stroke was applied on shiny wet paper. The second one was made when the paper was no longer glossy, but the paint on the brush had a lot of water in it, so it spread considerably. The third brushstroke was done at the same time, but with more pigment.
