How to make a traffic light with your own hands?
If you have a plumbing pipe lying around at home, and you also have shoulder straps, a cap, and a policeman’s baton, then you can make a character like this.
If you do not have such traffic police officer items, then make them from colored paper and cardboard. So, to implement your plan, take:
- plumbing pipe;
- wooden stick;
- acrylic lacquer;
- whistle;
- acrylic paints;
- cap;
- shoulder straps;
- a rod, and in the absence of this, colored paper and cardboard.
To work, you need tools such as a jigsaw and drill.
Cut the pipe in half crosswise. Draw with a simple pencil where the traffic light will have facial features, red, yellow and green circles. Paint it all with paints of the appropriate colors. Make two holes with a drill at the level of the character’s shoulders, insert a wooden stick here, and glue the shoulder straps. Place a cap on top of the pipe. Place a whistle on one hand of the character and a wand on the other. Here's how to make a traffic light. If there are no ready-made attributes, then glue black strips onto white cardboard, roll this blank into a tube, and glue the sides from the large edge. You will have a wand. Shoulder straps are also easy to create; we cut them out of blue cardboard. If we talk about how to make a traffic light, the easiest way to do this is to cover a rectangular cardboard box with dark colored paper and glue a red, yellow and green circle on each side.
If you have a dairy box left over, this is just what you need. Cover it with black paper and attach circles of the corresponding colors to the sides. To make your child better understand that you should never cross the road at a red light, draw a sad smiley face on a circle of this color. The yellow one will have a straight mouth, while the green one will have a smiling mouth, which means an invitation to move. Hide the top of the box under a cap, which is cut out of colored paper, its parts are glued together. If there is no such container, you can make a traffic light from a sheet of cardboard. The next photo shows how it should be cut and what dimensions it should be. Straighten the cardboard box, cut it out, cut out the circles. Glue black paper onto cardboard and cut out red, yellow and green squares. Glue them onto a dark base. Roll it up. Cut and glue a handle from cardboard, attach it to this roll. Insert this blank inside the glued traffic light. By turning the handle, you will change the color, thereby checking whether the children have correctly mastered the lesson about the rules of the road. The next traffic light is made of very interesting materials, for this one take:
- three laser discs;
- three juice caps;
- glue;
- lace;
- scissors;
- paints and brushes.
Let your child paint the juice caps the right colors.
If you have yellow or green ones, you don’t need to paint them. Glue these blanks to the center of the disks and connect the elements. Attach a cord of the required length to the back at the top, after which you can hang the craft. If you want to make a traffic light so that its elements are voluminous, then use the origami technique for this.
To do this, cut squares of green, yellow and red paper with sides of 5 cm, from them you need to twist the parts that are glued together. The finished balls need to be attached to the stand, after which the work is finished. A traffic light made from plastic bags is very interesting. For this craft you will need:
- garbage bags in red, yellow and green colors;
- cardboard;
- scissors;
- colored paper.
How to make pompoms is shown in detail in the following master class.
- To do this, first cut off the handles from the bags.
- Then, starting from the outer corner, cut into a long strip, as shown in photo number 2.
- After this, you need to wrap this tape around your palm or around two identical cardboard circles, in the center of which there is a lace.
- Now the coils on the outside are cut through. If you wound the ribbon around your hand, then tie the resulting blank in the middle with a piece of plastic bag, tighten it, and tie it.
- To make a traffic light, you will tie these loose laces, thereby connecting the structure. You can glue pens and a staff from cardboard to the exhibit, eyes from colored paper, and make a cap from the same material.
If mothers know how to knit, they can make this traffic attribute from threads.
You need to knit a black rectangle with knitting needles, wrap it around a kefir or milk bag, sew it on the side, top and bottom. To fit the bottom and top, knit rectangles the same size as these sides and sew them to the main fabric.
Crochet the circles and attach them in place. Cardboard and tinsel will also make a wonderful traffic light.
Notes on nodes in the preparatory group for modeling
Summary of a lesson on sculpting (plasticine) in the preparatory group on the topic: “My friend the traffic light” Purpose: To develop the creative activity of children in the process of sculpting using the technique of plasticine.
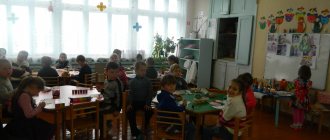
Tasks: - consolidate sculpting techniques: pinching, smearing evenly over the entire surface, flattening. — develop the ability to decorate in different ways: drawing additional patterns in a stack. — cultivate a desire to implement and comply with traffic rules; - consolidate ideas about traffic lights and knowledge of traffic signals (red, yellow, green). - evoke a feeling of joy, satisfaction from the created image. Material: Demonstration: a ready-made sample of a traffic light from the teacher, pictures with images of a traffic light. Handout: - yellow, green, red, black plasticine, - stacks, boards, napkins, cardboard silhouettes of traffic lights. Preliminary work: Conversation “Road signs”; Group traffic lessons; Didactic games: “Cautionful pedestrian”, “ABC of road signs”, “Smart cars”, dominoes “Transport”. Reading fiction on the topic of traffic rules; Familiarity with road signs in everyday life. Equipment: traffic light model, red, yellow, green circles, plasticine, sticks, musical accompaniment - the song “Traffic Light”. Progress of the lesson: 1. Organizational moment Educator: Guys, a letter has arrived in our group. Let's see who it's from. It turns out the letter is from Dunno. (The teacher reads the letter) Hello, dear children. I'm in trouble. I never learned the rules of the road, I thought that I wouldn’t need them. I was going to visit you. But the Wizard of Road Science sent me to the land of Confusion. Help me get out of here. I promise that I will definitely learn all the rules of the road. (Dunno). Educator: Do you agree to help Dunno return? What do you think is happening in the country of Confusion, where there is not a single road sign? (children's answers) 2. Main part Educator: To help Dunno return, you and I must complete the tasks of the wizard of road science. 1.Task What groups is transport divided into? -What applies to water transport? -What do we classify as airborne? -name the ground transport? -What applies to underground transport? 2.Task Game “Allowed - forbidden” -Play and jump at the bus stop... -Talk loudly on the bus..-Give your seat to older people... -Lean out of the window... -Behave calmly on the bus... -Push... -Distract the driver... -Pay the fare ... -Littering... -Letting go ahead... -Lean on the door... -Hold on so as not to get bruised... -Prepare to leave in advance... -Well done! 3.Task Guys, now I’ll tell you riddles, but the riddles are not simple, but about the rules of the road: 1. Three multi-colored circles Flashing one after another. They light up, blink - They help people (traffic light) 2. What kind of horse, all striped, sunbathes on the road? People drive and walk, But she doesn’t run away (zebra) 3. She will tell the driver everything, and will indicate the correct speed. By the road, like a beacon, Good friend - ... (road sign) Educator: That's right, children. To help Dunno get out of the Land of Confusion, you and I need to remember what a traffic light is for. Let's look at the layout of the traffic light: This is the same traffic light. This is what our conversation will be about. Now we'll look at what the lights are for. Conversation: The teacher points to the red traffic light and asks the question: What should pedestrians do when the traffic light is red? Children: Stand Teacher: schoolfiles.net
How to make a traffic light from plasticine.
Content
If the time has come to teach your child the rules of the road, then it is best to do this in a playful way. And ordinary plasticine can help you with this, because you can make all kinds of road signs from it, and most importantly, a traffic light. This is what we will do in today's lesson. This kind of work is very simple, so you can safely choose a traffic light if in kindergarten teachers ask parents to make a model of a busy street. So, let's get down to useful and interesting creativity.
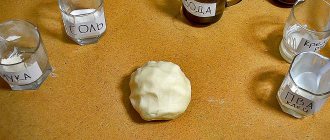
1. The colors for this craft are obvious: black, red, yellow and green. Together with your child, choose the appropriate blocks from the set. You also need to think about the mounting in advance, because most often the traffic light is placed on a pole. Instead, you can use an old ballpoint pen, a lollipop stick, or a pencil.
№1
2. Make an oblong parallelepiped from black plasticine - this will be the frame of the future traffic light.
№2
3. Next, prepare red, yellow and green plasticine. If you are planning to create a four-way traffic light, then you should take 4 balls of each color.
№3
4. Flatten the balls with your fingers into round cakes.
№4
5. Start attaching the round pieces to the black frame. The overhead lights must be red; they prohibit the movement of cars.
№5
6. Next comes a yellow warning light.
№6
7. And finally, green, which allows traffic to pass through.
№7
8. Attach the traffic light to one end of the prepared rod or pencil.
№8
9. To make it more convenient for your child to play with a new toy, made with your own hands, make some kind of base - for example, a small lid filled with plasticine will do. Prepare a stand and insert the other end of the rod into the plasticine.
№9
10. All that remains is to prepare the visors for each flashlight and attach them to the traffic light.
The final look of the craft.
Now you can safely learn the rules of behavior on the street and traffic with your child.
podelkisvoimirukami.ru