Preparation
Drawing classes allow the child to develop comprehensively
The result of achieving the goals and objectives depends on how thoroughly the teacher prepares for the lesson - this is no secret. And taking into account all the subtleties of the preparatory process plays an important role in this process.
Materials
In the preparatory group, children are already familiar with the main types of drawing materials. That is, they can use
- pencils;
- gouache;
- watercolor;
- wax crayons;
- markers.
This is interesting. Many methodologists categorically deny the possibility of using felt-tip pens in drawing classes in kindergarten, since children cannot use them to convey shades and elementary shadows in an image.
The basis
The A4 format is most convenient for children to use.
As a basis for drawing you can use:
- paper of different thicknesses (colored or printer paper);
- cardboard (thick and thin).
The only condition is that the drawing format should not be larger than A4 if we are talking about individual work. For group assignments, you can use sheets of A3 and even A1 format.
This is interesting. Images on whatman paper are allowed if the teacher takes an active part in creating the overall composition of the work.
Techniques and techniques in the preparatory group
As a task for sketching, children can not complete the entire composition, but only its element
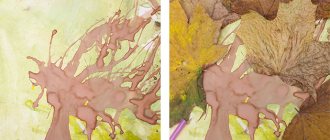
It is assumed that in the preparatory group children already know a number of non-traditional drawing techniques (for example, blotography, when an outline is applied to random spots of paint, or palm painting, when various images are created based on the outline of the palms). However, classical techniques still remain a priority. Among them
- coloring picture templates;
- completing the composition on a ready-made background (for example, a forest background is complemented by a drawing of a hedgehog, squirrel, mushrooms, berries, etc.);
- sketching (this technique is actively mastered in the senior group and practiced in the preparatory group);
- tracing and coloring stencils (in the group the figures depicted are becoming more complex, animals appear with traced contours of fur, small objects in the composition, etc.);
- drawing from life (natural materials are used as nature - branches, stumps, acorns, chestnuts, etc.).
To depict mushrooms and berries, it will be important to use additional drawing, sketching and drawing from life.
Drawing techniques are determined by the fact that children already have clear ideas about the point-boundaries of the image, determined by the idea of the drawing. Available for children 6–7 years old
- any form of painting (small, large details, as well as elementary shadows);
- drawing thin and wide lines in any direction;
- vertical position of the brush when drawing thin lines and inclined position of the brush for wide lines (when using paints);
- dipping, when a brush dipped in paint is applied to the paper with all its bristles to make a print;
- mixing a watercolor palette to obtain different shades;
- techniques for painting in different positions of the pencil in relation to the sheet.
In a lesson on mushrooms and berries, you can combine all these techniques, depending on what materials will be used.
Photo gallery of drawings made using non-traditional techniques
Using semolina painted in different colors using watercolor or gouache allows you to quickly fill the image with color
Drawing with cotton swabs is a type of blotography where an object takes its shape from a spot of paint.
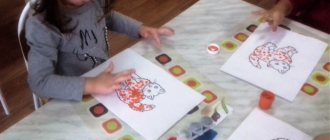
To create this drawing, the technique of fingerprinting paint was used.
How to personalize work?
The implementation of an individual approach is one of the main goals of the educational process in kindergarten. This is easier to do in drawing classes than in others, since the final product is a priori unique. And yet, the teacher can already achieve the goal at the stage of setting the task. To do this, an adult can give the following drawing options:
- present the composition at different times of the day (day, night, morning) or different times of the year, which implies the use of different colors;
- depict a picture from life in different approximations (for example, from close range if the baby has vision problems);
- add one element to a given composition at your discretion and prove the validity of this detail.
This is interesting. To individualize the drawing, you can invite children to add elements of other types of visual activities, for example, appliqué made from natural materials, fabric, or three-dimensional plasticine parts.
Composition options
Drawing, as already mentioned, can be done individually and collectively. In the latter case, it is better if these are elements (for example, pine, squirrel, mushrooms, etc.) made on separate sheets and then placed against a general background . Alternatively, children can color individual blocks of the overall composition. As for the thematic variety of using images of mushrooms and berries as a task, this is traditionally an “autumn-winter” thematic block, when kids study natural phenomena, the life of animals associated with the changes of the seasons. You can suggest the following ideas for wording the topic:
- “Supplies for a hedgehog”;
- "Rowan Branch";
- "Mushroom Glade";
- "Amanita";
- “Bullfinches on a rowan branch”;
- “Who hid there under the tree?”;
- “Gifts for a squirrel”, etc.
Motivation
As visual materials on the topic, you can offer pictures of different forest animals that feed on berries and mushrooms
The involvement of children in work depends on how much the teacher manages to interest them in the topic. To do this, you can use a whole arsenal of techniques, combining them depending on the topic and time frame of this stage of the lesson.
Songs
Musical accompaniment of classes allows not only to create a favorable atmosphere in the children's group, but also to present the necessary information in an unobtrusive form, for example, about what edible mushrooms look like. Moreover, you can choose videos so that kids not only listen and sing along, but also perform certain rhythmic movements. In this case, motivation can be combined with physical education.
Video: Example of a video clip for children “Mushrooms and Berries”
Poems
Rhymed lines easily and accurately fit into children’s memory, which is why in preschool education, memorizing poems by heart is almost the main method of consolidating acquired knowledge. For a drawing lesson, poems can be selected separately by type of mushrooms and berries, or in general about the gifts of autumn, for example.
- They walked along the path - they found Borovik. The boletus hid its head in the moss. We could pass it, it’s good that we walked quietly.
- Golden foxes - Curious sisters. They wear red berets, they bring autumn to the forest in summer.
- I walk through the forest, I look at the berries: There is a raspberry on the bush, There is a rowan on the tree, There is a strawberry in the grass, There is a blueberry under the mountain, Klyukovka is on a hummock... - The box is empty!
- - Autumn! Tell me quickly, have you saved anything for the animals? - I will give the bear and wood grouse a lot of berries. And cloudberries, and raspberries, and ruddy rowan. - And for the forest squirrel I have a different surprise: I will give the red-haired baby Acorns, mushrooms and pine cones.
Puzzles
This is a quick and very productive way to get children into the mood for work, since solving riddles does not require much time, and kids listen with pleasure and try to give an answer as quickly as possible.
- This fungus is the son of a birch tree. Whoever finds it, everyone puts it in a basket (Boletus).
- The mushroom is red - dangerous to health (Amanita).
- Yellow-red foxes - they call us sisters (Little Chanterelles).
- Near the stumps and on the lawn We always walk in a flock. Very friendly guys, They call us... (honey mushrooms).
Fairy tales
One of the win-win options to get kids to work is fairy tales. As motivation for a drawing lesson on the topic of berries and mushrooms, you can suggest not just listening to ready-made stories, but coming up with your own (from 2-4 sentences) on a given topic. For example,
- Once upon a time there lived a friendly family of cheerful mushrooms. One day a misfortune happened: the little brother got sick, so much so that he turned green all over...
- A daughter was born to the mushroom king Boletus, and he threw a feast on this occasion. He invited distinguished guests: Borovik and Borovikha, Gruzdya and Volnushka and other mushroom inhabitants...
- Chanterelles grew up in a clearing, bright and orange, and the evil witch Toadstool White lived nearby...
Conversation and visibility
It’s hard to imagine drawing without pictures. Children should see different options for interpreting the image that they have to reproduce. That is, if we are talking about berries, the images should be made from different angles, always with enlargement (for example, individual rowan berries, and not just bunches). And, of course, looking at the pictures should take place during a conversation on the topic.
- How often do you go to the forest?
- What grows in the forest?
- Why are mushrooms and wild berries needed?
- What can you do with mushrooms or berries at home? etc.
Scheme for drawing up lesson notes
To ensure that children are not distracted by anything, the teacher must carefully consider the structure of the lesson.
A detailed plan for working with children in a specific period of time is that part of the methodological work that determines the professionalism of the teacher . And you should start preparing your lesson by formulating your goals:
- teach children to depict mushrooms and berries on paper using different techniques;
- consolidate children’s knowledge about the structure of forest flora, shapes and colors of plants;
- train the skill of depicting several objects on one line;
- expand children’s understanding of natural phenomena;
- develop creative abilities;
- cultivate respect for the environment;
- instill a positive attitude towards creativity and communication with each other.
The tasks may be the following:
- consolidate knowledge about edible/poisonous mushrooms/berries;
- develop memory, cognitive sphere;
- automate the ability to distinguish mushrooms/berries from pictures or riddles/songs/poems;
- cultivate patience in work.
It is very important to observe the timing of each stage of work.
- Introductory part - 5 minutes (repetition of what we did last time, motivational techniques).
- The main stage of the work is 20 minutes (formulating the task, performing the work with the obligatory inclusion of physical education and finger gymnastics in the timing).
- The final stage is 5 minutes (drawing up a group composition or designing individual works on one stand, words of encouragement from the teacher and the child’s reflection, for example, in the form of questions - Did you like the lesson? What did you like? or What did you not like? Did you manage to draw everything you planned? How? will you rate your picture? Which picture, in your opinion, is the most beautiful? Why? etc.).
Example of lesson notes
Vasilyeva Svetlana “There are a lot of mushrooms in the autumn forest.” Open drawing lesson in the senior group (teaching the “dipping” method)” (fragment)
| <...Let's draw mushrooms on the grass for the squirrel. Let's sit down at the tables: And now I'll show you how to draw porcini mushrooms. Educator: Here is an autumn forest (showing a drawing). Here I have a picture of grass (I show it in the picture). I'll take a brush and dip it in white paint and immediately paint a lot of mushroom stems. The legs turned out to be straight (I show and talk about image techniques by applying the entire bristle of the brush to the paper). And now I’ll rinse the brush well, (I show how) I’ll dip it in brown paint and paint it on the legs of the hat. The legs stand, and the caps lie on them (showing a horizontal stroke). Educator: Guys, let's get to work. And the squirrel will help us. Children: Draw (the teacher helps). Squirrel: praises the mushrooms in the drawings, thanks the guys for their help. The squirrel calls several children to help them find strong porcini mushrooms. Squirrel, together with the children, places the drawings on the stand (discussing the drawings). Reflection: Guys, how did we help the squirrel? What did you draw? Where did you go? What did you like most?> |
How to draw a chanterelle mushroom simply and beautifully
The next work will be no worse than the previous one, because we will bring colorful foxes to life on paper. Without leaving home, we will be transported into the silence of the forest wilderness into an open clearing. There, next to an overgrown stump, were golden rows of small mushrooms. Inhaling their moist aroma, you just imagine fried potatoes with the collected yummy stuff.
This kind of story is truly inspiring, isn’t it? If your answer is positive, quickly throw out all your emotions on canvas. And our step-by-step lesson will help you in fine art.
Let's start drawing :
- We make a sketch with a pencil, mark the width and height of all elements of the future composition. Do not neglect them, because they help to position all the heroes in proportion. The lines should be very light so that they can be removed later with an eraser.
- Select the first wavy cap, it looks like a cloud. There is a crooked notch in the middle of it. We mark a smooth transition into the leg and draw out the veins.
- Repeating the same steps, draw a smaller fox.
- In the background we draw long blades of grass, each separately. So, our illustration will be more detailed and lively. We remove unnecessary marks and additionally outline the borders.
- Fill the foxes with a bright orange tint. We decorate the texture with a brown pencil. We paint the greens in various greenish tones.
- We depict rounded pebbles and leave them unpainted. We tint the ground in the appropriate color, and leave a few spots and specks on the base of the mushrooms.
Stages of working on a drawing
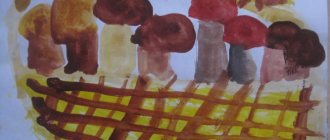
"Basket with mushrooms for a hedgehog"
This drawing can be done using the sketching technique
To complete this drawing, you can use both watercolor and gouache. First, children make a pencil sketch of mushrooms, and then complete the drawing (without a pencil outline) of the basket.
Instructions:
- “We draw with a pencil the ovals of the caps and legs of the mushrooms.”
- “We paint them in yellow-beige-brown colors.”
- “We use beige paint to make an oval into which we write mushrooms.”
- “We finish drawing the basket, color it yellow.”
- “We let the background dry for 1-2 minutes and apply a pattern of cells with brown paint.”
- “We also use brown to imitate weaving on the handle of the basket.”
This is interesting. If there is no beige paint in the palette, then you can make it by mixing white with yellow, adding a little brown.
"Bunch of Rowan"
The size of the image of rowan berries trains the baby's eye and sense of proportion
To complete this drawing, the dabbing technique is recommended, but a pencil outline is not required at all.
Instructions:
- “Dip the brush into brown paint and paint a twig.”
- “We apply thin short strokes like branches with green color.”
- “We draw berries on each branch, making dots with orange or red paint.”
- “Dip the brush into the green paint again and paint the branches for the leaves, making them thin but long.”
- “Now we apply the leaves by applying the bristles of the brush in one direction to the long green branches.”
"Amanita"
Drawings with felt-tip pens are usually practiced in classes devoted to creating an illustration for a fairy tale heard or a cartoon seen.
This drawing can be an illustration for a poem or fairy tale you have listened to, and since it is done with felt-tip pens, it takes a little less time to create. That is why such pictures can be supplemented with accompanying elements (in this case, butterflies, clouds, etc.).
Instructions:
- “We start by drawing the contours of the tree.”
- “We show the branches and draw marks on the birch trunk.”
- “Drawing the caps and legs of fly agaric mushrooms.”
- “We color them, not forgetting to leave white spots.” You can use not only felt-tip pens for coloring, but also pencils.
- “We draw butterflies. We draw an oval outline for the body, add wings in the form of the number 3, add a circle-head, and don’t forget about the antennae.”
- "Coloring butterflies."
- “We close the wavy lines into a shape similar to a circle - these are clouds.”
- “Coloring the clouds, finishing the sun.”
Photo gallery of finished works
The theme of mushrooms and berries allows you to practice still life painting skills
kids love to personify their illustrations with fairy tale characters. By depicting mushrooms, children learn to reproduce different shapes
Video: How to draw a bunch of rowan, educational video for children
Video: Learning to draw mushrooms of different shapes
Drawings of mushrooms and berries in the preparatory group can be either an illustration of the studied material related to the theme of autumn, preparations for animals, or gifts of the forest, or a way to practice artistic techniques using paints and pencils. In addition, these drawings allow you to practice the skill of creating images without a pencil outline, which, in turn, teaches children not only to maintain proportions and work without rough lines, but also trains their eye, and also develops a sense of color.
Pencil drawing master class
Regardless of the chosen type, the diagram of how to draw a mushroom with a pencil requires the following steps:
- Creating outlines. This is an oval cap with a stem attached to the bottom.
- Contour detailing.
- Erase auxiliary lines.
The completion is painting. To do this, you can use colored pencils, felt-tip pens or paints.
